Saturday, January 19, 2019

How to Make Your Bug-Out Bag Modular

by Contributing Author

Ah, the BOB. The prepper standby and source of constant tinkering, consternation and much discussion. There are a 1,001 ways to choose, fill and pack a BOB, but one method in particular I have been experimenting with over the past year since an associate introduced me to it has been a real game changer for me.

This method, which I have since heard referred to as the “modular BOB” is not new, but is often overlooked by preppers in favor of utilizing a backpack’s built-in compartments or simply packing all of their loose equipment in to the main cell just so.

The modular BOB concept offers a few distinct advantages over traditional packing methodology and a great deal of flexibility to some users. In this article, we’ll explore the concept and furnish some DIY tips for those who want to put the method to a trial. If you are like me, you’ll probably see the advantage.
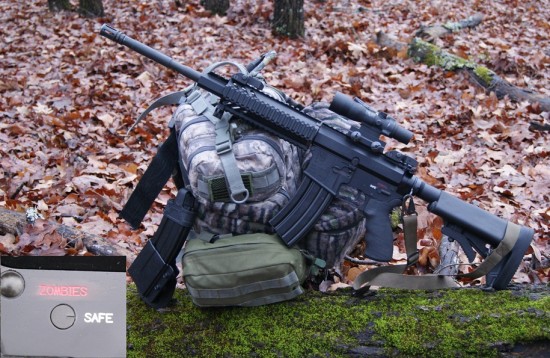
bug out bag and firearm

What is a Modular BOB?

A modular BOB is simply one that has its contents broadly grouped into “subloads”, or modules that are self contained in their own containers or packaging. Keeping your principal equipment groups packed together in discreet bundles makes adding and removing needed equipment much tidier than rummaging through a bunch of loose items, no matter how smartly you pack it.

In essence, your BOB is a big container for a bunch of smaller ones, each containing a group of supplies like medical gear, electronic support, ammo, fire-starting, etc. At first blush, this may seem like only a good way to add smaller bags to your big bag, but in practice you will be more organized, more flexible and able to adjust your loadout in a hurry so long as you keep your modules packed and ready.

Advantages of a Modular BOB

A modular BOB can be loaded or unloaded in a hurry without scattering gear far and wide and, if you are ok with the practice, kept unloaded or partially loaded until such time as you need it, only then being loaded rapidly and easily with the modules that will best support you and let you adapt to the developing crisis.

While anathema to some preppers, the nature of a modular BOB (modu-BOB?) allows you to take needed equipment from it to cross-load into a smaller pack or even standalone for an outing and return it in good order.

This flexible design also lets you remove and hand off needed equipment or supplies to someone in your group without unduly rearranging your pack, and if they have nothing else they have a container to hold the gear in. This way they do not have to rely on stuffing it in their pockets.

Depending on how you choose to set up your modular pack, you may not even need to remove or open it to detach a needed module of gear.

bug out bag

Disadvantages of a Modular BOB

Like anything else, there are flaws and disadvantages to a modular BOB as a system. First, they will not be as space-efficient as simply packing the items into a bag’s main compartment or smaller pouches as the containers holding each module’s contents will add varying degrees of bulk.

Adding “useless” weight is another flaw, as you should justify every single ounce you add to your BOB. Aside from holding a few things, you usually will not find much use for your smaller subload pouches. While the weight and bulk they tally is minimal overall (unless you are choosing heavyweight containers) they do add up.

Lastly, there will be situations where you may just need to grab that one particular item and would not need to haul out another zippered/velcro’d/snapped bag to reach it and in these times you may rue the day you went with the modular BOB concept. That one is not such a big deal though and is mostly preventable. I’ll give you a few tips to keep that from becoming a big deal.

Lastly, cost can be a small factor: buying or fabricating your subload bags or containers will cost money, adding to the already significant cost of a fully equipped BOB.

Nonetheless, I have found the concept viable and suitable to my goals, preparations and lifestyle, enough that I have made it my go-to BOB method and since it has trickled out to other parts of my life, specifically how I pack my luggage, go-bag and range bag, and keep many of the things I load into each packed in a subload.

If I really wanted to, I could grab any of them and attach or fit them to my already loaded BOB and be off in a flash. In the next section we’ll get into the finer points of splitting your supplies and equipment up into subloads and packing your new modular BOB.

Subloads or Modules: What Goes With What?

In the next section, I’ll be detailing what equipment should be packed with into each subload, and then we’ll follow that with info on how to put the whole thing together into your BOB for maximum efficiency and ease of access.

Note that this section is not a discussion on why certain items are included. The basics of BOB loadouts have been covered in extreme and exacting detail here and elsewhere. If you are just making your way into the prepping scene, need a refresher or more info on that topic, you can find an excellent introductory article here.

There is one major exception to the modular BOB concept that I believe is obvious, but I want to clarify here: your essential life-support gear and commonly used tools should remain first-line, on your person on your belt or in your pockets. So your pistol, folding knife, multi-tool, tiny survival kit, flashlight, lighter, basic trauma kit, etc. should remain in their usual positions on your body. Any additional emergency ammo should likewise be positioned for immediate access.

I have added my commentary and reasoning for each subload below.
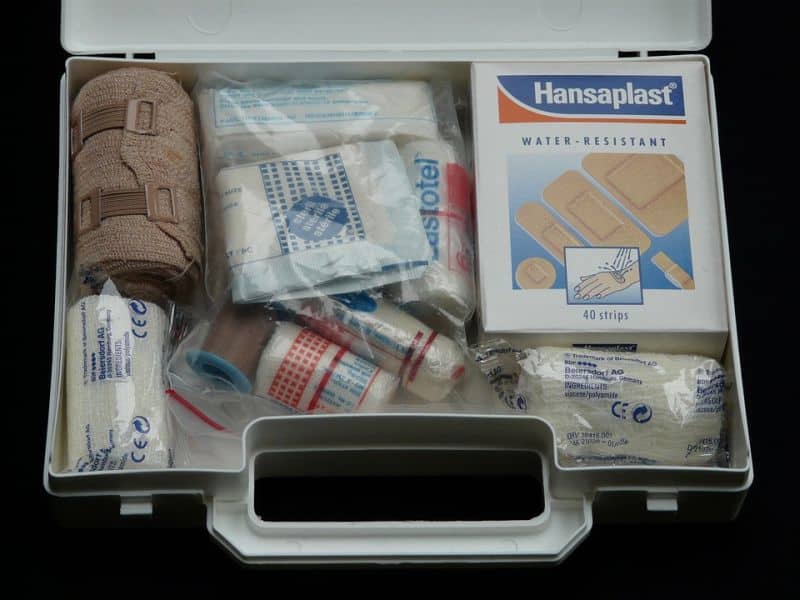
first aid kit

Medical Module

This module will contain your boo-boo kit as well as additional major first-aid supplies and trauma gear. So gauze, compression bandages, band-aids, med tape, antiseptic or iodine solution, tourniquets, medications of all kinds, blister relief, burn cream and mole skin for starters. This is also a good place to keep your reserve supply of any necessary medications you take regularly (your main supply should be kept on your for safety in case you lose or ditch your BOB.

This is a good candidate for mounting externally in a quick-detach configuration or packed in last so it is the first out upon opening the pack. More so than many of the other modules, clear, clean organization is crucial here: when you need serious medical intervention, you don’t need to be rummaging in this small bag for what you need. Set yourself up for success and pack your essential items for speedy deployment. The less vital “snivel” items can be packed wherever as speed is usually not a concern when deploying them.

A bag or case specially designed for medical gear is a smart idea here.

Electronics Module

All the charger cables, adapters, backup batteries, antennas, docks and solar arrays you need to feed the all-important GPS, radio and smartphone belong here. Take care to bundle the cables neatly and use bands, straps or clamps to hold them that way. Otherwise you can look forward to the crazy crow’s nest of tangled cables of all types when you unzip it.

None of the items in this subload are required for immediate life-support or problem solving, and so you have more options for packing and stowing. You will typically not need to access this module at lightning speed (no matter how bad you want to keep streaming your podcast) so you can use most any kind of container so long as it has little pouches or tie downs for your cable bundles.

Cooking Module

When it is time to get your wilderness chef on. Pack your camp stove, fuel, cookset, mug, bowl, cutlery, and anything else you need to cook up a meal in this module (except the food itself). This will typically be one of the heavier subloads in the bag, so take care that the container is sturdy and you pack it near the middle bottom of the bag.

mountain house food

Food Module

For a modular BOB, I am a big fan of stocking up on light, compact foodstuffs for calorie sustainment. I’ll leave out MREs entirely unless they are broken down and I am picking and choosing components. I like freeze-dried pouches, granola and energy bars, energy gels, jerky and other foodstuffs that stack well and hold up against rough handling.

Any food item with packaging that is rigid or large and tough to cram into a subload container gets cut. I want every cubic centimeter of this one filled with calories.
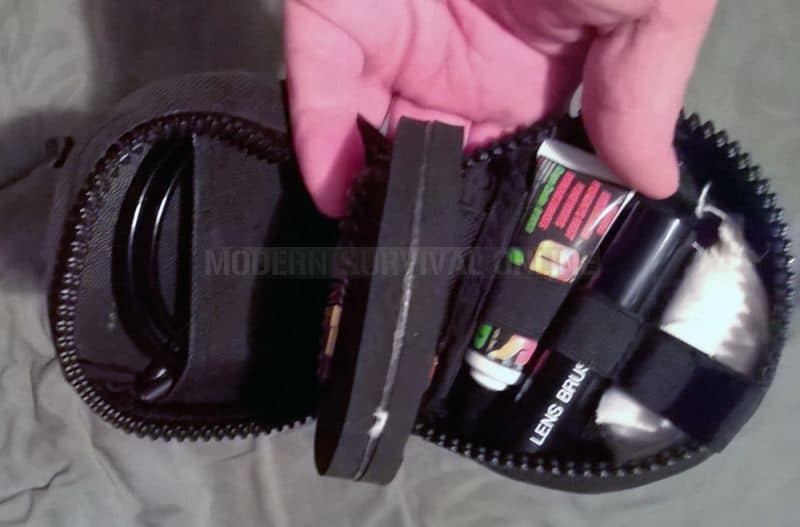
gun cleaning kit

Firearm Support Module

In this module I will pack an assortment of things that will l keep my gun making noise when I want it to. Inside I will include spare ammunition, a very compact cleaning kit and oil bottle, a few essential spare parts and springs, batteries for optics and nothing more. The idea is I can replenish my magazines or fixed ammo supply and give the gun a little PMI at the same time.

Shelter Module

Everything I need to whip up a place to sleep or just raise my core temperature. Inside this module I keep a pair of space blankets, hand warmers, a heavy duty tarp, strong cordage, 55 gallon drum liners, and thick plastic sheeting.

If you use or desire a flyweight tent, bivy or sleeping bag, you can use the stuff sack from any of them to accommodate your other items to keep with the modular nature of the BOB.

Fire and Water Module

I bundle these groups together as the typically small nature of the tools makes them a good fit to go together. Inside will be a Sawyer Mini water filter, water purification tablets, storm matches, a spare lighter, a ferro rod and my tinder box.

Some people may want these separate for whatever reason, and that’s fine, but you’ll end up with two tiny pouches instead of one small one. Don’t forget to keep at least one fire staring method on your first-line gear. I use a lighter.

Admin Module

All the things I need to access regularly to get where I am going or solve my most common bug-out problems. In this pouch I will keep a spare flashlight and headlamp, a few batteries, my maps, compass (keep a button compass on your first line in your survival essentials kit) whistle and a couple of chemlights.

This is another great candidate to keep within easy reach on the outside of your pack or even on a strap or waist belt.

What Pouches Should I Choose for my Modules?

The choices are endless, and boil down to preference and how much you desire to hook stuff to the outside of your bag. Note that I am generally against “gypsy packing” where you hang all kinds of crap from every available attachment point on the outside of a bag.

This does nothing except unbalance you, increase the snag hazard presented by the pack and make more noise. You generally want to keep everything packed down snug and tight inside the bag, but a few things make sense to keep readily to hand, like the med and admin modules I mentioned above.

If you desire to attach your modules to the outside of your pack, you’ll need an attachment system, and preferably one that allows you to quickly detach and reattach at will. MALICE clips, fastex buckles and carabiners are all options, as is MOLLE style straps that can be threaded and released quickly. Whatever method you select, choose with an eye toward durability and reliability vs. speed of attachment or release.

As far as materials are concerned, military-style pouches in nylon of various weights are common and affordable, and so long as one does sport too many of them on the outside of your pack you will not draw much undue attention. You can use anything from canvas to leather or plastic, hard or soft, so long as it can contain all the items in your module and do so at a modest weight penalty.

Conclusion

Setting up your BOB for modular capability will allow you a degree of freedom and flexibility that a traditionally packed BOB simply lacks. If organization, ease of re-packing and cross-loading are important to you, consider giving the modular BOB method a try.
modular bug out bags pin


via Modern Survival Online http://bit.ly/2U2cQOF

Lucid Dreaming | It works!! My most reliable lucid dreaming method

Hi! :) I'm back again after a long time. Been away from lucid dreaming for quite a while but recently decided I wanted to get back to it. After a long ass break from lucid dreaming, I have had a lucid within only a few days! This method (for me) is foolproof and produces hyper-realistic lucid dreams... Here's my method: (basically DEILD but with some specific details)

The Method:

1. Go to bed ideally before 12 and set an alarm for 5 hours ahead. Go to sleep with the intention to recall your dreams on waking.
2. Wake up to the alarm clock. Stay up for as long as your usual WBTB time would be (doesn't really matter, but not too long/short!).
3. Go to sleep with a strong intention that the next time you wake up, you'll stay completely still. As soon as you are exiting a dream, visualise yourself rolling out of bed, moving your arm, swimming, or any other physical activity. If there is movement - go with it. If not, relax and pretend to relax back into sleep. Often you'll find you'll begin the transition into a lucid dream (I experience WILD vibrations etc). If it's not working, I find that the relaxation part is key here, really feel yourself sinking into the pillow and you'll be surprised how quickly the transition begins. If nothing seems to be happening, go back to sleep and try again when you wake up next.
4. Repeat this for each time you wake up.

Some important points:

DREAM RECALL
The main technique is essentially a DEILD, but I find it is really important to have high dream recall. This increases general dream awareness and it's then easier to catch the crucial moment of waking up from a dream.

ATTEMPT ONLY 2-3 TIMES A WEEK
- DEILD attempts can be exhausting (especially when they are unsuccessful!). Attempting this method every night can have a negative effect on motivation.
- This method is most effective for me if I have 4 nights of only dream recall (eg. Monday - Thursday with no lucid dreaming attempts at all) and then 2/3 nights of attempts (Friday - Sunday). This ensures that my dream recall is high, my expectation to lucid dream is higher on the days I do make an attempt and my motivation is not negatively effected.
Weirdly, if I completely ignore anything to do with lucid dreaming on my 'days off', it increases the likelihood of a successful lucid dream when I make the attempts on my 'on days'.

This method is ideal for catching false awakenings it also gives me hyper-realistic lucid dreams - to the extent that dream control is difficult for me, just because the dream environment is so realistic. Also, meditating with eyes open in a lucid dream really helps with stabilisation and increasing the realism.

Let me know what you think or if this method has worked for you!


via Lucid Dreaming - Dream Views - Attaining Lucidity http://bit.ly/2FCfYh5

Lucid Dreaming | Lucid Dreaming while on Benzos???

This is different question, so I'm gonna put him in new thread.

Recently I started taking Benzos(klonopin 0.5mg per day) for Anxiety. I feel very sleepy at night and in morning which is good, but my techniques it seems doesn't work anymore, so I'm wondering why. Are benzos suppressing REM or intention memory(to have a LD), but I have a lot of vivid dream through the night so my REM must be okay. I even incorporate FILD and mantra-WILD, but to no avail. The moment I stop keeping my awareness, I fall asleep. I even try WILD just before sleep, but I'm getting strange result. I'm staying in my bed keeping my awareness(WILD or FILD) for like several minutes and then open my eyes to see am I dreaming, but room look absolutely the same(even the pain in my throat or noise of the fan heater), but when looked at the time on my phone a whole hour were passed and I'm getting also a bizarre sensation of my legs floating over my body. Did I'm trying to induce LD while dreaming, but when open my eyes again I'm in the real world again.

So how to proceed, any ideas?


via Lucid Dreaming - Dream Views - Attaining Lucidity http://bit.ly/2FIwlb0

Lucid Dreaming | Lucid Dreams without waking memory???

There is a little problem, I'm having. In recent months learned a lot of new techniques and have lot of lucid dreams:D I'm using mantra before fall asleep and combination of WBTB with SSILD or VILD,WILD in rare occasions(there are a little harder). For day work, I'm using "Here and Now Awareness" instead of RC to become one with the moment, I'm taking 3mg melatonin BTW.

So the problem is when have a LD, I can't access waking memory, neither my goal. They are not fake LD, I have fine control in them: can manipulate dream scenario, summon DC's, can fly and I know I'm dreaming. When try to remember my goal or waking memories, I'm getting a blank spot, so I'm just acting on my instincts(like I'm having an amnesia). Even from time to time I'm hearing a voice in my mind "Remember your goal", but I still can't remember. Hell recently even had a dream battle with DC's and while fight them, they try to make me remember "control yourself, remember who you are".

So what I'm doing wrong here?:armflap: Is this a side effect from SSILD?

BTW SSILD work wonders, having multiple LDs through the morning. :D

p.s. I have one more question, but in a new thread.


via Lucid Dreaming - Dream Views - Attaining Lucidity http://bit.ly/2FCfW8X

Lime SDR (and Pluto, Too) Sends TV

If you have experienced software defined radio (SDR) using the ubiquitous RTL SDR dongles, you are missing out on half of it. While those SDRs are inexpensive, they only receive. The next step is to transmit. [Corrosive] shows how he uses DATV Express along with a Lime SDR or a Pluto (the evaluation device from Analog Devices) to transmit video. He shows how to set it all up in the context of ham radio. An earlier video shows how to receive the signal using an SDR and some Windows software. The receiver will work with an RTL SDR or a HackRF board, too. You can see both videos, below.

The DATV Express software has plenty of options and since SDR if frequency agile, you ought to be able to use this on any frequency (within the SDR range) that you are allowed to use. At the end, he mentions that to really put these on the air you will want a filter and amplifier since the output is a bit raw and low powered.

If you are old enough to remember when a TV transmitter was a big box full of circuitry, seeing video pour out of a little circuit board is pretty amazing. What’s more, is that on transmit and receive you can do an impressive amount of processing in software that would have been very advanced using traditional hardware.

Oddly enough, the RTL SDR was originally made to receive TV anyway. You can actually do the transmit with nothing but a Raspberry Pi, and [Corrosive] mentioned he’ll do a video about that soon.


via Radio Hacks – Hackaday http://bit.ly/2T2DF5n

Thursday, January 17, 2019

20 Ways to Secure Your Gun

by Charles

Gun ownership carries with it many responsibilities. The responsibility to be safe, be effective, and always know the status and condition of your firearms to prevent tragedy. A significant part of the latter is ensuring the physical security of the gun against theft or simply unauthorized users.

The easiest way to do that is by having the gun on your body, either slung or holstered, or in your hands ready to do its job. Of course, that bromide is not a practical solution at any rate: who can truly keep a gun on them 24/7 for all 365 days of the year. And what about your other guns? You only have the two arms!

No, for all the times we don’t have our gun or guns on our person, we will rely on secure storage devices and techniques to ensure physical security. In this article we’ll be evaluating and recommending a variety of safes, locks, containers and secret-squirrel techniques to ensure your guns stay out of the wrong hands.

Basics of Secure Storage

When I use the term secure storage, I am referring to any technique or device used to keep a firearm from immediately falling into the wrong hands. That means different things to different folks, depending on their desired outcome.

For some, they may only be concerned with keeping honest people honest; keeping the gun from being discovered or operated by a nosy relative, child, guest, etc. Others will want their guns kept physically secured inside a container or room that has been hardened in some way. Some folks may be completely content with having the guns cleverly hidden from casual searches, and more or less accessible for their own use.

None of these are explicitly wrong, and even diehard proponents of heavy-duty safes, vaults and containers who pillory a good hiding spot as not secure forget that not artifact of man is truly, 100% unbreachable; the strongest, best engineered fortress, to say nothing of a mere container, can and will be breached given enough time and effort. Secure storage containers and safes only buy us time and form a deterrent against unauthorized access.

Time enough, we hope, that we can either intervene or our sticky-fingered burglar will feel their chances of being caught rising with every minute that they fiddle with your locking device/container/safe/whatever.

Deterrent enough, we hope, that they will abandon their plan to get their grubby paws on our guns at all, or even better, never even know they are there.

The best defense is naturally intervention, you, the owner, stopping and if necessary driving off the interloper, be they “innocent” but nosy Cousin Ted, or Griff the drifting burglar. But there are no guarantees. Most of us will not stay at home guarding around the clock our patch and belongings as a dragon would its hoard of gold. So with that in mind it is essential that you carefully weigh you desired level of security against how accessible you need a particular firearm.

Speed vs. Security

The constant dilemma when discussing storage is the balancing act between speed of access and security of the gun. There is no universal standard, and this is a decision that is entirely up to you, but one that must be decided based on reality.

If you are securing guns that are simply going to be in storage, i.e. not kept loaded for any kind of anticipated defensive use, then speed of access really does not matter. Conversely, any gun that you intend to call on must be reasonably fast to access, lest you not be able to get it on target in time. How long will you have to access your gun when you need it? The answer is the rest of your life…

Faster is always better, but speed always comes with a price in this case: you can have a loaded gun ready to fire, and kept off your body in a nightstand drawer, but security is very low or non-existent. You can have a loaded gun close at hand and highly secure against unauthorized use, but it is necessarily on your person; you are sacrificing comfort and convenience in this case.

Clever owners will be quick to say they will simply keep their loaded gun in a quick-open safe by the bed, one with a fingerprint-scanning biometric lock. Of course, fast, and secure, but far from sure: even the best examples of that technology are fiddly and failure prone. An alternative would be a purely mechanical equivalent safe: sure, secure, but far from swift.

This is not the rambling of an unrepentant contrarian, but an honest reminder that there is no one-solution-to-rule-them-all. You will always be sacrificing something in the balance. The trick is simply to sacrifice the least important element for your situation.

Consider what impact living alone, versus with family members would have, especially children. Do you have company over often? If yes, are they familiar with guns and understand what you are about?

If you decide to keep guns stashed in various places throughout your house to be picked up when and if needed, how are they secured? Do the methods differ, or are they uniform? All of this and more must be given careful thought.

Methods to Secure Your Guns

The following list with recommendations is sure to get your own creativity moving on storing your own firearms. Understand that not all of these methods will be appealing or even viable for you depending on where and how you live. That’s ok. Take lessons from all of them and use what methods you can.

Also this list is in no particular order of preference. It is not a ranking of methodology, but I will specify in each section which variations may be preferable as a rule to others like it, if applicable.

Secure Containers: Safes, Vaults, Boxes, Etc.

The default option for many gun owners desiring a place to put their guns under lock and key. Safes, strongboxes and the like come in all manner of shapes and sizes, vary greatly in sturdiness and make use of all kinds of locking systems. Depending on how many guns you need stashed and in what condition, your solution may take the form of a huge 800lb. behemoth with a traditional dial lock or a small, single pistol strongbox with an electronic fingerprint scanner or keypad.

Large safes obviously require more planning and forethought to emplace and secure, and may or may not be quick to open. A tip: traditional dial locks are too error-prone and slow, especially under stress to truly consider at all for rapid access, and even electronic keypads can be tough to punch in quickly at midnight with an unknown number of intruders breaking in to your house.

A smaller quick access type safe is often just the ticket for keeping a gun close at hand, loaded and secure against unauthorized users, but these small, comparatively lightweight strongboxes can obviously be broken off their moorings and carted away entirely. Even so, these are often the choice for folks with children, nosy or untrained family members, or other unauthorized visitors.

Take care when selecting a smaller quick-access strongbox that you do your due diligence before purchasing: some makes are notorious for poor QC and latch failure, meaning that even with correct code entry or sensor-recognition your firearm may remain closed inside.

On the subject of fingerprint scanning tech, while undeniably attractive and cool, it is my opinion such tech is not quite ready for prime time. I advocate sticking with a simple, heavy duty steel box with a 4 or 5 digit mechanical simplex lock.

A few good options in each category are below.

Quick Access Small Safes (Strongboxes)

Large Free-Standing Safes

Hidden gun book safe closed

Concealment Furniture: Shelves, Tables, Clocks, Oh My!

A newly popular though not newly commercialized avenue of secure concealment is specialty décor, shelving and other household appointments that are specially designed with invisible (or nearly so) compartments and controls to hide a gun in plain sight. These can be of special interest to some users since most folks, and many crooks, will not think to check a plain mantle clock, coffee table or floating shelf for weapons and other valuables.

Some units even go so far as appearing to be a cheaper wall mounted mirror, which will slide or swing open to allow access to a metal locker within. These can be a great in between solution between the sturdy but obvious security of a safe and the non-hardened but hard-to-find classic hiding spot.

The key to utilizing these well and still maintaining a degree of readiness is all about the placement. How do you move about your home? What are your habits like? A gun in a false clock inside your den that you are never in is not a great idea.

Hidden gun book safe in place

That brings up their biggest flaw: these solutions are generally at their best for people who want to keep one or two guns in a ready to fire state for fast access. They are far from ideal for general storage of a number of guns, and since most varieties utilize wood or plastic construction and necessarily low-profile or invisible locking systems they are easily broken into once discovered or suspected.

Nonetheless, they are a valuable option for many, and one of the only real “in-between” options going from safes to hiding places.

A few nice models are below:

Hiding Places: Beyond the Usual Suspects

If you have little fear of family or visitors stumbling coming by, or are committed to really keeping your guns out of the way, hiding places can be employed to good effect for security and quick access, even when storing a large quantity of guns.

The trick, should you desire quick access, is choosing a hiding place that will be missed when searched for in a rough fashion, be overlooked if it is discovered, and yet still remain easily accessible if you know where it is. This is no small feat, and an art form in itself. The real challenge is that places where your average thief will probably not look for valuables are the mundane things that people in the home interact with. You’ll see what I mean on the list of ideas below.

Remember: the choice of whether or not to keep your guns loaded when hidden is a personal one, but no matter where you live and what the laws say about any potential negligence on your part should your guns fall into the hands of the uninitiated or criminal, you are ethically responsible for what happens with it.

Yes, some things cannot be avoided, or helped, no matter how careful, diligent or prepared you are. Nonetheless, you should act as-if someone is looking for your guns. They may yet be.

Below is a list of hiding places that will blow the old standbys of “under the bed,” “top shelf in the closet” and “behind your socks” right out of the park:

  • Concealed in a wall or floor vent/register.
  • Hidden in an appropriate empty box in your pantry or cabinets.
  • Hanging inside a shirt or coat in the closet.
  • Beneath the dirty clothes in your laundry hamper
  • Beneath the basin on a peg or nail in your bathroom washstand
  • Behind/inside a false wall or compartment in a closet or access box.

These are just a few ideas to get your brain-storming. Remember what I said about the conundrum of picking hiding spots that would thwart burglars and occupants in the home? Now you see why. Give it careful thought and choose accordingly, lest you get your pistol sent through the washing machine!

Conclusion

Secure storage is within the grasp of any gun owner, in any situation, even if your budget is close to zero or even nil. What matters is that you take the precaution and put in the work and thought necessary to keep your guns from the hands of those that shouldn’t have them and in doing so keep them doing their job: in your hands, keeping you, hearth and family safe.

secure your gun pin


via Modern Survival Online http://bit.ly/2RNXFeD

Tuesday, January 15, 2019

Arduino RC Transmitter For Homebrew Projects

The field of radio control has benefited much from the onward march of technology. Where a basic 2-channel setup would once have cost hundreds of dollars, it’s now possible to get a high-end 2.4GHz 9-channel rig for well under $100, shipped to your door. However, the vast majority of these systems are closed-source and built for purpose. Sometimes, there are benefits to doing things your own way, and that’s precisely what this project does.

At its heart, it’s a simple combination. An Arduino Pro Mini talks to a NRF24L01 which handles the wireless communication. At that point, it’s up to you – throw in as few or as many controls as you like. For this build, [HowToMechatronics] has gone with a twin-stick setup, with a pair of potentiometers and twin toggle switches to round out the options.

The build comes in handy, as it’s possible to program in whatever features you may need for a given project. [HowToMechatronics] has used it to control a hexapod robot, among other projects. It’s a build that shows that with cheap and readily available parts, it’s possible to whip up a custom solution to suit your needs.

If this topic interests you.it’s worth saying that even those closed source radio control products can sometimes be hacked.

[Thanks to Baldpower for the tip!]


via Radio Hacks – Hackaday http://bit.ly/2TMrGsk