Want to explore the world of radar but feel daunted by the mysteries of radio frequency electronics? Be daunted no more and abstract the RF complexities away with this tutorial on software-defined radar.
Taking inspiration from our own [Gregory L. Charvat], whose many radar projects have graced our pages before, [Luigi Freitas]’ plunge into radar is spare on the budgetary side but rich in learning opportunities. The front end of the radar set is almost entirely contained in a LimeSDR Mini, a software-defined radio that can both transmit and receive. The only additional components are a pair of soup can antennas and a cheap LNA for the receive side. The rest of the system runs on GNU Radio Companion running on a Raspberry Pi; the whole thing is powered by a USB battery pack and lives in a plastic tote. [Luigi] has the radar set up for the 2.4-GHz ISM band, and the video below shows it being calibrated with vehicles passing by at known speeds.
True, the LimeSDR isn’t exactly cheap, but it does a lot for the price and lowers a major barrier to getting into the radar field. And [Luigi] did a great job of documenting his work and making his code available, which will help too.
We feature plenty of printed projects here on Hackaday, though they tend to be of the three dimensional type thanks to the proliferation of affordable 3D printers. But in this case, [Milosch Meriac] has managed to put together a printable design that’s not only a very cool hack, but is made up of a scant two dimensions. His creation, which could perhaps be considered something of an interactive circuit diagram, allows anyone with a paper printer and a few passive components make a functional low-frequency RFID sniffer.
[Milosch] tells us the goal of the project is to lower the barrier for experimenting with the RFID technology that’s increasingly part of our everyday lives. Rather than having to use something expensive and complicated such as an oscilloscope, experimenters can simply plug their DIY RFID sniffer into their computer’s line-in jack and explore the produced waveform with open source tools.
To create a paper RFID sniffer, you start by printing the image out on a thick piece of paper, like card stock. You then apply foil tape where indicated to serve as traces in this makeshift PCB, and start soldering on the components as described in the text. [Milosch] says the assembly procedure is so simple even a kid can do it, and the total cost of each assembled sniffer is literally pennies; making this an excellent project for schools or really any large group.
If you want to play it safe the sniffer can be connected to a USB sound card rather than your machine’s primary sound hardware, and still come in dirt cheap. [Milosch] stops short of explaining the software side of things in this particular project, but any tool which can use input from the sound card as a makeshift oscilloscope should be a good start.
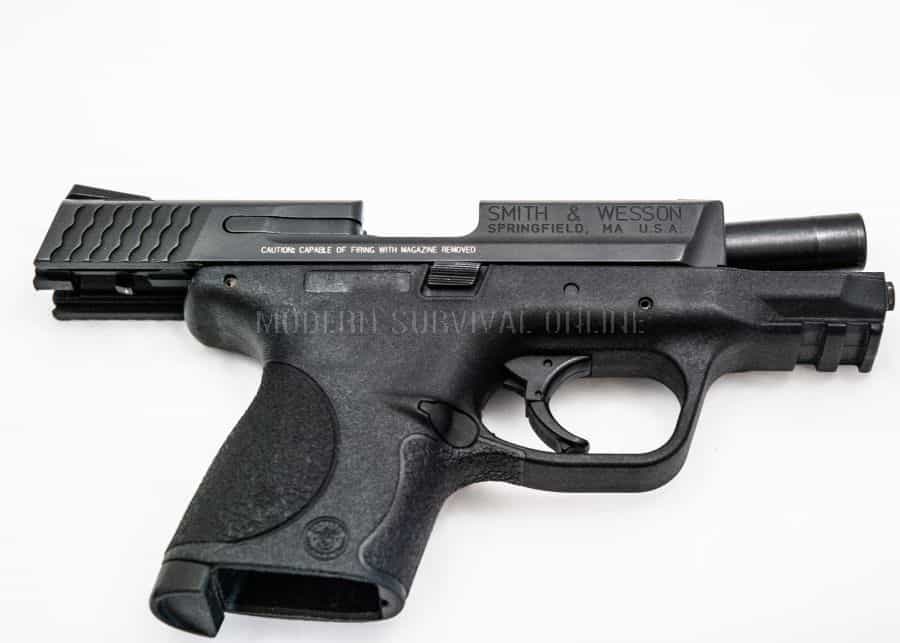
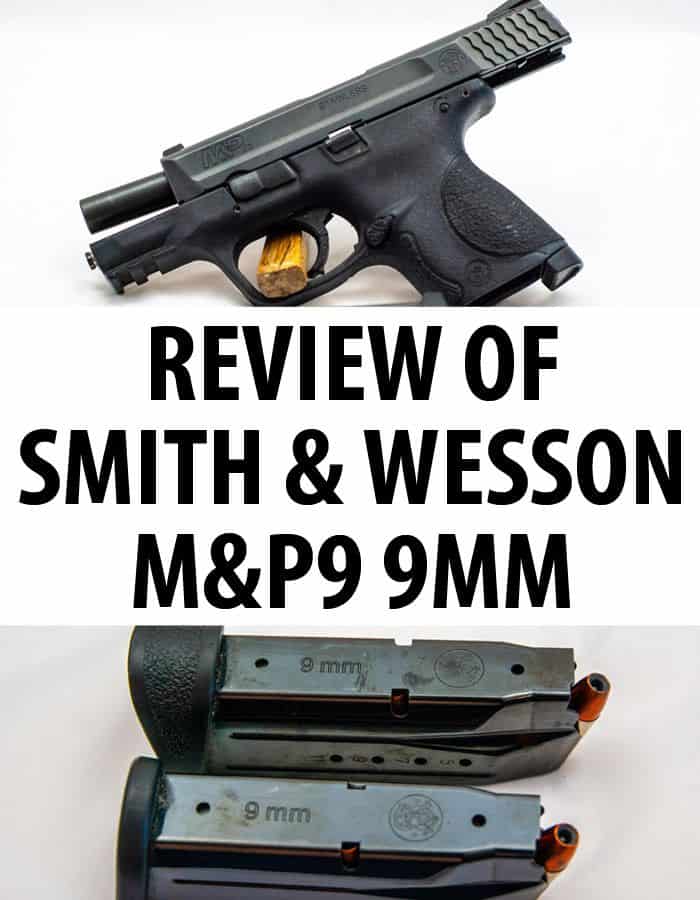
If you are in the market for a new handgun, you will notice that there are many polymer guns on the market. With the success of the Glock, most major manufacturers now offer a polymer frame gun, and most offer them in full size and compact frames. While all have their advantage, some are better than others. In this article, we are going to review Smith & Wesson’s M&P 9mm.
My EDC weapon is the Smith and Wesson M&P 2.0 9C (9mm Compact), model # 11688. I carry it in a Don Hume leather IWB holster and loaded with Federal Premium 9mm Hydra-Shok 124g ammo. I have carried this setup (initially with the 1.0, then the 2.0 after it was released January 2017) for the last 12 years. I love this gun, and I have shot nearly every “common” handgun on the US market.
Stats and Numbers
The S&W M&P 9mm is available in three frame sizes, full size, compact, and a specific variant named “Shield.” Here are the numbers on each.
Smith and Wesson released the M&P 2.0 series in January of 2017. So often we see manufacturers go in and mess with a gun that is loved by its shooters, and usually cause more problems than good. Well, S&W did their homework on this upgrade.
The 2.0 improves on just about every aspect of the weapon, but they maintained the same exact frame and feel so that professionals already using the M&P could transition without issue. Here is what Smith and Wesson have to say about the 2.0, taken from their website:
“The M&P M2.0 pistol, the newest innovation to the respected M&P polymer pistol line. Designed for personal, sporting, and professional use, the M&P M2.0 delivers an entirely new platform, introducing innovative features in nearly every aspect of the pistol, including trigger, grip, frame, and finish. Highlights of the M&P M2.0 pistol include an extended stainless-steel chassis and a low barrel bore axis for reduced muzzle rise and faster aim recovery.
The M&P M2.0 pistol further improves performance with a fine-tuned, crisper trigger, lighter pull and a tactile and audible reset. The pistol, available in three calibers, includes an aggressively-textured grip and four interchangeable palmswell inserts for optimal hand-fit and trigger reach. The striker-fire, semi-automatic polymer pistol is available in matte black or FDE – Flat Dark Earth – finishes, and includes two magazines, a limited lifetime warranty and a lifetime service policy.” (source)
Having owned and shot both guns extensively, I am willing to say without a doubt that the 2.0 is a better firearm, and would recommend it over the 1.0. It should be noted however that the 1.0 is still a fantastic weapon platform, and is nothing to sneeze at. My review here is based on the 2.0 version.
Configurations
Full Frame
The full frame M&P 9mm is a full sized gun similar to the Glock G17 or others on the market, featuring a 4.25″ barrel. It is marketed as a good choice for law enforcement or security work but is available on the civilian market in whole. There are multiple different configurations available from the factory, most having different combinations of external safeties that can be added. The base model does not feature an external safety.
Compact
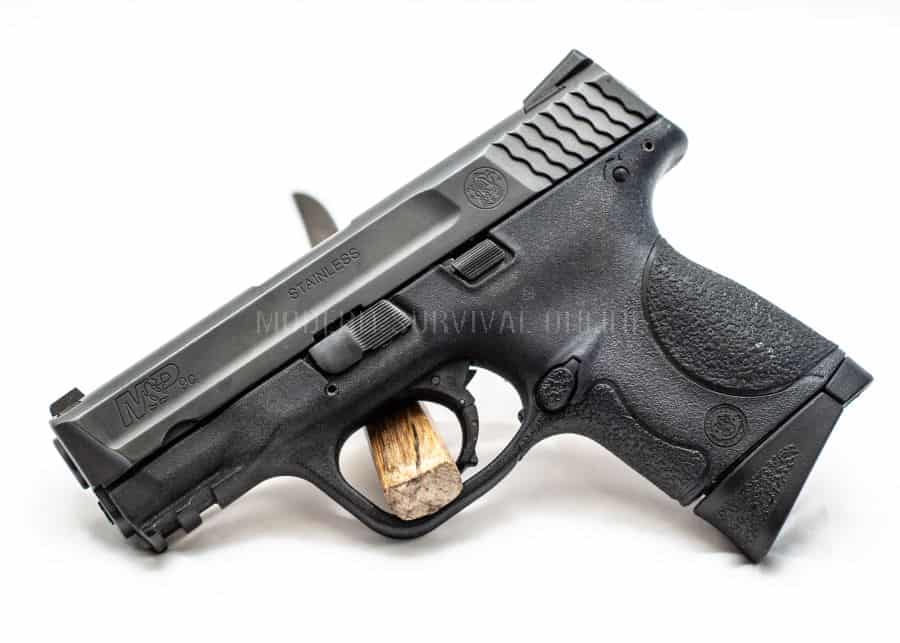
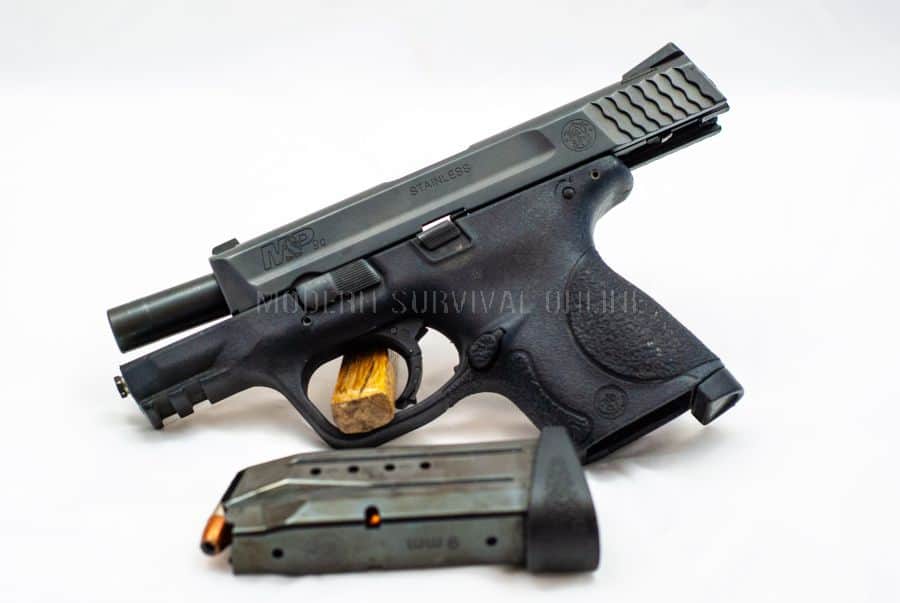
The compact M&P 9mm, designated the 9c, is a smaller frame than the full size, but still large enough to be utilized as a primary weapon. It is similar in size to the compact Glock model G19. It features a 3.6″ barrel. This gun is promoted as being ideal for concealed carry or as a backup/secondary weapon for law enforcement.
Shield
The shield is a variant of the standard compact size. It was designed to be lighter, slimmer, and easier to carry as a concealed weapon. To do this, Smith and Wesson took the frame down from a double stack to a single stack magazine and they shortened the barrel from 3.6 inches to 3.1 inches. The result is a gun that is 0.7 inches shorter, slimmer, and 7.6 ounces lighter.
Pros & Cons
Pros
There are many things to love about this gun, but I will try to highlight a few individually.
Grip– The first thing you will notice when you pick up an M&P is the grip profile. The grip is designed with an 18-degree grip angle which provides a very natural feeling point of aim. A natural point of aim is not only is comfortable but is a significant benefit for self-defense.
When you draw the weapon under stress, you could either not have time to aim with your sights or be too scared/upset to aim. If you have that natural point of aim, you hit what you point at. The grip is also customizable with four different sized palm grip inserts to help you get the feel you want.
Finish– The M&P’s come from the factory with a proprietary durable corrosion resistant finish called Armornite®. I have owned many guns that have special finishes that are supposed to protect the metal, and most work just fine.
This Armornite® is a different beast. My first M&P 9c, the 1.0 version, I carried daily for ten years and almost never cleaned the thing, and shot it at least monthly. It had no corrosion, no rust, and no holster wear when I retired it to the safe. Impressive to say the least.
Trigger– With the 1.0 I always felt that the trigger needed some work. I had cleaned it up some, but it still just wasn’t that great. Well, Smith and Wesson felt the same way. The 2.0 trigger is a smooth as you could ask for, has a nice light trigger pull, a very clean and sharp break, and has an audible and tactile reset. The trigger alone is what makes me gravitate to the M&P for teaching new shooters.
Accuracy– I have heard thousands of times that accuracy in a handgun is in the shooter, not the gun. While I agree with this on most occasions, I do feel like some pistols, even “tactical” guns, are more accurate than others.
Smith and Wesson claim that their 1 in 10” twist stainless steel barrel is what improves the accuracy. I do not know what it is, but I can get far better groups with the M&P at almost any range than I can with my Glock G19, Springfield XD, or my Kahr CW9.
Reliability– I have shot thousands of rounds through my two M&P’s and never had a misfeed. I have also used M&P’s to teach on the range, and have only had one misfeed, which truthfully was probably caused by “limp wristing.”
The guns seem to eat anything you put through them. Reliability is another factor that is just huge in self-defense. If I can’t trust that the gun is going to go bang when I pull the trigger, how can I trust my life to it?
Aftermarket Accessories– Some people see a stock gun as a clean canvas to work on. The aftermarket selection for the M&P is large and is only bested by Glock. There are numerous upgrades to the internals that can be purchased, as well as a host of attachments and accessories. Holsters can easily be found for just about any set-up you could want.
Cons
Sights– One of the worst things I can find about a factory new M&P is the sights. They are a basic steel bladed sight with one white dot in front and two white dots on the rear. They are rugged and simple to use, but leave a lot to be desired for me. I use Ameriglo Hackathon sights and feel they were a significant improvement over the stock sights.
Serviceability– This one won’t affect everyone, but beyond basic field stripping, the M&P’s are somewhat difficult to disassemble and service. Nothing is so hard that you can’t do it at home, but requires a lot more skill to do than a Glock would. See this article for a full comparison between the two. A good example is that you have to drift out the rear sight to access and clean the firing pin block.
9mm for Self-Defense
When it comes to using a 9mm for self-defense in favor of other handguns, I am comfortable carrying it for a few reasons. You will hear people tell about crazy meth heads that were fighting with cops and they shot them ten times, and he just ran away. There is no doubt this is a possibility, and similar situations happen all the time. The difference is that those kinds of people are not who you generally need to be worried about hurting you.
Most people who will break into your house or try to rob you on the street are not looking to fight. They are looking for a quick buck and getting out of there. The moment you raise your gun, the situation has significantly changed. If that doesn’t send them running, the sound of a shot and a bullet tearing through them almost certainly will.
People who stand up to cops are looking for a fight. Every person in the US knows that if you disregard police orders and attempt to resist that they have guns and may very well use them. These people are full of adrenaline, usually dealing with severe problems, and are looking for a fight. These factors will increase a person’s stamina, strength, and ability to keep fighting.
With all of that being said, good ammo is still essential. Since the 9mm is a lower powered self-defense round, you want to make sure you get the most energy you can out of it. I use Federal Premium 9mm 124g Hydra-Shok ammo.
I have had good experience with it being accurate, reliable, and consistent. I have also done penetration and expansion tests and was impressed with the results. Many other brands offer good self-defense ammo, Gold Dot and Hornady being two, that will perform as good as the Hydra-Shok. Whichever you choose, make sure you are carrying self-defense ammo that is designed to expand and deliver all of that energy.
Conclusion
In my opinion the M&P 9mm, actually the entire M&P series, is an excellent gun for range, concealed carry, or home defense. I would feel comfortable recommending it to anyone.
With a natural point of aim, the gun is hitting where you are pointing which can be a great asset under stress, especially for self-defense situations. It also helps shooters who are unfamiliar with handguns be able to pick it up and within a few rounds at least be on paper. Having taught many shooters over the years, this is a nice boost.
The reliability of the weapon also helps to make it an excellent self-defense gun. Knowing that when you pull the trigger, the gun is going to function correctly is vital. In my experience, the M&P can handle switching between different kinds of ammunition, which could save your life under the right circumstances. Today we find so many weapons that will only feed properly or cycle properly with a particular load or brand, that knowing you can feed it anything makes you feel better about the gun.
In conclusion, I recommend the M&P 9mm and if you are looking for a new pistol, make sure you check one out.
If there is one type of long gun that never goes out of style through the decades, it is the shotgun. There is no more ubiquitous gun across America, and much of the world. A shotgun can serve admirably as a multi-purpose hunting and pest control tool afield before coming back inside to defend home and hearth from other, two-legged critters with barrages of shot or enormous slugs.
If the old cliché “any gun beats no gun” is true, than it is doubly true that any shotgun beats no shotgun at all. That being said, having the right kind of shotgun, and stoking it with the right loads will make your job of repelling invaders so much easier.
In this article, we’ll be taking a look at some factors that will help you choose a good shotgun specifically intended for home defense, and make sense of the wide array of choices you have on the market today. After we do that, I’ll give you my list of recommendations for top-tier brands and models if you want to skip researching your options and just grab a good gauge.
So grab a box of shells and let’s get going.
Important Criteria for Home Defense Guns
As always, the single most important attribute for any defensive arm is reliability. If the gun will not go bang with near certainty when you pull the trigger you may be facing down an intruder with an inoperable hunk of metal in your shaking hands instead of a lead-spewing, fire-breathing dragon. Also knowing your gun is fussy will nibble away at your confidence in it, affecting your mindset.
Reliability is not purely mechanical for some guns; any manually operated shotgun like a pump or lever action is vulnerable to user induced malfunctions if the action is not cycled smartly and fully through its full range of motion. A pump gun suffering from binding is no better off than a semi that chokes on a certain brand of shotshell.
After that, a host of other factors are important; all shotguns are powerful, but for defense against humans we want to ensure we are choosing a gauge of sufficient potency to maximize effect on our badguys. 12, 16, 20 and 28 gauge are all more than potent enough, and even the wee .410 bore is nothing to sneeze at, but for our purposes a 12 or 20 gauge will maximize not only the availability of ammunition but the choice of loads to suit the task. If you should already have some other gauge, you can certainly rely on it if you have something other than birdshot to stoke it with (more on that later).
The size of a shotgun intended for in-home defense is important if there is any chance you will not be able to simply defend in place in your bedroom. Maneuvering any shotgun with barrels longer than 20” or so through confined spaces is tricky work, and even 20” is definitely pushing it.
Shorter is better for maneuverability, even if that short barrel comes at the expense of a shell or two of capacity. A hunting gun with a long 22”, 24” or 28” pipe will be almost impossible to negotiate around corners efficiently while keeping it safe from a grab attempt. Luckily, most shotguns’ barrels can be easily swapped if a shorter version is available.
Which Action is Best for My Needs?
All of the following assumes you have a choice, or can purchase the shotgun you desire. If all you have is an old, trusty side-by-side, then that’s your best choice. If you do have a selection of guns or are willing to buy what you want, I would strongly urge you to look at a semi-auto or pump action shotgun, as these guns have the most advantages for the most people.
Nonetheless, all action types have their perks and flaws, which I will broadly categorize below in my order of preference, from most desirable to least. Note that my situation and preferences are the result of my training, experience and expertise derived from teaching civilians on use and operation of shotguns for self-defense. Your specific needs, or the needs of a loved one, may be different. At any rate, keep my advice in mind as it will likely keep you from making a bad mistake on selection.
Semi-automatic, or autoloading- Minimal recoil, simple to shoot and easy to shoot well. All great attributes in a defensive shotgun. Modest capacity of 3-8 rounds. Still slow to fully load (if tube fed) or hard to manage spare ammo for (if box mag fed). Quality options will be more expensive than comparable choices in a pump action. The most ammunition sensitive by far, many examples may struggle with anything less than full-power, high brass loads.
If you can afford a reliable one, a very formidable defensive tool, and a fair choice for a novice or less experienced shooter on since it need not be manually cycled.
Pump-Action- Generally reliable, adaptable and versatile. Fine choice for defense and can be shot quickly with practice. Very insensitive to most ammo so long as it is of halfway decent quality. User can also induce malfunction from weak or short cycling of action, which can be difficult or time-consuming to clear. Capacity anywhere from 3-8 rounds, though larger capacities and detachable mag versions becoming more common. Recoil is stout compared to semi-auto.
Good news is high-quality pumps are cheap compared to other actions and if you buy used you can get a great buy on a high-end gun.
Break-Action- Possessed of 1, 2 or very rarely 3 or more barrels. Double barrel guns arranged in over-under or side-by-side configuration. Simple manual of arms, and very easy to load and fire for those with minimal training. Often has more perceived recoil than pump or semi due to typically light weight and slender stocks. Low capacity may be an issue, and many variations on ejector/extractor arrangement will require some practice to speed up reloads.
Depending on make and grade of gun, can be very cheap field guns to fantastically expensive hunting or sporting masterpieces. Not my first choice, but a break-action shotgun is still a formidable weapon.
There are a couple other actions; bolt- and lever-action. Bolt-action shotguns are very rare, and typically round with rifled barrels for slug use, intended to be employed as long-range hunting shotguns when rifles are regulated by season or forbidden. Lever-action shotguns operate much the same as lever-action rifles, and are similar to pump actions as far as perks and flaws. That being said, lever-action shotguns are antiquated and even modern production guns are all replicas of older designs. Not the best option for defense, but can work in a pinch.
What Load Should I Use for Defense?
Oh, the great debate. You’ll get as many recommendations as there are people, each with their reasons why their chosen load is “the best.” Fact is, there is no “best” load for a shotgun, even for defense. There are definitely some very poor choices, which I will detail below, but each loading has its own advantages and disadvantages in a defensive context. It helps to consider what we need our ammo to do in order to be effective against a human attacker.
Generally, we want a significant amount of penetration, no less than 10-12”. Any less than that and we have no guarantee of hitting vital anatomical targets in the body (you don’t have any guarantees anyway, but I digress). Add in to account heavy clothing and perhaps interference from a limb or a quartering shot and you need to go even deeper to overcome additional obstructions.
Additionally, the size of the permanent wound channel, or total crushed tissue, is an important element in determining effectiveness. More crushed tissue causes more blood loss, and more blood loss is good so long it is the badguy shedding it.
These two factors eliminate birdshot as a viable option for defense. While dangerous, birdshot does not penetrate deeply enough anywhere close to reliably enough to cause significant wounding, and its tiny size, even with all pellets in totality, means blood loss will be less severe than larger pellets. While it will cause serious and horrific-looking superficial wounds, it is a poor choice for home defense.
Your best choices for home defense will be buckshot of some size, which ensures greater hit probability and positively dreadful damage to the target, or some type of reduced recoil slug. Buckshot in either 0, 00, No.1 or No.4 sizes is a fine defensive load, as are reduced recoil Brenneke and Foster slugs. Take care with either, as their adequate penetration in humans also means they will certainly penetrate drywall and other material in the home and as with any gun can pose a substantial hazard to other people in the house.
Best of the Best Shotguns
The following is a shortlist of the best all around defensive shotguns money can buy. Some may not be the newest, or even the most expensive, but they are all reliable, hard-running and good shooting scatterguns.
Best All Around –Beretta 1301
Beretta has long been synonymous with elegant sporting shotguns made with old-world dedication to the fine details. Less known till lately is that they have also made a variety of extremely refined and reliable tactical shotguns.
The latest in this line of “combat” shotguns is their Model 1301, a gas operated semi-auto that is light, reliable and fast cycling. It comes out of the box with great sights and control placement, and unlike so many other semi-auto shotguns the aftermarket has responded with an array of add-ons and accessories to suit any task.
While an excellent gun made even better by a modest price for a semi from a top-tier manufacturer, the 1301 suffers from one weak point: the factory shell release is exposed and vulnerable to being inadvertently activated, releasing shells into the action when the gun is otherwise ready to fire, causing a hideous traffic-jam inside the receiver. Not something you want to deal with when dealing with a bump in the night!
Luckily inexpensive aftermarket parts can enshroud the latch with a protective fence to stop the issue from occurring. With that one small design flaw out of the way, the 1301 is a quickly becoming the favorite for hard-use semi-auto shotgun fans.
Best if Cost is No Object – Benelli M4
The commercial version of the U.S. military’s M1014 combat shotgun, the M4 is one of the most rugged and reliable semi-auto scatterguns to be had on the market today. Utilizing a simple and ingenious self-regulating gas operation the M4 will cycle most loads without any hitch or even user adjustment. Only very light loads will typically fail to cycle the bolt.
Incredibly robust and durable, the M4 is famous for its insensitivity to abuse and neglect, making it a perfect long-term primary shotgun if self-defense is your biggest concern. It is able to handle a constant diet of full-power loads with no problems or egregious wear and tear.
If the M4 has a weakness, it is the price tag: With an MSRP of about $1800 dollars and a street price between $1500-1600, the M4 is a huge chunk of change for a shotgun of any kind. Considering the limitations that shotguns bring to the table, many a prospective purchaser has wondered if they are better off spending that kind of cash on a rifle or carbine and a nice optic.
Nonetheless, if you want to pinnacle of reliable semi-auto shotguns, and can afford its hefty cost, the Benelli M4 is tough to top.
Best for No-Frills Reliability – Mossberg 590A1
Another military model available for civilian purchase, Mossberg’s 590A1 is a heavy barreled beast, but boasts supremely rugged construction in place of refinement. This does nothing to lessen its utility and suitability as a defensive arm, however, and the 590A1 comes ready to party with an easy to use ambidextrous safety and extended magazine tube that brings the capacity up to 8 rounds.
It is heavy, and the action is not the smoothest, though that will matter little when running the gun hard and fast. The 590’s pump action will cycle nearly any 12 gauge shell you can stuff into the magazine tube, from light training or less-lethal loads to stout slugs or buckshot.
If you want a modestly priced heavy-duty bruiser that will shrug off harsh handling and inclement conditions alike, the 590A1 is your best choice. Brand new this brawler will only set you back about $600.
Best for Customization – Remington 870
Is there a more ubiquitous gun than the legendary Remington 870? No, by any measure. Big Green’s classic scattergun has been produced by the millions, in dozens of variants. It is rightly loved for its reliability and smooth-action, but also adored for the sheer number of factory and aftermarket parts available for it.
No matter what kind of gadget, accessory or add-on you may be seeking, the 870 will likely accommodate you, from the sublime to the insane. Want an enhanced forend with rails or integrated light? Can do. How about a double-decker shell caddy and sight rail unit? No problem. Want a magazine fed, standoff equipped gun with a folding stock for ballistic breaching? Got you covered friend, stand clear!
An 870, any 870, is only a starting point for its user. While a fine gun out of the box and bone-stock, the 870 really starts to shine once you add and refine it to suit your tastes and shooting style. Models can be has used for as little as $200 or brand new between $375 and $500.
Best Budget Gun – Winchester 1300
The Winchester 1200 and 1300, while pretty nice guns in their own right, were only ever 3rd place contenders against Mossberg and Remington’s pump offerings. The 1300 in particular has all the hallmarks of a good defensive shotgun, being reliable, rugged and possessed of a very slick and quick action easily identified by its large rotating bolt head. This makes 1300’s something of a sleeper choice among shotgun aficionados.
Regrettably, the 1300 is no longer in production, but can be found in surprising quantities used at both gun and pawnshops for very low prices. The Winchester of yesteryear produced pump actions of inarguably better quality than their SXP offering of today, and it is worth seeking one out, especially if you are on a budget.
While you will not find nearly as many accessories or options for the 1300 as you will other pump actions, replacement parts are still widely found from multiple vendors, easing a common concern of upkeep among users of discontinued guns.
If you are content with a no-frills design and don’t mind a little hunt to track one down, the 1300 makes a great budget choice.
Conclusion
The venerable shotgun is still as valid a choice today as it was a hundred years ago. Loaded with the right ammo, and carried by a practiced user, “the gauge” is a formidable weapon in the hands of any citizen, and a downright terror to any home invader. Take the lessons learned from this article and seek out a shotgun that is right for you.
Staying warm during a long-term disaster will be as essential to your survival as having access to water and food. Failure to stay warm can lead not only to the obvious frostbite and hypothermia, but also cause a person to become sick at the exact time it is most dangerous to contract even a mundare illness.
When prepping for cold weather a successful approach will be three-pronged:
• Home
• Bugging Out
• Work and Vehicle
Having an off the grid heat source to not only keep your home warm but to also use for water purification and food preparation reasons should at the top of your priority list and survival budget plan.
Top 6 Ways To Stay Warm In Your Home During An Emergency
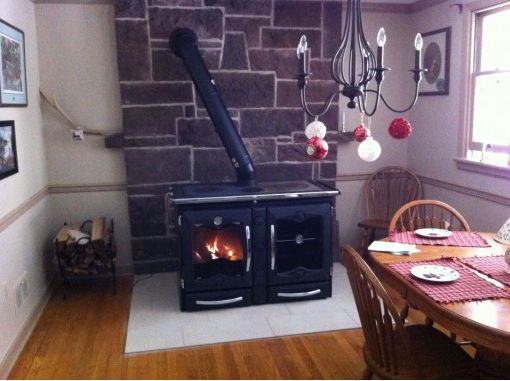
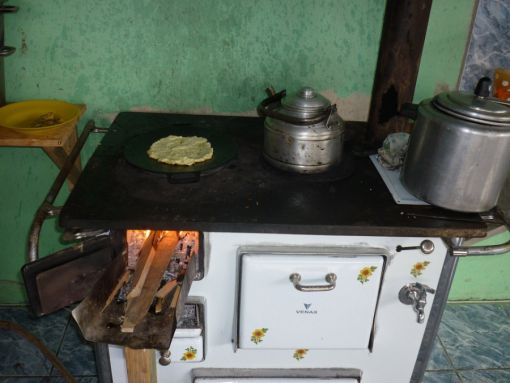
1. Wood Cook Stove
This multi-use type of wood stove will not only keep you warm but can be used as both a stove and an oven. These old-fashioned style cook stoves provide efficient heat that can be manually regulated and even used to water bath or pressure bath can upon during a long-term disaster.
A wood cook stove is the most economical choice for home emergency heat. Not only will a unit like the one shown in the photo above heat an entire floor of a typical home, it will also you to cook, bake, purify water, and in may cases, come complete with a warming unit.
When popping food in a microwave is no longer an option, keeping a plate of food warm for a member of the prepping family who is out on perimeter patrol or working the land, will be not only incredibly useful, but an incredible morale booster. Photo courtesy of WoodCookStove.com.
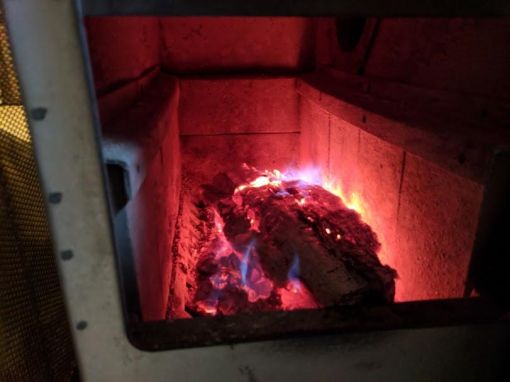
2. Wood Stove
These stoves are staples in rural homes across the country. They provide far more heat than a fireplace. Although not as easily as with a wood cook stove, if you purchase a unit made of cast iron with a flat top, the surface can also be used or heating food and boiling water. Pellet wood stoves might seem like a handy way to heat your home off grid because chopping firewood is not necessary, but you will not be able to run to the store or order wood pellets online during a SHTF disaster.
Unless your state laws or home insurance policy prohibit it, always opt for a traditional wood log burning stove. By attaching a copper coil set up to the wood stove (and likely to a wood cook stove, as well) you could generate your own hot water even after a complete power grid failure.
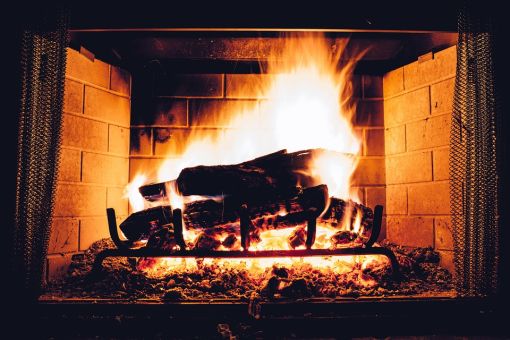
3. Fireplace
There is nothing quite like the bucolic and tranquil image crackling logs in a fireplace musters up, you will need multiple fireplaces on a single floor to achieve the same type of heat output you would garner from either a wood cook stove or a wood burning stove. If you build or purchase a cast iron or wrought iron tripod and cast iron cookware, you could make one-pot dishes and boil water in a fireplace.
If relying on a wood burning stove to keep you warm during an emergency disaster, make sure to purchase an extra grate and door insulation cordage. The ash pan beneath the wood burner should be emptied daily during heavy use to avoid a fire and unnecessary wear on the grate.
4. Propane Heaters
A propane heater can warm a room quickly, but will not broadcast out the warmth like either style of wood burning stoves or even a fireplace. Proper ventilation must be a top priority when running a propane heater to avoid carbon monoxide poisoning… and death. If you plan on using one or multiple propane heaters indoors during an emergency disaster, invest in nominally priced carbon monoxide (combo units that also detect fire are recommended) and copious amounts of batteries. You will have to stockpile propane to keep the unit pumping out the heat.
Any emergency heat unit that is fuel by a non-renewable source can leave you vulnerable to exposure and illness when the stockpile is ultimately depleted. We have a large propane heater that is filled up twice annually for about $350 to $500 per fill. If you purchase a similar tank and budget for the yearly fill ups, you should be able to expect to have a reliable heat source for six months at a stretch – at least. We have never run our tank completely out before getting the winter time fill up.
Get the most out of your propane heater by using a catalytic heater version with a ceramic element. This type element allows the propane to burn more along the lines of hot coals in a fire instead of a flowing flame, and not only saves on fuel but could pose less of a safety hazard.
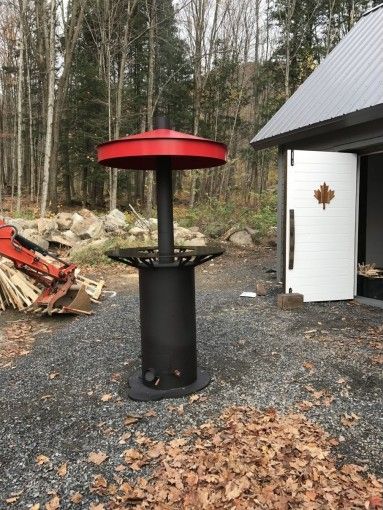
5. Outdoor Wood Furnace
This type of emergency heat unit will likely tax your survival budget, but will effectively move all of your heating needs off grid. These large exterior furnaces use pre-split logs and must be “fed” at regular intervals to avoid a drastic drop in temperature. Unless your prepper retreat offers ample firewood and you have both the helping hands and manual tools to drop a plethora of trees, you would
likely run out of available fuel before a long-term disaster even ends.
An outdoor wood heater like the one pictured above cannot be used to heat your home during an emergency, but it can be placed just outside of a garage, workshop, or other outdoor area where work is being conducted, to help keep the prepper group member from becoming too cold while completing a necessary task – or help prevent livestock from freezing to death during a snow or ice storm.
6. Solar Generator
Any type of generator will allow you to power an electrical heater, but a solar generator will work as long as the sun shines (even during the winter months) without needing to be fed any type of stockpiled fuel.
7. Kerosene Heater
These inexpensive and portable heaters can be used indoors with proper ventilation as well as in garage and outbuildings, as long as all manufacturer’s safety protocols are followed. Like with propane, you will only stay warm as long as your fuel supply holds out – making both styles of off grid heat a great companion heat source but should never be relied upon as your sole source of emergency warmth.
Warming Tips
• Use blankets to seal off any part of the house that absolutely does not need to be heated. Sleeping the entire family in the room with the wood stove or other source of alternative heat source, will allow you to not only monitor the fire all night but waste less of your fuel by closing the dampers somewhat and still remaining warm.
• Do not go in and out of the house any more than necessary, to avoid the room temperature from dropping unnecessarily.
• Do outdoor chores during the heat of the day to avoid becoming chilled and exposing the house to cold air repeatedly.
• Eat or drink something warm before sleeping and layer your clothing and blankets to help stay warm and conserve fuel.
• Place towels or blankets anywhere that a draft is flowing to avoid heat loss, and chilly air.
• All wood is not created equal, and anything that you cut will need time to cure. Hardwoods like oak, hickory, walnut, and locust, will burn hotter and can last all night. Softwoods like poplar and birch, are great to use with kindling to get a fire going.
The most important thing to remember when making plans to heat your home during any type of disaster, it the cost vs. payoff of the off grid heating source, and the availability of fuel.
Buying multiple propane and kerosene heaters to keep you warm during a SHTF event will be far less expensive than shelling out $1,000 to $3,000 for either a wood cook stove or a wood burning stove
Either of these types of heat sources are capable of heating a large space in a relatively short amount of time, cost you nothing for fuel if your prepper retreat is partially wooded, not be dependent upon any type of mechanical components that can easily break or rely upon fuel delivery for use.
Work And Vehicle Emergency Heat Sources
To stay warm in an enclosed space away from home, your emergency heat sources must be lightweight, portable, safe to use from a ventilation perspective, and hopefully durable.
Ceramic Pot Heater
Use to ceramic flower pots to make a simple emergency heater that is both cheap and portable – but not durable. Place on flower pot on top of another after placing an oil lamp or candle inside. The heat generated inside of the clay pot will radiate around at least the immediate area if not a small room, office or vehicle.
Hand and Foot Warmers
These extremely cheap little packets can be placed not only inside your gloves and shoes, but also in your coat pockets, pants, pockets, inside of your belt, just about anywhere on your body that can become chilled or heat can escape from when exposed to the cold.
Layering
Keep cold weather clothing in your office, school or work locker, and inside your vehicle – even during the summer months. If you are forced to walk home or shelter in place inside of an unheated building at night, you will get chilled, especially if exposed to rain and wind.
Keep wool or thick socks, weatherproof lined gloves, a hat with ear flaps, a ski mask, long underwear, and a weatherproof coat and boots in your go bag no year round. Purchase winter layering gear with 100 grams per square meter insulation counts to decrease the loss of body heat. This type of gram count is typically present in down and wool winter wear.
Mylar Emergency Blankets
These one-time use blankets can be wrapped around your body to stay warm, and slept inside of when use like a sleeping bag. Never pitch the mylar blankets after one use though, because they are so lightweight, they can be packed with you and used as an emergency shelter or to help protect gear from the elements.
Ways To Stay Warm When Bugging Out
The first priority when trying to stay warm during a bugout is to prevent the loss of body heat. Staying dry is the single most important step in the process.
• Packing rain repellant outerwear in your bugout bag will not only prevent you from getting soaked and chilled, but can stave off the frostbite that can lead to the hypothermia that kills in hours, not days.
• Extra pairs of socks and a poncho can be stored in your bugout bag without adding any real weight to your survival kit, or taking up much room.
• The single use hand and foot warmers as note in the section above, will also help keep you warm when bugging out.
• Invest in a quality 4-season sleeping bag to avoid getting chilled to the bone at night.
• Instead of pushing on with your bugout prep until dusk or trying to walk throughout the night, make camp early. The temperature can begin to drop quickly at 5 pm. Because you are walking briskly or hiking while carrying your bugout bag, you might not fully grasp the change in temperature.
If you get inside your emergency shelter and inside a good sleeping bag before your body is subjected to even colder air, you will stand a better chance of maintaining decent body heat and preventing a chill that might not be able to shake all night long.
Ideally, you want any sweat you have generate to dry completely before it gets cold, and the perspiration causes your clothing and hair to become damp.
• If you are bugging out during the winter and a storm blows in, make a snow cave to stay warm. Use a shovel or your gloved hands to form a cave shape just wide enough for sleeping that is about four feet tall. Stomp on the snow with your boot to pack it down if you do not have a shovel.
Create a sturdy door opening to crawl out of and for proper ventilation to avoid suffocation. I recommend using some sturdy broken branches to create a snow door frame around for added support against a cave in. No matter how thirsty you get, do not eat snow, it will chill your body too much, always take the time to melt it first.
• When nature calls, use a bottle with a lid to relieve yourself to avoid crawling out of your sleeping bag, shelter, or snow cave to avoid exposure to the elements during the night.
• A white gas stove like a Coleman Sportster II Dual Fuel 1-Burner Stove, is small and lightweight enough to tote in a bugout bag and should provide ample heat inside of a small emergency shelter.
• A folding camp stove is another idea bugout bag heat source that will help keep you warm during an emergency. These camp stoves are durable, inexpensive, lightweight, and feature corrosion resistant and wind shielding construction. Little green Sterno cans provide the fuel for the folding stoves – they too are inexpensive, durable and lightweight enough to fit easily into a bugout bag.
• Alcohol stoves, also often referred to as solo alcohol burners are compact, durable, and not only cheap, easy to make on your own, as detailed in the video below.
It would be impossible to tote every single thing you might need in a bugout bag and still be able to lift it. When making a list of survival priorities to place in the emergency bag, place outerwear that will protect you from the elements and at least one type of portable heat source that could be used anywhere to keep yourself warm.
Conclusion
A wildfire could destroy part of all of your wood cook stove, wood stove, fireplace, or outdoor wood furnace supply in mere hours, keep that in mind when budgeting for home heat sources.
No matter what type of heat source you choose to use in your home and as a portable emergency warming tool when away from home, always have at a minimum, one backup option of some type.
[Mathieu Stephan] has something new in the works, and while he isn’t ready to take the wraps off of it yet, he was kind enough to document his experience putting the mysterious new gadget through its paces inside an anechoic chamber. Considering the majority of us will never get inside of one of these rooms, much less have the opportunity to test our own hardware in one, he figured it was the least he could do.
If you’re not familiar with an anechoic chamber, don’t feel bad. It’s not exactly the sort of thing you’ll have at the local makerspace. Put simply it’s a room designed to not only to remove echos on the inside, but also be completely isolated from the outside. But we aren’t just talking about sound deadening, the principle can also be adapted to work for electromagnetic waves. So not only is in the inside of the anechoic chamber audibly silent, it can also be radio silent.
This is important if you want to test the performance of things like antennas, as it allows you to remove outside interference. As [Mathieu] explains, both the receiver and transmitter can be placed in the chamber and connected to a vector network analyzer (VNA). The device is able to quantify how much energy is being transferred between the two devices, but the results will only be accurate if that’s the only thing the VNA sees on its input port.
[Mathieu] can’t reveal images of the hardware or the results of the analysis because that would give too much away at this point, but he does provide the cleverly edited video after the break as well as some generic information on antenna analysis and the type of results one receives from this sort of testing. Our very own [Jenny List] has a bit more information on the subject if you’d like to continue to live vicariously through the accounts of others. For the rest of us, we’ll just have to settle for some chicken wire and a wooden crate.
Discussions or guides that offer recommendations about what supplies and items you should have in what quantities in to order to survive a given type of disaster are common. No two crises and climates are alike, and so this format has merit. Differing climates and situations mandate different approaches. I myself might have written more than a few paragraphs just like that.
But today instead of another specific, customized deep-dive assessing what kit you’ll need to survive a particular crisis, I’ll be presenting a generalist’s list of gear that I consider mandatory no matter what situation you’ll be facing and how you plan to cope with it. Bugging out or hunkering down, alone or in a group, wildfire or blizzard, atom bomb or active volcano, the following items are valuable in literally nearly any circumstance you could encounter, or rather, hopefully avoid!
These have all been chosen with emphasis placed on lightweight, multipurpose designs that can fulfill two or more objectives at once. So in the bunker, on the road or on foot all of these items are worth your coin and room in your pack.
A Word on Importance of Place
The items on this list are presented in no particular order of importance. I have purposely not instituted any rigid structure in grouping the items except for convenience and ease of reading. Humans of course are subject to hard requirements when it comes to survival and many choose to base their preparation rigidly around those tenets.
Things like water, food, shelter (or more accurately thermoregulation of body temperature) and security are the foundational necessities we all know, but you should not be blinded by them. Water is absolutely vital to life, even in the short term, but if you were to place a man ill-dressed out in frozen, subzero weather conditions he would have far more pressing concerns than dehydration. He is surrounded by water, but water he cannot use and most likely will not be able to use in time unless he is able to get warm.
Similarly, a person facing an arduous and harrowing journey through a city imploding from social strife would likely not place food as their main concern. Security and mobility would be far more important to them immediately.
My point is, assess your most likely threats, and plan accordingly. The categories of gear I am featuring on this list will serve you well in nearly any situation, even if they only fall in to the “really nice to have” category during your specific crisis scenario. Without any more rambling, let’s get to the list
1) Portable Water Filtration and Sterilization Solutions
I know I just got done making a point that water may not be a huge concern in your specific situation, but let’s face it: the only thing more important for sustaining human life in the short term than water is air! Having known-quantity drinking water on hand is best. Barring that, knowing where you can source water reliably is second-best, but in most situations means that the cleanliness of the water will be suspect.
The ability to remove chemicals, germs, microorganisms and particulates from your found water is essential. Even clear, cool running water may be hideously contaminated with cooties that can make you dreadfully ill or even kill you. Sure, some of those things are just very unpleasant in kind times when you can glug down the Immodium and binge on your favorite movies or TV shows, but a cramping gut and uncontrollable diarrhea can become debilitating in a survival situation thanks to rapid water and electrolyte loss.
A high-end, lightweight water filter in conjunction with water sterilization tablets or liquid will let you make all but the most polluted water safe, or safer, to drink. Modern filters especially are incredibly efficient, and their small footprint is more than justified in your pack. Even if you have gallons and gallons of potable water stored, don’t risk running out of drinking water because you have no way to make other sources safe.
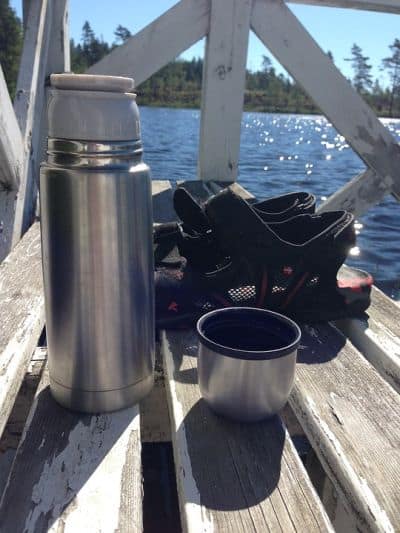
2) Wide Mouth Metal Bottle or Cup
If you were only going to carry one vessel for your drinking water, make it a good sized, no frills, sturdy metal one. A sturdy metal bottle may weigh a hair more than a similarly sized plastic one, but its general durability and more importantly its ability to boil water for sanitation and cooking will make it worthwhile.
The ability to boil water is crucial, not just for making the water safer to drink and for cooking as I mentioned, but also for its ability to potentially sterilize metal utensils of all kinds, from cutlery to field surgery implements like suture needles. Of course for some of you bean-juice fanatics the ability to make a cup of joe, real coffee may trump all other priorities!
Choose a model with a wide mouth that is easy to fill, either from a secondary water storage container or found water. Sure, they are a little trickier to drink from than a nice narrow-necked one, or one of those fancy bite valves, but the ease of filling them is more important. Take care whichever you buy that its internal liner, if any, will resist heating water to boiling temperature.
If you are dead set on a plastic bottle, you can purchase a large metal cup that nests around it to save room and achieve the same ends. Think the classic kidney shaped metal cup found on military canteens the world over and you have the right idea. This dual solution may be the best of both designs.
Of course, boiling water is much easier when you have a heat source which brings us to…
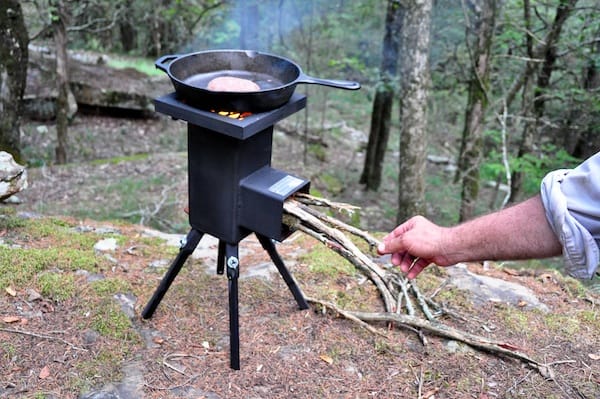
3) Lightweight Camping Stove with Multi-Fuel Capability
When you want to get food going or water boiling, it is much faster and easier to pop one of these tiny, mighty stoves out of your bag and add some fuel than build a proper cook fire. Any time you save building a fire or scrounging for fuel can be spent on other essential tasks like rest, repair or planning. Stoves in this class can accept anything from propane and alcohol to charcoal or wood, giving you freedom from dependency on any one fuel source.
Some models even feature a thermoelectrical battery that stores energy created from fire with USB connections allowing you to keep any rechargeable devices charged up. If you have a GPS, smartphone or flashlight that is rechargeable this is a great way to truly get the most energy possible from any fuel you have.
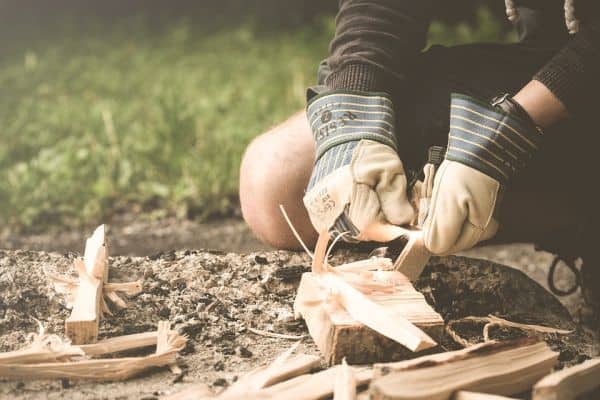
Fire is a fickle servant, but crucial when the electricity is off and lights are out. Fire is essential for warmth, light and signaling, both from light and smoke. To ensure you can create a fire, a proper, roaring fire in a hurry, have at least 2 handy, easy to use fire-starting tools available.
Many outdoorsy types gravitate toward fire steels and ferro rods for their simplicity, and so long as you have the striker or carbon steel knife to use with them have almost nothing that can fail except if you lose them. Tinder selection and technique is important with these, so practice ahead of time so you don’t struggle when you need it for real.
Those sparking tools are great, but nothing beats the ability to summon a flame with a snap of your fingers. A classic butane lighter is reliable, cheap and tiny enough to carry a few with no consequence. More expensive and ruggedized outdoor or survival models have greater capacity and will work in more adverse conditions.
Survival or “storm” matches are often waterproof, sturdy and burn furiously compared to common or grill matches. A bundle of these stashed in a tube makes for an excellent redundant fire starting method.
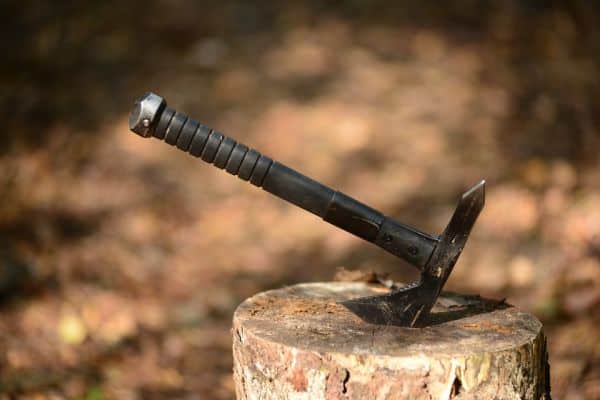
5) Small Tomahawk or Hatchet
For efficiently processing wood and small trees, light demolition and brutal close-range defense, the utility of a small ax in one form or another is unmatched. A field knife is a perennial choice for an all purpose tool, but for a small increase in weight adding one of these diminutive axes to your kit is a smart move.
As far as differences go, tomahawks are typically found with a straight handle and optimized more for combat or demolition. Hatchets usually have a recurved handle and are best at processing wood. Either will work admirably for chopping and splitting small pieces of wood, but you can get the most bang for your prepping bucks by carefully choosing what feature is on the poll, or backside, of the head.
Many tomahawks feature spikes that excel at piercing, and can readily be used to pop hinges, shackles and locks by leverage. Choose a spike poll if you want your tool to better serve for demolition and some light B&E.
Many hatchets and a few tomahawks feature a hammerhead protrusion, called (surprise) a hammer poll. Used carefully and minding the edge now facing you these can work almost as well as a carpenter’s hammer and will also make short work of driving pegs, stakes and the like. For generalist work the hammer poll excels.
6) Multitool
Rather than carrying an entire toolbox around, you can save pounds, space and aggravation by keeping one of these wonder gadgets close at hand. From tightening, tweezing and screwing to cutting and carving, a good multitool will prove invaluable at home or in the bush.
Choose a model with robust pliers in a size large enough to afford you some real leverage with the jaws. Besides that, the more tools onboard the better, within reason. You may prefer a model that stores interchangeable driver bits either onboard or in a sheath, or one with fixed bits. Both have pros and cons. I prefer a larger unit with a few more sizes rather than the interchangeable bit setup, as they will not come loose and get lost.
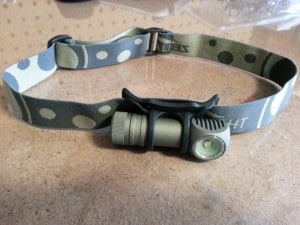
7) Headlamp
Lighting is crucial in any disaster scenario. The ability to banish the darkness and do so in a hands-free way is invaluable both for navigation and other work-related tasks. LED technology continues to improve at a rapid pace, so these guys get smaller, brighter and run longer every year. Add in different color lights and variable power and modes and you are hard pressed to beat that kind of performance.
With the exception of running a handheld light with a pistol or needing general floodlighting for camp or home, I have rarely wished for handheld instead of a headlamp. Keeping your hands free and the light aimable based on where you are looking makes sense for the majority of tasks.
Choose a model that features a common, affordable battery, is rugged and features easy switchology. Turning on a three color signal strobe when you just need a firefly to see by is aggravating and wastes power. Don’t forget to toss in extra batteries.
8) Space or Survival Blanket
Yeah, you’ll look like a baked potato, but these foil-like blankets reflect a massive amount of heat, and are excellent for general insulation as well as setting up a reflective shelter to catch more heat from a fire.
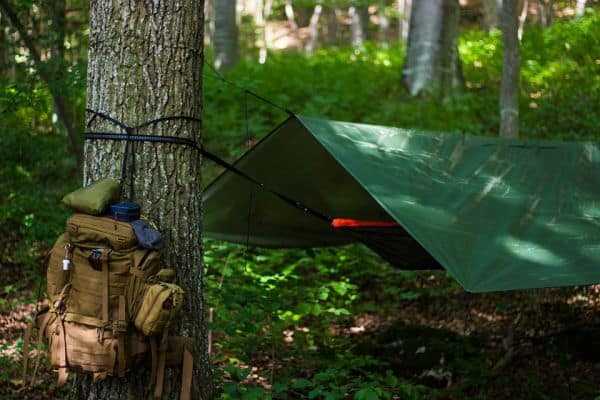
The uses for the humble tarp are almost limitless. From creating privacy to simple shelters or ground cover, a tarp and shank of small light cordage will let you tackle a host of situations with ease.
When choosing a tarp, opt for one that is at least 5’ x 8’ to allow you to rig it as a shelter. The material should be completely impermeable to water, and it should have many heavy duty grommets to allow you to rig it however the situation demands.
Don’t skimp out on quality! An $8, crackly bargain bin tarp will work for a time, but is not going to hold up as well as one made to a higher standard with better materials. Remember this: common items chosen for survival equipment should be selected with the same discernment as other, flashier gear.
Conclusion
Some pieces of gear make a difference no matter what kind of situation you are facing down, and where you choose to endure it. Hunkering at home or hiding in the backcountry, the above items all deserve a place in your stores or pack and together can keep you hydrated, warm, fed and safe.
I went through a rough period financially after getting out of graduate school. I could not find work in my chosen field, criminal psychology. I worked per diem (as needed/as available) at a halfway house for the severely mentally ill, and part time at a corrective program for drunk drivers, and during the spring and fall, teaching a class or two at a community college.
Money was tight at times, especially during the summer, when there were no classes for me to teach. One Thursday, I had the very unpleasant awareness that the fridge was more or less empty, all I had was a handful of change, and there was no paycheck until the next day.
What to do?
Options included:
Go hungry
Borrow money from a friend
Ask a friend or neighbor for a meal
Go to the local food bank and get supply of food
Go to the social services office for emergency food stamps
Beg for money or food on the side of the road
Shoplift
None of these options were attractive to me, so I came up with another idea.
I went fishing.
A mess of panfish, slapped on a charcoal grill, accompanied by a can of beans dressed up with brown sugar, mustard and tabasco sauce, accompanied by an impromptu cake/bread (?) made of Bisquick, water, instant coffee, coffee creamer, cinnamon, and powdered sugar made for a meal.
Flies
Flies are functional works of art. A fly is a handcrafted lure designed to imitate a food organism for a fish; typically an insect or baitfish.
Flies can be constructed from a variety of furs and hair, feathers, yarn, and synthetic material such as chenille, yarn and tinsel. The materials are fastened to a hook with a fine thread and locked in place with a type of lacquer commonly referred to as head cement. You should be able to catch at least five or six fish on a fly before it gets chewed up to the point where it needs repair or replacement.
Flies can be purchased in sporting goods stores, or ordered online. You can also learn to make them yourself. You can take classes on fly-tying, though I taught myself with Eric Leiser’s Complete Book of Fly-Tying when I was teenager. Later, as I met other fly tyers, I learned to refine and develop my technique even further.
They central point emphasized by Leiser that I completely agree with is:
Flies must look alive in the water
There are other factors, such as the appropriate size and color but whatever you construct; but if you want to catch fish, you have to produce something that will look alive when it moves through the water. This will arouse fish’s predatory instincts and entice them to grab the fly so you can set the hook, or even better the fish will grab the fly so aggressively, there is not even a need to set the hook.
Anatomy of Flies
Hook. This is the base upon which the fly is built. Fly tying hooks come in a variety of metals, sizes and shapes. There are tiny little size 32 fine-wire hooks for tying midges for trout, or enormous size 8/0 stainless steel hooks for saltwater fishing.
Tail: the part of the fly tied to the bend on the hook.
Body: something wrapped around the shank of the hook, often yarn, chenille, or dubbing, which are fur fibers spun onto thread.
Ribbing: a material which is spiraled over the body.
Throat A piece of feather or hair tied underneath the eye of the hook.
Hackle A feather wrapped around the body in place of ribbing, or behind the eye of the hook so the fibers on the feather standout from the hook at a right angle.
Wings feather or hair which either stands up at 90 degrees from the shank of the hook, or is fastened parallel or at shallower angle to the shank of the hook.
A tapered buildup of thread behind the eye, which holds the fly together, and will be lacquered or painted for additional visual features and/or to keep the thread from unravelling.
Types of Flies
Bucktails are designed to be fished subsurface, and have a wing made of hair either natural or synthetic. They typically imitate a baitfish.
Streamers also designed to imitate a baitfish, also fished subsurface, but the wing is made of feathers.
Dry flies float on the surface of the water, and imitate an insect, typically a mayfly or caddis fly, or a land based insect which got into the water
Wet flies are fished subsurface and can imitate an insect nymph, larvae, or pupae, or a small baitfish.
Nymphs are also fished subsurface, but are more specifically designed to imitate an insect nymph.
Flymphs are a hybrid nymph and wet fly.
Bass bugs float on the surface, and are made of spun deer hair or antelope hair, or plastic or cork and are specifically for catching smallmouth and largemouth bass.
Panfish bugs are similar to bass bugs but smaller. They are for panfish such as bluegills, crappies, perch, and green sunfish.
Saltwater flies are tied on large, stainless steel hooks, and are big robust flies specifically for saltwater fish species, though they are also useful for larger freshwater species such as pike, pickerel, or muskellunge.
Salmon flies are for salmon can be wet or dry, and very ornate works of art suitable for framing and display, or simpler and functional.
Steelhead flies are for steelhead, and are similar to salmon flies and Bucktails except they tend to use very bright colors.
Miscellaneous flies that do not fit into any of the categories above.
Materials
You will need the following materials to tie the flies described below:
To save money, get fly-tying materials from a craft shop. Craft shops offer a multitude of materials which can be used for flies; yarn, rawhide strips, plastic floss and pipe cleaners for bodies, marabou, artificial hair, and feathers for wings, feathers for hackle, and many other options if you are creative.
If you hunt or know a hunter, you have another source of furs, tails and feathers. Deer body hair, squirrel and woodchuck tails, peasant and partridge feathers are all widely used in fly tying.
above: fly tying bobbin
Tools
The following tools will be needed:
Fly tying vise The Regal vise is probably the best on the market. I have been using the same one for 34 years. It is also one of the most expensive. Cheaper vises are available to get started with, but you may not get as much use out of them.
Dubbing needle for a multitude of tasks, including applying head cement, tying finishing knots, roughing up dubbing to make it look more alive, or clearing head cement from the eye of the hook.
Where to Start
Wooly worms. These are so simple. Tail, body and hackle, three materials, plus the hook and thread, and five steps. With practice, you should be able to crank out a dozen of them in an hour.
Wooly buggers. If you can tie a wooly worm, you can tie a wooly bugger. Add a marabou tail to a wooly worm.
Marabou streamers Place the tail over the body, instead of the tail section, and you have a marabou streamer
Mix and match different colors and sizes of wooly worms, wooly buggers, and marabou streamers, and you can fill a fly box.
Conclusion
Learn to fish. Learn to make your own flies to catch fish. It is a satisfyingly primal experience to catch a fish on something you have created with your own hands.
A freezer full of trout, salmon, crappies and perch can ease the grocery bill a little, or provide an emergency food source in the event of financial hardship, or a broader difficulty. It builds confidence and gives you more options, making you less vulnerable. In other words it is (gag) empowering. I hate using PC language, but that term really fits here.
The feeling of satisfaction of watching a fish ascending and grabbing your fly floating on the surface is tremendous if you are fishing for sport and you intend to return the fish to the water. If you are fishing in order to eat, that feeling will be even more gratifying. Learning to tie your own flies is one more step toward becoming self-reliant.

 15 Rds