Hello! Id like to start out by saying that i have been trying to lucid dream since a little over a year ago, i wasnt very inconsistent though and for the past few months i took a break completely from lucid dreaming and also dream journalling in general, and just over 2 weeks ago i jumped back into it with fresh motivation.
I decided to commit to the MILD technique, ive tried SSILD, WILD, FILD but none of them worked out for me and i wanted to try perfecting MILD over a long time period say 6 months minimum, as i know if i get this down ill succeed pretty well.
In the past few weeks, ive been trying MILD before i sleep initially and if im able to, upon WBTB, and ive yet to become lucid but im not giving up hope whatsoever, though i am struggling somewhat in the idea of maintaining the mantra up until the moment i fall asleep, as staying focussed on the mantra itself keeps me awake rather than helps me fall asleep, in order to sleep i have to let my thoughts go and not focus on any one thing.
Futhermore, over the past week, ive been noticing some near attempts at DEILD, where in the later stages of my sleep in the morning i notice that i awake briefly and get sucked into extremely loud vibrations, like a transition into dreaming, this happened last night also or rather in the morning, and i had read on dreamviews that one thing i could do is to stare at the backs of my eyelids and wait for hypagogia to form, and i tried this out but found that nothing happened, and eventually the vibrations stopped. Everytime ive gotten to the transition stage, this week and in the past, i can never quite complete the transition into the dream and wonder what am i doing wrong.
Side note, i am dream journalling as consistent as possible, making sure to write something down everyday, as short or as long as it is, and im also performing reality checks often, i struggle with rcs but in the past few days ive been making myself do them consistently around 10 to 15 times a day.
If anyone has any tips or words of wisdom to share itd be greatly appreciated :)
via Lucid Dreaming - Dream Views - Attaining Lucidity https://ift.tt/3BoUEUM
Knife owners these days have no shortage of quality steels to choose from. For custom and production models alike, there is a steel to fit every budget and every requirement.
In fact, there are so many steels on the market that choosing one from the dozens available at the retail counter or on a manufacturer’s website can be a task unto itself.
One fine steel you’ll see referred to regularly is VG-10. A quick perusal of most knife forums will show it to be almost universally liked. So what is VG-10 steel anyway?
VG-10 is a high-end stainless steel first produced in Japan. A high carbon stainless steel, the formula contains 15% chromium, 1.5% cobalt, 1% carbon, 1% molybdenum, and 0.2% vanadium.
Originally intended for high-end kitchen cutlery, it has subsequently found its way into a variety of knife applications, including fixed blade and folding field and tactical knives.
But formulas don’t tell us the whole story about this impressively high performing stainless steel. Keep reading to learn more about VG-10, and see if it is right for your needs.
VG-10 is a Premium “Stainless” Offering
From the beginning of its conception, VG-10 steel was originally intended as the ultimate in performance stainless steels.
In fact, the common name is an abbreviation standing for v gold 10, with gold in this case meaning gold standard, or highest possible quality. Occasionally you will see this steel referred to as v-kin-10, “Kin” meaning “gold” in Japanese.
Though this steel is overwhelmingly manufactured in Japan, and they are rightly famous for it, the steel has made market inroads into other categories besides kitchen cutlery.
This is because this particular steel meets or exceeds the performance characteristics of other, cheaper and more common stainless steel formulas.
It sounds like quite a boast. But when we get down to the brass tacks of cutting performance in longevity, how does VG-10 stack up?
VG-10 Offers Ideal Performance Characteristics for Many Applications.
VG-10 has much to commend it in most cutting applications. It is capable of taking on a wickedly sharp edge when honed or stopped, shows dependable corrosion resistance qualities, generally maintains an edge without chipping except under substantial abuse and all the while remains easy to sharpen or touch up.
That is quite the list of features! Whereas most stainless steels will excel in one or two categories, VG-10 seems to excel in all of them, or at least reach a very high benchmark.
Beyond even these practical considerations, VG-10 is popular among skilled artisans as well. Paying careful attention when tempering this steel can produce a laminated effect that looks very much like Damascus steel, and consisting instead of interlocking, fractal patterns.
Truly, for those people who are unwilling to separate aesthetics and raw functionality, VG-10 might well be the ultimate stainless steel. However, this high performance and tremendous beauty comes at a cost, and that cost is measured in money.
When considering a production or custom knife upgrading the blade from more common stainless to VG-10 will usually bump the price tag quite a bit.
Is the cost worth it? That’s for you to decide but I can tell you with some authority that you will rarely, if ever go wrong choosing VG-10.
Possibly the Best in Class for Kitchen and Camp Use!
When you know your requirements, it allows you to choose the best possible tool for the job and in our case choosing the best possible tool means choosing the right tool made from the right Steel.
If you are working hard in the kitchen on a daily basis, or your job entails frequent, hard use of a pocket knife or fixed blade built knife, VG-10 May well be the ultimate steel for you.
Think about it. Whether you are in the kitchen or in the field, when you are depending on your knife you needed to be sharp and stay sharp through multiple cuts.
We are talking about high tempo work here. In either job, when a knife gets dull work slows down, costing you money or precious time.
Worse yet, dull knives lead to accidents because the wielder uses more force to accomplish the task and that is when slips and accidental cuts or stabs happen.
VG-10 steel means that your already frighteningly sharp edge will stay sharp longer through the same amount of work.
Even better, when it is time to touch up the knife after a prolonged task, the edge can be restored easier than competing steels, saving you even more time. This is a double whammy of sorts in your favor!
But the hits don’t stop there, as the corrosion resistant nature of this Steel will keep it in good shape and doing its job whether or not it is getting rained on, coated with sweat or just covered with acidic residue from fruits, vegetables or meats.
if it sounds like VG-10 is the one steel that can do everything you needed to do, well, you are pretty much right and only users who need the most heavy duty of steels for tasks like chopping, batoning or other abusive tasks need look elsewhere.
VG-10 is not the best option for making a cleaver, ax, hatchet, machete or some other heavy, hacking blade but it is damn near ideal for everything else.
Not to be Confused with VG-1
It should be noted that VG-10 is not the same steel as VG-1, though they both hail from Japan and the same original inventor. VG-1 has different characteristics from VG-10 and though it is superior and some regards it is inferior and others.
A thorough examination of VG-1 warrants its own article, but in general VG-1 steel is thought to have better overall sharpness and edge retention characteristics though it is commonly accused of being significantly more brittle and prone to chipping than VG-10.
For any application where the knife might encounter hardened materials that could result in chipping or rolling of the edge, VG-10 is generally superior.
For repeated cutting or slicing of materials at a high tempo with little risk of encountering any obstruction or obstacle they could result in edge damage, VG-1 might be better.
Conclusion
VG-10 is a high performance stainless steel originating and predominantly produced in Japan.
The characteristics of this steel formulation result in a knife that can be extremely sharp while also remaining easy to sharpen, and highly corrosion resistant and the whole while maintaining its edge through a very quick usage tempo.
This is a premium stainless steel and you should expect to pay accordingly, but it might well be the ultimate choice for everyday use kitchen, pocket and field knives.
You will hardly run into a prepper who is not making plans and accumulating gear to be ready for medical emergencies that might occur during or as the result of a disaster.
The mantra that I and others in the sector preach is that one must be prepared to be their own first responder. Doctors, nurses and EMTs will be completely overwhelmed if they are around to help at all, so you have to be ready to do it yourself.
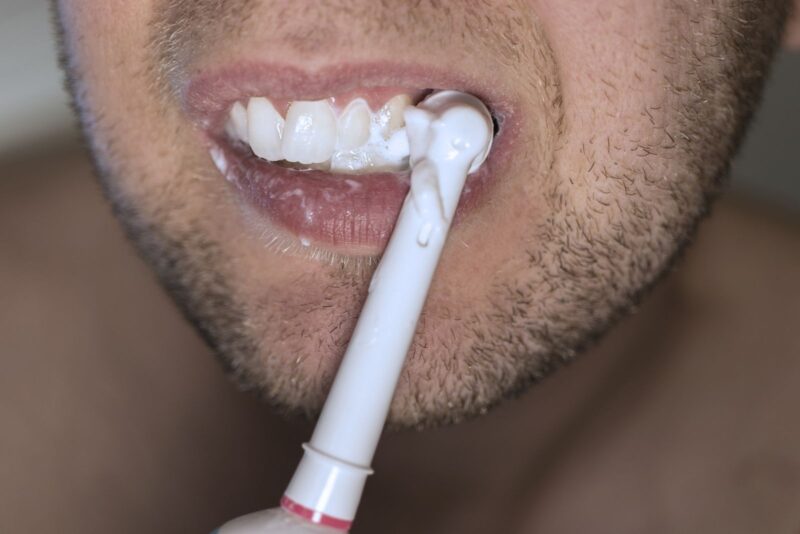
However, there is one component of medical care that is almost universally overlooked by preppers all across the land, and that is dental care. Dental care is about far more than keeping your chompers looking good so you can feel confident and polite society.
Failing to keep your teeth clean and any oral maladies taken care of can eventually lead to excruciating pain and turn life threatening far more quickly than one would think.
The idea of being your own dentist or serving as a dentist for those in your family or group during a long-term survival situation might seem daunting, but just like every other skill you have learned so far it is entirely achievable, at least to an extent they can make a difference when an intervention is called for.
In this article, we will provide you with an introduction to the concepts and fundamentals of SHTF dentistry skill.
For More than Just Social Acceptability
Before we get started, it is imperative that you understand just how important oral health is to overall health.
Sure, keeping your teeth free of plaque and cavities and gleaming pearly white definitely improves your appearance and helps your social life but you have far more at stake practically than socially if you let your teeth and mouth fall into disrepair.
Damaged or badly degraded teeth can no longer do their job of processing food, and even if they can the pain is going to make eating tedious and excruciating, certainly robbing meal time of any Joy and likely depleting your strength physically and emotionally.
Being able to eat easily in a carefree way is something that almost everyone takes for granted.
How much worse will this be in the middle of a survival situation amidst all of the other problems you are trying to deal with?
I would argue it will be pretty bad. when you have to go on living, that means you have to continually take care of yourself so that you can survive and thrive under the circumstances, like it or not. That means you’ll need to take care of your teeth and mouth like any other part of your body.
Hygiene is Imperative to Long-Term Survival Situations
As is said, cleanliness is next to godliness, and while keeping it clean in a survival situation won’t necessarily buy you divine intervention, it can stave off problems that you cannot afford under the circumstances.
A body that is dirty will begin to host bacteria in ever-increasing, constantly multiplying numbers. Depending on the type of bacteria and where it is on your body the maladies that might develop and escalate can range anywhere from annoying to life-threatening.
I can start with rashes and topical skin irritations progressing all the way to localized sores and eventually progress to severe infection, infection that will make you terribly ill or even kill you outright.
And we should not discount the nicer side of good hygiene. You and everyone around you are likely to be going through one of the single, worst experiences of their lives, and putting up with a foul and stinky body of another person along with their own is only going to increase stress levels.
A person who is clean and smells good, or at least does not smell terrible, will increase morale, and the mental edge that this can provide must not be underestimated.
BLUF: Poor Oral-Hygiene can be Life-Threatening
Discussing all the many varied and terrible ways that poor hygiene can kill you when you are chronically unclean can be an entire article unto itself, but concerning ourselves only with the hygiene of the mouth a buildup of bacteria will start out making your breath positively foul and eventually progress to the rampant buildup of plaque on teeth, plaque that will weaken them and eventually rot them right out of their sockets.
When the teeth begin to fail the gums will likewise be affected, and an open injury in the mouth to say nothing of a badly dissolved or crumbled tooth can provide an easy method of ingress for infection.
Considering the proximity to the eyes and brain any major infection of the mouth can easily become incapacitating, even fatal, and wholesale infection of the blood supply is not out of the question.
Both the eyes and the brain are considered immunoprivileged structures in the body, meaning a disproportionate amount of the immune system’s resources are dedicated towards monitoring and protecting them.
Typically, this means infections that begin elsewhere in the body will never make it far enough to affect the eyes or brain, but if the infection should start in the tissues very near to either, that is another story…
Accordingly, you mustn’t let neglect of your mouth turn into an easy vector for infection.
Hit the Books!
Chances are you aren’t a dentist, and you probably aren’t even a dental assistant. The chances are good, however, that you have a baseline level of experience in dental hygiene, you brush your teeth, floss, gargle mouthwash and so forth; your basic twice-daily care routine.
That’s good, and you’ll still need to do all of those things but it isn’t enough for our purposes.
To be truly prepared for post-SHTF dental requirements you’ll need a sampling of skills from various dental disciplines, including those of a dental hygienist, dentist and even a little bit of orthodontics know-how.
Sound intimidating? Maybe it is, but don’t be: These are skills that professionals spend years acquiring and a lifetime mastering, and it just isn’t practical for most of us to devote any significant amount of time to them unless we are actually practicing professionally.
But for mastering key concepts and learning fundamental skills, you can do the same thing that you have already done for other, less cringeworthy skill sets- Hit the books!
And by “hit the books” I mean actually crack open dental manuals, watch pertinent videos on YouTube and other sites and even see if you can track down any training for austere environment dentistry from a genuine practitioner or even an NGO devoted to the purpose.
Having even a little bit of practical experience under your belt will go a long way towards reducing fear and boosting confidence in a live “event,” and barring that even some sound theory and knowledge could make the difference.
No more excuses, time to skill up!
Your Two-Pronged Approach to SHTF Dental Care
Generally, you will prepare for post SHTF dental care and crisis intervention as two distinct but related sets of skills and supply requirements.
Basic Upkeep
Corrective/Emergency Procedures
Covering the basics is easy, and you might well have all of the supplies you need already, but taking care of the second category is significantly more involved, and more difficult.
Nonetheless, you must do both if you want to be truly ready for all eventualities. Below you will find sections about each category along with lists of materials, tools and supplies helpful for the purpose.
Basic Upkeep – Supplies, Do’s and Don’ts
No surprises here, your basic oral care and upkeep routine will not change much if at all post-SHTF. You’ll still need to brush, you’ll still need to floss and generally try to avoid things that are really hard on your teeth.
Some facets of your routine might change, for instance, if you use a waterpik or electric toothbrush you’ll be switching to manual equivalents in the absence of electricity or in an austere environment or electricity is precious.
Your list of supplies will probably contain no surprises, and you generally want to have on hand enough dental care tools and provisions to take care of yourself, your immediate family and anyone else in your group that you are responsible for:
Toothbrushes
You should include standard toothbrushes for everyday use as well as interdental toothbrushes. Interdental toothbrushes are tiny, straight pieces of wire designed to fit between teeth, and have a spiral of bristles sticking out in every direction. These are terrific for supplementing your flossing routine as well as cleaning around braces or sensitive areas that traditional brushing cannot reach.
Toothpaste
Mouthwash (optional)
Floss
Baking soda
Baking soda is a multipurpose item for oral care, capable of being used as toothpaste, diluted into a mouthwash and used as a debriding agent. If you run out of any of the other items on this list you’ll be glad you have it!
Clove Oil
Clove oil works as an excellent oral anesthetic for sores, cuts and even pain from cavities. Soaking a cotton ball in clove oil and then holding in place for 30-60 seconds is often all that is necessary to provide meaningful relief. Take care that you do not swallow any of this stuff; you won’t forget it!
Coconut Oil
Coconut oil is another wondrous, natural inclusion to your daily dental routine, and is possessed of strong antimicrobial properties as well as a highly moisturizing nature. It is helpful for keeping your breath fresh, gums moisturized, and preventing the buildup of plaque and tartar on teeth. A must-have for dealing with lesser injuries and ailments of the mouth and gums, and kept in a cool location out of direct sunlight it can last up to two years in storage.
When it comes to doing your daily brushing, depending on the situation you may or may not have a surplus of water to use for rinsing.
That’s okay, as most toothpaste only need to be slightly wet in order to work properly and if you cannot spare the water to rinse you can just spit out the foamy toothpaste as best you can and then go on with your day.
Not entirely pleasant, but completely serviceable for the purposes of keeping your teeth and mouth in good shape.
Corrective Procedures – Supplies, Do’s and Don’ts
Tooth fixative
Adhesive used for repairing chipped or broken teeth, or attaching fixtures to teeth.
Emergency tooth preservation kit
This is a kit containing a disinfectant rinse, preservation solution or gel and a container to safely transport a completely dislodged tooth until it can be reinserted into the socket.
Filling media
Used for the creation of temporary or permanent fillings. Temporary fillings work well for halting the pain from cavities, but permanent and semi-permanent fillings must be installed with care and skill.
Scaler and scraper tools
Dental picks
Extraction forceps
A fancy term for tooth-pulling pliers.
Periosteal elevator
A cutting tool used alongside extraction forceps. This thin chisel-like implement is designed to reach down into the gum line and sever the tissues holding a tooth in place.
Dental mirror
Dental spatula
Probe
Temporary tooth/denture media (TempTooth)
Used to DIY mold removable teeth or dentures to replace lost or missing teeth. Can alleviate discomfort when eating and improve morale.
Facemask
Gloves
Headlamp or head mirror
Gauze pads and rolled gauze
***Caution:Using any of the above tools for their intended purpose entails a certain amount of risk, as they are designed to be used by trained individuals in a proper dentistry setting. Undertaking any amateur dentistry entails risks that are inherent to the procedure, and should only be attempted by those with the knowledge and experience to do so safely.***
When brushing and flossing isn’t enough, or when mishap results in a badly damaged tooth, it is time to break out the big guns, or rather the big tools.
The pick, scraper and scaler tools on the list above are used for the removal of plaque and tartar. Dental fixative, sometimes called tooth adhesive, is used for the temporary repair of damaged teeth until proper care can be obtained.
Dental fixative is little more than an adhesive or cement which is safe to use and the mouth and will reliably bond teeth together. A small chip or a cracked tooth can be shored up using dental fixative.
Upon the removal of plaque or tartar, a cavity can be filled using a variety of filling media and associated spatulas. Care must be taken using either to ensure that surrounding teeth are not contaminated or otherwise impaired.
The really intimidating item on the list above is, of course, the ominously named extraction forceps. AKA Tooth-pulling pliers. These pliers are designed to safely grip a tooth destined for removal without crushing it, a mishap that can make a bad situation so much worse.
These tools are essential for dealing with badly rotten teeth or any others that must come out, and attempting to use common pliers, vise grips or any other such improvised device is likely to result in disaster.
Lastly, gloves and facemask will keep any amateur procedures as hygienic as possible and reduce the risk of infection. A headlamp or head mirror is essential for getting as much light as possible on the work area.
Lastly, temporary or improvised dentures or single replacement teeth can be made surprisingly well and effectively using polymer intended for the purpose.
Temp-Tooth is one such product consisting of temperature sensitive beads which will soften into a tacky rubber consistency after being soaked in very hot water.
Working quickly, a small quantity can be safely inserted into the mouth once wounds have healed and then molded into a prosthetic that will fit in the place once occupied by the removed tooth.
As always, there is no substitute for training and experience, and if you are forced to use any of these tools and learn while you go, both you and your patient will be in for a harrowing experience.
Dealing with Common Dental Emergencies
There are all kinds of dental emergencies that can occur, from abscesses and impactions to traumatically broken or otherwise damaged teeth.
Two of the most common that require intervention are an avulsed tooth (a tooth knocked completely out) and tooth extraction, “pulling” a rotten, badly broken or otherwise problematic tooth.
These two are among the most likely and most distressing, while also being two dental problems that can be successfully intervened upon by a reasonably skilled prepper.
Note that each of these events are legitimate dental emergencies, and if there is any way to reach a professional dentist or other dental professional you should do so.
Avulsed (Knocked Out) Tooth
Teeth can get knocked out for all kinds of reasons. Accidents, physical combat, roughhousing; it doesn’t matter why, what matters is that immediate action is taken to locate, preserve and reinstall the tooth so that there is a chance it will successfully “re-anchor” in the socket.
Knowing what to do and how to act can save precious time, as an avulsed tooth that is left unprotected will quickly experience pulp death, ruining any chance of a save.
If a tooth gets knocked out, do the following:
Step 1: Locate the tooth
Whatever has happened, locate the tooth if it has fallen out of the victim’s mouth.
Note that the tooth might have broken with some remaining in the socket of the gums. If you cannot find the tooth, none of the other steps matter.
Step 2: Pickup tooth by crown/enamel
When picking up the tooth or its components, take all pains to pick it up carefully by the crown (exposed) part or the enamel if the tooth is broken.
Touching the pulp or other tissues is a great way to cause infection from bacteria on your hands that can spoil your attempt at a successful reinstallation. Use gloves if you have them.
Step 3: Rinse tooth
Rinsing the tooth is essential to help prevent contamination and tissue death. Use a purpose-made cleansing rinse out of your tooth preservation kit if you have it, saline solution or failing everything else the cleanest, room temperature water you can find.
Step 4a: Reinsert tooth (If whole)
If the tooth is whole and intact and the damage to the mouth is relatively minor, try inserting the tooth gently into its socket. Biting down gently can help hold it in place. Judicious use of pain-killer or clove oil can help to manage pain.
Step 4b: Keep tooth moist (if reinsertion is not possible)
A tooth that dries out will experience tissue death quickly. Place the cleaned tooth inside the solution or gel found in your preservation kit or, barring that, saline solution.
Step 5: Splint tooth
Splinting the tooth is a procedure done to hold a reinserted tooth in place so that it can heal and, hopefully, reattach to the gums and go on living.
This is done with various apparatus and adhesives and should, ideally, be done by a dentist or orthodontist. You may need to improvise in a jam.
Step 6: Protect tooth for reintegration
A reinstalled tooth should not be exposed to much if any pressure from chewing, extreme heat or cold, acidic food, or anything else that might harm it.
It should be kept clean and rinsed, and antibiotics might be called for to prevent infection which will surely result in the loss of the tooth should it occur.
Note that all of the above assumes the tooth can be reinserted in more or less one piece, and that the tooth was not broken off with remnants still in the socket.
In that case, barring the attention of a skilled dentist or orthodontist, what you are really dealing with is an extraction (see next section).
Never try to force or otherwise mangle a tooth back into position; if it cannot be cleanly refitted, you are likely to cause more harm than good.
The Big One: Pulling a Tooth
Note that the instructions below are procedural for a person who is extracting a tooth from someone else. Extracting your own rotten tooth can be done, but worthwhile instructions for that procedure are beyond the confines of this article.
Check out one of our other articles here for even more info on handling this hair-raising procedure. Godspeed at any rate!
Step 1:Don personal protective equipment
Time to do this. Put on your face mask, gloves, headlamp or mirror and sweatband if you need it.
This isn’t just to comfort your patient; you must do everything you can to reduce the risk of infection since they’re about to have a gaping, open wound in their mouth that is easy to infect and the best of times.
Step 2: Position the patient
Do a few dry runs, preferably not on the patient, to determine the best working height and angle for you. Remember, it will be imperative that you obtain a straight shot to reduce the risk of damaging neighboring teeth.
Step 3: Apply anesthetic, if available
If there was ever a time for anesthetic, this is it.
Step 5: Use periosteal elevator to loosen ligaments holding tooth in place
Expect some bleeding to begin. Keep the area around the tooth as clean and dry as you can using gauze and an occasional spritz of water so you can see what you are doing. Try not to let blood begin filling up in the mouth of the patient.
Step 6: Grasp tooth with extraction forceps
Ensure that your hands are dry and you have a good grip on the handles of the forceps for the next step.
Step 7: Remove tooth by pulling directly upward/downward out of socket
Extract the tooth by pulling it directly upward or downward out of its socket as appropriate. Do not use a rocking motion if it can be avoided. Using a rocking motion increases the chances of damaging or loosening the neighboring teeth.
An exception to this is made when the tooth is most of the way out of the socket or in the case of the rearmost teeth.
Step 8: Ensure that all parts of tooth are removed
As before, use a periodic rinse and plenty of gauze to control bleeding and keep the site clear so that you can see what you are doing.
Step 9: Control bleeding
There will be lots of blood in the aftermath of an extraction, whether it comes out in one piece or not.
Step 10: Perform follow-on care, ensure that patient does not damage or dislodge blood clot
The patient must be monitored for subsequent infection, though swelling, pain and even significant bruising of the mandible or face is likely.
Cultivating Skilled Practitioners for Your Survival Group
Lots of preppers who get turned on to the seriousness and importance of this skill set naturally set about fostering your own skills and procuring their own equipment for the task.
This is undeniably a good thing, but a better approach and one with a much higher degree of efficacy is obtaining a skilled dental technician or actual dentist for your survival group.
This is not necessarily your family dentist or orthodontist. This person is someone that you can build serious rapport with and is of like mind when it comes to personal readiness and the topic of survival.
Having someone who has done all of this before, day in and day out, will drastically improve the chances of a successful outcome and minimize the chances of mishap, to say nothing of doing the whole thing with less pain and trauma for the patient.
If you have a friend, friend of a friend or a family member with any of the above skill sets they are a natural shoe in for the role but you might be able to cultivate a person to fit into your group by meeting the right people and making the right connections.
In fact, it is not out of the question that your dentist or a technician at your dentist’s office might be on board with the idea if you are able to make small talk with them about mutual interests, particularly mutual interests revolving around prepping.
Most groups have a leader, a mechanic, a rigger and a fighter, and many other specialists besides so it is only natural you should try to include a dentist in the fold.
Your teeth will thank you, and you’ll be thanking your lucky stars if you have a dentist at your elbow instead of an enthusiastic amateur when a bad tooth needs to come out!
Conclusion
Dentistry skills and supplies are an often overlooked component in a prepper’s readiness plan. Failing to take care of teeth in the long term can lead to serious dental maladies, including dangerous infections that can prove show stopping under the rigors of survival.
Take it upon yourself to learn fundamental dental care and intervention techniques in case you find yourself in the gravest extreme, and all preppers would be wise to cultivate a close contact or group member in the form of a dental technician or actual dentist.
Bleach is a precious and versatile survival commodity, but unfortunately one that is often overlooked in prepper stockpiles. Aside from its disinfecting, germ-fighting power for cleaning, we can also use bleach to reliably disinfect and he found water supplies that may be questionable.
Pure, unadulterated bleach will reliably vanquish all sorts of bacteria and viruses that might be present in your drinking water if you add a precise amount.
How much bleach should we add to our water in order to purify it?
The correct ratio for disinfection of water is6drops to1US gallonwhen using standard, unscented 8.25% concentration sodium hypochlorite bleach. If disinfecting smaller amounts of water or attempting to precisely measure bleach for larger quantities, add two drops to every 1 liter of water.
Once treated, agitate and allow the water to sit for 30 minutes before drinking.
Considering how little bleach is needed to successfully purify water supplies even a single jug of common, basic bleach can purify a truly massive amount of drinking water.
However, there is a lot more to know about this process if you want to ensure good results and avoid potential mishaps. Keep reading to learn all about the use of bleach for the disinfection of water
You Have to Use the Correct Kind of Bleach
Now, it is absolutely true that you can use common, garden variety bleach for this purpose but what you cannot use is bleach with any sort of adulterating additive, be it a thickener, fragrance or any other such trickery.
Also you cannot use any so-called oxygen bleaches or bleaching agents that are not straight up sodium hypochlorite.
Thickening agents or oxy bleaches will contaminate the water you are trying to treat, as will the fragrances.
You don’t want to drink either, and concerning the former they may be poisonous from the get-go. Fragrances and thickening agents may or may not be, but take no chances and at any rate it is not going to make your water any safer or taste any better.
It would be the very summit of tragedy to use any of these modified bleaches in an effort to purify your water and end up poisoning yourself anyway.
Also, double check the label of the product you are buying to ensure that it is free from any such additives but also that you are getting bleach that is an 8.25% concentration of sodium hypochlorite. That is what the prescribed ratios above are for.
You can use sodium hypochlorite bleach of differing strength, but you’ll need to adjust the ratios for safety.
Also, take care if you are purchasing your bleach in large quantities or from any chemical supply retailers, as these could be dramatically stronger than over the counter, household bleach for your laundry room.
Note that these might work and be convenient for purifying massive quantities of water but they are entirely too strong to make metering them out for smaller quantities easy or reliable.
I Thought Bleach was Dangerous to Drink?
Bleach, uncut and unadulterated, is indeed very dangerous to ingest, but as the old saying goes anything can be a poison or a medicine depending on the dosage.
So we are entirely, 100% crystal clear let me remind all readers that you should never, ever drink bleach for any reason. Sodium hypochlorite, in any significant concentration, destroys tissue.
Drinking bleach will play hell on all of your mucous membranes, dissolve the lining of your throat and then start to dissolve the interior of your stomach.
What’s worse, your body will naturally want to purge itself of this dreadful poison and when you begin to vomit you’ll have stomach acid coming up with it to attack the now deteriorated tissues of your throat. I hope I have made my case that this is a grisly and terrible way to die.
However, this same sodium hypochlorite that is so dangerous in high concentrations makes for a powerful and safe germ fighter in trace concentrations.
Adding sodium hypochlorite to water leads to a chemical reaction where oxygen is released in abundance throughout the water and it is the oxygen, not the sodium hypochlorite itself, that kills the invisible, but highly vulnerable microorganisms in the water that could make you so dreadfully sick.
Even better, compared to various drug therapies and antibiotics that germs can develop resistance to, there is no way for the nasty germs to develop any sort of resistance to this chemical reaction which obliterates them utterly by disrupting their molecular bonds. Blinded by science? How about disintegrated by science!
Anyway, bottom line up front is you should never, ever drink bleach straight and only ever administer it to your water supply and it precise quantities with strict attention paid to the procedure for safety.
Try the Following Tips to Ensure Good Results
Bleach is not a panacea. Bleach kills germs, pretty much all kinds of germs, in the water but can’t do anything about other forms of contamination such as those posed by heavy metals and other chemical contaminants. Only filtration or other specialized forms of purification can deal with those.
Also, you might treat your water supply with bleach and still get sick from it if you don’t follow best practices when it comes to handling and dispensing.
This is an especially common, and unfortunate, occurrence when using bleach to treat water in any container that you’ll be drinking directly from, or any container which relies upon some sort of cap, nozzle or other dispenser.
What happens is that contaminated water gets trapped, waiting, in the threads of the cap or the neck, or elsewhere in the dispenser and then gets swept into your mouth or into your vessel upon dispensing the treated water.
Although unlikely, you should still take steps to prevent this unhappy occurrence. All that is needed to counter this is for you to unscrew the cap a turn or two, just enough to let water leak out.
After you treat the water with bleach, shake up the contents, unscrew the cap a little bit, and then squeeze to forcefully flush out these nooks and crannies.
You can do the same thing with any sort of nozzle or other dispenser by forcefully flushing it out with your now treated water
Additionally, these ratios only work for clear water. If your water is cloudy or murky with any sort of silt or other dissolved solids, you should make every attempt to pre-filter it in order to clear up the water.
These murky solids will impede the bleach, and if you cannot filter it you’ll need to add even more bleach to overcome this which could pose significant health hazards in the bargain. Filter first, and then bleach!
Conclusion
Common, unscented and unmodified 8.25% concentration sodium hypochlorite bleach can be used to treat drinking water by adding six drops to one US gallon. Larger or smaller quantities of water can be treated accordingly by adding two drops for every 1 l.
In any case, the water should be agitated and then left for 30 minutes to ensure elimination of all dangerous or harmful microorganisms. Remember that water that is murky must be filtered prior to treating or else more bleach must be added to ensure total sterilization.
North Carolina is regrettably a state with fantastically circular, messy, and downright confusing statutes governing the ownership and carry of knives.
Several particular categories of knives are banned from ownership outright, and many common configurations of knife may not be carried concealed under any conditions.
The only class of knife that is legal for concealed carry is the incredibly vague “ordinary pocketknife”.
North Carolina is also host to a smattering of head-scratchingly stupid restrictions on when and where you may carry a knife, to include being a spectator at a parade or a member of a funeral procession. Yes, it really is that dumb.
Whether or not these laws are enforced today is a matter that is decided by court precedent, one area where North Carolina has been frustratingly erratic.
In the remainder of this article I will do my best to help make sense of the mess and explain the most salient points to you when it comes to ownership and carry of knives in North Carolina.
What You Need to Know
What Kind of Knives Can I Own?: Any knife except a ballistic knife, “spring loaded projectile knife” or similar knife.
Can I Carry a Knife Concealed Without a Permit?: Yes, but only “common pocketknives” may be carried concealed.
Can I Carry a Knife Concealed With a Permit?: Yes, but only “common pocketknives” may be carried concealed.
Can I Carry a Knife Openly?: Any knife except a ballistic knife, “spring loaded projectile knife” or similar knife.
General Ownership
Though you can own most types of knives in North Carolina that is where much of the good news ends.
The explicitly forbidden types of knives are ballistic knives and any other knife that launches its blade as a projectile. The state statutes specifically mention spring-loaded projectile knives, ballistic and any knife with similar characteristics to a ballistic or projectile knife.
North Carolina is so hell-bent against these obscure and strange knives that even police officers are banned from owning or possessing them except under the strictest of technical demonstration standards.
North Carolina also lacks any sort of statewide preemption when it comes to knife laws, and several cities and jurisdictions have knife regulations significantly more troublesome than the states already troublesome statutes. Make sure you learn the lay of the land when you are traveling into or around North Carolina with a knife in tow.
Concealed Carry, No Permit
The concealed carry law regarding knives is an absolute and total debacle in North Carolina. The only knife you are allowed to carry concealed is an “ordinary pocketknife”. Oh no, not this term again!
What is an ordinary pocket knife?
I can tell you for sure that it is very poorly defined in the text of North Carolina’s state statutes, but as described in the text of the law an ordinary pocket knife is a small knife that is intended to be carried in a pocket or purse, one that also has its cutting-edge and point completely enveloped and covered by the handle.
Hold on tight, because the show is not over yet: the state further opines that an ordinary pocket knife is one not opened by any throwing, explosive or spring action.
After that, they say no more. What can we deduce from this shabby explanation? For one, any automatic knife or switchblade, along with any assisted opening knife of any type is definitely going to be a no-go.
Throwing and explosive action are both more difficult to deduce. Throwing action was almost certainly not intended to mean a knife that opens while in flight after being thrown, but instead refers to something like a flick of the wrist sort of a motion to open it. This is most likely intended to disqualify butterfly knives and balisongs.
As for explosive action, your guess is probably as good as mine. Does it mean an explosive action of the arm, hand or wrist or some propulsive opening mechanism like an elastic band, gas charge or propellant charge?
Once again the state does not clarify, but since they already have a standing use of the term ballistic knife this seems unlikely.
The bottom line is that you should only carry the most mundane kind of pocket knives if you are going to carry a knife concealed in the state of North Carolina.
Concealed Carry, With Permit
North Carolina makes no distinction between carrying a knife concealed with a permit as opposed to without. Obtaining a permit will grant you no additional permissions.
Open Carry
Open carry at least is a somewhat happier subject, as you may openly carry any legal kind of knife, including certain types of knives that are illegal to carry concealed such as daggers, dirks, gravity knives and more. Ballistic knives are still illegal however.
Prohibited Places
You may not carry your knife, of any kind, at any public or private school or university.
Assessment
North Carolina’s laws are restrictive, vague and generally unhelpful when it comes to the carry of knives, specifically the concealed carry of anything beyond the most mundane pocket knives.
Whether or not you have a concealed weapons permit makes no difference; North Carolina does not want you carrying anything more than a utility blade concealed in the state.
This is a state whose knife laws are long overdue for overhaul, but unfortunately it does not appear anywhere on the horizon. Too bad for residents and visitors.
Important North Carolina State Statutes
14-269. Carrying concealed weapons.
(a) It shall be unlawful for any person willfully and intentionally to carry concealed about his or her person any bowie knife, dirk, dagger, slung shot, loaded cane, metallic knuckles, razor, shuriken, stun gun, or other deadly weapon of like kind, except when the person is on the person’s own premises.
(a1) It shall be unlawful for any person willfully and intentionally to carry concealed about his or her person any pistol or gun except in the following circumstances:
(1) The person is on the person’s own premises.
(2) The deadly weapon is a handgun, the person has a concealed handgun permit issued in accordance with Article 54B of this Chapter or considered valid under G.S. 14-415.24, and the person is carrying the concealed handgun in accordance with the scope of the concealed handgun permit as set out in G.S. 14-415.11(c).
…
(a2) This prohibition does not apply to a person who has a concealed handgun permit issued in accordance with Article 54B of this Chapter, has a concealed handgun permit considered valid under G.S. 14-415.24, or is exempt from obtaining a permit pursuant to G.S. 14-415.25, provided the weapon is a handgun, is in a closed compartment or container within the person’s locked vehicle, and the vehicle is in a parking area that is owned or leased by State government. A person may unlock the vehicle to enter or exit the vehicle, provided the handgun remains in the closed compartment at all times and the vehicle is locked immediately following the entrance or exit.
…
14-269.4. Weapons on certain State property and in courthouses.
It shall be unlawful for any person to possess, or carry, whether openly or concealed, any deadly weapon, not used solely for instructional or officially sanctioned ceremonial purposes in the State Capitol Building, the Executive Mansion, the Western Residence of the Governor, or on the grounds of any of these buildings, and in any building housing any court of the General Court of Justice. If a court is housed in a building containing nonpublic uses in addition to the court, then this prohibition shall apply only to that portion of the building used for court purposes while the building is being used for court purposes.
This section shall not apply to any of the following:
…
(5) State-owned rest areas, rest stops along the highways, and State-owned hunting and fishing reservations.
(6) A person with a permit issued in accordance with Article 54B of this Chapter, with a permit considered valid under G.S. 14-415.24, or who is exempt from obtaining a permit pursuant to G.S. 14-415.25, who has a firearm in a closed compartment or container within the person’s locked vehicle or in a locked container securely affixed to the person’s vehicle. A person may unlock the vehicle to enter or exit the vehicle provided the firearm remains in the closed compartment at all times and the vehicle is locked immediately following the entrance or exit.
(7) Any person who carries or possesses an ordinary pocket knife, as defined in G.S. 14-269(d), carried in a closed position into the State Capitol Building or on the grounds of the State Capitol Building.
…
14-277.2. Weapons at parades, etc., prohibited.
(a) It shall be unlawful for any person participating in, affiliated with, or present as a spectator at any parade, funeral procession, picket line, or demonstration upon any private health care facility or upon any public place owned or under the control of the State or any of its political subdivisions to willfully or intentionally possess or have immediate access to any dangerous weapon. Violation of this subsection shall be a Class 1 misdemeanor. It shall be presumed that any rifle or gun carried on a rack in a pickup truck at a holiday parade or in a funeral procession does not violate the terms of this act.
…
(c) The provisions of this section shall not apply to a person exempted by the provisions of G.S. 14-269(b) or to persons authorized by State or federal law to carry dangerous weapons in the performance of their duties or to any person who obtains a permit to carry a dangerous weapon at a parade, funeral procession, picket line, or demonstration from the sheriff or police chief, whichever is appropriate, of the locality where such parade, funeral procession, picket line, or demonstration is to take place.
(d) The provisions of this section shall not apply to concealed carry of a handgun at a parade or funeral procession by a person with a valid permit issued in accordance with Article 54B of this Chapter, with a permit considered valid under G.S. 14-415.24, or who is exempt from obtaining a permit pursuant to G.S. 14-415.25. …
…
14-269.2. Weapons on campus or other educational property.
(a) The following definitions apply to this section:
(1) Educational property. – Any school building or bus, school campus, grounds, recreational area, athletic field, or other property owned, used, or operated by any board of education or school board of trustees, or directors for the administration of any school.
(1a) Employee. – A person employed by a local board of education or school whether the person is an adult or a minor.
(1b) School. – A public or private school, community college, college, or university.
(2) Student. – A person enrolled in a school or a person who has been suspended or expelled within the last five years from a school, whether the person is an adult or a minor.
(3) Switchblade knife. – A knife containing a blade that opens automatically by the release of a spring or a similar contrivance.
(3a) Volunteer school safety resource officer. – A person who volunteers as a school safety resource officer as provided by G.S. 162-26 or G.S. 160A-288.4.
(4) Weapon. – Any device enumerated in subsection (b), (b1), or (d) of this section.
…
(d) It shall be a Class 1 misdemeanor for any person to possess or carry, whether openly or concealed, any BB gun, stun gun, air rifle, air pistol, bowie knife, dirk, dagger, slungshot, leaded cane, switchblade knife, blackjack, metallic knuckles, razors and razor blades (except solely for personal shaving), firework, or any sharp-pointed or edged instrument except instructional supplies, unaltered nail files and clips and tools used solely for preparation of food, instruction, and maintenance, on educational property.
I think topic is rather divisive as I have seen a lot of conflicting opinions about this . I personally do WBTB every alternate day but I have heard people say that it should be done only once or twice a week because your brain will get used to it and thus will not get Lucid while a lot of others say that there isn't an issue with doing it everyday if you are still getting decent sleep .
via Lucid Dreaming - Dream Views - Attaining Lucidity https://ift.tt/3GfnfiR
Keeping an attempt log is probably the best thing I did in my year of Lucid Dreaming practice , one which eventually led me to having Lucid Dreams . while everyone knows how important dream journaling is , barely anyone talks about how important keeping a log and report of your WILD attempts is .
An attempt log is a report on your present practices or indivijual WILD attempts . If you are practicing any sort of DILD methods , you can write :
Name of the practice :
General procedure - How YOU go on doing the said practice
Time since you are practicing that particular technique
The effect of that technique on your dream
The effect of that technique on your dream recall and vividity
The effect of that technique on your Lucidity
What you think are your shortcomings which are preventing you from gaining Lucidity
possible solutions to said problems
If your making a WILD attempt , write :
Time you went to bed
Time yo awoke for WBTB
Time you stayed up for WBTB
WILD anchor
Any extra quirk you made to the practice ( relaxation methods , combining some other technique etc )
Number of Dreams recalled after waking up for WBTB
Estimated time it took you to fall back asleep
Any subsequent awakening ( time and number)
The reason you think the attempt succeded/failed
Final wake time
Sleep quality
total sleep time
IMO Lucid Dreaming is figuring out what works best for you , putting those factors together and hoping that your brain chemistry is right . Logging really helps in finding these critical factors that may aid in Lucidity . It also really helps in finding out your REM phase , if you have a consistent sleep schedule after 10 - 12 days of Logging you will have a pretty rough idea about how your sleep works . The more factors you get right the easier it is to Induce an LD . Another important thing is that Attempt logging helps you to figure out your mistakes and then you can work towards fixing them
via Lucid Dreaming - Dream Views - Attaining Lucidity https://ift.tt/3pw3r56
hello guys, so i have a different type of question today. ive been trying to DEILD and i set up an auto-shut vibration alarm, to wake me up. its been 2-3 days, but i find myself waking up a little before the alarm for no reason, and theres like 10-15 minutes left before the alarm goes off and then i cant sleep easily and be in a dream. and this can happen several times too. why does this happen and how do i fix it to ensure that i wake up exactly to the vibrations?
thanks a lot as always:D
via Lucid Dreaming - Dream Views - Attaining Lucidity https://ift.tt/3B60Q3K
hey guys, so ive been trying wbtb for quite a while and i understand that it might just be the most important step to lucid dreaming, since almost all or should i say, every technique requires it. i think i should first solve this problem, and then think about the other stuff later. so, my problem is that i can not fall asleep after wbtb. i wake up after nearly 5 hours of sleep (ive also tried 4 and 6) and stay up for 10 minutes (ive also tried 15, 45, 30 minutes). but i just can not fall asleep after completing the method. i dont move much, i just sit up on my bed and think about lding. what has led me to sleep a few times was a wbtb of not even 10 seconds(i dont even think it can be called a wbtb) i just said to myself that i want to lucid dream and fell asleep really easily, but i think thats not effective because, the point of wbtb is to experience some time of real life wakefullness and awareness, right before getting into rem, so you can have heightened awareness in the next dream. and i think 10 seconds or even 30 seconds is not enough for that. so just what should i do, to help me fall asleep after a proper wbtb? also MILD by Stephen Laberge requires you to sleep with the intention as the last thing in your mind before falling asleep. and i think its impossible for me to fall asleep thinking of the intention, and trying to make sure its the last thing, that will just keep me awake!
all help is appreciated:D!
via Lucid Dreaming - Dream Views - Attaining Lucidity https://ift.tt/3DJfzDB
Sprucing up and maintaining your home is often not associated with prepping, but when you stop to think about it, it is your home itself that is one, big container for all of your many preps. If the structural integrity of that container is breached, the contents within will be vulnerable to degradation and loss, you counted among them!
It follows naturally that you will want to keep your home in tip top shape, not allowing any unseen or insidious issues to start damaging it.
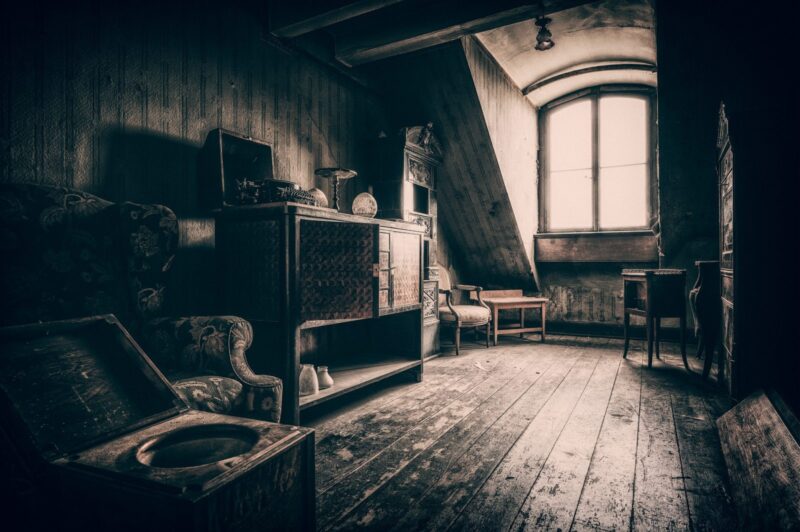
Things like windows, doors, and foundation are something that are constantly in sight and easy to remember, but very few homeowners stop to give their attic a second thought, unless they need to access it for some reason.
You might be surprised to learn that keeping your attic in good shape and functioning properly is absolutely imperative to keeping your house standing for decades to come.
Specifically, temperature fluctuations, hot or cold, can seriously degrade the structure of your home and badly damage anything that you might have stored in the attic.
To prevent these temperature swings, you’ll need to insulate your attic properly. This is a task that is well within the reach of a seasoned DIY prepper, and in this article we’ll be bringing you a foolproof step by step guide for taking care of this task yourself.
Your Home’s Attic is an Often Overlooked Section
As mentioned above, many homeowners simply overlook the health and well-being of their attic unless there is a serious crisis revolving around it.
Maybe a raccoon or squirrels have taken up residence up there, or perhaps a family member nearly fell through the ceiling after accidentally stepping between the rafters trying to retrieve Christmas decorations.
Whatever the case, if it is out of sight it is out of mind. What is an attic, after all, except the space between where your ceiling stops and the roof begins?
It turns out that the attic actually has an important function, serving as a compartment, or airspace between the living space of the home and the roof.
This air gets hot when it is hot, and cold when it is cold, and when functioning properly will help insulate the home appropriately while ferrying moisture out of the air.
It can even make for useful, easily accessible but out of the way storage for all kinds of things, and most germane to our purposes many of our preps.
Naturally, you should want to take advantage of this storage space if you can, but more importantly it is in your best interest to keep your attic in good repair and functioning properly so that you do not endanger the home itself and everything that it contains.
Excessive Attic Temperature Spikes Can Degrade Your Home and Your Preps
Most attics are notorious for being uncomfortable. If it is hot outside they are even hotter, reaching stifling, blazing temperatures. If it is cold outside, they are positively frigid.
Most people don’t want to spend any more time and the cramped, musty and uncomfortable conditions of an attic any longer than they have to and naturally this contributes to a lack of inspection and preventative maintenance.
It is not uncommon for an attic to be anywhere from 20°F to 30°F warmer than the ambient outside air temperature when it is hot and conversely anywhere from 15°F to 30°F cooler than the outside air temperature when it is cold. This means a few things for us.
First, our air conditioner or furnace will have to work even harder to overcome the loss of heat or loss of cooler air to the void of the attic if there is not a barrier to block its passage. This will drive up our utility bills precipitously.
Second, anything we have stored up there will be subjected to these temperature extremes, year in and year out. Most materials, whatever they are, will degrade far quicker than they would when kept in relatively cool or room temperature surroundings.
Additionally, these temperature fluctuations can lead to degradation of the wood and other materials that your home is made from, slowly but surely weakening it structurally.
To compound both of these harmful effects, most attics retain a certain degree of moisture, meaning the conditions will be quite literally right for mold, especially when it is warm or hot outside.
Mold infestations are a double whammy, first because they actively eat and rot wood, further weakening your home at an accelerated rate, and second because many species pose a health hazard to people and animals.
It goes without saying that mold blooms on all kinds of materials, from paper and fabrics to leather, have destructive effects.
If you want to keep your house in good repair and protect your stuff that you stash up there, you’ll need to get serious about stabilizing the temperature in your attic.
Insulation and Ventilation to Stabilize Attic Temperature
Your first and best option for protecting your home and your possessions against the atmospheric instability imparted by a poorly maintained or poorly fitted attic is to insulate the space properly.
Insulation provides a barrier that works both ways, hoping to keep your interior space cool or warm as appropriate, while also reducing extreme temperature swings in the attic itself, keeping any possessions stored there in better condition and preventing the harmful onset of mold or other deleterious effects to the materials your home is constructed from.
But insulation is not just a matter of dropping big, fluffy bundles of the pink stuff here and there in your attic space.
Properly insulating an attic entails ceiling all gaps and cracks that air can move through between it and the living space, wrapping or otherwise insulating pipes and other fixtures, ensuring proper ventilation is taking place using passive or active measures and then finally installing insulation of one type or another.
It is difficult, sweaty, and usually dirty work that involves a lot of traipsing around using boards and paneling to reach the areas that you need to reach, but it is not particularly complex, and something that can be attempted by most DIY-savvy preppers.
Execute it correctly and you’ll enjoy:
significantly lower utility bills,
a more comfortable interior year-round,
a home that will last significantly longer,
and a more suitable space for storing the things you don’t need close at hand, including your precious preps.
That sounds like quite a checklist, and it is, but lucky for you we are here to take you from zero to hero when it comes to attic insulation and teach you everything you need to know to tackle the job yourself. Keep reading and we will get into the nuts and bolts.
Understanding Insulation Type, R-Value, Ventilation, and More
You don’t need too much equipment or even very much in the way of supplies to do the job of insulating your attic correctly, but you do need to know what you are talking about.
Read through the following list of terms to help familiarize yourself with the items and metrics relevant to the task at hand.
R-Value
R-value, or resistance value, refers to how much a given type of insulation resists the “movement” of heat. A higher number means better insulation.
What R-value is appropriate to your attic is dependent upon where you live, the average temperature, and the severity of seasonal changes.
Generally speaking, a higher R-value is always better, but you invariably pay more for the performance when measuring apples to apples. A high R-value is particularly important in cold climates when you want to keep the inside of your home toasty warm.
Make sure you pay close attention to the specifics listed on a given type and brand of insulation, as it may specify the advertised our value is only achieved under certain circumstances or at a certain thickness which could be misleading.
Insulation Types
As with most things, there is more than one way to skin a cat, and by that I mean there is more than one kind of insulation that you can choose from for insulating your attic.
All of the following types of insulation have advantages and disadvantages that should be considered before choosing one.
Some afford extraordinarily high R-values in exchange for being a little messy, or perhaps a little expensive. Others are highly adaptable and durable but messy and require significant technical skill to pull off properly.
But no matter what kind of attic you have and what sort of challenges you are facing, rest assured there is a style of insulation that will work well for you.
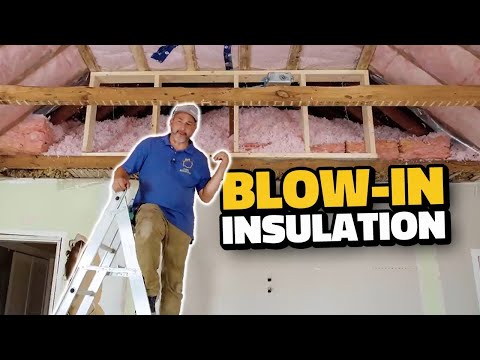
Cellulose
Cellulose is a common and popular option for attic insulation and is composed of recycled material in the form of ground up paper with some chemical additives to make it unappealing to insects that would otherwise eat it and also to give it some fire resistant qualities.
A dense layer of cellulose will nearly halt, but not completely block, the movement of air in your attic.
Compared to other common insulation types like fiberglass batting, cellulose provides a higher r value by thickness, and is relatively easy to use or install. Available at many home improvement stores, cellulose must be installed with a blower machine.
Though it appears light and fluffy in pictures, almost like you could spread it out by hand, with a pitchfork or a shovel, this is not the case. It is densely packed and generates tremendous amounts of dust when handled, necessitating blower installation.
There is not much you can do when it comes to dust control except letting it settle, though professionals often use high-end blower machines that will ever so slightly moisten the cellulose material to cut down on dust, and also help it settle into place more densely, slightly improving its insulating qualities.
Mineral Wool Batts
Mineral wool batt insulation is an older type that is becoming increasingly scarce today despite its good qualities.
Extraordinarily fire resistant, highly insulating, and renowned for its sound dampening properties, like all batt style insulation it is sold in giant rolls that are easily unfurled before being sized or tucked into place.
For attics that offer plenty of room to maneuver and evenly spaced joists this is a good option if you can find it and afford it. It is almost completely extinct in most areas.
Loose-fill Fiberglass
Fiberglass insulation is small chunks of incredibly fine glass threads, as the name suggests, and like cellulose is blown in using a big blowing machine with a tube to direct the spray.
Also like cellulose, don’t make the mistake of thinking you can spread this stuff by hand or with a scoop. It just won’t work that way.
Fiberglass has a major advantage financially, as it is very cheap compared to almost anything else on the market and widely available from coast to coast.
Like cellulose, loose fill fiberglass is ideal for filling in irregularly shaped crevices, non-standard joist spacing or in attics where you have very little room to maneuver. Unfortunately, compared to other materials the R-value of fiberglass, even when blown in, is relatively poor.
It is worth noting that older types of fiberglass or notorious for irritating skin, eyes and lungs. Newer fiberglass material is both more effective and less irritating, though you should still utilize appropriate PPE whenever you are handling or installing it.
Fiberglass Batts
Probably the most common and popular option for insulating new construction, and most often the choice for the well-intentioned homeowner who doesn’t know what they are doing, fiberglass batts continue to show up as attic insulation even though there are better options.
Like mineral wool above, rolls of fiberglass insulation are appealing because they are easy to handle and easy to install assuming there is room to maneuver in the attic and joist spacing is standard and regular.
However, r values for fiberglass rolls are poor to middling and it can be surprisingly expensive for what you get.
But rolled fiberglass does have advantages, namely the fact that it is extremely moisture resistant and non-combustible so it does reduce the overall risk of fire should it begin in the attic.
Generally speaking, if you live in an area with a mild climate and have a spacious attic with regular intervals between the joists and no major obstacles, consider fiberglass rolls, but know that there are better options.
Denim
Denim batts, or rolls, are sort of a trendy option in attic insulation at the moment. As you might have already guessed, this insulation is made out of repurposed, recycled and ground up denim blue jeans.
It is comparable in performance to cellulose, and like cellulose is typically treated for insect and fire resistance.
Like other forms of batt insulation, it is a relatively trouble-free installation so long as you have plenty of room to maneuver in your attic and regular spaces between joists to emplace it.
Unlike other forms of rolled insulation, however, it is quite expensive like many other so-called green options. If you are hell bent on using recycled materials, denim insulation might be the way to go but understand you’re going to be paying a hefty, hefty premium for the privilege of being able to pat yourself on the back.
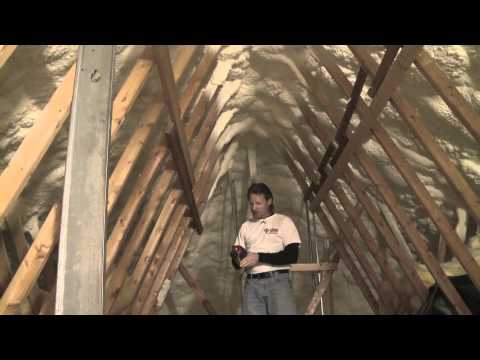
Foam
Sprayed foam insulation might be thought of as the ultra high performance option for attic insulation.
These pressurized chemicals are extruded through a foam gun and expand on impact while curing to fill every gap, every crack and every crevice with dense, sound deadening and is superlatively insulating foam.
This insulating foam is so tough and rigid that it is very difficult to remove, and even increases the structural strength of your home!
As an insulating material, it is basically perfect as far as performance is concerned and when properly installed totally seals off any unwanted movement of air, and even increases the functional envelope of your home’s interior space.
However, foam comes with some significant drawbacks. First, it is very expensive. Second, installation is just as much art as science and it is usually not within the realm of the average DIY homeowner.
It also requires laborious prep work to be effective, with every trace of debris and old insulation needing to be removed before foam can be installed, typically limiting it to professional installation for new construction.
Lastly, this foam will entomb anything it touches, and wires, pipes and fixtures covered by it will be rendered virtually inaccessible, causing a potential nightmare down the line if you need to replace or inspect them.
Despite all this, it’s superb insulating performance, high strength and decades-long lifespan all the while remaining completely maintenance free makes the costs and drawbacks worth it for many.
Sealing
Prior to placing any insulation, except expanding foam insulation, of course, cracks and crevices in the attic should be sealed to prevent the unwanted movement of air. This can be done using smaller cans of expanding foam and caulk.
The laborious and annoying, the better job you do ceiling the attic up prior to the installation of your new or supplementary insulation the greater protective value it will provide.
Similarly, pipes and ducts should also be wrapped with their own purpose-specific insulation, taped and sealed according to the manufacturer’s specifications prior to the placement of any attic insulation. Attic insulation should never be used to insulate pipes and ducting in one shot!
Radiant Barrier Panels
Not really a type of insulation, radiant barrier panels supplement the capabilities of your insulation by blocking heat coming through the roof.
Typically taking the form of a dense polystyrene foam board with a foil backing, these rigid panels are installed directly against the roof between the rafters.
If you live in an extremely hot climate or one that is perpetually sun-soaked, consider installing these to help supplement your efforts.
In cloudy or cooler climates, they are not required unless you are really gung-ho about squeezing every point of efficiency out of your insulation job.
Ventilation
Insulating your attic is only part of the puzzle. The other part is properly ventilating it. Attic ventilation, as you’d expect, is the process of allowing fresh air in while moving the old, stale air out and serves to regulate moisture levels while also helping to avoid temperature spikes.
Ventilation is generally a pretty simple puzzle and virtually every home built today will have an attic that is ventilated one way or the other.
It is worth noting, however, that older homes around the country may not be ventilated at all, and it is usually these that will struggle mightily when it comes to controlling mold.
Your home is probably already ventilated and unless you plan on a serious attic overhaul you likely won’t need to change a thing, but for completeness sake the two types of ventilation will be covered here in brief.
Passive
Passive attic ventilation systems do not rely on any electrical apparatus to move air through the space.
Typically consisting of soffit intake vents and then louvered ports at either end of the house or even a ridge vent running along the spine of the roof passive ventilation leverages simple physics to get the job done, with cooler air being drawn in through soffit vents which then pushes the warmer air out the other ports.
Some passive ventilation systems are ingeniously effective, and if you have ever seen those turbine looking vents perched atop commercial buildings or the roof of an older home, you have seen passive ventilation in action.
Passive ventilation overall is entirely adequate for the vast majority of attic ventilation needs.
Powered / Active
Powered ventilation systems, as described on the label, rely on some sort of electrically or mechanically powered fan or other device to physically move air around, usually as a supplement to passive ventilation systems.
Sometimes installed in the roof itself and sometimes at either end of the house under the eaves power ventilation systems are rarely necessary but can sometimes result in a gain in efficiency in the hottest environments.
Unless they are a simple user activated on off system, powered attic ventilation fans require a thermostat in order to trigger when attic temperatures reach a preset level.
If you live in an area with high UV exposure you should consider a solar power attic fan which does not need to be tied into the home’s existing electrical grid.
Now, we have discussed all of the appropriate materials and other tools required to do the job. It is time to suit up and get on with it!
Caution: Insulation is a Respiratory Hazard
Before you begin, understand that most types of insulation are at least mildly hazardous, with several being a rather potent respiratory hazard. Cellulose is notoriously dusty, fiberglass can be mightily irritating, and sprayed foam releases noxious chemicals as it cures.
For any attic insulation job, even the simplest, you want to don personal protective equipment appropriate to the job. A respirator is absolutely mandatory, and you should consider gloves, goggles and a zip-up bodysuit highly recommended.
Though most modern forms of insulation are not quite as nasty to handle as the older fiberglass types you could still find yourself quite ill if you don’t treat it with the respect that it deserves.
Installing Attic Insulation Step-by-Step
You can use the following step by step guide for most types of insulation installation. Note that this guide assumes you are using something other than sprayed foam which is very technically challenging.
If you are going the spray foam route, you may still rely on this guide to help you get your attic space prepped for best results, although the intricacies and subtleties of properly spraying foam or beyond the confines of this article.
For any loose-fill or batt styles of insulation, read on.
Step 1: Gather Supplies and Equipment
As always, begin at the beginning. Gather the needed supplies and equipment required for the job.
For any insulation install you’ll need your personal protective equipment as outlined above, the insulation material, a blower or other machine to handle it if required, work lights, sturdy plywood or boards for safely maneuvering over the joists and a small knife or bag slicer to open the packaging.
You’ll also need a second person to help you. For anything but the smallest jobs in the tidiest attics installing insulation is a two-man affair.
For blown insulation in particular you’ll need one person to operate and load the blower while the second person up in the attic directs the nozzle.
Step 2: Clear and Illuminate Space
Don’t start by just laying down new insulation all willy-nilly. Get the job underway right by first clearing out the attic of any obstructions that you can.
Christmas decorations, old knick knacks, leftover packaging from the previous insulation job, anything and everything that can be cleared out should be cleared out.
You can make your life a lot easier by brightly illuminating the attic. Most attic spaces do not have anything like adequate lighting, usually just a single, bare bulb or perhaps two.
You can run corded work lights or battery powered lanterns up into the attic space to light it up brightly so you can see what you are doing and ensure you will not miss anything.
Take care especially when using incandescent lights that they are not allowed to contact any flammable material as these lights can grow quite hot and will significantly increase the temperature of the space if left on. This can be especially grueling during the summer months.
If you are removing the old insulation, if present, do so now. Old insulation that is uneven, greatly diminished of loft, moldy, mouse eaten or generally in a bad state of repair should be removed.
Note that insulation that is in good shape can be left in place and covered up to increase the R-value of the install overall. This should only be done when deploying loose fill insulation. Foam or rolled insulation should only be installed on a bare surface.
Step 3: Seal Gaps and Insulate Pipes (If Required)
With the space illuminated and all detritus and old insulation removed, it is time to give the entire attic space a once over and seal it as required.
With the sole exceptions of your ventilation intakes and exhausts, every gap, every crevice, every place where a draft makes its way into the attic should be sealed using a general purpose expanding foam for larger gaps or holes and construction adhesive caulk for smaller ones.
It pays to be thorough here even if it is laborious. Even a couple of small gaps that are missed could allow a dramatic draft into your attic, spoiling your efforts to appropriately insulate and ventilate it. Take your time and do whatever you need to do to ensure a thorough sweep.
Also take the time now to wrap and insulate all ducting, pipes or any other thermally conductive material. HVAC ducts especially should be thoroughly insulated for maximal efficiency.
This is another thing that will help get your home heating and cooling bill down month to month.
Step 4: Screen Furnace Vent, Soffit Intakes and Recessed Lights
If you have never done this before, you might be astounded and how much of a mess you are about to make, especially if you are using any sort of loose fill, blown insulation.
The stuff gets absolutely everywhere, and it is all too easy to accidentally blow the stuff you just laid back up into the air using the nozzle of the blower machine.
Aside from being Grade-5 aggravating, it ensures that this stuff will get where you don’t want it to go.
Whatever kind of insulation you are laying, you need to protect certain fixtures in and around the Attic.
Soffit vent intakes, exhaust ports, recessed can lights, furnaces, whole house fans and anything else that requires the flow of air or uses electricity should be protected by shielding or fencing so that the insulation does not come into contact with it.
Recessed lighting and other energized equipment in particular is a significant fire hazard if insulation is in contact with it.
This can be easily done using a variety of materials, but heavy cardboard or foam board stock are popular, easy to work options that can be easily removed when you are finished. For more permanent installation, consider thin plywood or even plastic paneling.
Once you have fully enclosed all of these sensitive installations to allow a little standoff between it and the insulation, you are ready to move on to the next step.
Step 5: Map Out Wire Runs, Lights and Other Fixtures
This step is essential for preventing headaches down the line! So you’ve cleared out the attic, illuminated your workspace and protected any sensitive fixtures or other installations from coming into contact with the insulation.
Now, especially if you are utilizing deep loose fill or sprayed foam insulation take the time to sketch out a map of where all the relevant equipment, wiring and piping is in the attic.
The reason for this is that deeply layered insulation essentially covers up everything in your attic, and can make tracking down that one duct, light, wire or pipe extremely difficult.
Trying to locate any of the above by feel in the future is the leading cause of people accidentally plummeting through a drywall ceiling when they miss a step.
Don’t risk it. Sketch out your map, label it accordingly and be sure to indicate useful references that will help you home in on what you are looking for.
Then make a copy of your map and file one of them with other important documents you keep regarding your house. The other one can be placed inside a Ziploc bag or plastic file folder pouch and hung up handily in the attic.
Step 6: Mark Required Depth (If using loose fill or cellulose)
Blown loose fill or cellulose insulation must be layered to a prescribed depth for appropriate performance based on your requirements and the specifications of the material itself. It is not enough to just cover all of the exposed plywood or even up to the top of the joists.
Depending upon the climate and your requirements, you might need it a veritable mountain of insulation!
To ensure an even, uniform depth of fill you should Mark or install depth gauges throughout the space of the attic where the installation is being laid so you won’t have to guess at how deep it is. This can be done using a variety of methods.
Posts can be marked boldly with a pencil or marker. A paint stirring stick or thin dowel can be erected on a joist using painters tape. Other solutions abound.
Whatever you do, make sure these indicators are spaced widely enough so that you’ll get an accurate reading as you go along.
Step 7: Install Insulation
Now, at last, you are ready to get down to the business of laying your insulation. Whatever type you are using, you generally want to work at the point farthest away from the entry to the attic and lay back towards it.
Make sure you work methodically to ensure a uniform, even application being careful to not get in your own way.
If you are using loose fill insulation you’ll need to coordinate with your partner who is running the machine and loading it with insulation bundles. These machines are often quite noisy, so visual signals or even walkie-talkies with headsets may need to be employed.
As you’ll probably discover, all of the hard work was done prior to the actual placement of the insulation and this part should go relatively quickly. Like so many other jobs, the results are often much improved by thorough, diligent prep work.
Helpful Tips and Tricks
Covering every possible contingency, situation and specific circumstance is beyond the confines of this article and practically impossible.
That being said, long experience has produced these golden nuggets of wisdom that are sure to make your project easier and less aggravating.
Learn from the trials and tribulations of those who have come before you and your attic installation install job will go smoother and quicker!
Consider closing the attic entryway behind you when laying loose fill insulation. Even if you have extension cords running up for lights and things, the chances of a mishap that will see dusty, flurry-like insulation getting down into your living space are high. This stuff will prove maddeningly difficult to clean up, and you can spare yourself considerable aggravation while preserving your relationships with your family by simply shutting the door to the attic or closing the trap.
Never, ever try to tiptoe across joists unless you have no other option. I cannot tell you how many holes I have seen punched in ceilings or even serious accidents or someone plummeted through entirely trying to do just that. Instead, if your attic does not have adequate walkway space haul up a thick sheet of plywood measuring at least 6 ft long and a couple of feet wide for you to stand on. You can lie this across the joists to effectively place your own road as you go. If your attic entry is so cramped that this is not possible, you can do the same thing with several thinner boards that you strap together once you have them up in the attic.
If laying rolled insulation, you might see a net gain inefficiency my first mapping out the length and width of the spaces between the joists in your attic. Then rolls can be pre-cut and assembled with appropriate marks to allow rapid, easy installation once you have them up in the attic. Much time and effort is wasted trying to maneuver large rolls of insulation in a cramped space, much less cut them to width or length.
If placing rolled insulation, it can easily be cut using a serrated knife. Large, specialized and expensive insulation knives are sold for the purpose but you can use a long, bog standard bread knife from your kitchen for the task just as well.
If spraying in foam insulation, know that the curing process will result in the generation, or off-gassing, of significant chemicals that are fairly noxious. You should be wearing a respirator for all insulation installations, but make sure you have one that is rated for chemical vapors if installing sprayed foam. Once the job is done, now will definitely be the time to use your whole House fan if you have one installed to forcefully evacuate the air in the attic. Alternately, switch on any powered attic ventilators or place a common electric fan in the attic to help get those gases out in a hurry.
Conclusion
Most attics are forgotten about unless they are causing a problem, but even though your attic is out of sight and out of mind it could be slowly ruining the structural integrity of your home and damaging anything you have stored up there if the temperature is allowed to fluctuate too wildly.
Proper ventilation and insulation of an attic is vital to stabilizing temperature and moisture levels within acceptable limits.
Poor insulation or a total lack of insulation is most often the culprit, and upgrading or installing insulation is easy enough that it can be done by your average homeowner with the right preparations. Use the handy guide we have provided above and your attic insulation installation will go down as smooth as silk!
hey guys, so i need help again:D.
so i know what my dreamsigns are, i often see myself in school, and sometimes my friends from there too. now my problem is that i never recognize it and just play along the story, and i can not go back to school now and can not meet my friends either, so i cant perform a reality check when i notice the sign. is there anyway i can trigger lucidity with my dreamsigns. because ive a good number of such school dreams and i am confident it will fetch me a good amount of lucids. pls help.
also heres a bonus question:D.
so is trying too hard wrong, like getting lucid is in my mind almost the whole day, i try ADA, do RCS and think about dreams, write affirmations and spend a good amount of time on lucid dream forums and subreddits. so is this something thats stopping me from getting a lucid. honestly, i think the more i do lucid related stuff the better are my chances, but could this be counterproductive??
thanks a lot!!
via Lucid Dreaming - Dream Views - Attaining Lucidity https://ift.tt/3AAwE0p
Out of all of the tools that a prepper is likely to use in a survival situation one of the most important, and most primordial, is fire. Fire has long been mankind’s servant, even though it is one that is never truly mastered.
Fire serves us by providing light, warmth, a way to cook our food and even a weapon in a pinch. But to create fire we must provide three things: heat, oxygen and fuel.
This quintessential tool deserves quintessential fuel, and there is no more common, adaptable and renewable fuel on Earth suitable for use in building a fire than wood.
Wood grows nearly anywhere you find people, and that means that pretty much wherever you happen to be when you need to get a fire going you’ll be able to collect adequate fuel in the form of firewood with just a little bit of effort.
But anybody can heap together a pile of branches and twigs before dousing it in lighter fluid and putting a match to it. It takes a skilled outdoorsman or a seasoned prepper to properly select, prepare and utilize firewood to produce a controllable and efficient fire.
Every prepper understands that making the best possible use of your resources is imperative in a long-term survival situation, and so today we’ll be giving you a primer on firewood for survival.
Wood is One of Our Oldest and Best Fuel
Compared to ages ago, we all live in an era of unrivaled technological wonders, and that includes fuel.
We have over a dozen fuels derived from petroleum alone, and more besides, suitable for use and everything from vehicles to lamps and all sorts of other contraptions for a variety of purposes. But for a very long time fuel sources were far more limited, less efficient and more laborious to prepare.
Throughout time, one of the best possible fuels for building and feeding a fire is wood. Wood is certainly easy to find and generally easy to prepare, though optimizing it for even, clean burning can take several months or even a year or longer.
Despite this, it is entirely possible to cut down a live tree, limb and buck it, and build a useful fire with it.
One of the best attributes of wood as a fuel for a campfire or cooking fire is its adaptability. Small fires can be made using nothing more than twigs and fallen branches.
Whole sections of logs can be notched and split open to form a sort of free-standing torch and stove.
Small staves of firewood can feed a fireplace, wood-burning stove or open campfire just as easily. Firewood can even be used in an ultra-efficient application by burning it in a rocket stove.
So, yeah, even though we have propane, white gas, kerosene and so many other convenient, modern fuels besides you would be a fool to omit firewood from your plans and preparations. In the following sections we will dig deeply into the topic of firewood.
The Species of Wood Makes a Difference
The first thing you should understand about wood in the context of burning it as fuel for a fire is that there are many different types or species of wood, and that the species of wood makes a big difference on its performance.
Even cut to the same size and seasoned for the same length of time, different species of wood can behave very differently when it comes to such characteristics as:
Ignition temperature
Heat output
Smoke produced
Longevity
Spitting, sparking and popping
This is not to say you should become some kind of wood snob, or anything like that. You would be a fool to forgo pine in favor of oak in a survival situation when pine is what is abundant and all around you.
The point is you will be a better, well-rounded prepper if you learn the characteristics of various species of wood, particularly what is present in your region. Just like your granddad probably taught you, you should always choose the right tool for the job.
For instance, some woods, typically softwoods, ignite easily, burn quickly and work well in conjunction with longer burning woods when employed as kindling or a first stage fire.
Pine is one of the most common and the most popular for the purpose, but ash and birch work well also.
However, because these woods burn so quickly and so hot larger pieces might not burn evenly. Keeping short sections around 1 inch thick will allow you to burn them completely and under control.
Contrast this with longer burning species of wood like maple and oak. When you want to keep a fire going hot with minimal maintenance and interference these are excellent choices.
However, they have higher ignition temperatures and can be difficult to light on their own, even when using tinder, so they are best added as a second stage to fires that are already properly built and roaring hot.
Some woods are even desirable for burning because of special characteristics, such as aromas they can impart to the air or to food cooked over them. Cedar is one well-known example but pecan wood and cherry are also popular for the purpose.
There is so much you can do with a fire when you know what wood can do for you. But as you might imagine there’s a lot more to establishing yourself as a proper firemaster than learning the attributes of various woods.
Time to get on to the practical application part of this article: cutting, processing, seasoning and storing your firewood.
Best Firewood
Black Locust
Black locust wood is a superb firewood because of its tremendous heat output by weight and low smoke generation.
With a predominantly neutral smell, the above characteristics make it exceptional for use in fireplaces or wood burning stoves, with its only shortcoming being that it throws off a modest amount of sparks.
Hickory
Honly just gives up the first place slot to black locust when it comes to heat generation, burning extremely hot, and like the first place entry also generates very little in the way of smoke.
Where hickory comes into its own, though, is in its exceptionally pleasant aroma and tremendous flavors that can impart to food or barbecue cooked over it.
Unlike black locust, hickory would also produces very few sparks when burning, making it a slightly better choice in situations where secondary fire hazards are a concern.
White Oak
White oak is yet another great performer as firewood. It burns quite hot though not as hot as hickory or black locust produces little smoke, throws off few sparks and is all around an excellent burning wood.
White oak is also very easy to split and process when it is well seasoned and can turn what is usually a laborious chore into a pleasant if vigorous exercise.
Worst Firewood
Elm
Can definitely be burned for heat in a pinch, and you should burn it if it is all you have or plentiful in your area, but it produces far less heat by weight than other woods, even other softwoods, and is notoriously difficult to split.
Not for nothing, burning elm generates a moderate amount of smoke (but few sparks) and the most unpleasant quirk of this species is that it absorbs odors from the area that it is growing in.
So if your elm was sourced from a nearby bog, swamp or cesspool you are in for a very rude surprise when you light it up!
Aspen
Aspen is another poor performer when it comes to firewood. Low heat output, high smoke generation and a moderate amount of sparking means that the return on your investment is much lower than other woods and is going to increase your aggravation in the bargain.
Again, sspen can definitely be burned and will generate heat so don’t be afraid to in a pinch but if you are deliberately stockpiling wood to get you through the winter try to avoid this if you can.
Pine
Probably the most notorious species of wood there is in the context of firewood, pine does not have much to commend it aside from the fact it can keep you from freezing to death.
Very smoky, massive creosote buildup in chimneys and flew pipes, lots of sparks and an odor that is probably not as pleasant as you were imagining means pine is the absolute bottom of the barrel.
As might be expected, its heat output is particularly low, but surprisingly so compared to its weight. Burn this in your chimney or fireplace only if you have no other choice.
Can You Burn Newly Cut and Green Wood?
So let’s say you were out in the middle of the wilderness and collecting fuel for your campfire, or are just starting to harvest a tree to fuel a cozy fire in your fireplace at home.
You have plenty of live trees to choose from and the right tools to do the job safely. Is it possible to cut down a tree and then immediately chop it up into firewood sized chunks before burning it?
It is possible, yes. Should you? Not necessarily.
Wood is a living thing, at least while it is still part of the tree, and as such it contains a significant amount of moisture.
Newly cut wood or young saplings can still burn, but they will be difficult to ignite and will smoke furiously when they do catch fire.
They’re also far more prone to popping and spitting while burning, sometimes presenting a secondary fire hazard or an opportunity to get a good blister if you happen to be sitting too close to the fire.
Now, this does not mean you cannot make use of fresh cut or green wood as firewood; it will just be less efficient and generally more troublesome. The greater amount of smoke generated in particular can either help or hinder you depending on the setting.
In a survival situation where you are lost or stranded, a thick, white column of smoke is extremely visible against the sky, and can easily help rescuers lock onto your position.
However, the same smoke in a wood burning stove or fireplace will generate considerable amounts of creosote, accelerating wear and tear on your chimney and flue and increasing the likelihood of a dangerous chimney fire.
As long as you have the time, or the ability to gather it, you are much better off giving prepared firewood time to dry out completely, a process known as “seasoning,” or taking the time to locate fallen or otherwise dead wood that has been long expired and is hopefully dry.
Take care to avoid pieces that might have been left in standing water or subjected to any recent rains. More on this topic in the next section.
Cutting, Chopping and Splitting
Gathering wood off of the ground that has already fallen is nice and all, but generally if you want to amass a supply of firewood that will sustain you for any length of time you’re going to have to locate it, fell it, process it and chop it yourself.
This is only ever a laborious task, and a heck of a workout, but you can make the job a lot easier with the right tools.
Luckily, humans pretty much have mastered the art of felling and chopping trees and our tools reflect that. Whether you want to rely on power tools or classic manual chopping and cutting tools rest assured you can get the job done so long as you can supply the effort.
Caution: Felling a tree before processing it and turning it into firewood is necessarily a risky job. Danger abounds, be it falling branches that were hanging dead, just waiting to collapse on the unwary below (colloquially known as widowmakers in the logging trade) or the falling trunk of the tree itself, more than capable of crushing you flat. The tools themselves often pose the biggest danger, and a moment’s inattention, carelessness or ignorance in use can leave you with a severe wound. If this happens in a remote location, your number has probably come up. As always, get training from a skilled associate, or seek out professional training before embarking.
Axe
The classic felling axe is the quintessential tool for chopping down a tree and subsequently making firewood. Elegant in its simplicity and undeniably effective when kept sharp and wielded with skill, if you are only going to have one tool for the task make it a good axe.
It might not be the best tool for any given process but it is capable of doing everything from chopping down the tree initially to removing limbs (“limbing”), sectioning the trunk and subsequently splitting the sections into firewood.
Hatchet
A hatchet is little more than a compact axe, and works the same way for the same tasks. But what gains you get in convenience you give up in effectiveness, as the shorter handle generates less power and that means more swings to accomplish the same amount of work.
For many hikers and campers, the trade-off is worth it and you can always work with smaller trees to save yourself some effort.
Be very cautious when using a hatchet, as the smaller proportions means that a miss or glance when striking is significantly more likely to strike your legs or shins when you are working.
Chainsaw
The iconic and intimidating tool for modern logging, a chainsaw saves tons of time and effort compared to using an ax, hatchet or handsaw.
The most obvious drawback of the chainsaw, of course, is that it is spectacularly dangerous to use. This tool requires both skill and strength in equal proportion to handle safely.
A detailed breakdown of these skills is beyond the confines of this article, but suffice it to say you are wise to use all recommended safety equipment in operation. Appropriately rated safety gear is the only thing that will save you from disaster in the event of a mishap.
Handsaw
When you need to make a tidy, straight cut or cannot get the appropriate angle of attack using an ax or hatchet, a hand saw can accomplish the same things a chainsaw can do, only you will have to supply the horsepower.
It’s like doing wind sprints with your arms! At any rate, despite working up a great lather you’ll find that a hand saw, properly maintained, is surprisingly quick and efficient, and a folding saw is a great addition to any backpack if you are going afield.
Splitting Maul
A splitting mall looks a lot like an axe at first glance to the uninitiated, but the mall has a notably flared back end following the typical sharpened wedge on the leading end of the head.
This is designed to forcibly break the wood in two when striking, and allows you to easily split your firewood when the time comes. You can do the same thing with an axe, but you’ll notice that the axe head is more likely to get stuck in tougher pieces when it bites in deeply.
The splitting mall is not something you need to carry a field unless you know you are going to be processing a ton of wood, but it is an indispensable tool around the homestead.
Wedge
A wedge is exactly what it says. Made of hardened steel and separate from any handle of its own, a wedge can be placed in an initial notch or cut in the wood and then driven in using a sledgehammer or other striking tool like a field expedient baton.
With repeated strikes the wedge will open the separation in the wood wider and wider until it eventually splits, and multiple wedges can be used to split entire sections of trunks cleanly in two. The wedge is a great portable option for serious splitting when traveling light.
Proper Storage is Key to Good Firewood Performance
So the time has come to start accumulating firewood for future use. As we learned in the previous section, you know you need to dry the wood out, but what is the best way to do that?
Wood will dry out naturally on its own over time, but we must strive to get all the moisture out that we can. A few factors will contribute greatly to our objective:
Store the wood off the ground
Wood that is in contact with the ground will always maintain more moisture than wood that is not. Wood is porous, and can easily pull moisture out of the ground. This effect is magnified when it rains.
Aside from slowing or even preventing proper seasoning of the wood, allowing it to remain constantly moist or wet will promote fungal growth and rot that will quite literally eat up your firewood out from under you. That’s no good.
To combat this, store your wood on a water-resistant rack, one either designed for the purpose or improvised. Just because you stack your firewood piece by piece one on top of the other doesn’t mean the upper layers will be safe as they may draw moisture out of the layer beneath.
Pay attention to airflow
You can greatly accelerate the seasoning process by doing everything you can to improve the air flow over, around and through the spaces between your pieces of firewood.
Though it is tempting to stack them as tightly as possible to save space and make it appear tidier, this will retard the drying process.
Instead, leave a gap of about an inch between each piece and more if you can spare it. Also take care to stack your firewood some distance away from any nearby walls or other obstructions so that air may move all around the stack.
Cover it
It is imperative that you cover your stack of firewood while it is seasoning. The worst thing that can happen is you allow a passing shower or thunderstorm to soak your firewood.
While it is true that your wood can dry out again, this will only slow things down, sometimes dramatically so, and just like leaving your wood in contact with the ground can dramatically increase the chances that rot, mold or fungus will take root, degrading or even destroying the wood you have worked so hard to prepare.
When it comes to covering your stack of firewood an overhead roof with ample overhang for rain protection is better than a tightly fitted tarp or other fabric cover.
Size it right
Properly sizing your firewood is imperative for good performance, and what size you should split your wood into is determined by the size of the fire you want to build, the size of the container or fireplace and the purpose for the wood.
For medium diameter trunks and branches, splitting a section into quarters is generally adequate, though large diameter trunk sections could be split into sixths or even eighths.
No matter what size wood you are using, the important thing is that you split it, period; splitting wood exposes the inner core and fibers, drying it out quicker and making it easier to burn in general. The hard exterior is always tougher to ignite.
Keep it away from your house
Ask anybody who has cultivated a proper stack of seasoned firewood before and they will be happy to tell you about all the many, varied, wild critters that take up residence in that stack of drawing wood.
Mice, snakes, bugs of all kinds including, most worryingly, termites will be bee-lining for that stack of wood to make their new home. Not for nothing, bees and wasps will also readily build hives and nests respectively in a long undisturbed stack of firewood.
These are things you’ll just have to deal with when the time comes to access your wood, but the point is you do not, under any conditions, want that assortment of critters gaining access to your home, especially the termites.
Don’t keep your stack of firewood in the garage, under the carport or right up against your home.
Once you have done all of this, all that is left to do is give your firewood time.
Seasoning wood takes longer than you might expect, and with the right kind of wood and ideal conditions it could be ready to go into the fire pit or the fireplace and as little as 3 months, but it is wiser to count on a much longer time frame.
Many woods in temperate conditions will take upwards of 6 months, and some especially resonance woods can take as long as a year, perhaps a little more.
Still, playing the waiting game is far easier than processing the firewood in the first place, so all you need to do is focus on keeping it dry in the interim.
Legality of Gathering Firewood
So the notion of having access to plentiful, renewable fuel for your fire all around you is very tantalizing indeed, but believe it or not you will still have to pay attention to any laws governing property rights, trespassing and more if you want to gather it ethically.
It is easy to think that a branch, stick or log lying dead on the ground is basically refuse and free for the taking but that just isn’t true.
That stick or branch fell off of a tree, and that tree belongs to someone and that means subsequently the potential firewood belongs to someone. If it doesn’t belong to you, you must get permission from the owner to collect it, otherwise you are stealing.
Even when you are gathering from locations where you have been cleared ahead of time for your venture, you must make sure you do not accidentally trespass on any neighboring properties.
You might be surprised how uptight and vigorous people can get about their property rights, and honestly I don’t blame them.
This extends even to gathering firewood from public spaces, like the side of roadways, medians and so forth. Laws vary widely from place to place, but if you enter any of these places that are not approved for pedestrians and do so without a good reason you could be fine or charged with trespassing.
Similarly, even when city or county crews are trimming trees for any number of reasons that does not mean you have carte blanche permission to take what you want.
Generally, if you ask, no one will stop you from hauling what is in actuality yard waste away on your own dime, but you should never, ever assume until you have received proper permission.
Conclusion
Firewood is among the very oldest options for fuel when it comes to stoking a campfire or stove, but it works just as well today as it has throughout the centuries.
This is one subject where a little bit of know-how can translate into a major return on investment when it comes to controlling you’re fire and getting the most out of it.
Don’t look like an amateur and keep throwing green, unseasoned wood on your fire when you don’t have to: Follow the tips and techniques in this guide, and you’ll look like an old pro when it comes time to light the fires.