Monday, August 29, 2022

Step-by-Step How to Survive in the Woods

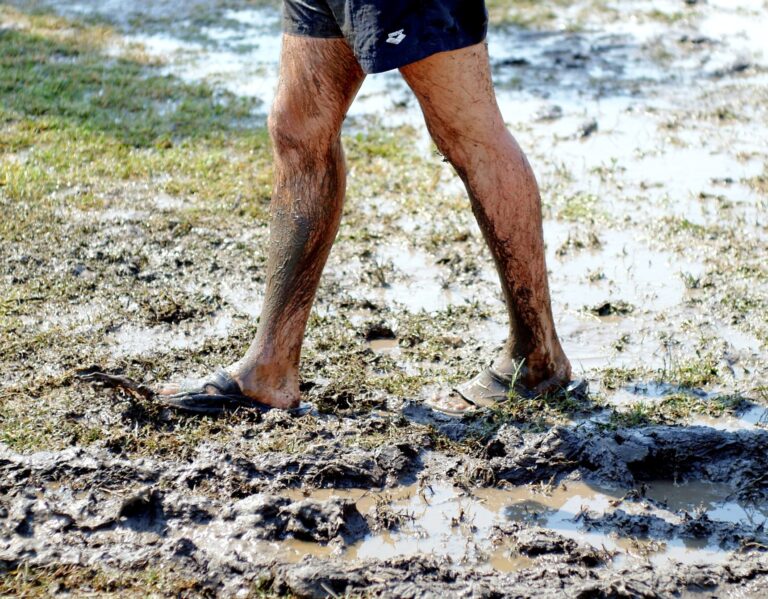
Probably the most popular, and the most common, theoretical survival situation that preppers game out is that of a woodland survival scenario.

bonfire

Forests all over the world, dark, deep and enticing, all have a nearly mythic proportion in our minds.

We are drawn to the woods while we are simultaneously afraid of them, and whether you are merely driving through a heavily forested region or off on some woodland adventure like a hunting or camping trip, there is always an opportunity for mishap in the forests of the world.

It is an easy thing to become lost in the woods, and though it is one of the most resource abundant environments you could be facing a crisis in they are no less deadly than more inhospitable places.

You’ll need plenty of forest lore and just as much survival know-how if you want to stand a chance of surviving a scary scrape in the woods.

Though the specifics of your personal crisis could be pulled from virtually limitless defining factors, the fundamentals of survival in the forest really don’t change.

In an effort to forearm you against disaster, we will be bringing you a step-by-step overview of surviving in the woods.

YouTube Video

Survival in the Woods is About Priorities- Survival Priorities!

There’s an awful lot of literature out there in the world, both on the internet and inbound books, about the specifics of surviving various events in various environments.

Though undoubtedly useful and perhaps a comfort to those seeking to survive incredibly specific circumstances, the contents of all such books are built upon the foundational elements of survival, or genuine survival necessities.

What are the survival necessities? As you’re likely expecting, these are the things a human being must have in order to survive, literally to sustain life.

Put another way, lacking any of the survival necessities, for a long enough period of time depending on the item in question, will see your body assume room temperature in short order, if you catch my drift.

Many survival and outdoor experts have their own spin or take on it just how many survival necessities there are, and that list can range from three, to five to 12 or more depending on how pedantic and specific the writer wants to be. Personally, I advocate for five.

Those five necessities are air, shelter, water, food, and security. Breathable air, mercifully, is something we can generally take for granted in most environments unless there’s a precipitous decline in air quality.

Shelter, protection from the elements, is the next big necessity, and more so even than dehydration can kill quickly when conditions are ideal. After that is water, as it only takes a couple of days without any water to drink for a person to perish.

Food is naturally a concern for keeping energy levels up, but you can go for weeks without a bite to eat before you die.

Lastly is security, as protection against injury, be it from man, beast or even simple accident is always critical though this is rarely near the top of the survival hierarchy.

To survive, all you need to do is provide those five things and life can go on. That’s it. Easier said than done, right?

YouTube Video

Just-in-Case EDC Carry for Woodland Survival

As you might have already determined, it really, really helps to have the right gear on hand in a woodland survival scenario.

While it is true that well-rounded and highly developed austere environment skill sets can save the day, more on that later, nothing beats having access to the force multiplying and efficiency boosting capability that tools provide.

The trick, of course, is that most of us won’t know or ever truly be able to know when or if we will find ourselves in a woodland survival situation.

Sure, a long-distance hike might go awry or a remote hunting expedition. It is easy to plan for those sorts of contingencies, but not for the other one in a million occurrences the continue to confound our best efforts to stay safe.

The solution to these worries is to constantly have on hand a few, choice survival items that are useful in all kinds of crisis situations, not just woodland settings.

This smart, minimalist approach to EDC readiness will serve as a painless but capable insurance policy against getting caught out.

Sturdy Knife

Probably the most fundamental tool that any prepper can carry is a good knife. Folding or fixed blade, the important thing is that you have one and if you want to hedge your bets make it a really strong one.

From lopping off branches for shelter creation to shaving bark for kindling and even fashioning into an improvised spear, a knife provides us with virtually limitless utility on our daily forays and in survival situations.

Paracord Fob or Bracelet

Cordage is always essential in a survival situation, usually for shelter creation but sometimes for crafting other tools or weapons and even for first aid purposes.

Strong cordage and a working knowledge of knots and bends can replace an entire tool set if you are crafting.

Naturally, no one wants to carry around a hank of cord every time they walk out of the house so you can ensure you always have a useful link with you by wearing a paracord bracelet or keeping a paracord fob on your keychain.

Firestarter

Fire is an ancient tool and remains a primordial force and that you can put to good use in a survival situation.

Getting a fire started using primitive methods is something of a badge-worthy skill for Preppers, but you’ll be far better off in a pinch relying on modern tools for the purpose.

A ferro rod and striker, perhaps integrated into your paracord bundle, or even a classic disposable lighter can get a fire going in virtually any conditions.

Button Compass

Direction finding is a key capability in a forest survival setting. Most folks have no idea just how easy it is to become disoriented in the woods until they are out there and don’t know where they are or where they are going.

You can prevent part of this unhappy occurrence by keeping a super compact button compass on you at all times, clipped to your watch band or keychain as appropriate.

Flashlight

People don’t do well in the dark, and you seriously won’t do well in the deep, true darkness of a forest beneath the canopy.

There is dark and then there is pitch black and you are likely to be dealing with the latter. Give yourself some insurance against having to get your affairs in order without the benefit of daylight by carrying a compact, long lasting flashlight on your person.

Not All Who Wander are Lost

No it is true you might wind up in a woodland survival situation through no fault or intention of your own, it is far more likely that some other activity or adventure in the woods will turn into a survival situation in those self-same woods.

For this reason, heading out into the forest without the right equipment is tantamount to idiocy.

You might be heading out on a hunting trip, extended camping expedition or a multi-day through hike.

Whatever it is, you should always carry with you a minimum basic kit to ensure that you can survive and sustain in the woods for a length of time.

Consider the items below.

Woodland Adventure Gear Checklist
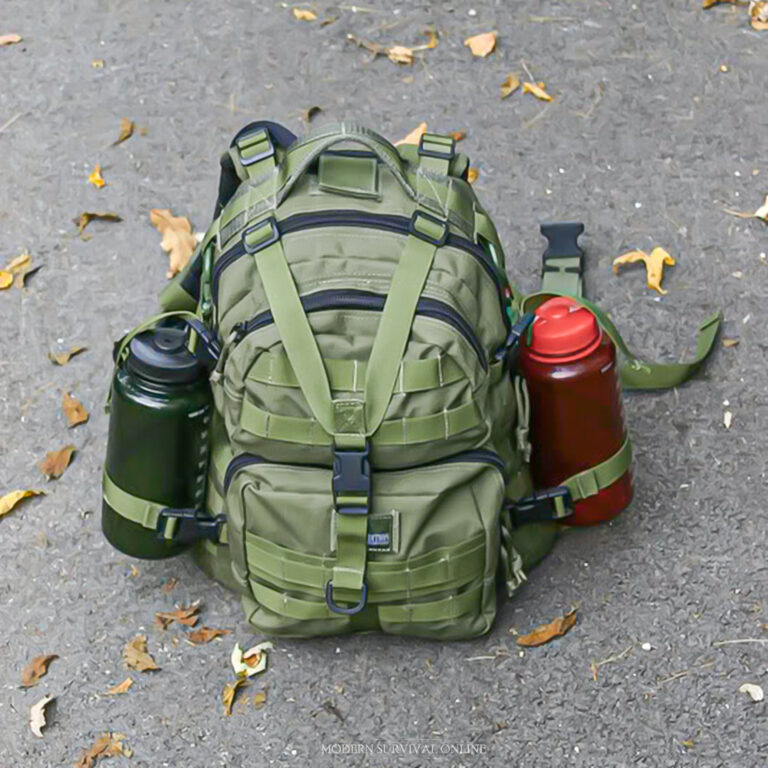
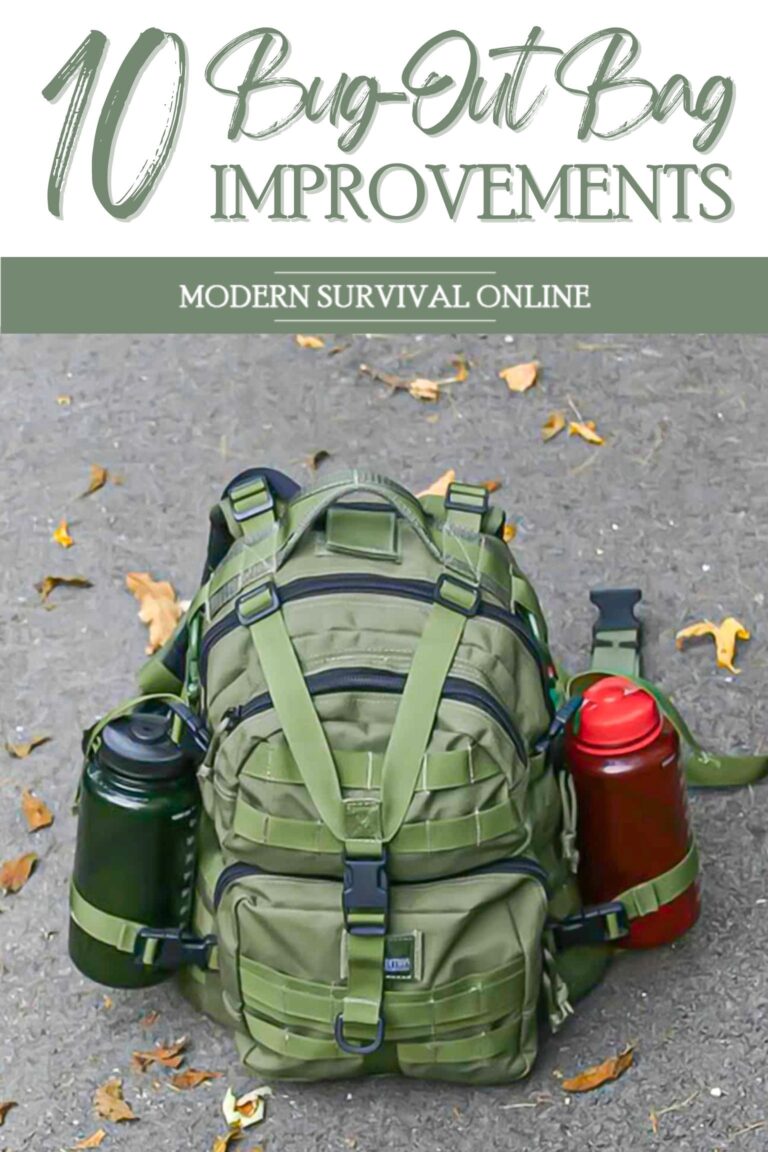
Backpack

You’ve got to have a backpack to effectively carry all of the items you will need through the woods.

If you choose your gear with care and pack smart, this pack can likely be a lot smaller than you are imagining.

There are all kinds of good backpacks on the market these days and we have plenty of articles that will help you choose the right one for your needs on this very site.

Tent or Bivy Bag

Shelter is always a survival priority and your most fundamental, self-contained shelter that you can carry with you on your back is your tent or bivy.

One will provide you a little more room but is more complex to set up and tear down while the other is smaller, simpler but far less roomy.

Tarp

A tarp is a survival multi-tool when in the woods. It can be fashioned into a shelter of its own, used to improve an existing shelter, as a shade, as a ground cover or even for catching mass amounts of rainfall or water. Get a good one and keep it handy!

Sleeping Bag

Nothing beats a sleeping bag when things get really cold. A sleeping bag is likely going to be one of the largest and bulkiest things that you bring with you into the woods, but you should only omit this if you are traveling during the warmest seasons.

Ground Pad

The forest floor is many things but comfortable is not one of them. A ground pad will help keep roots, pebbles and countless other tiny obstacles from digging into you painfully and preventing you from getting meaningful rest.

It also serves as crucial insulation between you and the Earth which will act as a giant heat sink to suck warmth out of your body.

Emergency Blanket / Camping Blanket

Whatever kind of clothing you have brought with you it is always valuable to have another means of adaptable insulation.

A blanket is best, the which type is best suited for survival in the woods is a contentious subject.

Emergency space blankets way next to nothing and are highly efficient but comparatively fragile and annoying.

Typical camping blankets are a little bit bigger and not quite as warm but most folks prefer them because they are far more comfortable and comforting.

Season/Weather Appropriate Outerwear

No matter where you are going, no matter for how long, no matter the place and no matter the season carrying with you seasonally appropriate outer garments is mandatory.

Way too many people heading out into the woods have a close call with hypothermia because they thought they were just going to be out for a short, brisk outing only to run way overdue and then get a nasty chill once night falls or bad weather happens upon them.

Compass

A proper compass is invaluable in the woods, and even as the most rudimentary form of navigation knowing exactly which direction you are heading will give you a tremendous amount of confidence when it comes time to affect self rescue.

A larger field or lensatic compass is an advantage so long as you know how to use it but you can make do with a simple button compass in a pinch.

Maps

Absolutely nothing beats a good set of maps when you are lost. Using some basic skills and in conjunction with your compass you will easily enough be able to navigate directly to your destination or to help, or at the very least start heading in a direction that will eventually result in rescue.

Make sure you take all necessary precautions to weatherproof these maps ahead of time.

Boots or Trail Shoes

Moving through the woods, or any natural environment, really, necessitates proper footwear for best efficiency and protection. A good set of lightweight hiking boots or technical trail shoes is ideal.

Avoid heavy, old-fashioned military boots or construction site boots at all costs, and don’t dream of doing it in fashion sneakers or other similar footwear.

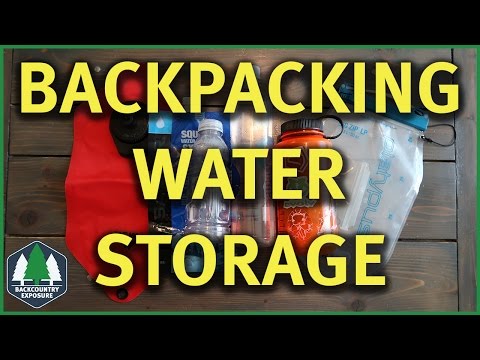
Water Bottle / Hydration Bladder

Water is a survival essential, as mentioned, and that means you need to start off with some clean drinking water on hand and just as importantly have a good, multi-purpose vessel that can hold more water you collect from natural sources.

Water Filter

Like we talked about previously, drinking from those natural sources could be an exercise in intestinal distress they could further waylay you when you can least afford it.

A portable, high-efficiency water filter will remove 99.99% of your troubles from any found water supplies.

Rations

Though you can go for quite a long time without eating before you starve, you’ll be badly degraded or even incapacitated before that comes.

Shelf stable, durable and calorie-dense foods are the name of the game when it comes to woodland rations.

Beef jerky, nuts, trail mix, dried fruit, and similar fare makes for highly portable and efficient foodstuffs.

Duct Tape

Duct tape is definitely a meme, but it is a meme that has earned its status. There is almost nothing you cannot construct or fix with duct tape, and you are crazy to head into the woods without it.

If you have the room, you can leave it on the roll but you can save space by unspooling it and re-wrapping it around your flashlight, water bottle or a similar item.

Ziploc Freezer Bags, gallon size

Freezer bags are another one of those sleeper survival items that you’ll regret ever going without once you use them a few times.

These durable plastic bags are ideal for waterproofing your gear, collecting water, and countless other tasks.

I invariably recommend Ziploc brand freezer bags with classic, clicky zippers. They hold up the best, and whatever you buy make sure you avoid those weird slider tabs since they aren’t as secure.

Cordage

Cordage is another survival essential, useful for all kinds of tasks. It is eminently useful for creating or placing a shelter, crafting tools, using snares or traps, and for all sorts of other utility chores.

Paracord is probably the most ubiquitous favorite these days for its incredible strength and modest cost, but you can also use the smaller, thinner, and lighter accessory cord for many of the same things.

Flashlight or Headlamp w/ Batteries or Extra Charger

Extended for raise into the woods demand extended run time on your lights. A flashlight will need extra batteries or a power bank if it is a rechargeable model.

Also consider a headlamp to give yourself easy-to-use, hands-free lighting for taking care of navigational or campsite tasks after dark. Holding a flashlight with your teeth sucks.

Knife / Multi-tool

A heavy-duty, fixed blade knife is a must for serious survival situations or recreational pursuits in the woods.

You’ll use this for innumerable chores, including processing sometimes tough firewood to size.

Also, consider the inclusion of a compact multi-tool to give yourself a variety of specialized bits for taking care of various jobs that the knife can’t handle.

First-Aid Kit

You don’t need me to tell you that countless injuries Great and Small can occur in the middle of the woods, and chances are your survival situation will properly start because of some injury or another.

A well-equipped first aid kit with gauze, tourniquets, materials for splints, various medicines, super glue and electrolyte replacement powder or gel makes for a good basis.

Mess Kit

You won’t always be eating out of hand, and even if you can it is far more sanitary to use a proper mess kit.

For creating a proper dinner over a fire, a metal pot or large mug, cutlery and more will have to take the place of a proper table setting.

Hygiene Kit

You might think that I survival situation is no time for such niceties as getting clean, and you’d be half right.

However, a lack of proper hygiene and long-term survival situations will further exacerbate your problems.

Keeping your body clean and maintaining it will reduce skin ailments, and infection vectors and also give you a much-needed morale boost.

Fire Kit

Every outdoor adventure kit should include a comprehensive set of fire starting tools and materials.

At least two of the following, ferro rod, lighter or survival matches, and a good supply of tinder, be it a commercial product or homemade stuff like dryer lint or char cloth.

Bugging Out into the Woods

As hard as it might be to imagine for some people, you might actually choose to head into the woods during a survival situation.

If society is falling to pot all around you, or you need to move out on foot to a safe fallback location and the shortest distance is through the woods you might be transiting through or surviving in the forest for some time.

If that is the case, you’ll need even more supplies than you would normally carry with you to make a go of it.

Look to the list above and basically increase all of your capability in every category, either for a greater duration away from resupply or for taking care of a greater number of people.

Often times the difference between a day pack and a bob or inch bag is simply the number of supplies that are carried!

Making Due with Nothing – Primitive Survival

What about surviving in the woods with absolutely nothing except the clothes on your back? Is it possible to survive if you lose all of the gear you have spent so much time accumulating for the task? Is it even possible?

I can tell you with certainty that yes, it is, although the demands placed on the survivor begin at zero or even higher.

This is where having the skills to pay the bills is absolutely essential. Primitive survival skills or austere environment sustainment training are what is required.

Beginning with nothing but their own two hands if you have the skills you can nap stones to create usable cutting tools, create cordage, harvest wood, build a shelter, get a fire going, find and gather or hunt food and do everything else you need to.

It will be a hell of a lot harder and take a hell of a lot longer but it can be done. If you want to give yourself the ultimate insurance against being truly stranded in the woods we have many articles on developing such skills here on the site.

Time Spent Thinking Clearly is Never Wasted

Before we get to our step-by-step procedures it is imperative that I impress upon you how critical it is that you stay calm whenever you find yourself in the middle of a survival situation in the woods.

Maybe you are lost, maybe you or someone else is badly injured, even near death. You could even be pursued through remote backcountry by a deranged killer.

Whatever it is, you need to stay cool and think clearly about the problem so that you can start problem-solving to fix it!

Regarding my own close calls in the woods and the stories I have heard other survivors, students or otherwise, regale me with the rising panic you feel when far from civilization and help is a real, primordial thing and can completely unseat your single, best asset- your brain!

As the saying goes, when the chips are down sometimes there is nothing left to do but look the devil in the eye and take care of business.

Panicking will not help anything, and it sure as hell won’t make you feel better. With that said, brace up and let us get to our steps.

YouTube Video

Your Step-by-Step Plan for Surviving in the Woods

Wherever you are, whatever has happened and whatever you have you can depend on this step-by-step plan to help you manage risk, mitigate danger, and start making meaningful progress toward a positive outcome.

Assess the Situation

There comes a point in any woodland survival situation when you realize you are actually in trouble. This feeling might creep up on you all at once or it might slam into you with a suddenness and ferocity of a cannonball.

Whatever has happened and whatever the situation, so long as you are out of immediate, life-threatening peril it is time to start assessing the situation and understanding it so you can work towards resolving it.

If you are lost in the woods, or just suspect you are lost, you need to stop and begin at determining where and when you went awry, possibly retracing your steps.

If you or someone else is injured, you need to take stock of the injury, the overall condition of the victim, and what capability they lack or still have.

The basis of the problem might boil down to I don’t know where I am, you or someone else might not be able to move, no one is looking for you or knows you are overdue or you are at risk of exposure or some other threat. Don’t let the enormity of the perceived danger you are in blur your judgment.

Collect Yourself

You are scared, possibly hurt. At this moment, panic is likely to come crashing down on you like a power hammer if you have never been in a similar situation before.

You’ll be thinking about all the things you are going to miss and people who are going to miss you because of your impending death.

You’ll think about dying, unfound and unknown in the woods before rotting away to nothing except a pile of bones to be scattered by coyotes.

Knock off the daydreaming, it isn’t that bad, I promise, and take heart because countless other people over the millennia have been in the exact same situation you are in and survived.

Don’t give in to those feelings of despair, fear or hopelessness. Survival is a mental game, and the first opening move in this game is taking control of your thoughts and emotions.

Again, if you are in no grave and immediate danger give yourself five or 10 minutes to just chill out and get your head right. Reacting out of fear or anxiety can see you blundering into a mistake that can make a bad situation way worse.

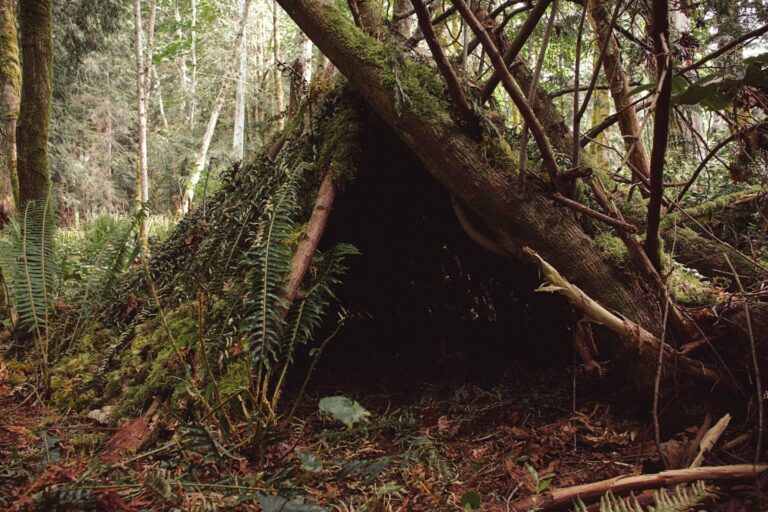
Prioritize Shelter ASAP

The importance of shelter cannot be overestimated in any outdoor survival situation. It is exposure, not lack of water, not starvation, and definitely not animal attack, that is statistically the biggest killer in woodland survival scenarios.

And it doesn’t have to be in the middle of winter, either, for you to succumb to the elements.

This is why so many carefree day hikers who wind up lost or overdue for any reason find themselves in a life-threatening situation because they failed to pack appropriate clothing for such a contingency.

Temperatures drop precipitously at night, and a chilly spring evening that finds you soaked from rain or just perspiration can rob you of body heat with frightening speed.

Then you get tired, sit down or even lie down on the ground. That could soon spell disaster for you since the ground acts as a giant heat sink, further stealing precious body heat from you.

Before you know it, you are hypothermic, and improving your situation becomes even more challenging.

For this reason, as soon as you have your wits about you it is imperative that you begin creating a suitable shelter at once unless you are absolutely, positively sure that you can make it to rescue or even better shelter before things get dark.

This might mean pitching a tent, improvising a bivouac, or constructing a field expedient shelter from branches, leaves, and other natural material along with building a fire.

Working knowledge of knots and bends and even a little bit of high-strength cordage (like paracord) will go a long way towards helping you craft a warm shelter quickly and easily no matter the conditions. You can learn all about the following useful knots here:

  • Sheet bend
  • Bowline
  • Prusik knot
  • Farrimond hitch
  • Constrictor knot

You might think you can power through the night, deal with a little drizzle, or generally put up with terrible conditions, but without excellent apparel and fitness to back you up, you are quite literally gambling your life on that assumption.

Take Stock of Resources

Now that you have reasonable shelter precautions taken, it is time to take stock of the rest of your supplies.

First, if you are uninjured and otherwise healthy, able to do whatever you need to do to improve your situation, count yourself lucky and give thanks for the blessing. Things become geometrically harder when you are injured or unfit.

Next, if you have any supplies with you, of any kind, determine what they can do for you under the circumstances. Keep in mind that even garbage may be helpful if you know how to use it right.

Do you have food or other rations with you? Do you have a supply of clean drinking water? Do you have something that can hold water, if you don’t have water on hand?

A water bottle, cup, empty can, or even plastic sheeting can be repurposed as a vessel for catching, holding, and carrying water.

Do you have anything that can help you see at night or create fire easily? Anything that might signal to rescuers, something like a flashlight, torch, brightly colored cloth, mirror, or something else?

Do you have tools and weapons, things like knives, saws, or hatchets? These can be precious resources for building shelter, improvising signals, gathering firewood, and more.

Guns are obviously useful for fending off threats or perhaps bagging game for food in a long-term survival situation but their deafening report also makes a great signal. More on that in a bit.

Wait for Rescue or Affect Self-Rescue?

This is one of the most contested elements of woodland survival, even among experts in the field.

Should you wait for rescue or attempt to self-rescue, i.e. find your way out of the woods to safety and civilization?

There is no straight answer, but generally you are almost always better off staying put, especially when injured, so long as there is the expectation that someone, at some point will come looking for you and generally know what your travel itinerary was.

Especially if you were out in the woods hunting, hiking, or camping and cared enough to file a flight plan with a trusted friend, relative, or just the rangers office if applicable you can likely rest assured that the bushes will be beaten looking for your person in fairly short order when you are declared overdue.

How long that depends on your itinerary and whether or not you stuck to it.

If you did not file a flight plan or for whatever reason have badly deviated from your expected route, rescuers might not know where to start looking or could be looking in all the wrong places.

That likely means you’ll need to attempt to hike out on your own. Similarly, if you or someone else require care and don’t have any time to waste you might need to get a move on to shorten the time it will take to render them to higher level care.

Signal for Help if You Can…

Even if no one is going to be looking for you, if there is any chance whatsoever that other people will be anywhere in the vicinity of your location you should signal for help using a variety of means.

Passing aircraft, ground traffic, pedestrians, and even, just maybe, satellites could notice something amiss in an area that will attract attention, and with attention comes rescue nine times out of ten.

There are many ways to signal to stress, both auditory and visual. A fire is one of the very best, day or night.

Particularly in the daytime during clear conditions, burning a fire supposed to produce thick black or white smoke that contrasts with the open sky will draw immediate attention in a wooded environment due to constant risk and concern over wildfires.

You can try burning rubber or plastic to produce black smoke, or young or damp wood to produce voluminous white smoke.

The fire is not an option or not safe, and you can get clear of the canopy, try laying down a highly noticeable symbol that can be seen from the air, either an SOS spelled out using branches or carved into the ground or a highly visible, colorful tarp that you can swing around your head.

Auditory signals also work well. The shrill blast of a survival whistle can be used for SOS communications and as mentioned before the report of a firearm.

If you are not particularly coordinated or comfortable using Morse code for a “proper” SOS, a repeating sequence of three evenly spaced reports is a universal signal for distress.

A firearm can often be heard over a longer distance but a whistle has the advantage of not requiring ammunition to function.

Understand that most forests are enormous places and it is easy to miss or otherwise overlook any rescue signal even when people are actively looking for you.

Do not despair even if a low-flying plane or helicopter completely misses what should be, to you, the most obvious signal in the world. Keep your chin up and keep at it!

Orient Yourself toward Probable Rescue if You Can’t

Let us say that, whatever the reason, rescue is just not in the cards or is vanishingly unlikely. Maybe you’re in a truly inhospitable, remote, and dense patch of forest.

Maybe absolutely no one knows you or cares about you and you didn’t file a flight plan in any case.

Maybe you found yourself taken to an unknown forest against your will and have affected escape.

All that matters is it is up to you to rescue yourself by hiking out or reaching someone who can help you.

Before you grab your gear and take off and a mad dash to get out of the mysterious woods you are currently in, you need to orient yourself towards the most probable rescue achievable.

First things first, you need a way to establish what direction you are heading in. A compass is best, but you can use the sun lacking a compass.

Which way should you head? If you have any knowledge of the area you are in you were hopefully smart enough to take note of major landscape features and settlements in and around the area.

For instance, if you know the forest you were moving around in is situated entirely north of a massive interstate highway that runs east-west, all you would need to do is head south until you bump into the interstate and could flag down help.

Even in remote locations, you can use this dead reckoning method of navigation to find your way with certainty.

If you are able to locate a river or even a prominent stream you could follow it to another major landmark or even to human habitation itself.

Lacking such knowledge or major landmarks your best bet is to try and get high in the short term. No, I don’t mean doping up to ease your nerves, I mean gaining altitude.

A hill, a safely climbable tree, something that will let you survey the land and look for the best approach to get somewhere where there is at least a chance of signaling rescue.

YouTube Video

Sustainment – Food, Water, and More

Understand that your predicament, unless it is a very minor one, is unlikely to be over quickly. It could take days, even weeks before you are rescued or able to affect self-rescue.

That means you’ll need provisions, namely water, and plenty of it, along with food to maintain energy levels and keep your brain operating in top gear.

At first, you will only have what supplies you have on hand and that means you need to procure more from the environment around you.

As mentioned above forests are far more plentiful when it comes to resources, including provisions, then other environments but you must know how to access, harvest or otherwise obtain them.

Food in particular is a dicey topic. There are all sorts of animals, mammals, reptiles, avians, and insects that live in forests that make for good eating but knowing how to catch, trap, or otherwise kill them and prepare them is an entire skill set unto itself.

The same thing goes for plants, and there are an abundance of leafy vegetables, nuts, berries and even mushrooms that can make for excellent, healthy, and delicious eating.

But as you probably already know the chances of eating something that is toxic, perhaps lethally so, are definitely there when consuming plants and fungi.

You must acquire this lore ahead of time if you don’t want to roll the dice every time your stomach starts growling and you reach for an appetizing looking berry or mushroom.

Learn about and look for the following wild edibles that are common all through much of North America.

  • Cattail
  • Dandelion
  • Wild Asparagus
  • Acorns
  • Chanterelle Mushrooms

Trapping is also a worthwhile pursuit but this is a skill that requires considerable skill and refinement to employ successfully.

Don’t worry so much about catching large animals as this is quite difficult, the traps needed to bring them down are usually just as dangerous to you, and they are less plentiful in the first place.

Smaller game is more common and much easier to catch or slay. Consider the following easy-to-get critters for supplementing your rations via traps and snares:

  • Birds
  • Squirrels
  • Mice
  • Groundhogs

Water too, despite a reputation for clean and unadulterated pureness, when found in nature, is likely to be filthy and full of germs that can make you seriously sick, or perhaps, though rarely, kill you.

A personal emergency water filter should be included in your compliment every time you step out the door to head into the woods for any reason or even when you are traveling through a region covered in dense forest.

So it is possible to drink from a natural source and go several days before getting sick, when dehydration or other effects take hold it could result in your condition and capabilities heading into a downward spiral, further hampering your efforts to survive.

Never, Ever Give Up!

Lastly, and most importantly, no matter how bad the situation looks, no matter how grim your outlook is and how dire the circumstances, never despair! Never, ever give up!

There is always something that you can do to improve your circumstances, and you should be buoyed by the knowledge that people have survived far, far worse situations than the one you are currently in and have come out more or less completely intact.

So long as you are alive there is cause for hope. So long as you can put in work you can bend the world to your will. Don’t forget that!

Conclusion

A woodland survival situation is scary and something of an iconic scenario in the prepping sphere but one that most people can surmount with a little bit of knowledge and a clear head.

Luckily, most forests are capable of supplying us with ample resources to fulfill survival necessities when the chips are down.

A little bit of prior preparation and accumulation of wilderness knowledge will prove sufficient to get yourself, and potentially someone else, out of a sticky and scary situation in the woods.

Frequently Asked Questions about Woodland Survival

I regularly field the same set of questions from students about woodland survival. A few of the most common are below.

I Live in a Warm Area and It Is Springtime. Is This Extra Clothing Really Necessary?

Yes, warm outerwear is essential virtually everywhere on Earth and at all seasons if you are heading into the woods.

Temperatures plummet quickly at night, and if you are already wet from water or perspiration and exposed to cold temperatures and a little wind you can be hypothermic in a frighteningly short period of time. Always carry a windbreaker at the very least.

Do I Really Need To Pack Extra Food? Isn’t There Plenty To Eat in the Woods?

Carrying extra rations with you into the woods is always a good idea unless your field craft skills are top-tier.

There is plenty to eat in the woods if you know how to find it, harvest it correctly, and make it safe much less palatable to eat. If you don’t have your skills tuned up you’ll need to rely on what you are able to decisively collect.

What Are the Top 5 Things Needed To Survive in the Woods?

The same things you need to survive everywhere. Air, shelter, water, food, and security in that order. Luckily the woods make it pretty easy to provide all of those things if you have the skills.

Get over the idea that there is some magic piece of equipment or a particular gear checklist that will guarantee your survival.

Can You Live off Foraging Indefinitely in the Woods?

A single person probably could if they were in a bountiful area and knew what they were doing with a high degree of skill and efficacy.

As always, winter will be a challenging and brutal time for gatherers. That being said, the likelihood of running into vitamin or mineral deficiencies is still quite high, and would likely need to be supplemented with hunted or other specialized fares.

Don’t I Need a Firearm for Woodland Survival?

You’ll never catch me recommending against a firearm, but in my experience, the usefulness of a gun is drastically overstated for woodland survival unless you are talking about long-term survival specifically.

Don’t get me wrong, they are invariably useful for various purposes, but the weight and space you’ll have to dedicate to a firearm, not to mention to other equipment to support and maintain it, is likely better spent on other things.

survive in the wood pinterest


via Modern Survival Online https://ift.tt/st25RlF

Friday, August 26, 2022

Can You Make a Fire Inside a Shelter?

One of the single most important and most fundamental survival skills is building a fire. Knowing how to build a fire will help you get dry and keep warm, as well as signaling for help and cooking food.

bushcraft survival shelter

But, in really harsh conditions you’ll need to stay inside your shelter for safety, and this begs the question, can you make a fire inside your shelter?

Yes, it is possible to build a fire inside your shelter if you are cautious and ensure adequate ventilation. But, if your shelter is constructed from flammable materials it is not recommended unless you’re sure you can contain the fire.

It is great if you are able to build a fire inside your shelter so you can enjoy maximum protection from the elements and plenty of warmth, but it is easy for this to go terribly wrong.

Keep reading and we will tell you all about the various factors you need to understand before attempting it.

YouTube Video

Always Consider What Your Shelter is Made From

The first and most obvious consideration when you are thinking of building a fire inside your shelter is what your shelter is made from.

Any materials that can catch fire or melt don’t necessarily disqualify you from building a fire inside, but you’ll have to be extremely cautious if you choose to.

However, shelters made from natural materials like grass, wood, leaves, pine needles, and the like might be so flammable that bringing your fire anywhere near them is a recipe for disaster.

On the other hand, something like a cave is perfect for building a fire inside under most circumstances because it cannot burn.

Then, in the middle, you have shelters like tents or houses. A large tent might support a small fire in a stove if you are extremely careful, with materials like canvas and modern synthetics proving to be quite fire resistant.

Houses might be equipped with a fireplace which is the perfect place for a fire; otherwise you’ll have to be careful that you don’t start an accidental fire in the structure.

A Fireproof Pit or Enclosure is Mandatory

Whatever kind of shelter you are occupying and however large or small your fire needs to be, it is absolutely mandatory that you provide a fireproof enclosure or surround for it. This is dependent on what you have at hand and how large the fire is.

Consider a traditional campfire. To build a campfire you first clear the ground, scratch out a pit, and then surround the pit with stones.

In a tent you might use a self-contained stove with a fuel canister or else build a small fire in a firebox set on top of a deep piece of cookware or some other fireproof object.

The idea is to prevent the fire from spreading out of control, contain small sparks and globules of smoldering sap and also prevent direct heat from melting or charring any part of your shelter.

Carbon Monoxide is a Deadly Killer

There is another major killer associated with having a fire inside any enclosed space, and that is carbon monoxide.

When any combustible fuel is burned, carbon monoxide is invariably one of the byproducts.

Carbon monoxide, or co, gas is extremely toxic, building up rapidly in the bloodstream as it poisons people who inhale it.

Carbon monoxide is a separate component of the smoke, soot, and other particulates generated when you build a fire.

It is odorless, colorless, and tasteless, and the initial effects of CO gas poisoning feel very much like fatigue or a mild illness, something a survivor might easily overlook in an already stressful situation.

After that, a headache and confusion will set in before a loss of coordination and eventually coma, then death.

There is no reasonable way to prevent the emissions of CO gas when building a fire. The only thing you can do is dissipate or evacuate the gas by ensuring good ventilation and plenty of fresh air in the area where the fire is burning.

CO gas is easily trapped in enclosed spaces and, as it cools, it sinks closer to the ground. This is obviously highly problematic if you are lying down in a tent, under a lean-to, in a cave, or something of that nature.

Most worryingly, most victims of Co gas poisoning so come while they are already asleep, meaning you could lay down at night in your shelter with a fire going feeling no ill effects, and then you’ll never wake up.

No Matter the Shelter, You Must Ensure Good Ventilation

The best thing that you can do if you are building a fire in your shelter is to ensure the space is well ventilated near the top, or that there is a positive draft coming through that blows smoke, and the co gas with it, out of the space.

This means you should always position yourself upwind of the fire whenever possible, and if you are in a space that does not allow it, then position yourself closest to the source of incoming fresh air.

Don’t Build a Fire in Your Shelter if You Have Any Worries

Remember, if you have any concerns about your shelter catching fire, melting, or accumulating hazardous gases you cannot risk building a fire inside of it.

Even if you are desperate for warmth in the situation, there are other things you can do.

You can position your fire outside of the shelter and then move yourself to receive maximum warmth from it, or supplement the inside of your shelter with an emergency blanket, foil, or some other reflector to capture more heat.

You can still make use of a fire without risking a potentially deadly accident.

YouTube Video

Can You Build a Fire Inside Your Tent?

Yes, although any tent that has an actual floor will necessitate using some form of standoff or fireproof enclosure to prevent melting or burning.

Many people who are camping inside a tent in the coldest environments bring their camp stoves right inside for cooking.

Although much smaller and with a far more localized flame compared to a traditional campfire, you could try something similar with a compact wood-burning stove or firebox set on stones or something else that will serve as a standoff from the floor of the tent.

Remember, you must take pains to ensure the evacuation of smoke and good ventilation that will allow fresh air in.

YouTube Video

Can You Build a Fire in a Cave?

Yes. You can build a fire inside a cave with little worry so long as you properly clear a space for it as usual, and then check to see which way the smoke is drifting.

Depending on how far in the cave you are, the slope of the cave, and which way the air is flowing in it smoke might be pulled into the cave or pushed out.

In any case, you don’t want to be breathing in smoke and CO gas, so position yourself accordingly and if possible always be nearest the fresher outside air.

YouTube Video

Can You Build a Fire in an Igloo or Snow Cave?

Believe it or not, it is possible to build a fire inside an igloo or snow cave. Now, I know what you are thinking, as this sounds like the worst of all possible decisions.

Won’t your shelter just melt away if you do that? It could, but not necessarily, and at least you know that your shelter will not catch fire or burn around you.

It is possible to properly situate a very small fire inside an igloo or snow cave and, with good ventilation, prevent the buildup of toxic gases and also prevent it from melting around you.

Now, it is true that the fire is going to be so small it might not make a huge difference in the overall temperature inside, but even a few degrees will help stave off hypothermia and improve your comfort level.

YouTube Video

Can You Build a Fire in a Modern Structure?

Yes, but with a caveat. If any modern structure you are occupying has a dedicated fireplace, then this is a no-brainer so long as the chimney is functional.

Otherwise, building a fire inside the structure is extremely risky, because modern homes and other buildings are very bad about trapping carbon monoxide inside.

Conventional wisdom says that you should never attempt this if the building does not have a fireplace.

If you are forced for whatever reason to build a fire inside a structure without the benefit of a fireplace, you must take great care to fireproof the floor and use a raised, completely fireproof enclosure or container to hold a small fire.

As always, do everything you can to get smoke out of the building and prevent the build-up of carbon monoxide.

If at all possible, have a battery-powered carbon monoxide detector in the room and in your immediate vicinity.

bushcraft survival shelter pinterest


via Modern Survival Online https://ift.tt/6gQBzG8

Monday, August 22, 2022

Cooking OPSEC During a Disaster

Most preppers already know that OPSEC, or operational security, is an important concept when surviving in the aftermath of any major disaster or other long-term crisis.

can heated on a stove

A loan word taken from the military, applying the concept to prepping and general survival means taking pains to keep your business your business, and not giving away to the outside world any information that might help them determine what you have, what you are up to and what you are doing.

One chronically neglected sector of good OPSEC in a societal survival concept is that of cooking.

Most of us have plenty of food on hand by now, and even several ways to cook it, but doing the cooking might be just the thing that attracts the wrong kind of attention.

That can definitely lead to a bad outcome for you and yours, so in an effort to prevent that I have prepared a guide that will help familiarize you with good OPSEC concepts while cooking during a disaster.

Why Should You Worry About This?

Before we go any further, it is probably best to address the elephant in the room. Why on Earth should you, or anyone, worry about good security practices when cooking?

Specifically, why should you attempt to cook in such a way to conceal your activities and possibly your presence entirely? Isn’t this the stuff of genuine paranoia? Don’t we have bigger problems to worry about?

Well, the answer really depends on what sort of situation you are facing, how long you expect it to last and where you are. Frankly, the answer also depends on how serious you are as a prepper.

If you’re only dealing with a thunderstorm related to power outage that is expected to last a day or two at the most, you probably don’t need to worry about any of the things I’m going to talk about in the rest of this article.

Whatever you want to cook and however you want to cook it will probably be just fine and incur no negative consequences.

Hell, you might even be able to have a nice little backyard barbecue with your friends and family in the meantime.

However, if you are dealing with the aftermath of a major catastrophe and all the associated crises, one that strains people, supply lines and the rule of law to the very breaking point, you had better take what I’m about to tell you seriously.

In such cases, particularly ones of indefinite duration, they’ll be plenty of other people that will want what you have and they lack, and that might be willing to hurt you or even kill you, and kill your family, to get it.

Prolonged physical and emotional agony along with a lack of basic necessities has a way of making people crazy. What does that look like? We will talk about it in the next sections.

Disasters Cause Chaos, Chaos Creates Opportunity (for Bad People)

First and foremost it is no surprise, or rather it shouldn’t be, that disasters of all kinds and all sizes create opportunities for bad people.

When people are distracted and disorganized and first responders, particularly law enforcement, have their hands full on all fronts bad guys take advantage of the opportunity and step their game up. Or stated more simply, when the cat is away the mice will play.

Even localized disasters like flooding and tornadoes invariably see an uptick in theft, looting, robbery, burglary, and assault.

Some of these criminal actors come from within your very own community, but others, if you can believe it, come from elsewhere.

These special scumbags might be thought of as disaster tourists, looking to make a score when others are suffering.

Chances are signaling your presence via running generators, smoke, fires and the other associated indicators of cooking in the aftermath of any disaster will draw these people to you like dogs to a meat truck.

Sustained Lack Will Make People Desperate

On the other end of the spectrum, you’ll have people that are simply desperate. People that desperately need gear and supplies, people that need water, and people that need food.

As one old saying goes a rumbling tummy will put all principles to a severe test.

Whether or not they were prepared is irrelevant: they are all out of the survival necessities that they must have, and the lack has become so profound that they could become willing to use force to get what they need for themselves and their loved ones.

This is a tragic situation to be sure, but consider the alternative. If they don’t even know you are there, and there’s no obvious indication that you have food, you greatly reduce the chances that you’ll even be confronted with one of the poor wretches.

For the record, I’m not saying that you should or should not share your food with these desperate survivors.

I am saying that unknown contacts with starving and desperate people have a greatly increased probability of conflict. You are better off avoiding it.

YouTube Video

What Security Factors are Associated with Cooking?

So, we know now that cooking activity might just be the thing that draws unwanted visitors to you. Why is that, and what are the signals that you put out into the world when cooking?

By understanding what these signals are, and working to eliminate or minimize them, you lower your overall profile in all circumstances when cooking.

Light

Depending on what you are using to cook with, light may be a major factor or completely a non-issue. Obviously, the extreme heat that is required for cooking almost always entails a certain amount of light pollution.

This is at its most apparent and most notable was something like an outdoor fire. However, even using a fireplace or wood-burning stove inside will produce ambient light that is readily apparent and visible through windows.

Using something like a compact cooking stove, particularly one that uses alcohol or some other low-flame fuel can virtually eliminate the typical light of an open flame.

Electric appliances like microwaves and toaster ovens are also simple to conceal completely.

Smoke

Smoke is a big one. Rising smoke from a campfire, grill, fireplace, wood stove or any other inefficient source of combustion can rapidly give away your position and activity in the daytime and even at night with clear skies.

Smoke is one of those things you can try to manage but it is extremely difficult to eliminate entirely when you are working with an open flame. Using the right fuel and maximizing efficiency can help to minimize smoke, as can using other tricks to dissipate or thin out what smoke is emitted.

In rural areas with less human activity overall, smoke is far more likely to be noticed. Poor air quality or a preponderance of other fires in its built-up and urban areas make smoke less of a concern.

Noise

Noise is another factor attendant with cooking that is overlooked or minimized much of the time.

It could be the clanging of cookware and utensils, the crackle of a fire, or just the general din of human activity.

Even talking or laughter that accompanies a meal might be enough to entice others to take a closer look.

Appliances, of course, make a certain amount of noise with microwaves being the chief offenders.

Electric stove tops of all kinds make very little noise aside from the creaking of their elements and a soft hum.

However, depending on your own situation and infrastructure the thing supplying the electricity to those electric appliances might make a ton of noise.

As always, gasoline and diesel generators tend to be quite noisy and will readily draw in looky-loos, thieves, and anyone else who is looking to get what they need.

Modern propane generators tend to be a far sight quieter. Solar generators, battery banks, and similar power solutions are nearly silent.

Aroma

Another factor that is attendant with cooking is the aroma, and this one might be nearly inescapable. Cooking food creates, usually, attractive smells that carry farther than you think.

Whether or not you are cooking indoors or outdoors will influence this significantly, as will the prevailing wind direction.

Cooking larger quantities of food over an open fire will generate a considerable aroma, whereas smaller quantities in an enclosed container or appliance will help to minimize the transmission of odor.

As expected, certain foods are inherently more aromatic when they are being cooked, and depending on what you like to add to these foods in the form of herbs and other seasonings the aroma might be intensified.

If you are in an area that is less populous or one that has many background smells forming a general miasma, aroma might be of less concern.

However, do not underestimate it, and a person who is very hungry will be able to home in on it with surprising ability.

Intel

On a more meta level, cooking gives people other information about you if they’re able to discern your presence.

Do you still have electricity? Where is the electricity coming from? If you are using fire might you have other firewood or other fuel?

The fact that you are cooking obviously tips people off to the fact that you have food of some kind, at the minimum.

If you’re using a grill you have propane or charcoal. Maybe the fact that you seem awfully well prepared for events will inform their opinion on the rest of your preparations, perhaps the ones you have lurking right out of sight.

You got the idea. When people can see that you are cooking up more or less as normal you’re going to seriously raise your profile in their eyes concerning what you might have that could benefit them.

Maybe the “ask” will come in the form of pleading and groveling. Maybe the ask will come at the barrel’s end or at knife point.

Does it Matter What Kind of Food You Cook?

When you are concerning yourself with operational security while cooking, even the type of food you have or plan on cooking it makes a difference.

Generally speaking, the longer the food takes to cook and the more sustained heat it requires or higher temperatures, the harder it is going to be to conceal your activity.

Consider the difference between heating up something like a TV dinner in your microwave versus cooking up all those same things yourself on a stove top or in your oven. There is something of an economy of scale at work here.

Similarly, grilling up whole animals or large cuts of meat will virtually necessitate you to do it on a fireplace, over a fire pit, or on an outdoor grill, dramatically raising your profile at the same time. In some cases, it might be impossible to hide what you are doing.

Minimizing Your Presence When Cooking is Possible with Smart Food Choices

On the other end of the spectrum, it is possible to prepare and eat food without raising your profile in any appreciable way.

Food that can be cooked in a bag or pouch in boiling water will not emit much in the way of smoke, aside from what the fuel itself generates, and also will help cut down on aroma.

Many foods don’t require cooking at all depending on their preparation and packaging and are ready to eat as soon as you open them.

Things like jerky, trail mix, canned soups, stews, meats, and vegetables, freeze-dried options and more are all nutritious, reasonably filling, and very easy to prepare.

Though it is true they do not afford that happy feeling or general morale boost of a properly prepared, hot meal they certainly beat a rumbling tummy and they have an advantage all their own when it comes to keeping your business and activity on the down low.

If you live in a densely populated area, particularly one that will be vulnerable to supply chain and food shortages in the aftermath of a major disaster, I would make it a point to heavily invest in such foods to the exclusion of others that mandate significant cooking.

Use Pouches and Foil Wrapping When Possible to Cut Down on Aroma

Whatever kind of food you are preparing, and however you are preparing it, it is possible to reduce aroma and potentially even cut down on cooking time by wrapping the food in aluminum foil or putting it in some other container for the duration.

Instead of grilling open cuts of meat and vegetables over an open fire or on your grill, maybe consider making a nutritious stew instead utilizing a dutch oven.

Meat and vegetables alike, even grains and other things can be prepared inside a sealed foil pouch to help keep in moisture and also cut down on aroma as described.

It might seem like a meaningless or marginal step to take, but keep in mind that everything you do to reduce your profile and decrease the chances that someone will detect you by any of the signals detailed in the previous section is worthwhile, particularly if you’re in a populated area or along a likely line of drift or travel near a populated area.

Aroma is always tricky because, if the wind shifts, you don’t know who might be able to pick up on it and from where they might approach.

For those who live in apartments or other multi-family residential buildings, cutting down on aroma is truly a priority.

Pros and Cons of Various Cooking Methods

Now, if prior to this point you have been broadly unaware of the importance of OPSEC pertaining to cooking in the aftermath of a disaster, this doesn’t mean you need to throw out everything you’ve already purchased.

Every good prepper knows that every piece of gear, every tool, is just that: a tool in the toolbox, and all have their own intended uses and merits. They all also have their own disadvantages, ones you should strive to minimize.

Understanding where various cooking methods and appliances fit into your objectives will let you pick the right one for your application, or at the very least minimize the risks of using what you have.

YouTube Video

Indoor

The following methods are those that are typically employed indoors, though it is not out of the question you might use them outdoors in conjunction with a generator or on an ad hoc basis.

Electric Stove / Cooktop

For most of us, our electric stove and cooktop is the main appliance in our kitchen. Undoubtedly convenient and effective, it will unfortunately likely be offline in the aftermath of any serious disaster thanks to a knocked-out power grid.

Did you have a generator, whole house battery backup or other personal electrical infrastructure, you might choose to still use your electric stove and cooktop though you should know it is a serious power hog.

If you can use it, it will be convenient and low profile, emitting very little light and virtually no smoke unless you burn the turkey again.

Gas Stove / Cooktop

If you don’t have an electric stove and cooktop in your kitchen, chances are you have a gas version instead.

A gas stove and burners have the advantage of remaining operational in the aftermath of losing power, but on the other hand, there is no guarantee that gas will continue to flow to it unless you have a large tank on your property or can connect it with specialized adapters to portable tanks.

Compared to their electric cousins, they operate very much the same although their open flames emit slightly more light.

Assuming you have reliable access to gas for fuel, they have a major advantage over electric stoves and cooktops because you won’t need to run a generator to power them.

Toaster Oven / Microwave

Believe it or not, a toaster oven and microwave might be a survival mainstay in a long-term crisis situation assuming you have the power infrastructure to operate.

Producing very little light, no smoke, and minimal noise is the indoor option of choice assuming that you can minimize or eliminate noise concerns related to powering it.

This might be a bridge too far for some, because the generator, if you are using one, might be chiefly responsible for attracting attention.

But if you have a quiet running generator or some alternate source of electricity your microwave can prove to be surprisingly efficient for your purposes.

A toaster oven fits into the same roll, more or less, only it takes longer to cook food as a rule but generally uses less power in the bargain.

Wood Stove

A wood stove can be a prepper’s best friend, capable of supplying heat, light and even cooking up a meal just like the old days. They are undoubtedly adaptable and surprisingly efficient in their modern iterations.

However, their chief limitation is that they rely on wood for fuel, and burning wood always produces a lot of smoke with few exceptions.

It should be noted, however, that a properly maintained and installed wood stove can be designed and fueled in an efficient way to produce very little smoke even when used continuously.

That being said, there is not much you’ll be able to do to disguise the column of smoke rising from the chimney pipe.

Fireplace

A fireplace can give you many of the same advantages as a wood stove, though it is one that is usually not nearly as efficient.

For centuries, the fireplace was not just a method of heating a home but also the primary way that cooking was done. With the right specialized cookware, you can do the same.

Owing to the more open nature of a fireplace anytime you’re using it to cook you’ll be generating significantly more light inside an entire room, light which will be easily visible as a cheery glow through the windows at night.

Of potentially more concern, a fireplace also generates considerable smoke, smoke which will go right up and out the chimney in quantity.

Outdoor

Outdoor cooking techniques and appliances are exactly that, those that are almost invariably used outdoors.

Unlike indoor options which might be rigged up for outdoor use, with few exceptions you never want to use these outdoor options inside a structure.

Although tempting in an effort to lower your profile, all of these options create massive emissions of carbon monoxide gas.

Carbon monoxide is deadly, and people die from subsequent poisoning every single year. Don’t make that mistake.

YouTube Video

Propane / Charcoal Grill

One of the best and most convenient outdoor cooking options is the one that you most probably already have.

Your backyard propane or charcoal grill is easy to use, portable and convenient, but one with a very high profile meaning it might be of limited use except during low-intensity and low-risk situations.

Nearby people can easily hear your grill as it pops and sizzles, and seemingly everyone in the county is going to smell it when you are cooking with it. Everyone knows what that distinctive backyard barbecue smell is, trust me.

All of these grills emit lots of smoke, and if used at night, the flare of open flames, particularly when you remove the lid, is highly visible to anyone within line of sight.

Unfortunately, there is not much you’ll be able to do to minimize any of these disadvantages.

If you’re in a pinch, consider using them to boil water for food preparation as described above in order to cut down on smoke somewhat, particularly if you have a propane grill.

YouTube Video

Camp Stove

A camp stove, particularly in the form of an ultra-lightweight portable burner with an accompanying fuel can, represents one outdoor cooking option that has some utility indoors because they are typically low emission.

Most produce an intense but barely visible flame, particularly when using certain fuel types, and they are extremely efficient for quickly heating small quantities of fuel and water.

They produce very little smoke, hardly any noise, and are easy to emplace or hide when required.

Although only suitable for preparing small, simple meals for one or two people at most in a reasonable amount of time, their sheer versatility makes them an attractive option for our purposes.

YouTube Video

Fire Pit / Camp Fire

A fire pit or open campfire, rather cook fire, outdoors has all of the versatility and advantages that a fireplace or wood stove does, only it leans even harder into their disadvantages.

Producing a tremendous amount of light and smoke that will be visible for miles, you should only use a fire pit or cook fire for the purpose if you have no other choice.

Don’t get me wrong, it can be done but you aren’t going to be hiding what you are doing.

YouTube Video

Dakota Fire Pit

Never say never. A Dakota fire pit, sometimes called just a Dakota fire, is one variation on an outdoor campfire or cook fire they can help you keep a surprisingly low profile if you must cook outside over open flames.

Essentially a recessed, open pit dog in soft ground and fed from another nearby hole connected to it by a tunnel, think of it as a low-tech jet stove and you are getting pretty close.

Aside from keeping the open flames mostly below ground level, the oxygen supply that feeds the fire will help it burn hotter, meaning that you get more bang for your buck out of any fuel you feed it but also helping to minimize smoke because of hotter combustion temperatures and reduced soot.

This is an invaluable technique for all preppers, but particularly for those who want to reduce their profile if forced to cook outdoors.

A thorough overview and walkthrough are beyond the confines of this article, but we have several good ones that can tell you more right here on Modern Survival Online.

YouTube Video

Solar Oven

Solar ovens are one of the very best low-profile outdoor cooking options. Using nothing more than that copious energy of the sun, they can cook food nearly as well as an electric oven, doing everything from roasting whole cuts of meat to baking bread.

All you’ll need to do is position the thing properly in direct sunlight while the sun is out. That, and keep an eye on your food because it can still burn!

They don’t produce any smoke, they don’t make noise, and they don’t create any secondary noise from a power supply.

However, the aroma of cooking food might still be an issue, and obviously, you can’t get any cooking done when the sun isn’t out.

This will necessitate you to handle any cooking during the daytime which may or may not be a problem for you depending on your specific circumstances.

Minimize Your Presence, Even When Cooking

It is no exaggeration to say that cooking carelessly in the aftermath of a disaster situation might get you, your loved ones, and anyone else in your group into an unwanted conflict.

By learning to maximize OPSEC and implement correct procedures when cooking you can greatly reduce your profile and hopefully avoid negative outcomes as a consequence.


via Modern Survival Online https://ift.tt/aLygtB6

Friday, August 19, 2022

Can Mud Repel Mosquitoes and Other Bugs?

I don’t think there is anyone alive who has spent any amount of time outdoors who hasn’t been plagued by mosquitoes and other biting critters.

person walking in mud

Whether they are trying to suck your blood for dinner or are just biting you out of some misguided instinct of self-defense, it is always aggravating, sometimes painful, and potentially life-threatening in the form of germs and parasites.

There are all sorts of bug repellents on the market, but some folks look for more traditional, homeopathic methods. How about mud? Can mud repel mosquitoes or other bugs?

No, mud is not a good mosquito or bug repellent. Mud will dry out, crack and fall off too quickly for it to afford you meaningful defense, and mosquitoes can easily home in on any area where the mud is already thin to bite.

If you are truly desperate, you might resort to slathering mud all over yourself, but it will at best only give you temporary relief. You’ve got much better options for keeping biting bugs off of you.

Keep reading, and we will explain why mud is not a good choice and also show you some worthwhile alternatives when the skeeters are starting to nibble.

Mud isn’t a Worthwhile Repellent

As a bug blocker, mud isn’t great. It won’t stick to your skin for long and once it starts to dry, which won’t take long in most cases, it will quickly crack and flake off. In the meantime, any exposed areas of skin are still vulnerable to mosquito bites.

Mud is also, obviously, messy. Applying mud to your skin in an even and efficient way can be a challenge, and even if you manage to do it without making too much of a mess, (you won’t) there is the obvious problem of cleaning up to remove it once it dries.

At best, it provides only temporary relief when applied thick and fresh where it can physically block or trap insects that contact it.

Mosquitoes Can Easily Pierce Mud

The most persistent and perennial biting insect is the humble mosquito. Though you might think them a mere annoyance if you are a burly, snake-eating mountain man type, you shouldn’t underestimate the little demons: mosquitoes are the deadliest animals on Earth.

They transmit diseases like malaria that kill a million people every year, and even if they don’t give you malaria, Zika virus or some other horrifying infection, their bites can be itchy, painful, and prone to infection.

But back on track, mud is not going to stop a mosquito from biting you. The female mosquitoes that bite us need blood to nourish their eggs, and they are capable of piercing all but the thickest layer of mud to get at the skin beneath.

The implement responsible for getting at your blood is the mosquito’s proboscis, a long and sharp appendage that they use to pierce your skin and find a capillary to drink from.

A mosquito can pierce through most anything that isn’t metal or some other tough, solid material.

Hair, fur, and clothing won’t stop it, and even thin clothes are no match for this finest of needles. Thin and easily defeated mud sure won’t.

An obvious countermeasure, as mentioned, might be to truly pancake a layer of mud on yourself to stop the mosquitoes from reaching you at all.

But you can depend on the mosquitoes searching and homing in on any gap or thin spot to get at your delicious blood.

There have been some reports of people using mud as a defense against mosquitoes with some success, but this is more likely because the mud was used in conjunction with other repellents or countermeasures rather than as a standalone measure.

Mud Probably Won’t Protect You from Other Bugs

Putting aside mosquito concerns for a minute, might mud save you from bites or stings from other insects? Possibly, but it is unlikely and less likely as time goes on.

As with mosquitoes, wasps, bees, hornets, fire ants and other insects that might sting can pierce through mud just as easily as their mosquito cousins.

Some of these insects also fly, making it easier for them to find any exposed areas of skin.

And what about crawling insects like ticks and chiggers? They will have no problem finding any thin or dry spots in the mud to attach themselves to your skin.

Mud Can Transmit Disease and Aggravate Wounds

Let’s look at something besides a purely mechanical consideration of the problem for a moment.

Is mud really something you want to be covering yourself in? Mud can transmit disease, both through the skin and if ingested.

It can also aggravate wounds, leading to infection. Mud, like all soil, can easily harbor some pretty hideous bacterial, viral and parasitic threats.

For example, leptospirosis bacteria can be found in mud and water. This bacterium causes a nasty disease that can lead to kidney failure, meningitis, and death.

The good news is that it is relatively rare in developed countries, so unless you are planning on rolling around in some third-world sludge, you probably don’t have much to worry about from this one.

Botulism is another one you better be damn worried about, as is tetanus. There are other diseases that can be transmitted by mud, but they tend to be more of a concern if the mud has been contaminated by animal or human waste.

If you have an open wound or abrasion, it is best not to cover it in mud. The same goes for cuts, scratches, and any other break in the skin.

And while we are on the subject of skin, if you have any sort of rash, eczema, or other dermatological condition, it is best not to put mud on it.

What Should You Try Instead of Mud?

If you are having problems with biting insects, and mosquitoes in particular, you have better options than slathering your body with nasty mud. Consider the following tips and tricks and you can keep your skin unpunctured.

Stay Away from Mosquito Hotspots

By far, the single best thing you can do is to try and avoid areas where mosquitoes are likely to be.

Mosquitoes can always be found in tremendous numbers near water and in wooded areas or even in your backyard if suitable spawning conditions and weather exist.

If you are planning on spending time outdoors, try to avoid these places if possible and always avoid camping near them!

YouTube Video

Use Bug Spray

You might not like it, you certainly hate the smell and you are right to be worried about chemicals but nothing works better at repelling mosquitoes than a good bug spray.

Be sure to look for a spray that contains DEET as this is the most effective mosquito repellent available.

Wear a Mosquito Veil or Use Mosquito Netting

If you absolutely have to be in an area where mosquitoes are present, try to protect yourself as much as possible.

Wearing a mosquito veil or using mosquito netting is an effective way to keep them away from your face and neck and out of your tent or enclosure.

Wear Long Sleeves and Pants

This is really only an option if you are going to be outside in an area where mosquitoes are likely to be and the weather permits.

Wearing long pants and sleeves will help to keep mosquitoes from having direct access to your skin.

As we learned, it is possible for them to bite you straight through some thinner fabrics, but most clothes offer good protection.

Wear Light Colored Clothes

Mosquitoes are attracted to darker colors for some reason; call it a quirk of biology. So if you want to avoid them, try to wear light-colored clothes.

This is not totally foolproof as they will still home in on you via your carbon dioxide emissions and body heat, but it will help a bit, especially in conjunction with other techniques.

Use a Strong Draft or Fan

Mosquitoes are not strong fliers and even a gentle wind can make it difficult or entirely impossible for them to approach you.

If you have a fan handy, position it so that it blows directly on and past you whenever possible.

If you have a breeze to work with, set up your tent or chair facing into it. This will prevent the creation of a lee or dead zone that mosquitoes can exploit to get at you.

mud mosquitoes repellent pinterest


via Modern Survival Online https://ift.tt/8cOfWu9

Monday, August 15, 2022

10 Ways to Improve Your Bug Out Bag

Preppers spend an inordinate amount of time packing, customizing, and generally fussing over their bug-out bags.

green backpack with two water bottles in side pockets

This is understandable, as the bug-out bag is a central and crucially important prep in all kinds of scenarios.

Whether you are facing a calamitous natural disaster or a man-made catastrophe, your bug-out bag, bristling with precious gear and supplies, will be there to equip, arm, and sustain you.

Considering how much work goes into assembling and perfecting a BOB it is understandable that most people would leave well enough alone when they get it just right according to their needs and wants.

That being said, we should never allow ourselves to become convinced that anything cannot be improved upon.

This includes our precious BOB’s. A few ounces saved, a little additional capability or just creature comfort improvements all add up to making you more efficient when the rubber hits the road.

Your BOB was only “perfect” yesterday; today is a new day and that means new opportunities for improvement.

With a little know-how and a new point of view, you might discover a way to improve your pack beyond the typical. In this article we will share with you 10 methods for upgrading your trusty BOB.

1. Improve Belt, Straps, and Frame

This is a great upgrade for anybody, no matter what kind of BOB you have. Well, unless you have some itty bitty day pack-sized BOB in which case it probably is not a BOB at all.

Some of the most important components in your bug-out bag as a system are the parts that come into contact with your body, the ones that allow you to carry it and stabilize it.

Think of these as your interface with the pack; the straps, the belt, and the frame, if your pack has one.

If any of these systems are substantially defective in any way your user experience is going to suffer.

That means you will suffer and you’ll expend more energy to carry the same load over the same distance, under the same conditions.

A belt that slips around or is insecure, thin, biting, or flimsy straps, and a weak frame that digs painfully into your shoulder blades are not going to do you any favors.

Don’t skip on upgrading any of these components assuming you really like the pack itself and it does the job otherwise.

Many modern packs are semi-modular in nature and you can easily change out the belts or frames and potentially even the straps.

Some components are even designed in such a way that you can upgrade the foam padding in these parts according to your desires.

Believe me when I say that any quibbling aggravation could potentially turn into a murderous annoyance once you have carried it long enough, so don’t skimp on these upgrades.

YouTube Video

2. Waterproof It

You’ll hear plenty of talk out of preppers about how they are ready to bug-out come rain or shine, thick or thin, no matter the conditions.

They might talk tough, and they may even physically be up to the challenge, but is their gear up to the task?

Take it from me; it will never fail that when it is time to get a move on for real the weather will always turn against you.

Heck, it’ll usually do that even when you’re out for a recreational hike or camping excursion! Hauling a fully loaded BOB is trial enough but it can be made exponentially worse when it is raining hard and it starts taking on water.

In fact, you should assume that your BOB is going to be soaking wet unless you do something about it yourself.

There are very few pack manufacturers whose claims of water resistance or outright waterproofness can be taken at face value.

Much of the time when you buy a pack and it makes a bold claim of waterproofness it really means “sheds a little water”.

Fine, if you spill your artisanal Fiji water on it- it will probably handle it just fine. But when it is raining pitchforks you’ll need more substantial protection.

The implications are serious. The nylon that most packs are made of is fairly heavy even though it feels airy light when empty.

It will also absorb water, making it drastically heavier because water itself is quite dense. Worse, all of your precious survival gear you have packed within the BOB will be placed in substantial jeopardy.

Electronics may be destroyed, clothing will be soaked, paper made soggy, and potentially useless.

Any metal components could begin to rust, and rust will ruin them. This of course will add even more weight as your possessions absorb water.

Forget that! You need to waterproof your pack. How you do this is up to you. It could be something as time-tested and reliable as a deployable rainfly or rain cover that completely encloses it.

It might be an improvised solution like a heavy-duty can liner and a little duct tape. It might even call for a little bit of old-fashioned know-how like a coating of beeswax, just like Grandpa used to use, or a modern rain repellent that you reapply periodically.

Whatever solution you rely on make sure you test it and inspect it for performance.

3. Add Redundancy

We have all heard the clichéd adage that two is one and one is none. This is a pithy reminder that anything we need, anything we are counting on, will surely become lost, broken, or worn out during our travels and travails.

Anything important that is worth carrying is important enough to warrant carrying a secondary and perhaps even a tertiary.

As I said, it is definitely a cliché but the thing about clichés is that they became that way usually because they have a core of truth to them.

You need to take stock of your most essential items contained in your BOB loadout and identify the ones that you really, really could not do without under your anticipated circumstances.

Then you need to provide for carrying some backup functionality one way or another.

Popular inclusions in this category could be prepping standbys like fire starting gear, navigational equipment, water filtration gear, shelter supplies, etc.

But do note that I said functionality, specifically, and not necessarily a clone of the item in question.

This is where you can really flex your creative muscles to cover your bases while minimizing your encumbrance.

If you rely on a GPS for navigation you can save weight and space by carrying a backup set of maps and a field compass while knowing how to use both of them.

A water filter is one way to purify water for drinking, but another way to purify it could rely on treating them with steritabs.

Consider this line of thinking in a different context. A .22 rifle makes for a great game-getting hunting weapon and is also formidable on defense.

Carrying an entire secondary long gun will be extremely cumbersome, but you might be well served with a handgun in the same caliber (to share ammo while maintaining capability) or even something like a slingshot which is still a powerful ranged weapon.

With a little forethought, careful planning, and a dash of creativity you can add redundancy to serve as a hedge against loss or breakage while minimizing your equipment burden.

YouTube Video

4. Add Onboard Water

Water is absolutely essential to survival. You don’t need me to tell you that but, by golly, I said it anyway.

You should be carrying a quantity of drinking water with your BOB ready to quaff, and this is despite how heavy water is and how hard it is to carry. That is how important it is.

Filtration gear, sterilization chemicals, and all that associated accouterment are fine, but when you need water to drink you need it right now not after a prolonged stop involving multiple steps just to make it safe.

Many of us rely on a variety of hard containers to hold our water. The ubiquitous and ever-present Nalgene is overwhelmingly popular as are a variety of hard canteens and even soft or flexible pouches.

But no matter what kind of vessel you use for holding your water and how you choose to stow it on your pack they almost invariably require you to stop, unlimber the pack, pull out your container and then drink before stowing it and carrying on. That’s fine, but there is a better way.

You should consider adding a hydration bladder to your pack even if it is a small one. The ability to drink on the move without slowing down and without taking off your pack is a huge boost to efficiency and will save energy.

The average BOB is a hefty piece of gear, and taking it off and setting it down only to pick it up and put it on again is definitely going to burn some calories when you do that a dozen or more times over the course of movement.

What if you only had to stop to refill your bladder a couple of times over that same length of time? Those are some significant energy savings!

While it is true that these bladders are notorious for getting grungy and skunky if not kept scrupulously clean and sometimes installation can be a pain they are worth every penny and all the cussing.

I used to be a die-hard when it came to carrying hard water bottles but eventually got fed up and supplemented my bottles with a small 2-quart hydration bladder. I have never looked back!

5. Keep It Quiet

This is one of my favorite upgrades that is usually overlooked by most preppers. Even better, it is one that will cost you no money, or only pennies, and nothing but some of your time, diligence, and effort.

I’m talking about keeping your bug-out bag quiet, and I mean silencing it. Does that make me sound crazy? Far from it, and I’m not talking about doing it just so you can hear your favorite birds singing in the distance.

In the context of a survival situation keeping your bug-out bag and all the rest of your gear quiet is an important part of maintaining noise discipline.

Noise discipline is critical because it affords you better situational awareness of what is happening in the environment around you and it also makes you much harder to detect by anyone or anything that might be listening.

Not for nothing, this is another quality-of-life improvement because now you won’t be listening to a clanking, jangling racket day in and day out.

To accomplish this, you’ll need to get really, really serious about packing your gear with a fanaticism that borders on the insane. There is no noise, no sound, and no friction that is too small to warrant your attention.

If your matches are softly clattering together inside their box you want to address it. The mild clang of your rifle magazines tapping against a plastic hard case will need to be muffled.

Anything and everything that can be silenced, every sound that can be deadened should be attacked with fervor.

If you do your job right you should only hear the squeak and rasp of the material your pack is made from rubbing against your clothing and itself. If you can you should even get rid of that!

Yes, this process is a little tedious and further complicated by the fact you’ll need to commit to memory precisely how you need to pack your chosen load out to accomplish this.

But I can promise you this is an upgrade that anyone can perform and furthermore everybody should perform.

But once you take care of silencing your pack and experience gliding through the trail and across the fields like a veritable ghost there will be no going back.

YouTube Video

6. Cut Weight

For anybody who carries a pack for any purpose and for any length of time, this is the mandate absolute.

Shave the weight, cut the pounds, and lighten up by any means possible wherever achievable. This is one of the prime mistakes that beginning backpackers and preppers alike commit.

It is so easy to get sucked into worrying about choosing and packing the right gear to cover every contingency that your weight budget is given nary a thought.

An ounce here, a pound there, and pretty soon you are hauling a mammoth pack that will make for a backbreaking journey and is prone to blowing out.

There are three basic approaches to cutting weight. The first involves the choice of the pack itself. The second involves the choice of gear and the third is choosing what gear to take.

All approaches are viable and you should utilize all of them that you can in order to yield a far lighter pack and load.

Considering the pack itself you must look carefully at its configuration and also what it is made out of.

A modern, streamlined, and high-tech hiking backpack might only weigh a few feathery pounds and add almost nothing to your overall load.

An old-fashioned, heavy-duty military pack or tactical bag made out of dense ballistic nylon will have a fair bit of heft to it even when empty.

It might not sound like much, but believe me, that difference of just a few pounds will make a big difference at the end of the day.

If possible, you should consider upgrading your pack to the lightest model available that will still do the job you want it to do.

Regarding gear, the weight of any given item should be factored into your decision-making matrix prior to purchasing.

Gear that is extremely heavy might not be worth taking no matter how good it’s other quantities if it eats up too much of your margin towards your weight budget.

Gear that is not as good, but reasonably reliable and weighs half as much could be a better choice in the end.

Lastly, choosing what gear to take along, what backups are truly essential, and what contingencies you should be prepared for is an agonizing but mandatory process.

Nonetheless, it is one you must perform to avoid hauling everything plus the kitchen sink and the tools needed to install the sink.

Be ruthless, be efficient, and pretty soon you will have a pack that is lean if not light and you’ll be glad you took the time when out on the trail.

7. Integrate Electronics

One thing’s for certain, times and attitudes are changing. It wasn’t but a few short years ago that many of the most old-school traditionalist preppers still held sway and preached a doctrine of strict avoidance when it came to electronics as part of your survival plans.

The notion was that electronics, for all their advantages, were too unreliable, too fussy, too fragile, and too dependent upon the grid to be dependent for serious survival purposes.

They were only ever a perk or nicety, if that, and these old grognards were certain that the good times would never last when the chips were down.

But, that mindset is rightly going the way of the dinosaur. Our modern electronics, especially ones designed for outdoor use or survival purposes, are die-hard, trustworthy, and extremely efficient, capabilities such that we cannot ignore them.

Even better, we have plenty of our own power generation solutions that are entirely suitable for off-grid use and inclusion in our loadout as a standard part of our kit. This has removed the last excuse when it comes to electronics and a survival context.

You would be wise if your bug-out bag reflected this new paradigm. Your BOB should work with your electronics, not against them.

Your chosen pack should support and protect your electronics while making on-the-go charging and, more importantly, on-the-go access easy.

This could be something as simple as waterproof, shockproof hard cases for devices, batteries, and power banks to specific pouches and cable routing solutions for user-friendliness.

But with this new capability comes a few additional challenges, namely the fact that the bad guys or just interested parties can potentially track the signals emitted by your devices.

That’s a bad day for sure, but the solution is simple: by installing a “faraday” bag (signals blocking pouch) into your BOB you can be assured that no unwanted and unnoticed signals will be leaking out to whoever might be listening.

8. Add On-the-Move Solar

Speaking of electronics and their universally attendant off-grid charging systems, you should consider setting up the exterior of your BOB to attach a solar panel that can grab a little sunlight when you are on the move, even if it isn’t as efficient as properly placing it for maximum gain.

The ideal, prescribed way to use a solar cell is to carefully position it so it is square and true directly facing the sun, and then you move it so that it maintains that orientation as the sun tracks across the sky.

On a good day, and with proper babysitting, you can gobble up a surprising amount of power in a comparatively short period of time. But in general the worse your alignment the less power your solar cells generate.

Despite this, some power gained during a time when you would otherwise not be creating any is always better than no power gained during that time. For this reason you should consider this upgrade.

Using nothing more than some tie downs, paracord, and perhaps a nearly weightless piece of foam board it is possible to attach your solar panel to the exterior of your BOB while routing the cable to a separate power bank, if required, stashed safely on the inside.

It is true that your movements as well as any intervening terrain will have an effect on this charging setup as normal, but this handy trick can significantly shorten the amount of time needed to fully recharge your sales, or even keep your electronics going when they would otherwise be dead.

9. Improve External Storage

One of my biggest prepping pet peeves concerning BOB’s is seeing an abundance of gear and extraneous pouches strapped to the outside of a pack banging and clanking, looking for all the world like a cancerous growth made from the dregs of an army surplus catalog.

“Gypsy chic” may be a thing in certain circles, but we want to keep that out of prepping that’s for sure! Samwise Gamgee, you are not.

I despise this so much because there is hardly anything you can do to make your pack less efficient and more cumbersome, quicker, than this.

It doesn’t help that most backpacks are set up to attach pouches and external gear to the front (their front), moving the center of gravity in the direction that at least needs to go, which is away from your back.

This makes any added weight feel geometrically heavier and also increases your profile in such a way that you are more likely to snag it or stumble and fall.

On the other hand, there is some prime and juicy real estate on the exterior of our pack that we should make use of.

Specifically, any gear that we don’t want in our pockets but still need to access regularly deserves a home on your backpack, on the outside, just not where you are thinking.

The shoulder straps and waist belt are great places to put pouches that can hold a small water bottle, compass, maps, small tools, and so forth.

The top of the pack too is a great location for a small pouch containing a variety of “admin” equipment, things that you need routinely but don’t want to go digging into the pack to access.

Be smart about this and keep all pouches and all exterior equipment as close to your body as possible to maintain your center of gravity.

Done intelligently you can free up space in your pockets and get your pack working even better for you as a total load carriage system.

10. Go Modular

This is another great BOB upgrade that does not get as much air time as it should. Modularizing your BOB is not something you do to the pack itself but rather the equipment that it carries.

This technique, or upgrade, relies on packing your gear into discrete units or batches of similar intent that you then store in dedicated pouches or interior bags ready to be withdrawn all at once.

This greatly eases logistics at the cost of a little internal volume and minimal extra weight.

For instance, all of your medical gear could be kept together in a specific pouch as could your cutlery or mess kits, firearms maintenance kit, and fire-starting kit.

If you rely on quick or improvised shelters say using a tarp, emergency blanket, inflatable sleeping pad, and some twine or paracord that could all be bundled together.

Tools are another category that is ripe for inclusion into a role or tool bag so they stay together.

The sky is the limit when it comes to modularizing your load, and everyone has a slightly different approach.

Some go with item categorization like I do whereas other people batch their things according to situational use, for instance small “boo-boo” or incidental injury medical supplies in a small kit while major trauma supplies are held in another.

If this sounds like a waste of time, space, and weight because you’ve never had a problem with the way you traditionally pack your BOB, I beg you to give it a chance and see if it doesn’t drastically increase your ease of access.

Conclusion

Your BOB might be great, maybe even the best it has ever been, but it could still potentially be better.

Considering how important the bug-out bag is to most survival plans no effort and no investment should be spared in improving your bug-out bag capabilities.

Anything you can do to make it lighter, make it more comfortable, and make it more user-friendly and efficient is time well spent, indeed.

bug out bag improvements


via Modern Survival Online https://ift.tt/l6irNf0