Sunday, June 26, 2022

15 Must-Have Truck EDC Items

One of the most important tools in a prepper’s arsenal is their vehicle.

truck drifting

Serving as a conveyance for evacuation or bugging out, a prime mover for mass amounts of cargo or a taxi to get you and your group where you are needed, when you are needed, it is difficult to overstate the flexibility and freedom afforded to people who have their own ride.

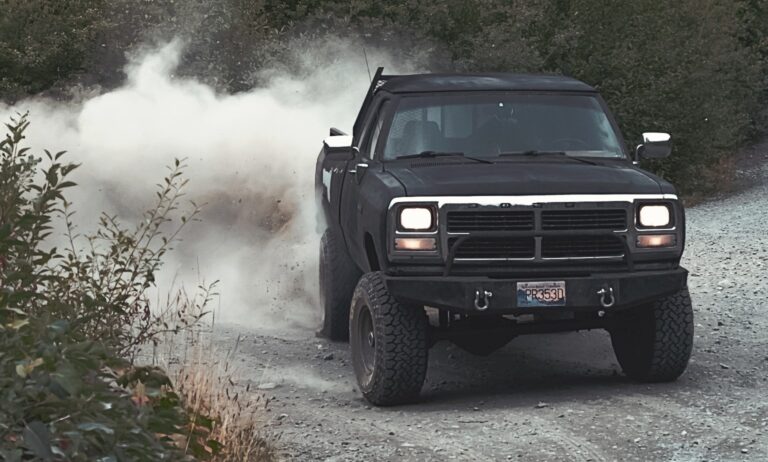
And out of all the many vehicles you can own, I would argue that there are none so capable and so versatile in so many domains as the common pickup truck.

When it comes to towing or just hauling massive, bulky or heavy cargo, nothing beats a pickup truck among typical consumer vehicles. Most even have some off-road capability in the bargain for maximum mobility over any terrain.

For those of us who drive pickups, it is possible to turn them into a mobile store room capable of fulfilling all of your prepping objectives with the inclusion of some smart supplies, gear, and tools.

In this article, we will cover a list of 15 must-have items for vehicle everyday carry specifically for trucks.

YouTube Video

Your Truck is Your Mobile Base of Operations

Your daily driver truck or specialized, purpose-built bug-out rig can serve as a mobile base of operations and Supply point no matter what kind of disaster you are facing.

Trucks have the carrying capacity and all-around capability the handle pretty much everything.

if you get into an accident or come upon the scene of another accident where you might render aid, your truck can carry the needed recovery tools and supplies to get a vehicle unstuck, or help you conduct repairs well enough to get going down the road again.

Your truck can also serve as a mass people hauler in the event that evacuations are required so long as you drive safely and at low speed.

And your truck can do so much more, from providing you with additional supplies to help you sustain and survive, to functioning as a towing vehicle for another vehicle or a trailer that is similarly equipped.

Cars may be fine and SUVs certainly have their own advantages, but nothing is as capable or as comfortable in a variety of hardcore situations as a pickup truck.

By the way, when you are considering the list below keep in mind that these items represent ones that I have found to be perennially useful in pretty much every environment and in every setting.

Even so, it cannot account for all the many variations and people’s lifestyles and objectives, so if you find that any of them are flat out not a good fit for your needs, delete them!

15 Truck EDC Items to Have
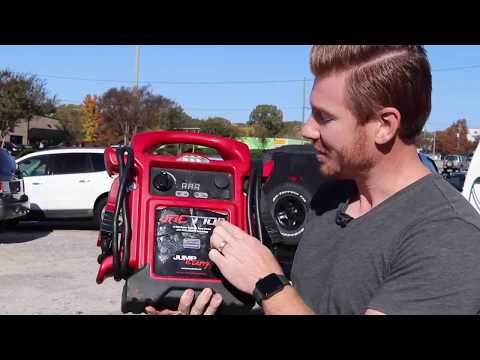
YouTube Video

Jumper Box

A jumper box at its simplest is basically a battery with an attached, short pair of leads that will allow you to jumpstart your own truck or someone else’s vehicle without need of attaching jumper cables to each vehicle.

These are just the ticket for being completely self-sufficient wherever you happen to be.

A dead or dying battery is an extremely common occurrence when it comes to component failure, and it will still immobilize your truck like anything else.

To get even more capability out of this inclusion, look for a model that features a built-in air compressor, wide area work light and even charging ports for cell phones, power banks and other mobile devices.

This can allow your jumper box to serve as your full-time power hub when on the road.

One word of advice, however. Not all these devices are created equal, and many of them, sadly, are pretty low quality and will not hold a charge at all for very long.

Having to babysit what should be a standby piece of emergency equipment is a pain in the butt and will increase your workload, so take the time to research which brands have the capacity and the longevity to free you from the constant need to put it in your truck and take it out.
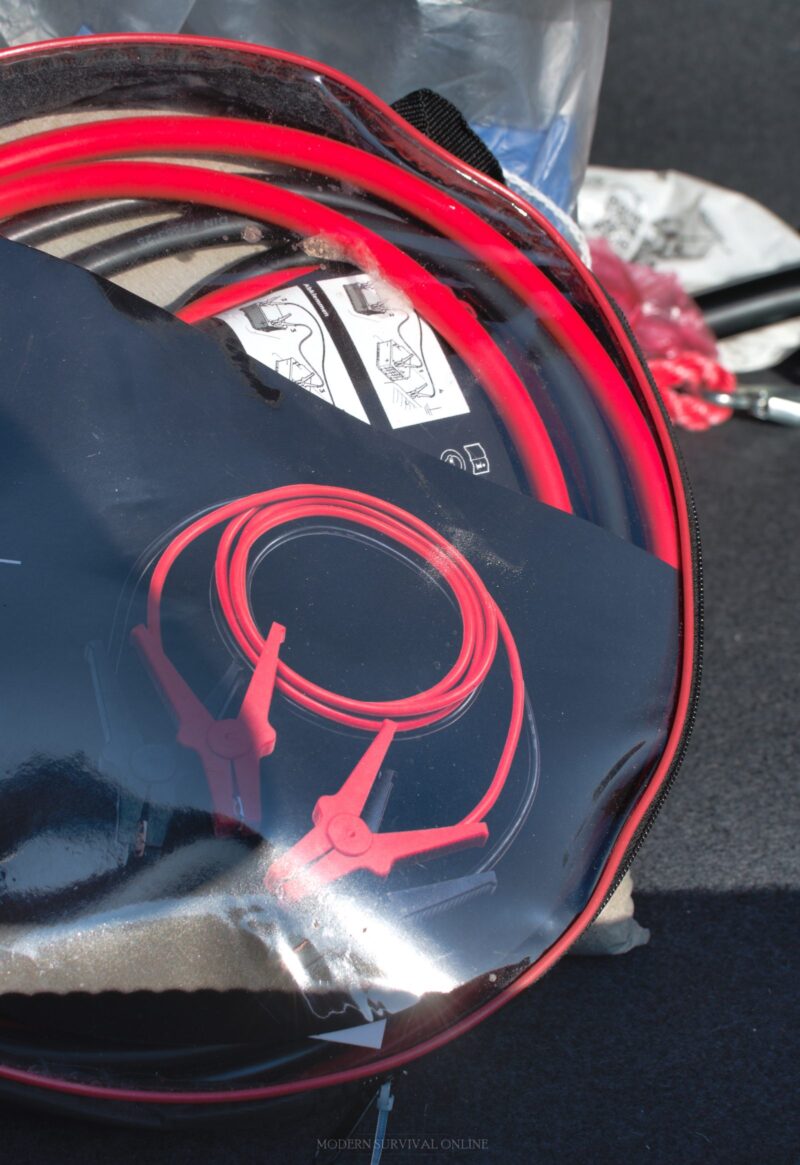
jumper cables in car trunk

Jumper Cables

Just because you carry a jump box that does not mean you should omit jumper cables.

This is a universally useful contingency tool that, surprisingly, quite a few people still do not habitually carry and that is a shame especially if they are preppers.

Jumper cables will do the job in cases where a jump box is either out of power or underpowered for the task, and this is an item that every single driver should know how to use safely.

But when it comes to trucks, which typically make use of bigger engines and correspondingly larger batteries than typical sedans and other passenger cars, you’ll need correspondingly tough jumper cables.

Your jumper cables should be of a heavier gauge than normal with all copper clamps and of extended length.

The larger engine bays and ride height of trucks can make getting another vehicle close enough to effectively attach standard jumper cables challenging.

this is one of those tools that, if you are lucky, you will not need very often but even so make sure you check up on your cables regularly.

Rubber coatings can crack and split and copper can oxidize, hampering the efficiency of your cables or even creating an unsafe condition. Take care of your truck EDC tools and they will take care of you.
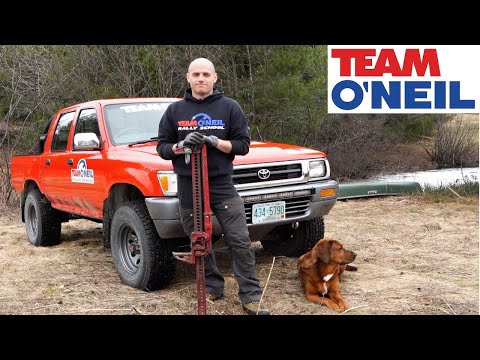
YouTube Video

Farm Jack

The farm jack, also known as a high-lift jack, is that long, slender, skeletonized apparatus that you will commonly see bolted to the hood or tailgate of dedicated off-road vehicles and lifted pickup trucks everywhere.

As you might expect, these jacks are capable of lifting a load much higher than a typical floor jack or bottle jack often included in consumer vehicles and are necessary for safely and effectively lifting tall pickup trucks and other vehicles that ride on high suspensions.

Beyond these utilitarian tasks, the farm jack is a wonderfully powerful multi-purpose tool that no prepper should go without.

With a little bit of skill, you can also use a farm jack as a powerful spreader, akin to manually operated jaws of life, a come-along and more.

However, you must be cautious when using this potent tool because they are notoriously fickle and can easily injure you if the jack or the load that it is hoisting slips.

The long, ratcheting handle can recoil under certain conditions and severely injure you, and everyone who knows someone that routinely uses a jack like this has probably heard a horror story of just such an occurrence. Treat this tool with respect, and it will treat you well!
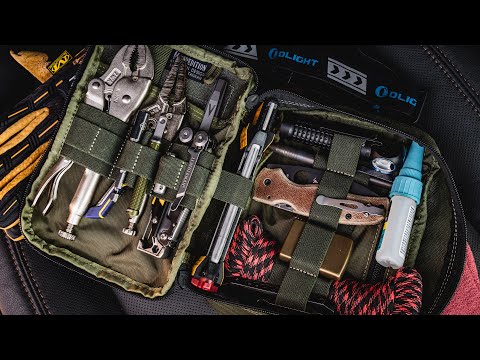
YouTube Video

Emergency Tool Kit

No truck should be without its own dedicated emergency tool kit, consisting of hand tools and supplies needed to correct common automotive breakdowns and mishaps.

A mechanic’s complement of ratchets, wrenches, pliers, sockets and other common automotive tools is a necessity, as is a sturdy, two-sided mallet for loosening or adjusting recalcitrant parts.

This kit should also include a variety of lubricants and fluids that the vehicle requires for operation and you may require for getting the job done.

Penetrating lubricant, motor oil, a bottle of coolant, brake fluid and some spare parts like bulbs, belts and fuses can turn what would be a show stopping mishap into a minor inconvenience.

Also, don’t forget to include the ever useful roll of duct tape. Duct tape can hold smashed body work together, reinforce cracked windshields and seal up holes that would otherwise let in water.

Don’t underestimate this stuff, and make sure you spring for the good kind that has a strong fabric backing and powerful adhesive that is perfect for automotive use.
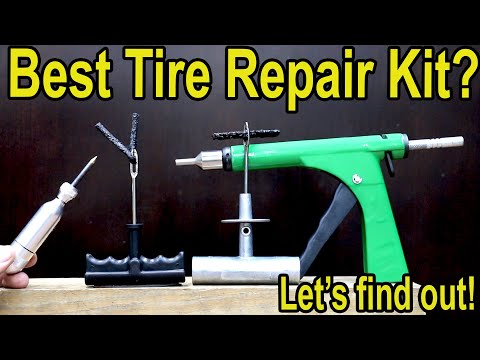
YouTube Video

Tire Repair Kit

Second, only to a dead battery, a flat tire is the most likely component failure you’ll experience in any vehicle, even one so strong and capable as your pickup truck.

Although most pickup trucks carry a full-size spare tire, and this is wise, sometimes you might be in a situation where you must deal with more than one flat or a subsequent flat that renders your truck down a tire no matter what.

Most tire punctures thankfully go through the tread, and typically occur from some long and slender sharp object, a screw, nail, strong piece of wire and so on.

It is possible to effectively repair this type of puncture in the field much of the time so long as the tire has useful service life remaining. A tire repair kit will help you take care of business.

A tire repair kit consists of tools designed to help you remove the hazard, clean up the edges of the hole and then insert and set a sticky, resinous plug that can then be trimmed off flush with the surface of the tread, closing the hole and hopefully sealing it so that it may be reinflated.

Note that most tire repair kits are in no way suitable for repairing major holes or any puncture that goes through the sidewall of the tire, though certain specialized kits for overlanding or off-roading might be capable of such a repair in the field.

YouTube Video

Tow Chain or Tow Straps

Let’s face it, when you use a tough vehicle the way that God and the designer intended you are eventually going to come into a situation where you get stuck.

Maybe it was an ill advised off-road maneuver or maybe your vehicle just wasn’t up to the task of crossing some truly treacherous terrain, or perhaps still you simply skid off of the road due to slick conditions or an emergency maneuver to avoid an obstacle.

Whatever the case, your truck is now stuck and must be pulled free.

This is where another vehicle, or your vehicle if you are the Good Samaritan, can help to pull another out of its predicament by using appropriately rated chains or towing straps.

So long as a vehicle has an appropriate hardpoint to connect to, either will do the job.

It should be noted that both have advantages and disadvantages, but tow straps are far lighter, significantly more compact and much safer in use compared to chains.

Whichever one you choose, make sure you learn how to use them and the proper procedure for self-recovery or recovering another truck.
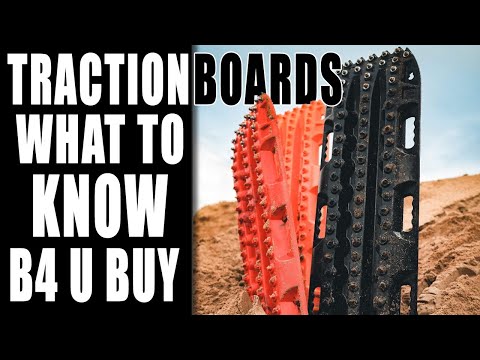
YouTube Video

Traction Boards

Traction boards are yet another invaluable vehicle recovery tool, and one of the best and overall most effective for self-recovery.

If your truck should bog down and mud, sand or snow you can use traction boards to increase the overall patch of contact of your tires on the surface below, and many have an aggressive, studded texture to help the tire grip them.

In use, these could hardly be easier or quicker to employ as all one has to do is dig out a little bit of terrain ahead of the tire or behind them before wedging the leading edge of the traction board beneath the tire and then gently rolling the vehicle and whichever direction is appropriate for extrication.

In use, this might result in an inchworm type movement as the driver or someone assisting might need to continually relay the road using the traction boards, but they are generally sure and simple in use.

YouTube Video

Tarps

No truck loadout can be considered complete without a couple of heavy duty tarps on board.

You can use tarps as intended to cover any exposed load carried in the bed, or create a shelter for yourself in the bed when parked, but tarps are also an invaluable, multi-purpose survival tool that any prepper would be glad to have on hand no matter the situation.

You can use tarps to create a shelter, a reflector for a fire, as a ground cover windbreak, rain catcher and more.

In order to stand up to such heavy duty use, particularly when covering a load in the bed of the truck and moving at highway speed, the tarp must have heavy duty stitching and equally heavy duty grommets otherwise they will tear loose from the massive forces exerted against them.

This means you might have to spend significantly more for a suitable set of tarps then you would be expecting based on the average price of the light duty coverings intended to keep leaves and snow off of your riding lawn mower, but it is a price that is well worth paying.
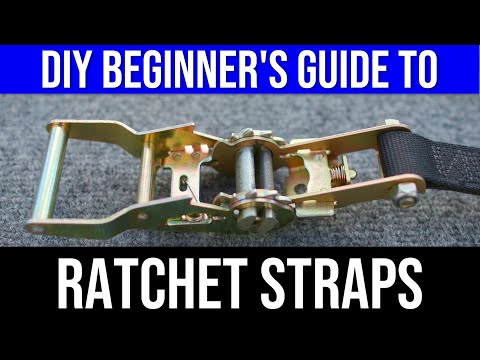
YouTube Video

Ratchet Straps

Ratcheting straps are a ubiquitous piece of gear for securing cargo in the bed of a truck.

Consisting of a length of flat wedding that is routed through a levered, ratcheting assembly, these are far easier and quicker to use than rope or other cordage except in cases where one is very skilled with the application of hitches and knots.

To use a ratchet strap, they are typically routed over or around the cargo in such a way that it is held snugly in place against the floor or sides of the truck bed before being secured to an anchor point therein.

The slack is taken out of the strap and once snug further ratcheted down using the ratchet assembly. This will exert considerable force and tension on the load, hopefully keeping it in place.

This is truly one tool that no truck owner can go without, and you will use these constantly when hauling anything of consequence in your truck bed.

YouTube Video

Road Flares

Signaling and marking equipment is vital for every vehicle, and especially vital for large trucks.

Being forced to pull over on the side of the road due to malfunction or accident, especially on the side of a busy road, means you and your truck will be at great risk of being struck by traffic, especially on your side of the road.

The single best thing you can do to prevent such a horrible incident is to utilize attention-getting signaling equipment, and the single best option among all the signaling supplies you could buy is traditional chemical road flares.

Highly reliable and the single most visible tool when it comes to roadside safety, these flares can be used in any environment and in all weather conditions, and their sputtering, vivid red flame cannot be missed except by the blind.

You’ll have to use a little bit of caution whenever employing these in dry conditions or wear an explosive hazard that might be present due to leaking fuel or other chemicals, but this is a small price to pay for keeping yourself or the site of an accident safe.

YouTube Video

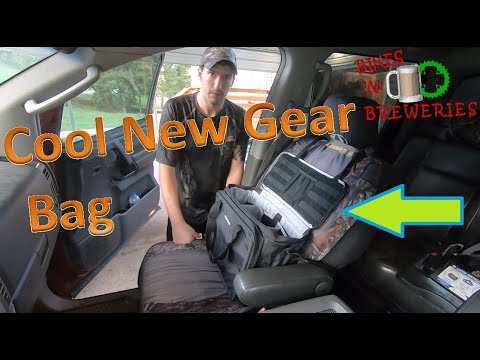
Seatback / Front Seat Organizer

Chances are the specialist items that you carry with you in your truck everyday will already have an appointed home, but for everything else, all the incidentals, the small things and the items that just seem to disappear into those voids beneath and beside the seats, you can use a seat back or front seat organizer.

Taking the form of a row of multi-purpose pouches slung on the back of either the front driver or passenger’s seat, or a seat top organizer that will secure to the front passenger seat, these are just the ticket for keeping all of those incidental items corralled and easily accessible.

Depending on your typical daily routine and how often you bring passengers along, say nothing of the trustworthiness and permissibility of your environment, you might opt for the easily removable and transportable front of the seat organizer instead of the seat back organizer which could generally advertise you as a prepared individual, a look you usually want to avoid in order to keep from attracting the wrong kind of attention.

YouTube Video

First-Aid Kit w/ Trauma Supplies

Unfortunately, hideous injuries and automobile accidents go together about as often as peanut butter and jelly.

Considering that when lives are on the line seconds count, is in your best interest to have a dedicated, thoughtfully packed first aid kit somewhere in the cabin, and make sure you’ve got the skills to use it be it on behalf of yourself, one of your loved ones or even a complete stranger if you choose to intervene.

Be honest, your first aid kit should have legitimate trauma supplies aboard. Items for treating burns, penetrating injuries, major lacerations and severe extremity hemorrhaging.

All of these injury types are quite common in automobile crashes so it makes perfect sense that you be prepared to go to work on them immediately as soon as the scene is safe.

Like many things, first aid supplies do have a shelf life and will wear out, they will also wear out quite quickly when exposed to the hostile environment of a truck interior, be it hot or cold by turns.

Make sure you check your supplies routinely, and get rid of anything that is obviously degraded or way past its use-by date.
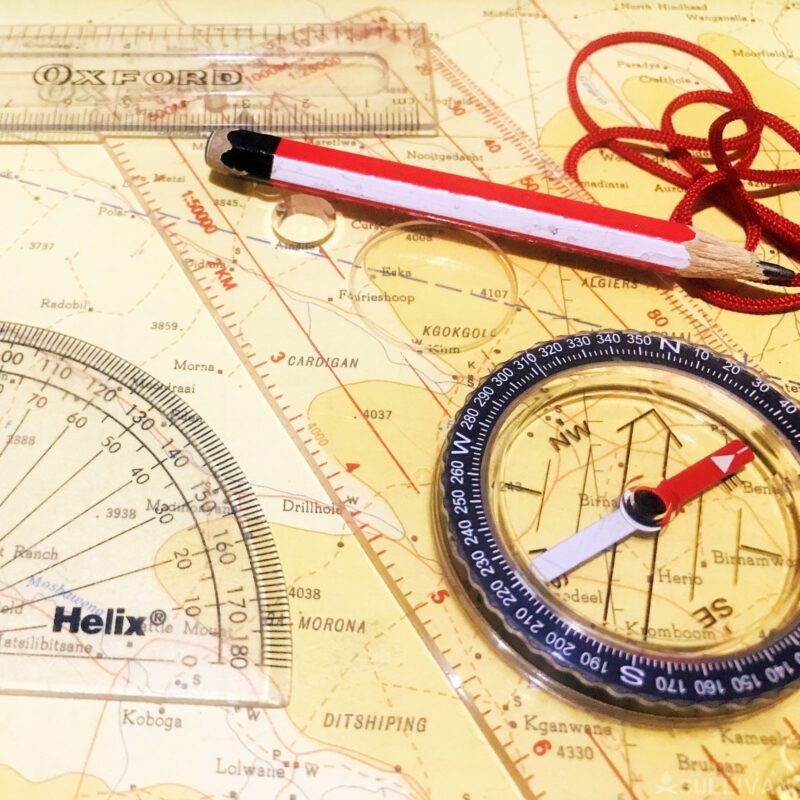
map compass protractor pencil, and string
a map and a compass, along with a protractor and a pencil, and a piece of red string

Maps and Compass

One of the most fundamental preparedness items for any prepper is the map and compass.

If we are being perfectly honest, we have all gotten a little bit lazy thanks to the preponderance of reliable, effective and accurate GPS systems built into our trucks and freely available I’m pretty much every smart device.

These devices are great, and I make use of them all the time, but that doesn’t mean that any of us should be completely inured to them.

When the networks go down, when the devices get damaged or when the power is off you’ll need an alternate method of navigation and this is where you can rely on the same thing that the rest of humanity has relied on for hundreds and hundreds of years.

Your set of maps should consist of a road atlas along with near area and regional geographic or topographical maps along with an accurate, quality field compass if you don’t make it a point to mount a vehicle compass on your dashboard.

YouTube Video

Go Bag

Your go-bag is essentially a smaller, leaner and lighter version of your big bug out bag that should be packed and ready standing by at your home.

A go-bag is sort of like a parachute that you keep in your truck, meaning it is kept loaded with all the supplies you would need to make your way home and is a form factor that lends itself to being quickly grabbed when you are bailing out of a vehicle that may literally be on fire.

This is not a kitchen sink type of pack. This is a bare-bones or essential type of preparedness kit.

It should have the minimum amount of supplies that cover your bases concerning the survival necessities, including shelter items, water, foods for quick energy and things of that nature.

whatever kind of go bag you choose must be regularly checked and rotated the same as any of your other emergency preparedness kits, and I like to make it a point to check my truck-bound go-bag whenever I check my full-size bug-out bag at home.
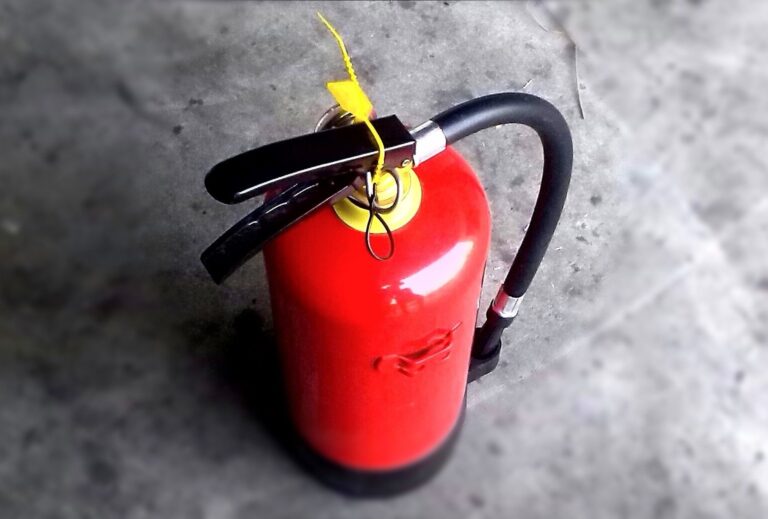
fire extinguisher

Fire Extinguisher

Automobile fires claim hundreds of lives and cause millions and millions of dollars in damage every single year, and the only chance you have of stopping such a fire is having an appropriately rated fire extinguisher on hand and within arm’s reach.

If you cannot act in seconds before the fire really brews up, your vehicle is likely going to be a total loss.

Most vehicular fire extinguishers are comparatively small and should be mounted in a bracket or some other sort of holder that will keep it available for rapid access but also hold it entirely secure in case of a crash or collision.

You definitely do not want the hardened container of a fire extinguisher flying around inside the cabin like a missile, as that will be a problem all its own!

Whichever one you select, make sure you get it tested periodically and serviced if required.

A fire in the engine bay or anywhere else on your vehicle demands an immediate and proper response if you want to have any chance of saving your truck and its contents.

YouTube Video

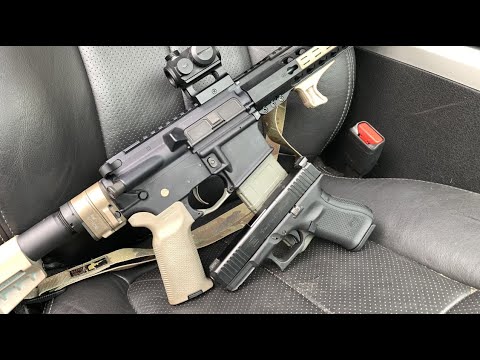
What About Keeping a Long Gun in the Truck?

A conspicuous omission that some readers will doubtlessly throw a penalty flag on is that of a long gun or a so-called truck gun.

While I admire the notion that a prepper would always want to be prepared with a more capable firearm should it be required, the reality is that keeping a long gun, or any gun, in your vehicle full time is an absolute non-starter, even in the highest trust environments.

Why? Simple. Vehicles are not secure storage containers. They really aren’t secure at all, and most vehicular strong boxes capable of holding a long gun will not stop a determined thief for very long, and stashing a gun in a bag, under a seat or just out of view is damn near the same as handing it over.

Vehicle break-ins only get more and more common overtime, and no matter where you live, even in the nicest neighborhood and the nicest town, it is only nice so long as no one scummy strolls through it looking for easy loot. Don’t keep a firearm in your vehicle full time.

I can advocate for, however, keeping a sort of firearm support bag in your truck.

This bag should contain extra ammunition, feeding devices, medical supplies and other tactical tools that might be required in case you should become stranded and have to abandon your vehicle because of major civil unrest or perhaps a terror attack and just so happen to have one of your long guns with you.

Even if kept in the vehicle full time, should it get stolen, only ammunition and magazines, not a complete gun, will fall into criminal hands.

Conclusion

A pickup truck is one of the single best vehicles that any prepper could want.

Super capable, adaptable and versatile for hauling cargo or people, your pickup truck can be further improved as an everyday prepping mainstay by the inclusion of smart gear and tool picks.

Use the list above containing 15 of the best truck EDC options and outfit your pickup today.

truck edc items pinterest


via Modern Survival Online https://ift.tt/9BlhLu3

Friday, June 24, 2022

167 Kick-Ass Survival Tips to Keep You Alive

Let’s stop beating around the bush. We all know the basics of survival: how to store food, water, and put together a bug-out bag.

survival items collage

What we’re all really looking for are advanced, high-quality survival tips, tricks, tactics, and secrets that can help us take our preps to the next level.

You can’t find these by doing a quick search using your favorite search engine, or by reading your favorite survival blogs.

Many of the articles out there are just re-hashes so you don’t really learn anything new. And when you finally do find something useful, you realize you spent half an hour digging for it.

Wouldn’t it be nice to read something different for a change? Real survival tips from real preppers such as myself and others, go beyond the basics such as preparing your car for a bugout, or how to store food in Mylar bags with oxygen absorbers.

The prepping community has grown exponentially over the last few years and I’d be honored to help raise the bar as we gain more experienced preppers into the community.

I apologize in advance if you’ve already read, heard, or are already putting some of these tips into practice.

I’ve been reading and practicing like crazy lately, so it’s hard for me to know who first came up with some of the ideas I’m sharing, except the ones that are my own.

So, without further ado, let’s get started with this massive collection of tips (which I’ve conveniently grouped into categories)!

Bugging Out

1. Leave some room in your bug-out bag.

You never know when you’ll have to carry some extras, like things you find along the way, or items your partner or kids ask you to carry, or extra stuff when you are forced to leave your vehicle behind.

Let’s say you find an abandoned BOB along the way that belonged to someone who died and you can basically take anything you need.

Wouldn’t you want to be able to add more of the things you KNOW you’re going to need rather than the ones you THINK you’ll need in advance? This is where the extra room comes in handy.

2. Pack the heaviest items closest to your spine. This way, you’ll put as little stress on your back as possible.

3. Make sure items more likely to be used are easiest to grab. Put them at the top, inside the pockets or even in separate, smaller bags that attach to the back of the main one. Careful, though, you don’t want too much weight packed too far away from your spine (see tip #2). Some of the things you’ll need in a hurry include your first aid kit, your gun, water, and your bandanna.

YouTube Video

4. Keep your vehicle ready to move immediately.

If a motor vehicle is part of your bug-out plan, make sure it is well-maintained and that the fuel tank is kept topped off as much as possible.

Have the necessary emergency equipment to deal with different weather conditions, have spare parts that commonly need replacing, and the correct tools to install them.

5. Have a secondary bug-out vehicle on hand. No, not a second 4x4 but something you can put inside it, such as an inflatable boat, a canoe, a mountain bike, a foldable bike, or even a skateboard. You just never know when you have to abandon your car.

6. What to take when you are forced to abandon your car. In this case, you may want to take some of the things from the trunk with you as you continue your journey on foot, or in the canoe, bicycle, or skateboard.

7. Keep your hiking boots attached to your bug-out bag. This way, if you have to get your bag and leave in a hurry, you’ll also get the boots without having to occupy one of your hands.

Of course, these will misbalance the bag but remember you’ll be wearing them soon enough. We’re just trying to cover having to leave in a hurry.

8. In case of social unrest, you may want to move to your bug-out location late at night or early hours of the morning.

That’s when most of the rioters as well as the police will be sleeping, so you reduce the risk of being bothered when attempting to leave your city.

YouTube Video

9. Always have improvised flotation devices on hand, in case you need to cross a body of water, a plastic bag filled with water can keep you afloat as empty 2-gallon plastic containers.

10. If you live in an area with hot summers and a lot of sun, make sure you pack sunscreen, moisturizer cream and a hat or a bandanna. In the event of a bug-out, you’ll end up spending a lot of time in the sun.

11. Cut off the handle of your toothbrush so it takes less space and makes the entire BOB lighter. I know it’s not much but you really don’t need the handle.

Bugging In

12. Avoid eye contact. When trying to reach home in an SHTF scenario, looking people straight in the eye for more than one second could be interpreted as a challenge/aggression and cause them to come after you.

13. To get out of a riot, walk in the same direction as the protesters, at the same speed but at a slight angle. Adjust your angle depending on the side roads that you could get to.

14. If you get caught in the middle of a riot with nowhere to go, take shelter in any building whose doors are open.

15. Move your crying toddler to the most sound-proof room in the building. You don’t want anyone (including your neighbors) to know you’re home.

16. Keep activity at your BIL to a minimum. No one should know you are at home. If possible move to an alternate BIL every few days assuming you have the luxury of choice for BILs

17. Have ear buds for your transistor radio so you can keep up with what’s going on without giving away your location.

18. Resist the urge to build a fire pit in your living room, do not bring your propane (or charcoal) grill into the house because you feel there are no longer any rules and your family is hungry. Eat from your canned food and store food much as possible. People can smell food cooking and it can attract unwanted attention.

19. As a matter of fact pay special attention to your smoke detectors. Even in a grid-down scenario, they should still be able to operate on 9v batteries. Make sure they remain functional as fire is a very real threat and care should be taken to avoid catastrophe.

20. When SHTF, stay in the house, cover windows so no light shows at night, and keep curtains drawn during the day. Give no sign that would indicate that anyone is home, or if they are, that they are better off than anyone else.

The neighbor you used to play golf with on Saturdays and have backyard BBQs within the summer WILL come calling, and it won’t be to have a cold beer on the front porch. Hunger will make a man do crazy things, so keep a low profile.

Shelter

21. This is for the newbies but SHELTER is more important than FOOD and WATER. The rule of threes states you can live 3 hours without shelter, 3 days without water and 3 weeks without food.

22. Mylar blankets are overrated. They’re more useful to radiate heat back from a fire. If you still want to use them, the best way would be in conjunction with a sleeping bag.

YouTube Video

23. Never make a shelter in a ditch or, as some preppers on YouTube do it, really close to a river. You might get inundated and if you’re unlucky enough to get trapped in a flash flood, that might be the end of you.

24. Never use shipping containers as underground bunkers. They’re made to be stacked one on top of the other but are very weak when it comes to lateral pressure. The earth surrounding them is going to alter their structure and if you happen to be inside when it happens…

25. Thoroughly check out a cave before choosing it as shelter. Look for “residents”, falling roofs and the possibility of it getting flooded. Also, try to make sure you won’t be trapped in there if unfriendlies come calling.

26. Bunkers are, in most cases, less than ideal. The people outside can either wait until you run out of food and water or they can smoke you out if they discover where the ventilation system ends.

Light, Fire and Heat

27. Strap a headlamp around a jug of water, point it towards the liquid and turn the light bulb towards the bottle for an instant nightlight.

28. Use hardwood to keep a fire burning for a longer period of time. Examples of hardwood include oak, ash, beech, cherry, and maple.

29. Not a tip but a warning: always put out a campfire before you go to sleep. So many accidents happen when a gust of wind comes up in the night and scatters embers onto tents and the grass.

30. Run twigs through a pencil sharpener to make tinder.

Clothing

31. Avoid wearing a bandana over your face unless you’re protecting yourself from tear gas. Sure, you think you might be blending in, but law enforcement officers might mistake you for a bad guy. The same could happen if you wear camouflage.

32. Consider what types of shirts, pants, undergarments, and vests would you use for both tough durability, earth tones, and with a multitude of pockets.

Jeans, thermal underwear, t-shirt, sweatshirt, overcoat, ski mask rolled into a hat for the top. If it gets hot during the day you can always remove layers.

Stockpiling

33. As a general rule, it’s always better to stockpile the ingredients to make something instead of the food itself.

34. If you have to erase the writing of a Mylar Bag, use rubbing alcohol. It’s something you should have in your first aid kit anyway.

35. In order to increase the shelf life of your food, store it in places that are as cool as possible, such as basements. Generally speaking, you can double the shelf life for every 18 F or 10 C decrease in temperature.

YouTube Video

36. Do NOT use oxygen absorbers when storing sugar or salt inside Mylar bags. Sugar will harden if you do and salt… doesn’t really need anything for preservation because salt itself is a preservative.

37. What should you do when you realize you have very little water? Try these:

  • Avoid making too much effort. In fact, the more you sleep, the better you can conserve your energy.
  • Avoid sweating, and move slowly.
  • Don’t drink diuretics such as caffeinated beverages (Coke, alcohol, energy drinks) or alcohol (particularly beer). Once it hits the bloodstream sugar, just like salt, pulls water out of your cells and the cells react by sending along a message to the brain – “We’re dehydrating, give us water!” This triggers the thirst reaction – making you more thirsty. Alcohol suppresses the release of vasopressin – also known as the anti-diuretic hormone (ADH) by medical professionals. The kidneys don’t have enough ADH to control excretion and send messages to the brain that water must be excreted.

38. If you don’t have enough room for all those 5-gallon buckets, use 7-mil bags. You can store the same amount of food in almost half the space!

39. Consider these less common survival items with unbelievable shelf life: spam, pemmican, and hardtack.

40. Use freeze-dried food for your bug-out bag. Sure, you can still add energy bars or hard candy but freeze-dried foods taste great, are lightweight, and will provide you with not just carbohydrates but with many essential micro and macro-nutrients. They also have an excellent shelf life.

41. Sure, you’ll need water to cook them but that shouldn’t be a problem if you have a water filter and access to a water source.

YouTube Video

42. Keep in mind your family’s allergies before building your food stockpile.

43. Although brown rice is healthier, white rice has a longer shelf life.

44. If you don’t have oxygen absorbers, you can use salt and peppercorn instead. Put each of them in a light cotton bag to increase the shelf life of beans, rice, grains, etc.

45. Store wheat berries instead of flour. Wheat berries have a shelf life of 20 years, while flour only lasts for a few months.

46. You can overwinter certain veggies, meaning you can leave them in the ground during winter. This way you avoid having to freeze or can them, and you save time as well as space in your pantry. Carrots, spinach, broccoli, kale, and onions can all be planted in the autumn and left over during winter.

47. Before you store pasta for the long term, keep it in the freezer for a few days to keep any larvae eggs from developing.

48. Unconventional places to hide your food and water include in fake air vents, inside trash cans, inside Pringle’s cans, in fake pipes, in PVC pipes buried underground, inside trees, inside barns, inside wells, in abandoned cars, inside pots and pans you don’t use and in your garage.

Ensure all the stored food is in watertight, airtight, and rodent-proof containers to avoid food spoilage.

49. Always make sure you’re not being watched before accessing your cache locations.

50. Never use milk jugs or plastic juice bottles to store water for the long term. No matter how well you rinse, there will still be leftovers that will contaminate your water at some point. Always use BPA-free containers that have never stored anything else but water.

51. Avoid using 5-gallon water jugs. Many of them will leak at some point. Rather use smaller containers to contain damages. Losing 5 gallons could be a catastrophe.

52. Make an assortment of foods inside every 5-gallon bucket or bag. This way, if you need to bug out and only get to grab one container, you’ll have more than one type of food inside. Food variety is important in a survival situation.

53. Don’t forget to stockpile things to help you open, cook and consume your food: can openers, cooking pots, small stoves, spoons, forks, etc.

YouTube Video

54. Well water has benign bacteria in it that will metabolize sulfate minerals once you store it. One way to inhibit them is to chlorinate your well water each year.

Sulfates can act as a laxative – which can be dangerous for infants as it leads to dehydration. With time people will become used to the sulfates, but in a survival situation, you don’t want to be troubled with a runny tummy.

55. A good place to stockpile water is your swimming pool. However, it’s best to boil it, or add bleach to it before drinking – 2 drops per quart.

Survival Bags

56. By replacing the food inside your bug-out bag with freeze-dried packages you’ll shed quite a few pounds and it’ll make a world of difference if you’re forced to bug out with it on your back. Even better, you can use labels.

57. Think outside the box when it comes to survival bags. Bug-out bags, INCH bags, get-home bags, and everyday carry kits are just “standardized” survival bags that a lot of people happen to like.

But you don’t have to always follow the rules. You can store survival items in just about anything: tin cans, coffee cans, mason jars, etc.

58. You can make your bug-out bag waterproof by “lining” it with plastic bags on the inside.

59. Don’t use backpacks with external frames, they’ll get caught in branches. Get one that has an internal frame. Besides, you’ll blend in better if people don’t see it.

Home Defense

60. A bigger dog isn’t necessarily better from a survival standpoint because they need a lot of food and water. Consider other options such as the Jack Russell terrier, the Basset Hound, or the Beagle.

61. A good fence/wall is able to deter potential intruders and can prevent trespassing to some degree, increasing your level of safety up a notch.

62. Exterior lights/motion-activated eventually, are excellent as early warning systems for home defense. They alert you about possible intruders and have the potential to intimidate villains passing by.

63. Professionally installed home alarm systems are an excellent investment for your security and peace of mind, as they may alert the neighbors about a specific threat long before the police arrive at the scene.

It would help a lot to talk to your neighbors in advance about this issue, i.e. mutual defense/aid in the community, and about your/their alarm system.

YouTube Video

64. Secure/reinforce the doors and windows.

65. You can install security cameras in all the vulnerable areas of your residence and don’t forget to put a big sign mentioning this fact (something like “This Property is Under 24 hours Video Surveillance”).

66. A safe room is a fortified room of your home, designed to protect you and your family from burglars, looters, rapists and critical events.

In times of danger, you can barricade yourself inside and call for help. Safe rooms are not bunkers. They’re intended as temporary havens for weaker, unarmed people to retreat to until help arrives.

67. Avoid providing potential burglar tools which can be used against you, such as ladders near your residence, pick axes and spades, or ropes lying around.

68. Trim the bushes that can block your view from the windows or obstruct your line of sight.

69. Eliminate objects from around the exterior of the house that can be used to toss through the windows like decorative rocks, spare bricks, and so on.

YouTube Video

70. Have self-defense weapons/objects placed strategically inside of your residence that will allow you to protect your physical integrity if SHTF (guns, knives, hammers, etc.) but not in an obvious position otherwise the burglar may get to them first.

If you carry a gun it should be on your person. You don’t want the intruder accessing it first.

71. Be prepared physically and mentally for a possible confrontation with a burglar. Remember the average time for a street fight is 3 to 8 seconds – in your home, you’ll have very little time to act so make those seconds count.

72. In the worst-case scenario, if you have to shoot someone, never-ever shoot to kill; the idea is to stop the threat of physical injury/death upon your person, not have a murder rap.

73. If you arrive home one night and notice someone’s broken into your home and is still there, don’t be a hero. Move to safety and call the police (if available). Your life is more important than your valuables.

74. If you suspect you are being followed by possible hijackers drive right past your own home and on to the nearest police station. Hi-jackers attack when you are opening driveway gates or pulling into the driveway.

75. Use double-cylinder deadbolts for your front door.

YouTube Video

76. Replace glass doors and basement windows with plexiglass or polycarbonate or install security bars.

77. Install a wide-angle peephole that’s at eye level when you kneel. This will make you a smaller target if the person on the other side has a gun.

78. Prune large trees that could allow a thief to climb into one and through one of your windows.

79. Make sure drainpipes that someone could climb to enter the property are protected with razor wire at intervals so access cannot be gained this way.

80. Balconies provide easy access for someone with a grappling hook. Enclose with burglar bars or security gates you can open up, so you don’t feel like you are living in a jail.

Put razor wire at the edge of the balcony – you get really pretty variations that look like lush ivy plants but underneath they have vicious spikes.

Personal Defense

81. To escape an attacker, use the least amount of energy. This doesn’t mean you should stay still but don’t exhaust yourself. If he’s stronger than you, the less energy you have, the less likely you are to set yourself free.

82. Never comply with your attacker the first time. People have died even though they did everything they were asked, so why not buy yourself some time. Don’t be afraid to say No, I Don’t Know and I don’t want to.

83. Did you know a lollipop can make a lethal self-defense weapon? Hold the candy inside your fist and allow the plastic part to stick out from between your fingers. Punch your attacker in the eye, ear, neck, and other sensitive parts. A key held this way also becomes a lethal weapon.

84. Careful of how you store pepper spray inside your car. If the temperatures reach 120F (48C), it can leak out. This not only means it won’t work but it’ll contaminate the air inside your car.

YouTube Video

85. Keep a self-defense weapon really close to your front door. This way, when you answer someone you don’t know, you will have it on hand to protect you.

Umbrellas with a concealed blade in the tip, walking sticks that have a spring-loaded blade, and such like look innocuous enough standing in the hallway until they are needed.

86. Don’t use pepper spray if the attackers are less than 3 feet away from you. It’ll affect you too. The range of most pepper sprays is between 3 and 15 feet.

87. Don’t put pepper spray in your car’s trunk or at the bottom of the glove compartment after a while just because nothing bad happened.

You probably bought it out of fear but the odds of you needing it don’t decrease over time. Always keep it within reach.

Mindset

88. Stimulate all your senses when making visualization exercises. If you’re picturing yourself during a bugout, imagine people screaming, seeing the cars being taken away by the tornado, buildings falling from the earthquake, and so on.

Feel the texture of your bug-out bag as you put it on, or the smell of your wife’s perfume as she comes near you in panic. These little details make the entire experience more real.

89. Average people struggle with the noise in dangerous situations – gunfire, shrieking wind, the noise of rioters, roaring fires, etc. can be disorientating and affect concentration.

Soldiers and emergency workers are trained to function in chaos and noise – the body becomes used to it allowing them to keep cool and calm.

90. Whenever you find yourself having to do a large task, break it down into smaller ones and do them one by one. Remember a journey of a thousand miles starts with one step. (Lao Tzu)

91. The only way to master fear is to understand that it exists and admit that it’s something you can’t fully eradicate.

92. To deal with loneliness, find friends among even the smallest insects. Focus on easy, useless tasks such as polishing your shoes.

Urban Survival

93. The moment you realize something is about to happen and you decide to bug in, start filling the bathtub and every other container with water.

It may be a matter of minutes until it runs out so start filling not just the tub but every jar, pot, pan, and tin can you can find.

Of course, lack of water might actually be the tip-off that something’s happening, that’s why you need to stockpile in advance.

94. If trapped in a riot, remove all accessories (earrings, neck chains, rings, tie clips, etc.) so you don’t become a target.

95. Always have some cash on hand to get food and snacks from vending machines. You need to keep yourself hydrated and energized when dealing with an SHTF event.

96. Always rent/buy as close to your workplace as possible. This way it’ll be easy for you to get home on foot while everyone else is stuck in traffic.

97. Know all the alternate routes to get out of a city – The main ones are probably going to be jammed with everyone trying to evacuate the city.

Devious back routes you avoid because of time lost may just be your savior if you know them well. Practice using them so they are familiar.

Would you consider evacuating the city by boat (assuming you have a river that crosses your city)?

YouTube Video

98. Do NOT engage in battle Things escalate a lot quicker in a city due to a large number of people, panic, and confusion.

Since you probably have a lot less food, water, guns, and ammo than rural preppers, you can’t really afford to deplete them by fighting for some nonsense reason. Plus, you might wake up outnumbered and put your life in danger.

99. Be creative when it comes to finding food and water. The city’s bodies of water are going to be full of food and water… and you might have to use those resources.

You’ll have to filter that water, those ducks need to be killed, plucked, and cooked, possibly without any electricity.

101. You can use the rail tracks to bug out. Depending on the type of disaster that will strike, the railroads may be abandoned.

102. Never sleep with the air conditioner on In case of a fire, it will only allow smoke to propagate faster and decrease your chances of survival.

103. Don’t disturb your burglar! If you come home only to find your place getting ransacked, don’t be a hero. Hide, run and call the police.

If this is a post-SHTF situation, get a gun and, possibly, some help before going in there. The best thing to do, probably, is to let him or them leave and make sure you improve your home protection as soon as possible.

YouTube Video

104. Avoid crowded places If you can, try to avoid malls and other crowded places. You never know when a terrorist decides to kill as many as he can.

Do your shopping right after the mall opens or right before it closes. Better yet, do your shopping somewhere else.

105. Always park your car in a spot that’s well lit. This will make it less likely for someone to try to break in.

106. Keep an apartment dog. Dogs will surely scare some burglars who will hear them bark and move around the apartment when they try to break in.

107. Handkerchief. Always carry a handkerchief with you when going out, you might need to protect yourself from smoke or tear gas.

108. Don’t let your walkie-talkies and guns show. If you do, it’s only a matter of time before someone is going to want them – particularly your gun.

In fact, you shouldn’t even allow the tip of the gun to show from under your shirt as it will be easy to guess that you have a firearm.

109. Consider your workplace as a bug-out location. This needs careful consideration. If you’re working downtown, that’s probably the worst place to bug in.

But if your office is a more suitable location for bugging it, you might want to discreetly stockpile some stuff in your desk… just in case.

YouTube Video

110. Have an Everyday Carry Kit (EDC). Having an EDC doesn’t mean you have to carry a backpack with you every day.

110. Never stay in hotel rooms above the 2nd floor. In case of a fire, it’s going to be tough for you to evacuate.

111. Make sure your kids all have get-home bags. When disaster strikes, chances are they won’t be at home. Make sure they all have some emergency items stuffed in their backpacks… just in case.

112. Have some means to overcome obstacles when you’re bugging out. The first thing that comes to mind are fallen trees (that are going to be everywhere after a hurricane) and building debris.

A chainsaw or an ax will do the job but a big hammer may also prove useful in some scenarios.

These are heavy and you’ll need a vehicle to carry them, but a full tang tomahawk can be very useful for your bug-out-bag.

A video from the recent fires in Australia comes to mind –one person who had a chain saw was able to cut some trees so the rest of the people could drive their vehicles into the shallow waters of the lake and save themselves and their vehicles from the fire.

During the same fires, people who couldn’t get vehicles through the trees had to swim into the middle of the lake and watch their vehicles burn.

113. Have means of entertaining yourself during a power outage. Board games, books, maybe even a Kindle if you have a solar charger for it.

114. Cities provide you with lots of stuff to burn to keep warm. No need to freak out about freezing to death.

You will find plenty of newspapers, cardboard, junk mail, and wood chips, to burn and keep yourself warm.

115. Forget your car. If you need to escape a riot and you have your car nearby, it might be safer to abandon it and go on foot. Better to deal with a broken windshield than with a broken leg.

116. Don’t make a fashion statement. Camouflage, urban camo and black hoodies are all no-nos. You don’t want to be mistaken for a prepper. Jeans and a t-shirt will do.

117. Keep away from windows. If bugging in is what you decided, you must keep away from windows at all times. Resist the temptation to see what’s happening; turn on the radio or the TV instead.

118. For safety, bed down in the passageway at night – it’s too easy for people to fire shots through windows. That way when you hear shots you can either lie low or get yourself ready for the follow-up attack.

Communications

119. A radio which is powered by batteries, solar cells, or even a hand-crank, can be a great go-to source for information.

120. FRS and GMRS radios are very easy to obtain and operate, and satellite phones also may be a good option for you if you find yourself frequently in very remote places.

121. What about CB radio? This public radio service is a good option, and no license is required.

122. There are more communication channels than the FRS and GMRS radios, and the distances that a CB radio can cover are also greater than both.

However, your range is limited to your area. What if you need to contact someone outside the region? Here is where ham radio shines. There are no geography limits.

With ham radio, one could contact those loved ones in the area, (assuming they also are hams, or at least know a ham,) and one could also reach out and contact someone outside the region to let them know who is alive and well.

Homesteading

123. Rainwater is safe to drink. There’s no need to worry about it being too acidic or safe to drink1. All water is acidic and the only water you shouldn’t be drinking is water near radioactive sites.

124. You’ll still want to avoid filtering and purifying it even if you have the means, to make sure your body is used to a few germs and can mobilize its defenses to keep you safe.

YouTube Video

125. Collecting rainwater is illegal in some states or you may need a permit2. Before you install a rainwater harvesting system, you need to check with your local authorities if and how much you can harvest.

126. Don’t chop veggies on a wooden cutting board if you just chopped meat. Some bacteria will remain in the wood and then contaminate the food you cut afterward. Always clean your cutting boards after cutting meat on them.

127. You don’t need to keep water boiling for minutes in order to kill all pathogens and make it potable.

You just need to get it to 158 F (70 C). This way you’ll save time, fuel and, of course, water, which would otherwise be lost in the form of steam.

128. In order to slice meat, you can give it a quick freeze first (approx. 20 minutes).

129. Goats should be milked from the side, not from behind. The reason is, that they sometimes defecate.

130. Here’s how to keep your plants watered if you’ll be away for a longer period of time: put a bucket of water, place it next to the plant and make sure the bottom of the bucket is at a higher level than the top of the pot.

Then, place a long yarn connecting the bottom of the bucket with the inside of the plant’s pot.

Wilderness

131. Tie a belt around a tree and attach hooks to hold various things.

132. You can create a pillow or a mattress by filling plastic bags with leaves.

133. If you don’t have a knife sharpener, you can use the bottom of a mug or even the edge of your car’s windows.

134. If you’re having difficulty lighting a regular match because of the wind, shave the portion near its head.

Not completely, the shavings should still hold on to the match but you will see them easily catching fire in windy conditions.

YouTube Video

135. Use a tarp to collect rainwater.

136. Lots of things can make good tinder: a deck of cards, dryer lint, cotton balls soaked in Vaseline, facial clean pads or cotton balls dipped in melted candle wax.

137. Oil, grease, mud, and smoke are great pest repellents if you don’t have natural ones like citronella, lemongrass, or tea tree oil.

138. Reptiles are not good at indicating water sources. Birds and insects are.

139. Use your reading glasses to start a fire by focusing on the sun’s rays.

140. Don’t throw away your lighter just because it’s run out of fuel. It will still spark and that’s all you need to light your tinder.

Survival Fitness

145. To practice carrying your bug-out bag, ditch going to the supermarket with your car.

Instead, get a backpack, load your groceries inside and walk there with it on your back. This will not only improve your stamina but will also save you money on gas.

Post-Collapse

146. Since people who will still be fat after a while might tip off others that they have food, consider having clothes that are 2 sizes too big to look thinner.

147. When you return from a bartering negotiation, always make sure you’re not begin followed. If you gave of the impression that you’ve got more you may be a target.

Medical

Disclaimer: you should know that I am not a doctor and that I am not responsible for the negative effects of you using my tips. Please consult your physician.

Before I give you these tips, I feel compelled to remind you that I’m not a doctor so my advice is for information purposes only.

148. Avoid storing your medicine in the bathroom, as some people do. The moisture will decrease its shelf life.

149. Someone who’s just experienced an electric shock can pass it on to you. Electricity travels through air.

150. Never touch or get too close to someone who’s experiencing an electrical shock. The current can travel through the air and will get to you too.

Either stop the electricity source or use a wooden stick to push the person away from the current.

151. You can apply pure honey to a dressing and then directly over a wound. Honey, just like lemon juice has an anti-bacterial effect.

YouTube Video

151. Never suck the venom out after a snakebite. You risk yourself when you should be ready to assist the victim in getting help.

The primary concern in the treatment of snakebite is to limit the amount of eventual tissue destruction around the bite area.

Before you start treating a snakebite, determine whether the snake was poisonous or nonpoisonous. Bites from a nonpoisonous snake will show rows of teeth.

Bites from a poisonous snake may have rows of teeth showing, but will have one or more distinctive puncture marks caused by fang penetration.

Symptoms of a poisonous bite may be spontaneous bleeding from the nose and anus, blood in the urine, pain at the site of the bite, and swelling at the site of the bite within a few minutes or up to 2 hours later.

Do not:

  • Give the victim alcoholic beverages or tobacco products.
  • Give morphine or other central nervous system (CNS) depressors.
  • Make any deep cuts at the bite site. Cutting opens capillaries that in turn open a direct route into the bloodstream for venom and infection.
  • Put your hands on your face or rub your eyes, as venom may be on your hands. Venom may cause blindness.
  • Break open the large blisters that form around the bite site.

152. I’ve said this before in a previous tip but it’s worth repeating: make sure your first aid kit is easily accessible from your bug out bag.

YouTube Video

153. Never consume antibiotics past their expiration dates.

154. Use belts to stop bleeding (as tourniquets).

155. Mix vinegar with water, then apply on sun-burnt skin to relieve pain.

156. If you are under physical and mental stress or subject to severe conditions, increase your water intake. Drink enough liquids to maintain a urine output of at least 0.5 liters every 24 hours.

157. Keep your hair clean as your hair can become a haven for bacteria or fleas, lice, and other parasites. Keeping your hair clean, combed, and trimmed helps you avoid this danger.

158. If you get a small blister, do not open it. An intact blister is safe from infection. Apply a padding material around the blister to relieve pressure and reduce friction. If the blister bursts, treat it as an open wound.

159. The signs and symptoms of a fracture are pain, tenderness, discoloration, swelling deformity, loss of function, and grating (a sound or feeling that occurs when broken bone ends to rub together).

Natural Disasters

160. If you want a see the direction a tornado is moving, pick an object that’s close to it (a tree, a building) and notice how it’s moving relative to it.

161. During an earthquake, don’t sit in the doorway. Find an interior wall and sit down next to it.

YouTube Video

162. To check a gas pipe for leakage, wet the suspected segment of the pipe with a soap solution (mix 1-2 tablespoons per gallon of water). If you see bubbles, it means it’s leaking.

Weapons

163. You should never use gasoline to clean your guns. This is a highly flammable substance.

Misc.

I’m adding tips here that didn’t quite fit in any other category.

164. To mark a cached location, take a photo of yourself or your family right above the ground. It looks like an innocent snapshot instead of a map.

165. Replace your shoelaces with Paracord… Paracord has many uses, 87 of them being detailed here.

YouTube Video

166. If you need to get in or out of a burning building, if possible, you should crawl on all fours because you’ll find more oxygen closer to the floor.

167. If hijackers follow you into your driveway and leap out with guns, reverse into their vehicle as fast and hard as possible to get them off balance and the vehicle out of the way, and then speed off.

Their vehicle will be running and the handbrake will not be on as they will be planning on a quick getaway so there should not be too much resistance. It beats being shot.

survival tips pinterest


via Modern Survival Online https://ift.tt/lpAe9qc

Wednesday, June 22, 2022

Is it Safe to Heat Food in a Can?

Canned food is a reliable, convenient option, and aside from being an everyday staple in the kitchen it also serves as a fundamental part of a long-term food storage plan.

can heated on a stove

You might have seen various depictions in media of people heating up canned food right in the can prior to eating it, but is this safe? Is it safe to heat canned food in the can?

No, you should never heat canned food directly in the can whether or not the can has been opened. Sealed cans can build up to dangerous amounts of pressure, leading to an explosive eruption of scalding liquid.

Even a can that has been opened or vented will likely contaminate food as the plastic liner breaks down, or the steel releases harmful elements into the food.

Yes, steel is often used as a durable and efficient material for all sorts of cookware, but that doesn’t mean that a common steel can is suitable for the purpose.

In any case, it is a bad idea to heat up canned food while it is still in the can. Keep reading to learn more.

Pressure Buildup in Sealed Cans is a Serious Danger

You might have seen people in movies or TV heating up sealed cans of food right on a stovetop or over a fire.

Then, they crack the seals and enjoy a steaming hot meal with hardly any mess. What could be nicer? Turns out, almost anything.

This is not only lazy cooking, but it’s also dangerous. Canned food can build up tremendous pressure if heated too high or for too long, and this pressure can cause the can to violently rupture or even explode.

Explosions from steam pressure are no joke, and they can cause serious injuries.

Even if the can doesn’t explode, the scalding hot liquid inside can spurt out when a seal fails and may cause serious burns.

If you don’t want to shower the surrounding area, yourself and everyone else with screaming hot stew or green bean water, don’t do it.

Modern Cans Have Liners that Will Break Down in High Temps

Even if you’re careful not to heat the can too much, there’s still a risk of dangerous chemical contamination.

If you’ve ever looked closely at the lining of a can of food, you might have noticed a strange-looking material that looks a bit like plastic.

This material is actually called polyethylene, and it’s one of the most common materials used to line cans.

Polyethylene is a type of plastic that is very durable and resistant to both heat and chemicals. It’s also relatively inexpensive, which makes it an attractive option for food manufacturers.

In addition to polyethylene, other materials that are sometimes used to line cans include aluminum and tin.

These materials provide good protection against both oxygen and moisture, helping to keep canned food fresh for longer periods of time.

But these plastic liners in food cans are not meant to withstand high temperatures, and they can break down under high heat releasing harmful chemicals into the food you then eat. Not good.

Even the Steel Itself Can Release Harmful Elements into Your Food

When at camp after a long day, or firing up a portable stove during a power outage, you might not think twice about heating chili in a can for supper.

Just this once can’t hurt, right? After all, it’s just metal and food, what could go wrong? Well, according to researchers at the University of Massachusetts Amherst, there might be more to consider than you realize.

When heated, the steel itself can release harmful elements into your food like lead and cadmium.

Exposure to heavy metals can cause a variety of health problems, including organ damage, neurological problems, and cancer.

Lead is particularly harmful, and even low levels of exposure can cause serious health problems.

Cadmium is also particularly dangerous and can cause kidney damage and other health issues. Once metals enter the body at the molecular level, they can be difficult to remove.

Chelation therapy is one method that has been used to remove heavy metals from the body, but it can be expensive and may not be covered by insurance.

Additionally, chelation therapy can have harsh side effects. Is this something you really want to risk for a minor convenience?

Sure, heating food in a can and consuming it once, twice or even a few times is probably not going to cause any heavy metal-related problems, but why contribute to that issue at all?

YouTube Video

Don’t Even Think About Heating the Can in the Microwave!

I would hope this does not need any elaboration, but for the sake of completeness, I will mention it now: do not heat up any metal can in your microwave.

First, no matter how you heat up a can of food, any intense heat will cause the aforementioned problems.

Second, and most importantly, heating nearly any kind of metal in a microwave is bad, bad news: the resulting sparking and arcing can cause a fire, or at the very least, damage your microwave. Don’t do it!

Can You Heat Food in a Can During an Emergency?

Okay, let’s say that for whatever reason you absolutely must heat up food in a can during an emergency situation. What are your options? Can you get away with it without risking too much harm?

Nominally, yes. You have a few options. You could try using a stovetop or some other kind of portable stove.

Crack the seal on the can, remove the label, and gently heat it, stirring regularly. This would be the safest option, as long as you’re careful not to overheat the can.

In general, you will want to always vent the can, and avoid heating it over an open flame since that will make precise heat control more difficult.

The bottom line is that heating food in a can is not something that should be done if you have any other option, and even if you don’t do only sparingly.

However, there is one method you can use that will safely warm food in a can with the minimum amount of risk.

YouTube Video

The Safest Way to Heat Food in a Can

The safest and overall best way to heat up food in a can while minimizing the risk of chemical and heavy metal contamination, and also reducing the chance of a rupture, is by immersing it in hot, but not boiling, water.

You’ll want to avoid leaving the can in boiling water as it can cause the can to rupture as mentioned above.

Simply lower the can in hot water kept at a simmer, unopened, and use tongs or some other kind of tool to handle it safely. Let the can sit in the hot water for a while to heat up evenly, and then open and enjoy.

Obviously, it will take significant practice to learn when various foods are thoroughly heated.

There aren’t any guidelines for this! That being said if you are determined to heat your food in the can this is the best way overall.

But there you have it: everything you need to know about heating food in a can. Is it safe? No, not really, and can be quite dangerous when heating a sealed one.

Is it convenient? Perhaps. Is there a better way? Almost always. Think twice before you heat food in its can!

heat food in a can pinterest


via Modern Survival Online https://ift.tt/VHcSqgB

Friday, June 17, 2022

These 9 Berries are Safe to Eat… But Stay Away from These 6!

Berries are a bountiful, delicious and nutritious wild food that can make for a great supplement to your rations anytime you are out in the wilderness.

holly bush with berries

But before you go and chow down on a bunch of fresh-picked berries, you had better know which ones are safe to eat and which ones are poisonous.

Choose the right berries, and you’ll eat well, but choose the wrong ones and it could mean misery or death!

In this article, we will tell you all about 9 common and safe wild berries, and also warn you off of 6 dangerously toxic ones.

We will also discuss the dangers associated with eating poisonous berries and dispel some common myths about determining whether or not a berry is safe based on its color.

Read on to learn more about which berries are safe and which ones are dangerous!

Wild Berries that are Safe to Eat

YouTube Video

Wild Blueberries

The wild blueberry plant is a fascinating little fruit-bearing shrub. It’s native to North America, and it has been a staple of the diet of many Native American peoples for centuries.

The wild blueberry is a small, bushy plant that typically grows to about two feet in height, with leaves that are oblong and dark green, and flowers of white or pale pink.

The plant’s berries are, as you’d expect, its most distinctive feature – they range in color from deep, midnight blue to purple, and they are often used in pies, jams, and other desserts.

The wild blueberry plant is an important food source for many animals, including bears, deer, and birds.

In addition to being a delicious treat, the berries of the wild blueberry plant are also rich in vitamins and antioxidants.

YouTube Video

Blackberries

Wild blackberries can be found growing in many parts of the world. In North America, they are typically in season from June to August.

The bushes grow between 2 and 6 feet and do best in full sun and well-drained soil. Blackberry bushes are typically covered in sharp, tough thorns, so they can be difficult to pick without getting scratched.

However, the berries are well worth the effort, as they are juicy and sweet with a subtle tartness.

The berries themselves are small, oblong and composed of multiple drupelets which give it that distinctive, clustered appearance with a dark purple or black skin.

When picking blackberries, be sure to look for ripe berries that are plump and deep purple or near black in color. If the berries are red or green, they will not be as sweet.

Also, avoid any berries that have white or brown spots, as these indicate that the berry is overripe.

YouTube Video

Raspberries

Native to Europe, Asia and parts of North America, the raspberry is a perennial plant with woody stems that belongs to the same family as the blackberry.

Raspberry bushes typically have green leaves and white or pink flowers, and thorns just like their blackberry relatives.

The fruit itself is red and has a distinctively cone-shaped structure that is hollow when picked. Raspberries are usually available from late spring to early autumn, although some varieties can be found growing year-round.

In the Northern hemisphere, they’re typically available from June to September, while in the Southern hemisphere they can be found from November to March.

Raspberries are a bright, crimson red when they’re ripe and ready to eat, and grow in clusters the same as blackberries.

YouTube Video

Mulberries

The mulberry tree is a type of deciduous tree that is native to many parts of the world, including Asia, Africa, and North America.

Hardy and fast-growing, these trees can reach a height of 60 feet or perhaps a little more. Mulberry trees have a wide, spreading canopy of lightly serrated leaves and long, drooping branches.

The fruit of the mulberry tree is clustering, plump berry that looks very much like an overlong blackberry or raspberry.

Interestingly, the berries come in a variety of colors depending on the species of the tree, and can range from white to red and black to pale lavender. Usually ripe from June to August, the berries have a sweet taste and can be eaten fresh out of hand.

YouTube Video

Wild Strawberries

Wild strawberries are a small, delicate fruit that is beloved by many for its sweet flavor, regularly described as far sweeter and juicier than common produce section cultivars.

These strawberries grow regularly in wooded or grassy areas and are typically smaller than the ones you would find at the grocery store.

The wild strawberry plant has white flowers and three-lobed, heart-shaped leaves, and the berries themselves are red with small seeds on the surface.

Wild strawberries are typically in season from May to June, although this can vary depending on location.

If you’re lucky enough to find some of these delicious berries, savor them; they are so small and delicate you will rarely get more than a mouthful from them.

YouTube Video

Huckleberries

The huckleberry is a member of the Vaccinium family, which includes other well-known berries such as blueberries, cranberries and lingonberries.

These hardy plants are native to North America, and they can be found growing in the wild from Alaska all the way down to Mexico.

Huckleberries typically grow in mountainous or forested areas, and they thrive in sunny locations with well-drained soil.

The plants are relatively small, with leathery leaves and small white flowers that grow in clusters.

The berries themselves are small, of dark blue or purple color, and they have a tart flavor that is popular in pies and jams.

Despite their small size, huckleberries are packed with flavor and nutrients. Huckleberry season varies depending on location, but in general, the berries are ripe and ready to pick from late summer to early fall.

YouTube Video

Elderberries

Note: Elderberries must be cooked to be made safe to eat- raw elderberries and elderberry seeds are always toxic. The elderberry plant is a shrub that can grow up to 12 feet tall.

It has dark green, slender, long leaves and clusters of small white or cream-colored flowers.

Elderberries often grow in moist, partially shady areas such as woods, hedges and wetlands. They are native to Europe and North America but can also be found in Australia and New Zealand.

The individual berries are dark purple or black and grow in dense, heavy clusters on the plant. Elderberries have been used for centuries in folk medicine to treat colds, flu and other ailments.

The berries can be eaten cooked or processed into jams, jellies, pies and wines. Today, elderberry products are sold as supplements and natural remedies.

Some studies have shown that elderberry extractives can help reduce the severity and duration of colds and flu, but more research is needed.

YouTube Video

Chokeberries

Also known as aronia berries and not to be confused with chokecherries, the chokeberry is a member of the Rosaceae family, which includes other familiar fruits such as apples, pears and cherries.

There are two main types of chokeberries: black chokeberry and red chokeberry. These deciduous shrubs are native to North America and can be found growing in damp woods, bogs, and wetlands across the continent.

Chokeberries are small, round fruits that grow in groups on the shrub, each dangling from a small vine-like cherries. They get their name from the astringent, sour taste of the berries.

When eaten raw, chokeberries will make your mouth pucker and your throat constrict, hence the name!

They are safe when raw, but when cooked or processed their flavor mellows and becomes much more palatable.

Chokeberries are high in antioxidants and have potential health benefits such as reducing inflammation, improving heart health and boosting immunity.

YouTube Video

Muscadines

Muscadines are a type of grape that is native to the southeastern United States. The vines grow in wild, wooded areas, along fences and in old fields.

They usually grow as vines, but can also be found as shrubs. Muscadines are plentiful in states such as Florida, Georgia, Louisiana, Mississippi, North Carolina, South Carolina and Virginia.

Muscadine plants are easy to identify due to their large leaves and conspicuous clusters of thick-skinned berries.

The berries themselves are large and round, appearing nearly identical to large grapes, and range in color from green to black. They are typically ripe and ready to pick in late summer or early fall.

Stay Away from These Toxic Berries

YouTube Video

Belladonna Berries

Belladonna, also known as “deadly nightshade,” is a member of the Solanaceae family, which includes other well-known poisonous plants such as potatoes, tomatoes and tobacco.

The belladonna plant is a tall, leafy herb that grows up to four feet in height and produces small, dark berries.

All parts of the plant are toxic, but the berries, which taste sweet, pose the greatest risk to human health. The belladonna toxin can cause seizures, hallucinations and even death if ingested in significant quantities.

However, the plant has also been used medicinally for centuries to treat a variety of conditions.

When used in small doses, belladonna extractives can help to relieve pain and reduce inflammation. That will be of no consolation if you scarf down a handful of these alluring but poisonous berries.

YouTube Video

Moonseed Berries

Moonseed plants can be found in the wild in North America, Asia and Africa, and they have been known to grow up to six feet tall.

Moonseeds get their name from the shape of their seeds, which are said to resemble the crescent moon.

The plants themselves are slender and vine-like, with dark green leaves and small white flowers. While they may look innocuous, moonseeds are actually quite poisonous.

The berries contain a toxin called dauricine that can cause nausea, arrhythmia, seizure and respiratory failure if ingested.

In severe cases, the toxin can cause paralysis or even death. There are many reported cases of children dying after eating only a small quantity of the fruit, it is no joke.

Luckily, the berries are said to taste quite nasty, so you’ll know something is wrong if you bite into one. Make sure you rinse your mouth out well!

YouTube Video

Yew Berries

The yew is a coniferous tree that is native to Europe, Asia and North America. Beautiful and ancient-looking, these evergreen plants are most commonly found in Europe and Asia, although they can also be found in North America.

Yews typically have a slender trunk with reddish-brown bark and branches that droop down towards the ground and can attain a height of 30-40 feet.

The leaves are dark green and needle-like and adorned with inconspicuous but appealing red, olive-like berries.

And don’t get too close, either: all parts of the Yew are ferociously poisonous, as they contain a toxin called taxine among other harmful compounds, compounds that are efficiently absorbed through the skin or even inhaled.

Taxine can cause arrhythmia, bradycardia, and cardiac arrest if ingested, and even a tiny bit of matter from the plant is enough to be deadly. As little as two berries can be fatal to humans, so it’s best to steer clear of these altogether.

YouTube Video

Pokeweed Berries

Pokeweed is a tall, herbaceous plant that can grow up to ten feet in height. It has large, dark green leaves and deep purple or red berries that grow in clusters.

Pokeweed plants are found throughout North America and parts of Europe and Asia and have been used medicinally for centuries by native peoples.

All parts of the pokeweed plant are poisonous, but the berries pose the greatest risk to human health. The toxins in pokeweed berries can cause vomiting, diarrhea, seizures and even death if ingested in large quantities.

YouTube Video

Mistletoe Berries

Mistletoe is widely known and adored as a festive holiday decoration, one often hung above doorways. In nature, mistletoe is a parasitic plant that grows on trees, such as oak, apple and maple. Mistletoes are evergreen plants with leathery leaves and small, white berries that grow in clusters.

The mistletoe leaves and berries contain phoratoxin and are poisonous to humans; though rarely fatal ingestion can cause vomiting, diarrhea and abdominal pain.

In severe cases, the toxin can cause seizures, coma and even death, and is particularly deadly if the leaves and berries are steeped to make a tea.

YouTube Video

Holly Berries

Holly is a shrub or tree that is native to Europe, Asia and North America. Holly plants have glossy green, spiny leaves and red berries that grow in clusters.

Holly plants prefer soils that are high in organic matter and they often grow in forested areas. The holly plant is most commonly associated with the Christmas holiday, as it is often used as a decoration.

However, because it is on this list and in this section you know it has a dark side. Holly berries contain multiple compounds that can cause severe vomiting and diarrhea if ingested.

However, the berries must be eaten in large quantities to put someone at the risk of death.

That being said, many children have been severely poisoned and died because they could not resist trying those tempting, red berries.

Isn’t There a Surefire Way to Reliably Tell Toxic Berries from Safe Ones?

Unfortunately, no. Though some misguided or ill-informed individuals may tell you that there are “universal” or “foolproof” ways to distinguish between safe and poisonous berries- color, shape, etc. – it simply is not true. Relying on such rules of thumb, erroneous as they are, could be the last mistake you ever make.

When in doubt, always err on the side of caution and avoid eating any berries you cannot positively identify as safe.

Many berries look very similar to one another even if the plants they grow on do not, and even then it can be easy to mistake a poisonous plant for a harmless one.

Eating even a small quantity of toxic berries can cause serious illness or death, so it’s simply not worth the risk.

The best way to avoid accidentally eating a poisonous berry is to familiarize yourself with the plants that grow in your area and learn which ones are safe to eat and which ones are not. If you’re not positive that a berry is safe to eat, don’t eat it!

Many Berries are Safe and Healthy, but Not All!

Though it’s important to be aware of the risks associated with eating wild berries, it’s also worth noting that many are safe and healthy.

With a little bit of caution and some expert knowledge of the various species, you can enjoy these delicious fruits without fear of making yourself sick or suffering even worse consequences.

Review the list of safe and toxic berries above and you’ll be better prepared to assess any wild berries you come across.

berries safe to eat pinterest


via Modern Survival Online https://ift.tt/haHWNYP