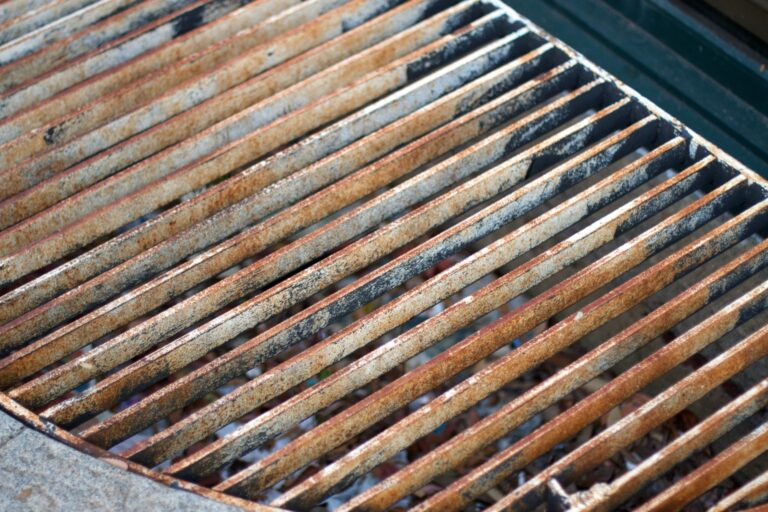
It’s the middle of summer, and that means cookouts! If you’re like most people, your grill is probably covered in rust.
You know you should clean it, but that is a chore, and messy besides. It won’t hurt to put it off just a little longer, right? So is cooking on a rusty grill safe?
Yes, it is safe to cook food on a rusty grill as long as the rust is not flaking off into the food. Ingesting rust particles is generally harmless unless the quantity is extreme.
However, rusty grills may be prone to breaking or malfunction and this could be dangerous.
It is important to clean the rust off of your grill for two reasons: first, so that the food you are grilling does not taste like metal; and second, so that your grill does not start a fire.
In this blog post, we will discuss 9 easy ways to clean rust from your grill.
9 Easy Ways to Clean Rust from your Grill
Method One: Vinegar and Water
Soak a rag in white vinegar thinned with just a little water, then use the rag to scrub the rust off of the grill. The vinegar is acidic and will help to break down the rust and make it easier to remove.
This method works well when rust is minor, so called “dust rust.” the good news is that vinegar is totally safe to consume, no harmful residues.
Method Two: Baking Soda and Water
Mix baking soda with water until it forms a thick paste, like runny drywall spackle. Apply the paste to rusty areas on the grill and let it sit for about 30 minutes, perhaps a bit longer. Rinse with water and scrub off any remaining baking soda using a coarse pad or brush. Give it a final rinse and you are good to go.
Method Three: Soft Drink
Pour a can of Coke or some other soft drink over the rusty parts of your grill, and let it sit for several hours (or overnight).
The acid in the Coke will help to dissolve the rust pretty handily. For serious rust, a shallow container that can hold the grill grate a two liter bottle of soft drink will help.
Scrub if needed, rinse well with clean water.
Method Four: Lemon Juice
Soak a rag in lemon juice and use it to mop the juice onto the rusty spots, or leave the rag draped over the trouble area.
Scrub the rust off of your grill using a brush or abrasive pad. Lemons are acidic and will help to break down the rust, but make sure you rinse with water to neutralize it!
Method Five: WD-40
Spray rusty areas on the grill with WD-40 and let it sit for a few minutes. The WD-40 will help to dissolve and loosen the rust.
Scrub the aftermath away with a wire bristle brush. A thorough soap and water rinse is required after this one!
Method Six: Salt and Lime Juice
Mix salt and lime juice until it forms a thick paste. This creates a powerful one-two punch of abrasive salt and acidic juice that will wipe out most rusty areas.
Apply the paste to rusty areas on the grill and let it sit for about 30 minutes. Rinse with water, assess and then repeat with fresh mixture until the rust is gone.
Method Seven: Steel Wool
Soak steel wool in water to lubricate and use it to scrub the rust off of the grill.
Progressing from coarse to fine will reduce rust in a logical progression, but take care because it can scratch your finish, leaving “cobweb” marks behind.
Rinse thoroughly to remove any residue and traces of the wool.
Method Eight: Commercial Grill Cleaner
There are many brands of grill cleaner that can be purchased at most hardware stores or grocery stores, from the mild to the insanely aggressive.
Follow the instructions on the bottle to clean rusty areas on your grill, but make sure you always wear appropriate protective gear and use it in a well-ventilated area. As always, rinse thoroughly when finished!
Method Nine: Power Washer
If you have a power washer, you can use it to clean heavy rust from your grill. Point the spray nozzle at rusty areas on your grill, stand off a bit and hold the trigger observing for removal before you close in.
The force of the water will help to remove any rust buildup but can damage grill components if you are not cautious. You might have to try several nozzles, angles of attack and ranges to find the sweet spot.
Whichever method you choose, be sure to rinse the grill thoroughly with water after cleaning.
This will help to remove any residue and particulates left behind from the cleaning and prevent them from contaminating your food. Wire bristles from brushes are especially bad news!
Now that you know how to clean rust from your grill, there’s no excuse not to!
Get out the vinegar, Coke, lemon juice, WD-40 or grill cleaner and get scrubbing. Your grill will be looking good as new, and much safer to use, in no time.
Seasoning Your Grill
One way to help keep your grill in good condition is to season it before you use it.
This will create a barrier between the metal and food, which will help prevent rust and keep contaminants from getting into your meal. Here’s how to do it:
Start with clean grates. If they aren’t clean, take the grates off of the grill and soak them in hot, soapy water for about 30 minutes.
Scrub them with a brush to remove any built-up dirt or debris.
Rinse them off and then dry them completely.
Apply a thin layer of vegetable oil or grill seasoning paste to all surfaces of the grates using a clean cloth or paper towel. Take note of the smoke point temperature.
Put the grates back on the grill and heat them up to the smoke point of your oil/seasoning paste. Keep them hot for about 15 minutes.
Turn them off and let them cool completely before wiping off any residue. Your grates should be a glossy, dark color.
You can also season your grill periodically throughout the year to help keep it in good condition. Just be sure to clean it first so that the seasoning will stick properly.
How Can Cooking on a Rusty Grill be Dangerous?
Cooking on a rusty grill can be dangerous because the grates may break, or pieces can break off in your food.
A grill grate or grill body that fails unexpectedly could send your food plunging into hot coals, or a hot burner assembly tumbling out of the bottom of the grill or even into you!
Aside from the obvious risk of severe injury, you could start an accidental fire that will be difficult to arrest under the circumstances.
The most important thing you can do to prevent this is simply to keep the grill clean and rust-free. By cleaning the grill, you’ll be inspecting it for damage and degradation that could indicate a dangerous condition.
Also, rust can build up a surface of sorts that, while brittle, could conceal severe damage and loss of structural integrity beneath it.
It should also be pointed out that sometimes a grill component is just too far gone to save. Grates and small parts can be replaced, but if the body of the grill is rusted out or wobbly, it is time to consign it to the scrap heap and get a new one!
Keep that rust at bay and you can have confidence in your grill!
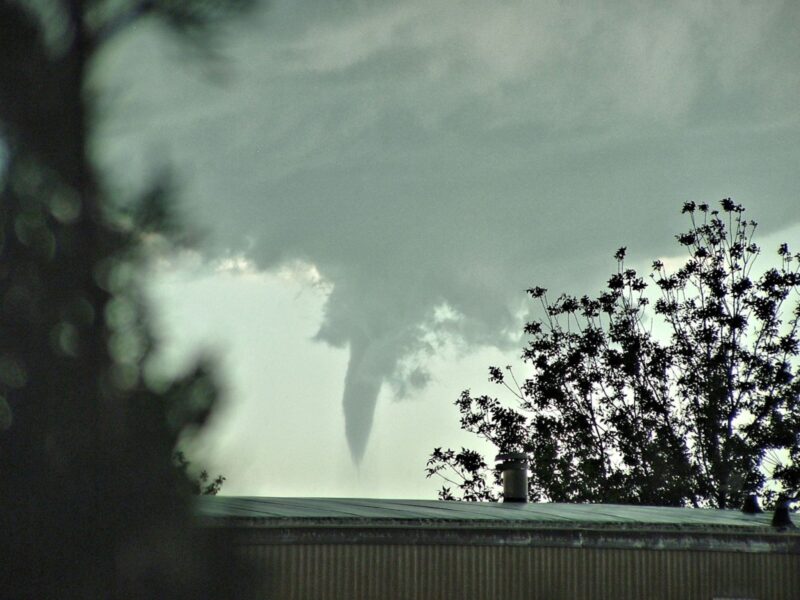
Tornadoes are one of those natural disasters that seem so potent and so random there is nothing you can do except hope to survive their passage.
tornado
While they are incredibly destructive and can spawn from any storm system when conditions are right, there is always something you can do to improve your chances of surviving with a good outcome.
Knowing what steps to take and what skills to develop when getting ready for tornado season, or when traveling to any place where tornadoes are common can it make the difference between life and death.
You might have a few minutes to react to an oncoming tornado, or you might have only seconds, but seconds can count for a lot if you take the correct action.
To help you get ready for twister season we are bringing you a list of six tornado survival skills that you can practice today.
The Most Powerful Wind Events on Earth
When it comes to sheer power, tornadoes take the crown among all the many varied storms that occur on planet Earth.
The most powerful tornadoes can produce sustained wind speeds in excess of 200 mph and are truly cataclysmic for anything that gets caught in their path.
Even lower level tornadoes produce frighteningly potent sustained winds more than capable of damaging and destroying homes and other smaller buildings.
As a tornado grows stronger, the hazards you are facing get ever more dangerous.
You’ll go from toppling trees and missing roof panels to lethal flying debris and even entire automobiles and train cars being carried through the air as if they were made out of styrofoam.
To say the passage of a powerful tornado is a surreal experience, assuming you survive it, is an understatement.
Before the storm, you’ll be facing a foreboding and heavy atmosphere descending on your area.
But, in the aftermath, emerging from your shelter, you will likely be confronted with a landscape that is nothing but a tangled and twisted ruin with hardly one brick left standing upon another.
It is bad enough facing such a situation and having to cope with it, but it is far worse for you and your loved ones to be killed during the event.
There’s not much you can do to combat a tornado, but there is a lot you can do to improve your chances of being alive when the roaring finally stops.
The following section contains six proven tornado survival skills that will help you weather even a deadly twister.
6 Tornado Survival Skills to Practice Today
ID’ing Shelters
One of the single best things you can do to improve your chances of surviving a tornado is learning how to identify worthwhile shelters that will give you protection, or at least a degree of protection, from wind and airborne debris.
This is not always easy, and some traditional shelters prove to be less than adequate against the most powerful storms, but with a little bit of information and some quick thinking you’ll always be able to improve your position wherever you are and whatever the circumstances.
Tornadoes have a way of making a mockery of even the strongest structures built by man.
Storms only halfway up the Enhanced Fujita scale of tornado strength usually prove more than capable of leveling most residential structures and typical businesses, and stronger ones can even carry buildings away right off their foundations.
This means that residing inside something like a modular home, a mobile home or any other lightweight structure is virtually a death sentence.
What you want to do is head for the strongest interior room of any given building that lacks windows, and always give preference to underground rooms or ones that are partially subterranean in a hillside.
The very best shelters are dedicated, purpose designed and built tornado shelters. Most businesses have such a room somewhere in them, and many societies found in tornado prone regions have them scattered all over town.
You can even install your very own in your basement or accessible via outside somewhere on your property.
It is in your best interest to always keep in mind where the closest, best shelter is during tornado season, and have one picked out when a tornado watch is issued.
Make it a point to locate the best tornado shelter wherever you happen to be when you are traveling.
Taking Cover in a Hurry
Thanks to advances in meteorology and weather detection technology, including radar and satellites, we fortunately often have advanced warning of conditions that are likely to form tornadoes and of tornado touchdowns themselves.
However, not all of these complex systems are accurately predicted, or detected in time, and even when likely conditions are announced tornadoes can form with frightening speed and move just as quickly.
Accordingly, when you detect the likely presence of a tornado or hear a tornado warning from any source it is time to take cover immediately.
You might have a few minutes or even just a few seconds before the tornado is upon you. There is no time to delay.
Grab your loved ones, and anyone else that you can help immediately and get into cover before battening down the hatches for the tornado’s arrival.
Depending on the circumstances you might have time to gather some useful survival supplies or you might not, but in any case you can set yourself up for success by stocking your own dedicated shelter with those supplies ahead of time, or at the very least keeping a tornado readiness bag set handily about for instant action.
Speed is of the essence in tornado survival, and there are many, many tragic stories of people being overtaken and killed while seeking better shelter. Sadly, these unfortunate souls were overtaken by the storm before they were in cover.
Don’t let this happen to you and yours. Move with haste towards shelter whenever you suspect a tornado could form or know that a tornado warning has been announced.
Vehicle Bailout
One of the worst things that can happen to you is being caught in a tornado while in any motor vehicle.
First, most motor vehicles provide no meaningful protection from airborne debris that is the number one hazard to life and limb associated with tornadoes.
Second, stronger tornadoes may carry away vehicles by the dozen should they be caught in their path.
If this happens to you, your vehicle will be tumbled, battered, lifted high into the air and invariably slammed back down or left to fall to its uttermost ruin with you inside.
Your chances of surviving such an event are almost zero, and though there are some survivor stories of this exact occurrence happening they are of miraculous portent.
Instinctively you might think you are better off with even the meager protection of an automobile body when the winds of change start blowing, but this is misguided.
If a tornado is in the area chances are good you will not be able to outrun it in your car or truck, so you must abandon it and take cover outside of it.
If there’s a nearby building that is suitable or, even better, a designated tornado shelter head for it at best speed.
But, if there isn’t, you are better off leaving your vehicle and taking cover in a ditch or other lowest lying area around.
Lie on the ground face down and cover your head with your arms and then wait for the tornado to pass.
Of note, you should never, ever take cover under an overpass as has sometimes been suggested in the past.
Overpasses do not provide meaningful protection from wind or airborne debris, and studies suggest that they in essence serve to funnel both through the space, increasing the likelihood you’ll become a casualty.
Extrication
Surviving the tornado is only one part of the endeavor you’ll be facing. The other part is extricating yourself from the likely rubble of your home or other shelter once it has gone by.
Since tornadoes can inflict terrible devastation, it is highly likely you’re going to need to employ creative techniques to free yourself and your family.
Homes can collapse on top of the basements they are built over. Debris of all kinds could come to rest over the hatch of a shelter.
A structure could be shifted just enough to wedge a door shut or otherwise render it immovable. There is just no telling what might trap you inside your safe space, creating another nightmare you’ll have to sort out.
It is beneficial, then, to learn how to extricate yourself and others from such a situation without making things worse.
Damaged structures are notorious for collapsing when people start messing and tinkering with them, and you definitely don’t want to further imperil your life or anyone else’s while trying to help.
The right tools are a major asset here, with wrecker bars, pry bars and even various power tools or heavy equipment if you can get your hands on it highly worthwhile.
Remember that the most powerful of the simple machines you can make use of in pretty much any circumstances is the lever, and a strong length of wood or metal pipe could prove to be enough to shift a weight that is trapping you and your family.
Physical Fitness
Physical fitness is not so much a discrete skill as it is an essential characteristic for tornado survival.
The rigors of surviving the storm and the necessary tasks that you will have to attend to after it is over means you’ll need every ounce of strength and endurance your body can muster if you want to make it through.
For that reason, it pays to keep yourself in good shape at all times.
Stronger people are more useful and harder to kill in all circumstances, and the longer you can keep going the greater an asset you will be both for yourself and for your loved ones.
Any physical fitness plan that is emphasizing survival, particularly tornado survival, should be focused on cardiovascular endurance and sheer strength since the only tools you might have to take advantage of in the aftermath could be your own two hands.
The tasks you are called on to handle might take absolutely everything you’ve got to accomplish, but you’ll be glad you are able when the time comes.
The more sweat you put in now the less blood and anguish you’ll have to shed later after a tornado.
Storm Awareness
Storm awareness is a crucial skill for staying safe and giving yourself time to react when in tornado country or tornado season.
Although tornadoes can be unpredictable and sometimes up here without warning, it never fails that there are some common markers that are indicative of conditions likely to spawn tornadoes or of an active tornado on the ground.
Learning to recognize these signs will give you a major advantage.
First, tornadoes almost invariably spawn out of an existing, powerful thunderstorm system. Chances are you won’t have much to fear from tornadoes during clear, calm days.
Second, certain meteorological features indicate the likely presence or imminent formation of a tornado.
Among them, any sign of circular rotation in a cloud layer is an immediate warning sign that should send you scurrying for cover, as is the sudden cessation of rainfall.
Do note, however, that many tornadoes are concealed by driving bands of rain that mask their appearance.
If there is a lack of rain, listen for a howling, freight train-like sound that is characteristic of active tornadoes on the ground. If you hear this roaring sound, especially if it is growing louder, take cover at once.
Lastly, many tornado survivors report strange colored skies immediately preceding the arrival of a tornado.
Anytime the sky has a yellowish or greenish hue you are probably in for a serious storm if not a tornado outright.
This color is due to soil and other particulates being lifted high into the air where they tint the light of the sun. If you notice this ominous hue in the sky, don’t wait, take cover.
By staying alert to the characteristics of tornadoes and the storm systems that are likely to produce them you’ll maintain situational awareness even in circumstances where you don’t have access to weather alerts.
Practice These Skills Today
Tornadoes are terrifying, powerful storms that produce wide paths of total destruction and can prove to be quite deadly.
There is not much that man can do to hinder such an event but with the right skills and proper procedures it is possible to greatly improve your chances of survival during one of these powerful twisters.
Learn and practice the six skills outlined above on this list and you’ll be better prepared for coping with tornado season.
Is anyone here familiar with the blinking constant reality check? I ask cuz I don't think I understand how to conduct it and I'm looking for some guidance. Should I just be mindful of my blinking? Should I constantly ask myself whether I have to blink or not? How can I become critically aware of my blinking?
Thanks in advance, and sorry for my broken English lmao
via Lucid Dreaming - Dream Views - Attaining Lucidity https://ift.tt/k8fGwrV
The Colony has an interesting premise, one that is near and dear to most preppers: The world is turned upside down because of a catastrophe and society has collapsed. It is up to a band of survivors to work together and overcome survival challenges if they want to live.
For the show’s first season, ten cast members were placed in a simulated post-apocalypse environment for ten days to portray life after the collapse of society as a result of a deadly epidemic.
The volunteers assist with many aspects of sustainable living, including water, electricity, safety and food. Experts provided commentary and insight to the audience while our intrepid heroes struggle and often fail to overcome the constant survival tasks before them. On July 21, 2009, the Discovery Channel aired the season premiere.
Filming began on February 28 and lasted until April 28, 2009. It is currently on Netflix, but who knows for how long!
As always, if you want to experience the highs and lows of the show yourself, beware of spoilers ahead!
Season One Plot Synopsis
Each episode of the series features a number of phases with each design to simulate, and illustrate for the audience, a survival challenge that will likely accompany a societal collapse event.
Although certain parts of the show are dramatized, overall it provides quite a bit of insight into what such an event could look like.
Episode 1 begins with our 10 survivors being kept away for a full 30 hours with virtually no food and only the bare minimum of water to stave off dehydration.
Shocked and fatigued, mentally ailing, six survivors split off to loot and abandoned department store for any resources that they can carry. Their plans are cut short when scavengers arrive to steal what they have acquired.
After disengaging from the scavengers all the survivors must work together to walk over 8 miles down the Los Angeles River to their new home, the eponymous colony, an 80,000 square foot Warehouse sitting on three and a half acres of marginally securable land.
Now that they have some tools, food, water and plenty of scrap materials, the rebuilding of their burgeoning society begins.
An episode to the next order of business is to gather more supplies and create a source of energy to run tools, lights and other appliances.
A battery array is created, but a generator is needed to recharge it along with fuel. One lucky forging mission produces a suspiciously provisioned stash of canned fruits and veggies and a pair of live goats.
A small engine is scavenged in episode 3 along with pulleys and other parts to create a generator.
Gasoline is a precious and extraordinarily rare resource, and so a wood gasification project is set up by one of the survivors, a mechanical engineer.
This solves the fuel crisis for a Time. Under the circumstances, the survivors agreed that an escape vehicle must be procured as a contingency option in case their new home is made unsafe.
The next episode sees the survivors work on creating and maintaining a variety of creature comforts along with replenishing supplies, namely water and fish from the river and citrus fruits from any plants nearby.
A ripple of uncertainty and excitement goes through the group when they discover a working television that is on and receiving an emergency broadcast.
Unfortunately, these distractions allow Marauders and thieves to enter the perimeter and directly attack the colonists at the warehouse. Several days worth of provisions are stolen.
Episode 4 begins with a solar shower project being completed to help maintain the survivors hygiene. Everyone is still reeling and shaking from The Marauder attack the previous day, and security is high on everyone’s list of priorities.
These priorities are put to a test when a caravan of traders, all of them armed with firearms, arrive to trade goods with the colonists.
In the aftermath of this, holes in the warehouse walls are boarded up and secured, weapons are created, distributed and hidden, including a flamethrower and a primitive taser.
Serious thoughts of escaping the increasingly uncertain and dangerous city begin to rise, and further work on the escape vehicle commences
Episode 5 opens with fabrication and construction projects grinding to a halt due to a fuel shortage. One team is dispatched to search for a renewable energy source in the form of solar panels.
While they are away, the unity and morals of the team are tested when two strangers sneak into the warehouse through a secured door and beg for safe haven. They are sent away after an uneasy negotiation, and work on the escape vehicle continues.
Episode 6 sees the group in sorry shape. More than a month of living in harsh, unclean conditions with poor nutrition and overall lack of calories is taking a toll on their health. Minor injuries prove to be more severe than anticipated and everyone is losing weight and mentally sluggish.
A scouting party is sent to look for medical supplies at a nearby band in hospital, and during the trip one of the survivors goes missing with his whereabouts unknown to his compatriots.
That evening, the remainder of the group mourns the loss of their friend, but the television comes on again with another emergency broadcast.
Spirits are raised to this revelation and focus shifts towards establishing communication with other groups of survivors elsewhere in the world. A large SOS banner is crafted and placed on the roof of the warehouse.
The next episode, number 7, leads to more encounters with other groups of survivors moving through the area.
A group of zealous missionaries walking along the river discuss the subject of Faith with the survivors who are gathering water and fishing.
Elsewhere, later, to wandering survivors please for any resources that the group might spare in order to test their group loyalty, morals and sense of charity. Work continues on a few creature comforts and soap to improve hygiene.
Episode 8 sees the escape vehicle nearing completion, and with it mission is planned for we can ordering a probable route out of the city and into the country.
Another group of survivors arrives at the colony begging for food and water among other supplies.
One major surprise sees the arrival of one survivor’s wife among them.
Suddenly, and as a total surprise to the survivors, water pressure returns to the warehouse for a brief period but just as quickly goes off again, simulating the unreliable and sporadic nature of utilities in the aftermath of a major catastrophe.
A major leap in the group’s security is made when two of the survivors cobbled together a balloon made from reclaimed helium and trash bags that carries a loft a security camera allowing them to scope out the area around the colony.
Episode 9 proves to be the most severe test yet, with Marauders barring access to the river while the two wandering survivors who snuck into the warehouse several episodes ago return to steal important resources.
After this occurs, the colonists know that they must leave and leave in a hurry, and pour all of their efforts and completing the escape vehicle and making other vehicles roadworthy for the trip.
The armed traders also return trading much needed gasoline, water and food for solar panels, salt and a kiss from one of the female survivors.
Episode 10, The finale, sees the survivors making ready to leave after an accident severely injures one of them and another radio broadcast give them unverifiable information about a safe destination far away from the city.
Before they are able to flee, the Marauders arrive to storm the warehouse property in an effort to take control and capture the survivors.
Weapons and defensive fortifications are erected, improvised explosives are placed, doors are barricaded and the fence is electrified.
The survivors make ready to escape.
Survival Lessons from The Colony, Season 1
The Colony, Season 1 is a great example of how quickly things can go from bad to worse, but also how people can rally and restore some semblance of normality even under the most pressing of circumstances.
The lack of clean water, sanitation, and medical care leads to the rapid spread of disease and infection. Injuries become infected, and people soon start falling ill from simple things like cuts and scrapes.
Preppers can and should learn from the mistakes made by our intrepid survivors in The Colony, and also learn from their victories.
By taking steps to ensure that they have a good supply of clean water, sanitation supplies, and medical supplies. Without these basic necessities, it won’t take long for a prepper’s group to fall apart.
Episode 1 highlights the importance of having a plan and sticking to it. The survivors in The Colony had a plan to escape the city, and though they encountered many setbacks, they never wavered from their goal.
Preppers should have a similar plan in place, so that if disaster strikes, they know exactly what needs to be done and can act quickly and efficiently.
Episode 2 is all about security. The survivors in The Colony knew that they needed to be prepared for anything, and so they set up a perimeter fence and patrol schedule.
They also posted lookouts and set up traps to keep intruders out. Preppers should take similar precautions to ensure that their group is safe from outsiders who might want to take advantage of them.
Episode 3 shows the importance of having a reliable source of information. The survivors in The Colony were able to find out about the marauders thanks to a radio broadcast, and this allowed them to be prepared for the attack.
Preppers should make sure that they have a way to get information in the event of a disaster, so that they can stay up-to-date on what is happening and make informed decisions about how to best protect their group.
Episode 4 is all about teamwork. The survivors in The Colony knew that they needed to work together if they wanted to survive, and so they divided up into teams with specific roles.
This allowed them to make the most of their resources and skills, and ensured that everyone was pulling their weight. Preppers should do the same thing, so that everyone in the group knows what needs to be done and can work together towards a common goal.
Episode 5 is all about resourcefulness. The survivors in The Colony had to get creative when it came to finding food and water, and this meant making use of things like rainwater catchment systems and purifying contaminated water.
Preppers should always be thinking about how they can make do with what they have, so that they can stretch their resources as far as possible.
Episode 6 is all about adaptability. The survivors in The Colony had to change their plans on the fly when they realized that the marauders were coming, and this meant being able to think on their feet and improvise.
Preppers should always be prepared for the unexpected, and should have a plan B ready to go in case things don’t go according to plan.
Episode 7 also highlights the importance of communication.
The survivors are able to establish contact with other groups of survivors scattered around the world. This allows them to trade resources, and gain information about the state of the world.
Preppers should make sure they have a good communication plan in place, so they can stay in touch with other groups of survivors if the need arises.
Episode 8 highlights the importance of having a contingency plan.
When the water pressure returns for a brief period, the survivors are able to take advantage of it and fill up their tanks. This allows them to have a backup source of water in case the water supply is cut off again.
Preppers should always have a backup plan in place in case of an emergency. This could include having a stockpile of food and water, or having alternate sources of energy available.
In Episode 9, we see that it is important to be able to defend yourself and your group. The colonists are able to fend off the Marauders by using firearms, improvised explosives, and by constructing barricades.
In the same situation, you had better make sure you also have weapons and defensive supplies in case of an attack.
This could include firearms, knives, axes, and other tools that can be used for self-defense.
In the final episode of The Colony, we see that it is important to have a plan for what to do when things go back to normal.
The survivors in The Colony are able to reestablish contact with the outside world, and they start working on getting back to it and out of a hellish situation.
Preppers should make sure they have a plan for how they will reintegrate into society after a disaster, so that they can be prepared for anything.
The Colony is Prime Prepper Fare
If you’re a prepper, The Colony is appointment viewing. The 2009 TV show followed a group of people who were forced to live like it was the end of the world.
They had to scavenge for food and water, build their own shelter, and find ways to protect themselves from the marauders who roamed the land.
The show is a great example of what preppers can learn from “reality” TV that is geared toward us!
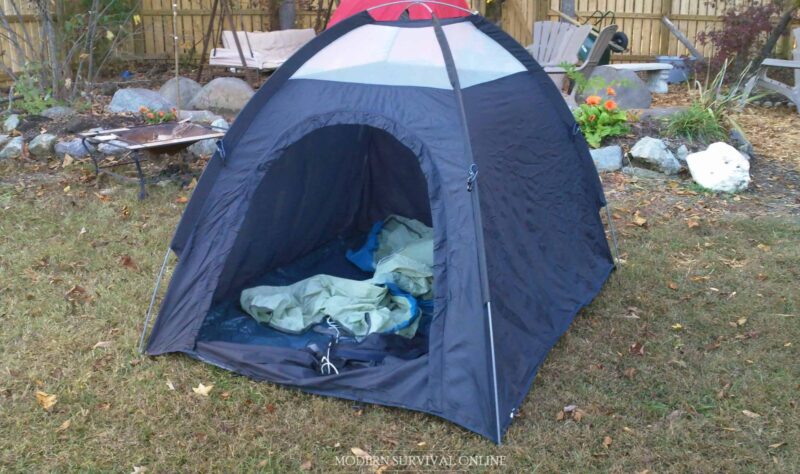
Camping can be a great way to get away from the hustle and bustle of city life and enjoy nature. However, if you’re not careful, camping can also be dangerous.
a two-person tent
One of the biggest concerns while camping in a tent, especially in open spaces, is being struck by lightning. Are tents safe to camp in during a lightning storm?
No, tents are not safe to stay in during a lightning storm.Atent offers no more protection than being in the open,and it maymake you more vulnerable to lightningeitherdirectly or in the case of a nearby strike.
You’ll need to find better shelter than a tent if you want protection from lightning. There is much more to learn if you want to refine your understanding of all the factors involved. Keep reading to find out!
Tents Offer No Protection from Storms in General
While it is true that a tent might offer some shelter from gentle rain or mild wind, it does not provide any protection from serious thunderstorms or lightning.
In fact, being in a tent during a storm could be more dangerous than being outside. You’ll have more than lightning to contend with, too, though this is the threat most people associate with them. More on that in just a minute.
During any thunderstorm, you should avoid touching anything conductive that could channel electricity from a lightning strike into you.
This could be anything that is attached to the tent, such as poles or guy lines. It need not be metal to conduct this level of electricity and if lightning strikes nearby, the current could travel through the material of the tent and into your body.
You should also avoid using any electronics inside your tent during a storm. This includes cell phones, laptops, and even battery-powered lanterns.
All of these items can potentially attract lightning and create a spark that could ignite the flammable materials in your tent in case of a near lightning strike.
Tents Won’t Save You From Lightning
While tents might not offer any protection from thunderstorms, what about lightning specifically? Surely being inside a tent is better than being out in the open, right? Unfortunately, that’s not the case.
In fact, being in or near a tent during a lightning storm can actually be more dangerous than being out in the open. This is because tents are often made of flammable materials like nylon or polyester.
If lightning strikes nearby, the current could travel through the ground, right through the tent and into you, roasting you and burning out your nervous system.
Additionally, many tents have metal components which will only serve to attract and channel lightning, making your situation statistically worse!
Or Pounding Rain
Trying to rest in a tent that is being pounded by hard rain is usually the opposite of a relaxing experience, and one that can be made all the worse if your tent is leaky.
But you have more to worry about than discomfort when facing down torrential rain from a passing storm.
You need to be aware of the dangers posed by severe weather conditions, which can include flash flooding, particularly when your tent is in a flood-prone area, canyon, gully or any place where massive quantities of water can accumulate or sweep through without warning.
Your tent might be carried away with you inside, a serious drowning risk, or else it could collapse and wrap around you, leaving you helpless and soaked!
A Tent Definitely Won’t Help With High Winds, Either
If you’re camping in an area that is experiencing high winds, be aware of the dangers.
A tent will do nothing to protect you from being blown away should the wind blow hard enough, such as the case of a wind shear or tornado, and can even cause you to be trapped if it collapses on you.
Make sure to keep an eye on weather forecasts and avoid camping when conditions are right for severe windy weather if possible.
If you must camp in a windy time, find a sheltered spot where your tent will benefit from a windbreak and less likely to blow away.
Also it’s important to be aware of the dangers posed by flying, windborne debris.
A gust of wind can easily knock down a branch, push over a tree or start a domino effect that see large rocks tumbling down a slope.
Any of these could seriously injure or even kill you if they hit you. Avoid camping under tall trees or near loose, vulnerable slopes if possible.
If you must camp in such an area, find a sheltered spot where you be better shielded if the wind does manage to knock things over.
Where Should You Shelter from a Storm?
So, what should you do if you’re caught in a lightning storm while camping in your tent? The best thing to do is to find a nearby building or vehicle that you can take shelter in.
If that’s not possible, then get as low to the ground as you can and make yourself as small a target as possible. Avoid being the tallest object in the area, and avoid touching metal objects since they can conduct electricity.
If you’re in a group, have everyone huddle together so that you present the smallest possible target. And whatever you do, don’t climb higher or hold onto any metal implements!
Tents Are Not Safe in Thunderstorms
As you can see, camping in a tent during a lightning storm can be extremely dangerous. A tent will not protect you at all from lighting or other severe weather.
It’s important to be aware of the risks before setting out, and to take the necessary precautions to protect yourself and your fellow campers.
With a little planning and common sense, you can ensure that your camping trip is safe and enjoyable, no matter what the weather throws at you!
What are some of the other dangers posed by severe weather conditions while camping?
Share your experiences and tips in the comments below! And be sure to check out our other blog posts on camping safety for more information on staying safe while enjoying the great outdoors.
Kids spending time in the kitchen is an important part of life, because they need to be familiar with the basics of preparing food. But it’s also important for their survival.
Recently in the news, I saw a story of a 3 year old who survived for several days after her mother died in the home by raiding the fridge.
Now, I don’t like to think about that, but I do feel better that if something was to happen, at least my kids could feed themselves and keep themselves from getting dehydrated.
As far as a prepping survival skill, kids need to know how to cook. How to get around the kitchen. How to meet their most basic needs.
Now, I realize there will probably not be Easy Mac after a few weeks if things get bad, or even a microwave for cooking it, though it is possible to cook things like Easy Mac and Cup O Noodles without a microwave. But, my kids know more about cooking than many kids their ages.
For some reason, sheltering kids from learning to cook (and really, to take care of themselves) seems to be a mainstream way of life.
I mean, I know teenagers who can’t do much more cooking than my 6 year old. They’ve never been in the kitchen to do more than eat. And that’s sad.
Instill a Family Culture of Teamwork and Self-Help
I regularly talk to people who complain to me that they want to get their families, particularly their kids into prepping, but every time they bring it up to them the conversation just sort of fizzles out.
They aren’t interested, they are detached, their minds are elsewhere, you know the drill. The problem seems insurmountable, I can tell they are frustrated, but this story usually plays out the same way every time.
I will ask this prepping parent about what’s going on in their life and their kids’ lives, particularly the interactions with them.
Rarely without fail they tell me about the dozens or hundreds of things they have to do daily for and because of their children to make their lives go.
In short, the parents are living as glorified butlers and fixers for their kids while the kids luxuriate away in cyberspace or involved in trivialities.
No wonder you can’t get your kids interested in prepping or a lifestyle of readiness! It sounds a lot like work to their ears, and it is, but it really isn’t the kids fault.
It is the parents fault for not inculcating a solid family culture of teamwork, and the individual values of self-help and self-reliance.
Sometimes this arises because parents truly, genuinely want their kids to be happy and want to help them.
Other times it arises out of a sense of fear that the children, particularly when they are young, cannot do something right or safely.
Whatever the root cause, it results in utterly dependent, spoiled children who are going to be total liabilities during a crisis, and will be helpless in their own lives later on.
It is in every Prepper’s best interest to avoid this unhappy outcome. So how do we do it?
Your Kids are More Capable than You Think
This boils down to giving your kids objectives. Setting standards. Letting them learn and, when necessary letting them struggle.
I know this sounds like bad medicine to some parents reading in the audience, but the results are undeniable! If you want kids that are able to do things you have to let kids do things on their own!
The best, safest and most productive way to do this is by allowing them to help out around the house.
Like the kitchen story I told to you above, kids want to replicate what they see in adults, particularly their parents whose approval they fervently crave.
They also want to self-actualize and the earlier that they realize they are capable of doing things for themselves, they’ll want to do more.
Use this as a teaching opportunity, telling the children that the family unit is more important than anything else on Earth.
To that purpose, everyone works together, helping each other out but also helping themselves so that other members of the family can focus on important things. This is highly rewarding and easy for children to understand.
For your efforts, you’ll be rewarded with happy, healthy and productive children who are more than willing and able to help take care of themselves and other things around the house according to their age.
Chores and Tasks Suitable for Children
Now, where the rubber meets the road is determining and what your child can actually accomplish, what they can attempt to tackle safely and what you can tolerate when it comes to them messing up!
For the smallest of children, attempting to dress themselves or put their toys away is probably the only chore that they can even try.
But children grow more and more capable by the day, and some of them can surprise you. As they get a little bit older, you might be surprised to learn that they can help with the dishes, gather ingredients, set the table or any number of other kitchen related causes.
Elsewhere in the house they might be able to dust, tidy up, feed and water pets and other similar tasks.
In my opinion, once children reach the age of 9 or 10 most will be ready to tackle full-blown chores, including the cleaning of windows, doing dishes on their own, sweeping, mopping and so forth. Standards should be set and enforced.
As children get older, entering their preteen and teenage years the complexity and intricacy of the tasks can increase.
At no point should adults be whipping up snacks or other meals for the children except at pre-planned family meal times. It is not out of the question to expect teenagers to prepare dinner for the family periodically.
This is also a good age to get them well and truly involved in prepping and personal readiness fundamentals.
They can help with inventory and rotating goods, going over checklists, stockpiling gear and other supplies and taking care of all the other ceaseless chores that are attendant with the lifestyle.
Consider the following lists as a guideline for starting your kids off helping in the kitchen and around the house:
Youngest Children, 3-6 years:
Set the Table
Fill glasses
Clear the Table
Fetch Glasses
Tidy up spills
Wash and Clean fruits/veggies
Pickup and Put away Toys
Bigger Kids
Make simple dishes
Fetch/prep ingredients
Carry in groceries, put them away
Wash dishes
Take out garbage
Sort laundry
Clean fixtures
Pre-teens and Teens
Vacuum
Sweep and mop
Clean out appliances
Make dinner for family
Clean windows
Landscaping
Most other things adults can do!
As Always, it is Up to the Parent to Make the Call
Now, as I always like to say one size fits all advice rarely does. But in this case I stand by it! However, it is imperative that any good parent know, really know, their child, and what they are capable of as well as their limitations.
You don’t want them to outrun their headlights, and you shouldn’t let them do anything truly dangerous when they are unable to follow your instructions to the letter or comprehend what is really at stake.
That being said, a little bit of danger is good for children, and something as simple as frying an egg over low heat is a high value, high reward proposition with minimal risk.
On the other hand, anything where they might have to deal with dangerous chemicals or implements or could potentially set someone else in the family up for failure if they make a mistake should be supervised.
At least, it should be supervised until you are well and truly sure that the child is competent.
Also, while it is good to set expectations and indeed put a little bit of pressure on your kids so they can perform, if a task is delicate or time sensitive you might not want to risk it!
Better to do it yourself and ensure that it is done on time, allowing your kids to stretch their legs a little bit when the timetable is not in jeopardy of being compromised.
Helping in the Kitchen will Help Prepare Your Kids for Life
So, get your kids in the kitchen. With the holidays rapidly approaching, you’ll have plenty of opportunities to get your kids familiar with measuring cups and mixing bowls.
Let them taste the difference between sugar and flour.
My kids are looking forward to making their contribution to Thanksgiving Dinner: turkeys made from cookies, Rice Krispie treats, and candy corn. My son is awaiting the day I tell him it’s time to make Christmas cookies.
My daughter will probably count more eggs and lick more bowls than I will this year. And that’s the way I like it.
Keeping trespassers off your property and intruders out of your home is always to your benefit, but traditional barriers like fences, gates and bars are eyesores and can be expensive.
cactus plants
It is possible to set up meaningful deterrents to trespassers with various species of unique, thorny plants. This article will tell you about several.
The Importance of Controlling your Perimeter
For a long time, mankind has used barriers to keep out strangers and foes in both peace and conflict. The further you can keep someone intent on harming or stealing your belongings, the better.
In situations where interlopers have a material objective, like stealing anything not bolted down, barriers to entry will improve the odds that such smash-and-grab robbers skip your home for greener pastures.
Barriers that are well-designed work to the advantage of the defender by slowing or stopping attackers’ movement and allowing defenders more time to execute their strategies when legitimate attackers are committed to seizing a location or looting its contents.
Some barriers are built in such a manner that they funnel enemies into a closely guarded area or certain route of approach, making them either unable to withstand the defenders’ counterattack or vulnerable to other active defensive measures.
We have all seen the blundering footmen who, in legendary epics, struggled to advance across a field of obstacles in order to attack a castle are familiar to us all.
While some of this material is fictionalized and not entirely accurate, the concepts of defensive barriers are apparent.
The high walls, ditches, and thick hedges of a castle make it difficult to gain entry. No wonder starving the defenders out was the best approach!
But chances are we do not have the time, resources or manpower to install proper fortifications like the ones of old.
Even if we did, do you really want to live in a castle, and would your homeowners association or neighbors let you get away with it?
Probably not! But we still have great options for defensive barriers in the form of natural, living plants.
Can Plants Really Work as Security Obstacles?
Without a doubt, yes!
Sometimes beautiful but always a problem to cross or bypass, certain spiny-studded species of plants can prove to be as impenetrable and as perilous as double coil razor wire.
In fact, in some cases, plants can be even more forbidding than traditional security barriers!
Anyone who has ever had a nasty run-in with a truly nasty tangle of thorny or spiny branches will affirm!
A well-placed row of thick cacti or a tall clump of brambles is often all that is needed to dissuade an intruder from attempting to cross your property line.
Every area has a climate that will support some types of plant life suitable for the purpose of deterring trespassers.
All we need to do then is figure out which plants will work in our environment, and how they will fulfill our specific purposes, whether we need control and privacy at the perimeter of our property, or near perimeter defense immediately outside potential entrances to our home.
As you might imagine, this is both easier and more difficult than utilizing traditional barricades and other defensive measures, but with the right knowledge and a little bit of prepper ingenuity you’ll find this process will be easy enough and rewarding!
Considerations for Selecting and Cultivating Defensive Plants
There are a few things you should consider when selecting plants for security purposes:
The plant’s size at maturity. Will it be large enough to deter people Will it will a space near a door or window adequately? Does it grow large and broad enough to fit a shape requirement, as a hedge or fence?
The plant’s growth rate. How quickly will it reach its full size? How soon will it offer any meaningful defensive capability?
Can you save time by planting seeds or purchasing immature plants, or will you need to spend big to get a useful plant?
The thorns, spines or prickles on the plant. How sharp and painful are they? Will they snag clothing and scratch skin, or inflict genuine lacerations and puncture wounds on people who blunder into them?
The plant’s density. How thick will the foliage be? Can it provide visual obstruction on the other side? How difficult will it be to prune and shape?
The color and shape of the plant. Will it blend in with its surroundings, or be easily seen among other vegetation? If aesthetics are a major consideration for your property, is it attractive?
Cost. Just as with any other purchase, there is always a cost associated with adding plants for security purposes. You will need to factor in the price of plants, irrigation (if necessary), and maintenance costs.
Compatibility. Make sure the plants you select will grow well in your climate and soil type. Some plants are more fussy than others, and may not do well in conditions that are too hot, dry, shady or windy.
The best way to find out what plants work well for security purposes is to ask other like-minded preppers in your area. Chances are good someone has already tackled this problem and can offer some valuable advice!
These are the major considerations for determining which plants are best for our needs. Now, before you go out and buy that barbed wire fence or install those spikes on the top of your wall, take a look at the following plant species.
12 Plants that Will Deter Trespassers
Let’s take a look at a few specific plants that might be useful as defensive barriers. The following plants are perfect for keeping unwanted people away from your property:
Cactus
Hardy desert succulents with sharp thorns make ideal barriers against both people and animals; they’re drought tolerant so don’t require much water.
Usually slow growing, but there are many varieties that can suit any ornamental or defensive application.
barberry fruit on branch
Barberry
This plant has sharp thorns along its stems and branches that can inflict serious wounds; it also has a dense growth habit, making it difficult to penetrate.
bougainvillea glabra
Bougainvillea
This ornamental vine is covered in sharp thorns and grows quickly, covering any structure with its thorny vines, used to support itself as it climbs.
Beautiful when mature, another great ornamental choice that packs a wallop. Somewhat more delicate than others on this list.
firethorn
Pyracantha (Firethorn)
Another thorny shrub that produces reddish orange berries which are quite poisonous. More importantly for us it sports spines that can grow to longer than four inches. Quite durable and difficult to cut or break, this plant can easily grow taller and wider than man height.
Roses
Roses come in many different varieties, but all have thorns. They can be planted as bushes or hedges along the edge of your property to deter trespassers.
yellow rosebush
Some species are incredibly hazardous. One of the most decorative plants on this list, they need considerable care to flourish.
Hawthorn
hawthorn
Hawthorn is a small tree that grows thorny branches. It can be used to create a natural fence around your property and also acts as an effective deterrent to birds and other animals.
Junipers
juniper
These evergreen shrubs are covered in sharp needles that can puncture skin and clothing. Junipers grow all over the world in many climates, so there is certain to be a species that will work for your needs.
Crown of Thorns
This is a tropical plant that has an extraordinarily dense spiral of very sharp thorns on every surface, and even packs irritating sap waiting to punish any interloper.
crown of thorns
It can be used as a hedge or barrier but will require support to grow tall.
There is virtually no way to handle this plant safely! Thrives in hot, sunny climates, and sprouts red flowers when blooming.
Brambles
Brambles are a group of thorny shrubs that include blackberries and raspberries. These grow fast, wide and reasonably tall at around five feet high.
blackberry bush
You’ll also get delicious berries for your trouble, but they can be a bear to prune.
Holly
holly bush with berries
An evergreen shrub with sharp, spiny leaves and red berries that are poisonous. Usually noisy when disturbed, this is one of the less aggressive plants on this list.
Agave
Agave is a succulent with sharp, dagger-like leaves. It can be used as a hedge or border plant to keep people and animals away. Thorns are so strong they are famously used as sewing needles in some cultures!
Porcupine Tomato
This is a plant with sharp, dense, needle-like spines that can pierce through clothing and skin. It’s not the most attractive plant, but it will keep people away!
Most species feature attractive, candy-like berries that contain a potent alkaloid toxin. Keep children and pets away!
So there you have it! A variety of plants to choose from that will surely keep unwanted trespassers away from your property.
With just a little bit of planning you’ll be sure to come up with an option or two that will work well on your property.
Start Planting Today
Now you know how to select and cultivate plants that will act as effective deterrents against trespassers.
Remember, the key is to choose plants that are compatible with your climate and soil type, and take into account the size, density and “aggression” of the plant when making your selection. Happy planting!
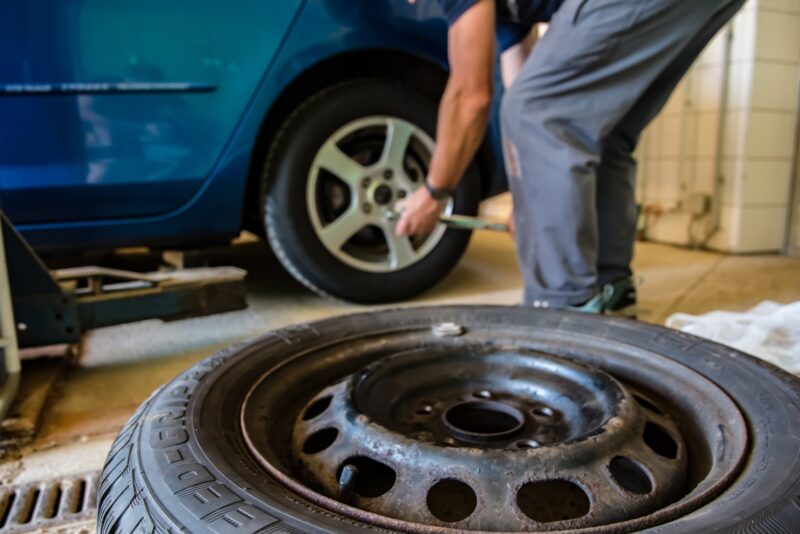
For many preppers, their vehicle is an invaluable part of their bug out and survival plans. Compared to going about on foot, a motor vehicle provides extraordinary speed, range and carrying capacity, and a nominal amount of protection from the elements.
But aside from being an important conveyance when times are tough, our vehicles also serve day in and day out as a daily drivers, commuter cars, and grocery-getters and family hauler.
Naturally, most of us take this capability for granted, and only start paying attention when things go wrong, wrong enough to bring us rolling to a halt.
Motor vehicles are complicated, and even though innumerable things can go wrong with them it is often the simplest and most visible components that fail and prevent us from hitting the road.
Without question, the most common component failure on any modern vehicle is the tires.
The modern, inflatable rubber tire is a marvel of simplicity, and a surprisingly complex piece of engineering.
We and our vehicles demand a lot from our tires, and knowing your way around them, their specifications, repair procedures, replacement and more is critical if you want to be prepared for dealing with pre-trip or roadside contingencies.
Today we are bringing you a guide that will lay the groundwork for understanding everything you need to know about tires.
Tires are the Most Common Motive System Failure Point
Compared to earlier wheeled vehicles like chariots, wagons and even the prototypical automobiles, our cars today enjoy equally modern wheels, specifically the “attired” wheel clad in a modern, rubber, pneumatic radial.
It is no overstatement to say that the modern tire has had just as much to do with the quantum leap in vehicle performance as anything else.
Providing a soft ride, extremely long service life and reducing the wear and tear on the rest of the motive system and drive train components, the tire is integral to vehicle operation on or off road.
Virtually every single vehicle today utilizes some type of inflatable tire with scarce few exceptions. Every bicycle, every motorcycle, every truck, van and car all use conventional tires.
Big rigs, trailers, heavy equipment and even lightweight lawn equipment all used them. Even airplanes are completely dependent on rubber tires in almost every instance for safe takeoff and landing.
I am not exaggerating when I say that all of our modern vehicles require proper and serviceable tires for safe and reliable operation, and without them, you probably aren’t going anywhere.
If you lose even one tire on a typical four-wheeled vehicle, be it a car or truck, the performance and handling of the vehicle will be badly compromised.
At speed, you are likely to lose control entirely and crash. If you lose more than one tire, meaning more than one goes flat, you will find it extraordinarily difficult to make forward progress at all.
Sure, in a time of uttermost desperation you might run a vehicle at low speeds with flat tires, or even down on the rims of the wheels themselves, but this is likely to cause serious damage and has a high likelihood of resulting in a crash.
No matter what kind of vehicle you are dealing with, and no matter how capable it is when on or off the road you can be assured that any failure from any one of its tires will be enough to severely impair it or even immobilize it.
This makes understanding tires, the limitations, performance envelopes and their expedient replacement, a critical skill for all preppers.
Now, there is an astounding amount of detail and variation in modern tires.
Sizes, types, specifications, performance ratings across all kinds of metrics, special capability or construction and many, many other factors.
Most of this information that a consumer or a technician needs to know at a glance is usually printed or embossed on the sidewall of the tire in the form of an alphanumeric code.
To the uninitiated, this code looks like a string of indecipherable gibberish, but once you become even passingly familiar with the typical contents of this code you’ll be able to determine the capability and suitability of a tire at a glance.
Tire Types
Usually denoted by a one or two character code at the beginning or very end of a tires designation printed on the sidewall, this code will tell you roughly for what category of vehicle a tire is for, or its overall serviceability for full-time or emergency use. The most common codes are as follows.
P – Denotes a tire for a passenger car. Easy to remember.
LT – Denotes a tire used for a light truck, typically employed on pickups and many SUVs.
ST – For “special trailer”, a tire designed for use on larger trailers that may be towed by a typical consumer vehicle.
T – Stands for “temporary”. This code denotes a tire that is intended as an emergency use, compact spare tire, sometimes called a donut.
These undersized tires replace larger diameter tires on the vehicle they are rated for, but are only used for lower speeds over relatively short distances to help a vehicle limp home or get to help.
Tire Sizes
Tire size is another obviously critical characteristic for obtaining optimum performance from your vehicle.
There are a surprising number of size characteristics if you really want to dive deeply into the science of tires, but for our purposes there are just three we are predominantly concerned with:
The diameter of the tire, the width of the tire and the offset.
The diameter of the tire is determined by the wheel it is being mounted to, and is specifically the surface area of the wheel where the bead of the tire will rest when installed.
The width is determined by measuring the inner distance of the tire from bead to bead on either side.
Lastly the offset of the tire is once again determined by the wheel it is being mounted to, measured from the wheels centerline to the mounting surface and is often expressed as half of the previous width measurement.
When examining a common tire for most consumer vehicles, you’ll usually see these three measurements expressed in the order presented- diameter, width, offset- but depending upon the manufacturer and the type of tire this may not always hold true.
Don’t worry; with just a little bit of experience and study you will soon learn to recognize the measurements for what they are and whatever order they appear in a tire’s code.
Tire Duty Ratings
A subcategory of the tire classes listed above, the duty rating further groups tires into specifications based on what type of terrain, conditions or load factors they can be expected to handle with a modicum of safety and efficiency.
This is an especially important factor to understand for consumers, as the duty rating of the tire will inform you if the tire is up to the task that you will demand of it, be it driving in inclement weather, at high speed, or holding up under heavy loads.
Light-Medium Duty
This is a category that covers typical, common tires for most passenger vehicles. Tires in this category are rated to carry between 550 to 1,100 lbs at the drive wheel, for cars, and 1,100 and 3,300 lbs on the drive wheel for trucks and large vans.
Tires in this category or further broken up into various classifications by speed rating. The speed rating details what sort of conditions and speed the tire is rated to handle.
This is important information if you are buying tires for a performance vehicle, off-road vehicle or live in an area with frequent inclement weather.
Snow Tires
No surprises here, snow tires are designed to help the vehicle handle effectively and safely in icy, snowy or wintry mix conditions. Examining these tires you will see large, deep gaps called voids between the raised tread areas.
These gaps are designed to allow snow and slush to be compacted between them before being ejected as the tire revolves, allowing the tread better and more consistent contact with the ground below.
Certain snow tires might be better classified as ice tires because they feature aggressive studs built into the treads that will provide attraction even on a hard packed and slippery snow or ice.
It is worth mentioning that tires of this type are typically regulated in many states because they are notably rough on payment.
Similarly, in areas with seriously hostile cold conditions studded tires might be mandatory.
Regardless of the exact specification, any tire in this category that successfully passes winter traction testing at an official proving ground can feature a snowflake design on the sidewall to complement the tire code.
All Season
All season tires are similar to snow tires and that they are designed to handle on road inclement conditions and accomplish this by having large gaps between the flat surfaces of the tread, or at least larger than typical road tires.
Compared to snow tires above, these gaps are smaller.
Tires in this category are great all-weathers and all-season options for vehicles that might be expected to deal with periodic inclement weather.
Tires in this category will usually feature M+S marking somewhere on the sidewall which stands for mud and snow.
All Terrain
All terrain tires are a good option for daily driver off-road capable vehicles, as they have adequate performance specs off-road but are intended to be relatively quiet, responsible and easy to handle when on the road at highway speeds.
Even better for preppers, tires of this nature usually do pretty well on snow and ice in the bargain.
Mud Terrain
Mud terrain tires are what many people imagine when thinking of stereotypical off-road tires on smaller vehicles.
Aggressive, knobby tread with widely spaced voids give these tires the best possible responsiveness and handling in muddy off road terrain.
The downside is they don’t do very well at all on pavement compared to other tires on this list, and they are notably quite noisy and a little unpredictable during emergency maneuvering on pavement.
High-Performance
These tires are designed to handle extreme speeds in regards to material capability and handling characteristics.
Within this category you have two subtypes, high-performance which is for speeds up to but not exceeding 168 mph, and ultra-high performance, which is for speeds up to but not exceeding 186 mph.
With relatively short life spans and rough riding characteristics these tires should only be employed for those vehicles that require them or drivers who know they need tires capable of handling such speeds.
Run-Flat
A special subcategory of tire typically employed on vehicles which do not carry a spare tire of any kind.
Designed with an especially stiff sidewall that will maintain the shape and profile of the tire even when air pressure is lost completely, tires of this type allow drivers to keep on rolling even at a reduced speed and only for a comparatively short distance to seek help.
Usually expensive and sometimes not capable of being repaired after being damaged, these might nonetheless be a good option for special circumstances.
Race Car
Exactly what it says on the label!
Race car tires are designed for race cars, ultra performance vehicles that are expected to perform feats of extreme cornering and operate continually at extremely high speeds.
Both generate massive stresses on tires, and accordingly these tires are designed for maximum, peak durability under these conditions, although they wear out quickly.
Race car tires are available in a further three subtypes, slicks, for normal use, rain, for racing use in wet conditions, and DOT, which are “street legal” race car tires.
Heavy Duty
A distinct category of tires, akin to light-medium duty tires but for much larger and heavier vehicles, commonly used on tractor cabs, semi trucks and their trailers.
Tires in this category are expected to carry a load of between 4,000 to 5,500 lbs on the drive wheels and are usually seen mounted in tandem on the vehicles that use them.
Off-Road
A subcategory of heavy duty tires commonly employed on massive construction vehicles, earthmovers, agricultural equipment and other big rig type machines that need to move over soft ground in order to do their jobs.
Typified by extremely wide and extremely deep voids between the treads, these are still sometimes employed on hard surfaces like tarmac.
This covers the spectrum of tires that most preppers could reasonably be expected to encounter or require for their purposes and owned vehicles, be they daily drivers or business-oriented fleet machines.
It is worth mentioning that there are many, many other kinds of tires besides the ones listed above, everything from tiny tires found on lawn equipment to specialized, solid tires for forklifts and similar machines.
Now that we have a basic grasp of tire categories, it is time to get down to the brass tacks and examine exactly what a tire code can tell us.
Sample Tire Code
Without any education on the subject, a typical code printed or embossed on the side of a tire might well look like a nonsensical cipher, but as you will soon discover they are actually quite easy to interpret.
Below is an example code that we will break down piece by piece into its constituent components:
P215/65R15 95H M+S
P – As we learned above, the p indicates a tire for a passenger car, a sedan, coupe or similar vehicle.
215 – This is the width of the tire in millimeters, one of the primary measurements discussed above.
65 – This is the aspect ratio of the sidewall height.
R – The letter R indicates a radial tire, though other Tire types are sometimes encountered for consumer vehicles. A ‘B’ indicates a bias belt tire where a ‘D’ indicates a diagonal belted tire. Note that no letter in this position of the code indicates a cross-ply tire.
15 – This portion of the code indicates the diameter of the wheel that the tire is designed to fit, in inches typically. Certain manufacturers use millimeters and millimeters is far more common elsewhere in the world than North America in which case it will be a three digit number.
95 – This is the load index number, and can be looked up on the ETRTO standards table to reveal the maximum load rating of the tire. A ‘95’ indicates that the tire is rated for 1,520 pounds.
H – This is the speed rating of the tire, and is similarly cross-referenced on a table to reveal the maximum speed that the tire is rated to handle. Note that these single or double digit indicators might be found elsewhere in the sequence, not always in this position.
M+S – Indicates an all-season tire type, as we learned above this M+S indicator is short for mud and snow.
That is it for the tire code shown above. Not too difficult, is it?
With just a little practice you will quickly learn to recognize what groups of characters indicate, and how they are commonly placed throughout tire codes so that you may quickly and surely interpret the specifics of any tire you come across so marked.
Tire Degradation
Tires are a surprisingly complex component, consisting of the best advances in automotive material Science combined with state-of-the-art manufacturing techniques to provide tires of unparalleled performance, longevity and durability.
We have come an awfully long way from the simple rubber tires of last century. The modern tire is a multi-component composite marvel, but they are not invincible.
Regular wear and tear from use, abuse from showboating maneuvers or hard cornering, burnouts, hard stops, and even exposure to weather in the form of moisture and UV radiation from the sun are enough to significantly reduce the service life of the tire.
This could potentially introduce dangerous weaknesses into its structural integrity, weaknesses that might translate into a blowout and subsequently a crash.
The point is that even tires mounted to a vehicle that is not being driven regularly must be maintained as usual in the form of regular rotation, inspection and protection from ambient weather conditions.
Tires that are left out exposed in nature will frequently degrade and quite literally rot right off of the wheel unless you intervene with preventative maintenance.
Be on the lookout for thin, hairline cracks in the surface of the tire as this indicates the beginnings of a dry rot.
Tire Failures
Tires are expected to put up with a lot in normal operation. Heat, stress, wear and tear, it all adds up and takes a toll and eventually from the accumulation of where in use or unfortunate running with a hazardous piece of debris or other mishap on the road tires can fail.
Invariably, this is when we can least afford to have our tires let it down, and all we can do in the aftermath is deal with it or pay someone else to deal with it for us.
Accordingly it is in your best interest to learn everything you can about common tire failure events so that you’ll know what to do in the event they do fail and whether or not it is worthwhile to attempt repairing the tire and returning it to service, or ditching it and simply putting on a replacement.
As you probably already guessed, the most common tire failure is a loss of air pressure, AKA a flat tire.
Tires go flat because they are incapable of holding the air that pressurizes them, giving them shape and the correct profile for normal operation.
Loss of pressure occurs from leaks, either fast or slow, or from a catastrophic loss of air pressure, usually called a blowout.
The root cause of either a leak or a blowout could be simple wear and tear or caused by a piece of debris that punctures the tire.
If you are lucky, you will simply come out to your vehicle in any given set of circumstances and find that one or more of the tires have gone flat, usually noticeable by the car sitting at an odd angle or failing that the distinctive rough ride and “wop wop” sound of a flat as soon as you begin to move.
If you are unlucky, however, a blowout can occur while you are at speed going down the road. This is the most serious and potentially the most life-threatening form of tire failure.
The tire either goes flat rapidly while underway or in the worst case scenario the tire disintegrates and comes apart leaving only the bare wheel in contact with the asphalt. In any instance, if this occurs at high speeds a loss of control is likely.
The vehicle will usually violently pitch to one side and an overcorrection can result in a severe skid or even spinning out. Should I blow out a curve for a large and heavy vehicle a wreck is almost certain.
Correct training and preparation can help a driver minimize the chances of a bad outcome should a blowout occur.
Whichever scenario you are facing, a blowout that strains you while underway on the highway or the unfortunate incident of a flat tire when you are ready to depart, you’ll need to get the wheel off the car to take care of the problem. We will cover how to do that in the next section.
Dealing with a Damaged or Destroyed Tire
Depending on the setting, your skill and the tools available you’ve got a couple options for dealing with a flat or destroyed tire.
A common flat tire is not the end of the world assuming that the tire is in overall good shape and has plenty of life left. These tires can usually be repaired in an ad hoc or permanent fashion to get your vehicle back on the road.
Most driver-level repairs are temporary or semi-permanent, designed to enable you to get the vehicle back underway at a modest speed and get the tire serviced.
Professional repair at a garage will repair and reinflate the tire restoring it to normal operation, like it never happened. However, some tire damage cannot be repaired at all, meaning the tire will need to be replaced.
This usually happens at the end of the tires service life from normal use or in the case of a particularly nasty puncture or a bad puncture that goes through the sidewall of the tire as opposed to the tread.
It should go without saying that tires that are destroyed, either blown open or completely shredded, cannot be mended.
In the case of a puncture that can be repaired there are a few options:
Plug – Plug repairs are among the most common employed by drivers as an interim fix for a puncture going through the tread area of the tire.
These kits are commonly sold at department stores and automotive supply stores and consist of a set of tools designed to help you remove a piece of debris that caused the puncture, clean up the hole and then insert a long, sticky epoxy plug to seal the tire.
Although these are intended to get a tire back in operation long enough to get to a garage, it is possible that a repair of this nature will last for quite a long time.
Patch – Using similar adhesive materials to the plug repair above, a patch is designed to adhere on the inner surface of a tire to cover a hole going through the tread area.
This requires dismounting the tire from the wheel, and that means it is usually going to be a non-starter for most drivers to perform, especially in an austere environment or on the side of the road.
Although not specifically intended for repairing punctures through sidewalls, difficult as they are to fix, in the case of a very small puncture a patch might be used on the outer surface of the sidewall.
Combination – For the ultimate in durability a combination repair might be instituted, utilizing both a plug and patch along with additional materials and adhesives to affect the strongest possible bond and restore the tire to service.
Performed correctly, a combination repair has the best likelihood of holding for a long period of time and at high speeds.
Switching Out a Damaged or Destroyed Tire
Whatever has happened, be it the discovery of a flat tire or the harrowing and hair-raising catastrophic blowout while you fly down the highway, your vehicle is effectively out of action until you switch out that bad tire.
This is most commonly done by jacking up the vehicle, removing the affected wheel and replacing it with a spare one if you are lucky enough to carry one aboard your vehicle. If you don’t, you’ll have to obtain one and then proceed.
Although intimidating to the uninitiated, changing out a flat tire is a simple process although it could be difficult in rough conditions or if the lug nuts holding the wheel onto the axle are stuck. Even this can be overcome with the inclusion of a few select tools.
This is a fundamental task that every single driver should learn and become fluent in because, as mentioned above, the flat tire is the most common equipment failure for any vehicle.
Below you will find a list of tools and after that procedures for swiftly, correctly and most importantly safely changing out a flat tire.
Jack – This should be a bit of standard issue equipment for your vehicle, whatever it might be.
You’ll use the jack at the indicated point according to your vehicle’s manual to lift up the car nearest the tire that has gone flat.
It is worth noting that common jacks included with your car’s equipment for the purpose are pretty weak on their own, and you should never, ever get underneath a car held up by a jack alone, or allow any part of your body to be underneath the car while changing out the tire.
Jack stands – A jack stand is a simple, mechanical apparatus designed to hold up a vehicle that has been lifted up with a jack and these provide a far better and more secure option for safely keeping the vehicle aloft when you are working on it for any purpose.
Jack stands are typically employed in a garage setting, and rarely carried along as part of a vehicle’s equipment complement except in special circumstances. Nonetheless, these are great to have around if you ever have to change a flat tire at your home.
Wrench – Also known as the lug nut wrench, because it is designed to fit the lug nuts holding the wheel onto the axle of your vehicle.
Again, this is something that should be issued with your car, truck or SUV but if you have a short, wimpy one you’ll need to upgrade it or add an extra tool to provide better leverage in case you are dealing with stubborn lug nuts.
Breaker Bar – The breaker bar is an extension for the lug nut wrench, and could be anything from a long-handled ratchet with an appropriate socket to a simple length of sturdy steel pipe that will provide far better leverage than a short handle lug nut wrench can muster on its own.
If you are dealing with a particularly tricky stuck lug nut a breaker bar might mean the difference between affecting a quick and efficient roadside replacement or having to call for a ride!
Gloves – Believe me when I say your hands are going to get dirty, greasy and potentially injured when changing out a tire.
Injuries range from busted knuckles thanks to a slipped wrench or a lug nut that suddenly releases to cuts and other injuries owing to roadside debris.
Get a good, lightweight set of mechanics gloves and keep them with your vehicle’s emergency kit.
Changing out a Flat Tire Step-by-Step
You have the tools and a flat tire that needs changing. The following steps will walk you through it.
As always, take the time to refer to your vehicle’s owner’s manual to ensure there are no other special procedures required to successfully and safely lift up the car and change a tire.
Step 1: Before you do anything else, the vehicle must be moved to a safe place well away from traffic, and if at all possible it should be flat, level and have hard ground capable of supporting the weight of the vehicle on the small footprint of your jack.
If you cannot get the vehicle far enough away from traffic to attempt a change, don’t risk it! Call for a tow instead.
Step 2: Time to get the car in the air. Retrieve your jack and the lever used to operate it if it is not permanently attached. Jack’s come in a variety of styles, so again consult your owner’s manual and place the jack in the correct orientation at the specified point for lifting.
Begin to lift the car in the air by operating the jack, taking care of every part of your body out from under the car while this is happening. Lift the car high enough only to get the tire just up off the ground.
Step 3: Loosen the lug nuts holding the wheel. Use your lug nut wrench to loosen the lug nuts, and be prepared to use plenty of force as they may be quite tight.
Employ your breaker bar if required. Loosen them only enough to where you can easily unscrew them by hand.
Once this is done, retrieve the spare tire and then finish removing the lug nuts before removing the wheel with the damaged tire.
Step 4: Time to mount the replacement tire. Before doing so, ensure that it is inflated to the correct pressure and otherwise in good shape.
Set the replacement tire on the bolts and snug it up before replacing all of the lug nuts until they are just finger tight.
Step 5: Begin at tightening the lug nuts as tight as you can using your lug nut wrench.
This should be done in an alternating pattern, either the one specified by your vehicle’s owner manual, or by tightening a nut and then moving to the next one opposite it on the hub in a clockwise manner.
Repeat this procedure until all lug nuts are as tight as you can make them.
Lug nuts should be tightened to a specified torque, but lacking a specialized torque wrench we just want to be sure that the lug nuts won’t loosen up when we get back on the road.
Step 6: Now operate the jack to lower the car all the way back down until you can easily remove the jack. Put away all your tools, double check your installation and then get back in your car to get back on the road.
Note: If using a compact tire or an emergency spare tire, AKA a “donut,” as mentioned above, keep in mind these tires are not rated for the same speeds as your usual tires.
Typically you’ll have to keep it under 50 miles an hour when rolling down the road on a donut, and preferably you’ll be going even slower than that.
Also keep in mind that such tires are not rated for extreme distances, and usually only have an operational lifespan of about 200 miles or perhaps less.
They are only designed to get the vehicle moving again so that you may safely drive it yourself to a garage for effective replacement of the damaged or destroyed tire.
And that is all there is to know about changing out a flat or destroyed tire.
With some practice, confidence and the right tools you can usually complete this ordeal in about 15 minutes or less even in rough conditions, assuming you have a decent place to park the car in order to work.
I recommend all preppers practice this procedure now so they won’t get it wrong in a live event.
Now You’re A Tire Pro
Tires are an essential and inseparable part of modern vehicles, in every category, and for those of us who rely on our vehicles every single day we probably don’t stop to give them much thought unless we have to pay for new tires or one of them fails leaving us stranded or delayed in our travels.
More than any other component on the vehicle the tires that get you down the road are most likely to fail and result in an accident or in a delay that you can ill-afford.
For that reason, it is essential that every driver but especially preppers cultivate and maintain a working understanding of tire specifics and the procedures for dealing with mishaps.