Cooking during a SHTF event is a very tricky proposition. If proper sight, sound, and smell OPSEC is not observed, everyone within a one mile radius could know you and your family not only still have food, but also have the means to prepare it.
During a brief disaster, like the power going out due to a seasonal storm, using the backyard grill will likely not be problematic.
But, during a long-term disaster of a more serious nature allowing the tantalizing scent of grilled meat to waft onto neighboring properties and nearby roads could be a deadly mistake.
Past disasters and emergencies may have convinced some non-preppers the value of stocking up on non-perishables, but those event’s didn’t necessarily mean lack of electricity in the long-term. It will still take only roughly three days for the millions of unprepared folks around the country to run out of food to eat.
Even if you have been friends with your neighbors for years, the smell of meat on your grill when the bellies of their children are empty can provoke a violent confrontation that could cost your family all of its food, cooking source, or worse.
Preppers who live in rural areas will have a distinct advantage from a SHTF cooking OPSEC perspective, over their small acreage, small town, suburban, and urban peers.
Cooking discipline is far easier to achieve when you have zero neighbors. Yet, smell and sound can travel a lot further than many may realize, especially on a day when the wind is not with you.
I only have to go one quarter of a mile down our half mile private road to smell the food our the people at the house across the grilling in their own backyard.
No one other than your family or members of your prepper tribe also residing at your retreat, should have even the faintest idea that you have food, and means of making it in an off the grid manner.
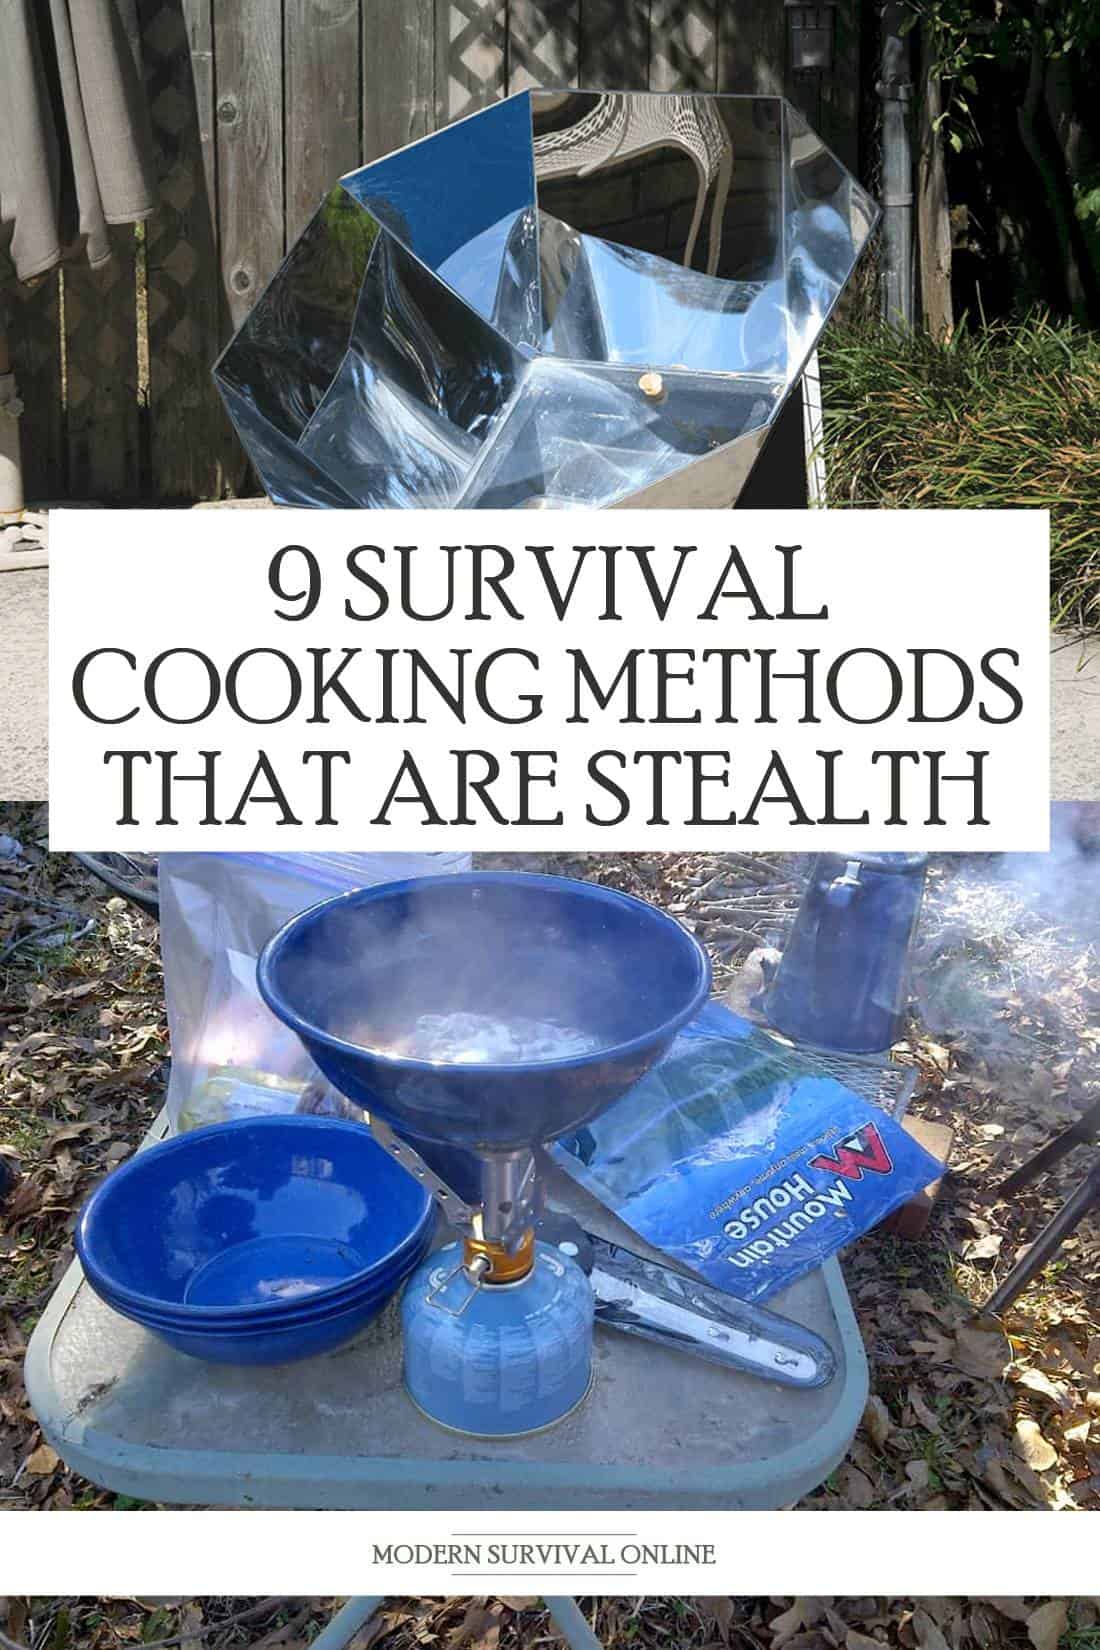
Solar Oven
Cooking food in a sun over will take a lot longer than popping it onto a grill or campstove, but the glass or plexiglass top cover on the off grid oven will greatly curtail the scent.
A solar oven is basically an enclosed box with reflective panels (although some are made without reflective panels).
Most solar ovens are capable of reaching a temperature of 400 degrees F. The average cook time for most foods typically prepared in a regular kitchen oven are 250 to 350 degrees – making this quiet off grid cooking method that will help you exercise proper sight, sound, and scent discipline.
You can bake, broil, or roast just about anything in a solar oven that you would in a conventional oven or on a charcoal grill.
Solar ovens (or solar cookers as they are also called) can work during the fall and winter, but take a lot longer to reach temperature, and may not be well suited for meat preparation during the colder months.
Gas Oven
If your home kitchen does not include a gas oven, investing in one even if it means converting the hookup from electric, should be made a prepping priority. When the electricity goes out, a gas stove and oven will still continue to work.
A natural gas oven will run on reserves for perhaps as long as 3 to 6 months in many areas. But ultimately, if no one is at the compressor pump plant keeping everything in working order, the flow of natural gas will end.
Natural gas service is not always offered in out of town rural areas. If this is the case where you live, (or you want a backup for your backup) a gas range unit can still be installed.
Purchasing a propane gas tank (or tanks) will allow you to hook up a gas range in your kitchen no matter where you live.
We can cook for more than a year using just one large propane tank on our survival homestead. A set up of his type will provide a way to cook indoors so no one – no matter how close they live, will be able to see, hear, or smell that you are cooking.
Unless you live outside of a rural area (the only place preppers should live anyway) you can buy as many propane tanks as you would like to keep a gas oven going for potentially many years.
Solar Powered Generator
Purchasing a solar generator (or several) will also allow you to cook indoors. Even if your space and budget allow for only a small generator, you will still garner enough power to use conventional food preparation devices indoors or on your back porch.
Unlike a gasoline, diesel, or kerosene-powered generators, a solar powered generator runs silently, and does not need a stockpile of fuel in order to operate. But, just as with the solar oven noted above, the cooking powered generated from this type of generator will be reduced during cold weather months.
A solar generator can typically have enough juice to power a crockpot, hot plate, toaster oven, roaster oven, air fryer, and even a small wattage microwave.
Freeze Dried Meals
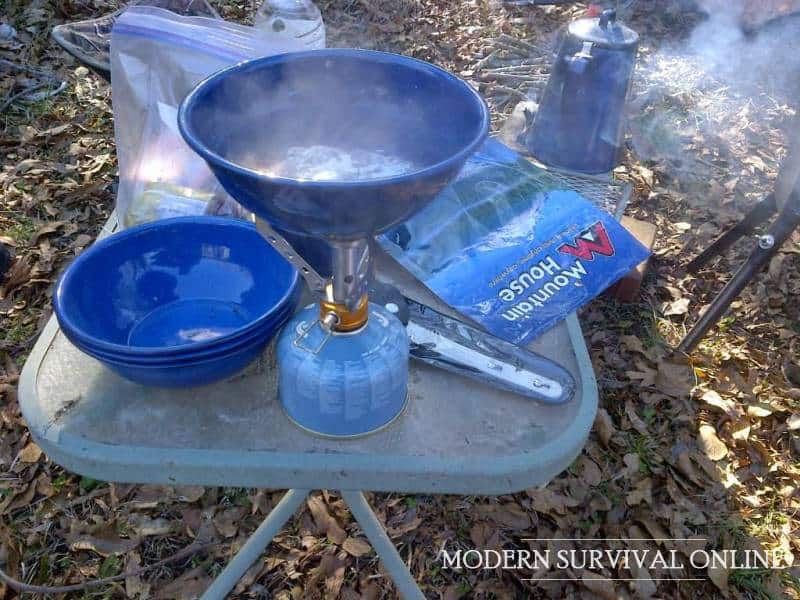
One of the very best ways to prepare hot food to eat without sacrificing sight, sound, or smell discipline. You can buy freeze dried meals from survival supply vendors that require only hot water be poured into the pouch to complete the process.
The heating of the water can be done using a camping style solar shower bag, solar oven, a small rocket stove that emits little smoke, or simply by placing a glass jar of water in a sunny spot, and allowing it to heat up naturally.
Long-term storage packet meals like this are more expensive than using food your have grown or raised yourself and preserved, but the SHTF cooking OPSEC value they provide is priceless.
Investing a freeze drying machine can cost between $1,500 to $4,000 depending on size and model. While this is a substantial expense, it could be a money saver in the end if you put in a large garden, as well as hunt and fish for a lot of your own food now, before the world goes pear-shaped.
Fireplace, Wood Cook Stove, or Wood Burning Stove
Not only will owning any one of these wood powered features in your home allow you to cook, they would also allow you to keep the living area warm, as well.
Once again, rural preppers will have a distinct advantage over preppers living in other areas when it comes to fireplace, wood burning stove, or wood cook stove cooking.
Preppers who cannot resupply their own firewood will only be able to use these options until the stockpile they have paid for and had delivered, run out. Hiding a big pile of wood from view is also going to be a major hurdle.
During cold weather months, smoke coming from any wood powered source will not look out of place in a rural area. But, in the summer, late spring, or early fall, a smoke flume coming out of a chimney will quickly alert a passerby that you have food, and are in the midst of preparing it.
Any time you can cook indoors the smell of what you’re doing is hidden. All of these wood powered devices operate not silently, but extremely quietly.
Outdoor cooking should be avoided at all costs. Unless you are in a bugout situation and have to build a fire for warmth or water purification, using a conventional campfire should always be a last resort.
Drawing attention to yourself, what you have, and what you are doing is the exact opposite of what a prepper rightly concerned about OPSEC would ever want to do.
A Dakota fire hole or Dakota fire pit is designed to produce heat using just the bare minimum of both flames and smoke. An outdoor fire like this will fairly quickly generate enough heat to boil water or cook food.
The amount of space needed to both dig and use a Dakota fire hole is incredibly minimal – making them a viable SHTF cooking option for small town, suburban, and even urban preppers.
The sight and smell discipline offered by using a Dakota fire pit is not as perfect as using a gas range, solar oven, or solar generator, but is still a potentially viable option if the Dakota fire hole can be dug in a location that no one outside of the family will see.
Cooking Bags And Aluminum Foil
When using a Dakota fire hole, or forced to build a traditional campfire in an emergency situation, using aluminum foil or cooking bags will reduce the cooking smell tremendously.
Packing cooking bags or foil in your bugout bag will reduce, at least slightly, the smell of food being prepared if you use a traditional campfire or a Dakota fire pit when away from home, as well.
Wrapping food in multiple layers of foil before putting it on a cooking grate or in a cast iron pot to prepare it, or in a cooking bag, will not alter cooking times and in fact can make the meal being prepared even more tender.
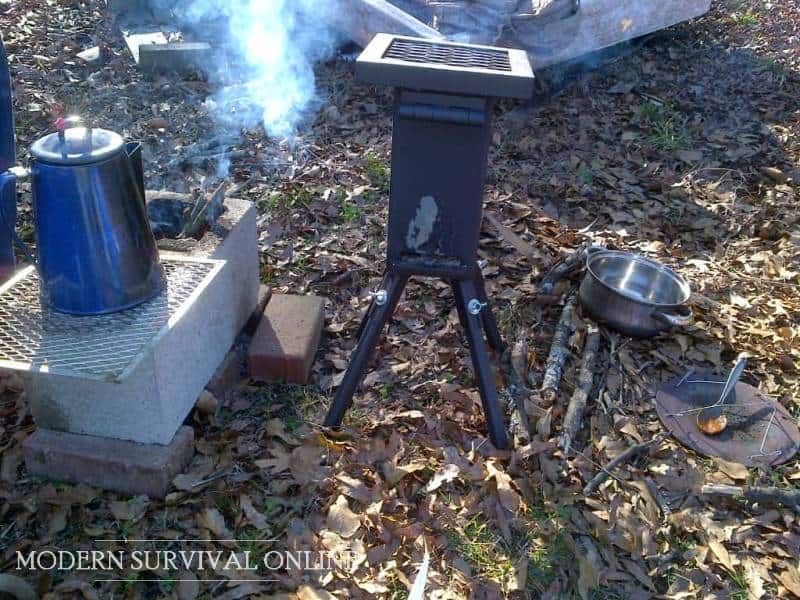
Camp Stove and Oven
A small portable propane powered camping stove or camping oven offers you the chance to make any food you would on a conventional kitchen range without making any noise or emitting any smoke.
But, the smell of bacon cooking on a camp stove, or biscuits baking in a camp oven can draw unwanted and potentially dangerous attention. Using a propane-powered cooking device indoors is not safe – as the label on camping stoves and ovens clearly state.
But, using such an off grid food preparation device on a porch close to your house door or inside of a garage with a window or exterior door cracked may allow for the recommended proper ventilation, and vastly reduce the smell of the cooking food beyond the immediate area.
Check out our reviews of these popular camping stoves:
Thermal cookers do require an external heat source like a small portable rocket stove designed to hold a small pot to boil water or a Dakota fire pit. These food preparation devices are basically large thermoses that can accommodate small to medium cook pots inside.
It takes around 10 minutes for water or other liquids placed inside of the pot to hit the boiling point. Once the water has boiled, the other ingredients that are stirred into the pot will cook for up to eight hours – without making any noise or drawing any attention to the meal preparation via smell.
Final Thoughts
There are pros and cons to every SHTF cooking option on this list. While all can work efficiently in an off grid manner, some rely on the resupply of a fuel source and others cause some type of smell, sound, or smell discipline issues.
Using more than one OPSEC minded off grid cooking options so you not only have backup for your backup but a third layer of sight, sound, and smell discipline cooking options will help keep your family well fed and safe during a long-term disaster.
Preventing anyone other than the loved ones living in the same home from knowing you have food and a cooking source to make it is the only way to keep both them and your food stockpile safe.
Dehydrated foods are an increasingly popular option for concerned homeowners, campers and preppers alike.
Dehydrated foods enjoy increased shelf stability, lighter weight and are still reasonably easy to prepare or even ready to eat right out of the package. Most of them still taste pretty good to boot!
However, despite dehydrated foods being a staple going back to civilizations of antiquity, they are not typical fare for most people, and certainly not in any quantity. Is dehydrated food safe?
Should you eat dehydrated food? Yes, so long as you pay attention to calorie and nutritional intake. Dehydrated foods have many advantages compared to other methods of preservation, not the least of which is a lack of additives and preservatives oh, good to excellent shelf life and convenient portability. However,theyalso require significant water for preparation in some cases and are higher in calories, sugar, and salt.
There’s more to learn about dehydrated food, stuff that will help you make a decision on what kinds and how much is right for your lifestyle and requirements. Keep reading to learn the full story.
The Good
Dehydrated Foods Maintain Nutritional Value
Dehydration has significant advantages over other forms of food preservation. One of the foremost advantages is that food maintains the maximal amount of nutrition.
The majority of a food’s vitamin and mineral content will be preserved with only a few specific vitamins experiencing significant loss during the dehydrating process.
Other forms of preservation which utilizes high heat or chemical preservation will typically sap vitamin levels significantly.
This can be countered somewhat in the case of dehydration by adding certain preservatives, and in fact this process is typically employed with grocery store-bought preserved foods and snacks, namely fruits and veggies.
Vitamins C and A typically lost in the dehydration process and are often countered with the aforementioned chemical additives, however this will come at the cost of depleting various other mineral content in the food.
This is a trade-off that is essentially unavoidable with dehydration, and for the prepper or home dehydrator it is easily avoided by augmenting your diet with other food to make up for any loss of vitamins in the dehydrated goodies.
Even accounting for this odd quirk most foods retain an excellent nutritional profile if they were healthy to begin with, making dehydration an excellent method of preservation for those on strict meal plans or with special nutritional requirements.
All Natural Method of Preservation
As mentioned, store-bought dehydrated foods may have a few additional additives but that will definitely not be the case if you are dehydrating your own meats, fruits and veggies.
The food that goes in the dehydrator we’ll come out when it is finished with nothing else added in the process if you don’t put it there yourself. If you start with high-quality, clean all natural food you will have high-quality, clean all natural dehydrated food at the end.
From a quality control standpoint this is tremendous, and is also a boon for those on specialized diets.
What’s more, home dehydrated food will often last even longer than their store-bought counterparts because not everything that goes into these mass-produced foods is actually a benefit to shelf life.
Much of what is added to simply to improve flavor, color or texture; all likely will not be needed when you do it yourself.
The Bad
Some Dehydrated Foods Require Significant Water for Preparation
Many choice dehydrated foods require no additional preparation before eating. All kinds of veggies, fruits, and meats are ready to consume, typically as a nutritious and tasty snack. You can even get some specialized fare like dehydrated ice cream, cobblers and other delicacies.
However, plenty of other foods including such staples as beans, grains and typical survival or camping meals require a fair bit of hot water or even sustained boiling to prepare.
This could be an issue for you or it might not be. If you are breaking out the dehydrated stuff at home during a power outage or some other low intensity, short duration emergency it might not give you a second thought.
However, anytime you are enduring a situation, disaster scenario or not, where drinkable water is a precious, precious commodity you might very well want to cut down on the expenditure of water simply to prepare food when some other form of preserved food might be ready to eat complete with its own moisture content.
Only by careful assessment of your requirements and anticipation of the challenges you might be facing can you make a decision on whether or not dehydrated food will put too big of a strain on your supplies or not. If so, stick to the ready-to-eat varieties of dehydrated food.
Contains More Calories, Salt and Sugar by Weight
Dehydration, as you probably know, removes water content from common foods. By removing this moisture content, a significant fraction how many consumables bulk and weight are removed.
As mentioned above, sometimes certain vitamins and minerals might be depleted somewhat in the bargain, but you want to know what stays behind in this new lighter and smaller portion? All the calories, all the sugar and all the salt.
This is something of a double-edged sword. On the one hand, concentrating the salt and sugar in a smaller morsel of food typically makes it taste better.
Most folks who have tried dehydrated fruit will comment on how sweet and delectable it is. On the other hand, taking out water weight reduces the bulk and stomach-filling properties of the food in question.
These lighter, smaller and tastier morsels are easy to binge on, and that means for the same weight of the same food you’ll be ingesting drastically more calories, sometimes upwards of four times as much!
This means dehydrated foods make it very easy to blow your calorie budget when you are on a diet, and the last thing you should do is sit down with a great big bowl of dehydrated apple, banana or apricot chips and gorge on them when your favorite show is on.
Sure, you can tell yourself they’re healthy (and they are in moderation) but 2,000 calories worth of fruit is still 2,000 calories!
Conclusion
Dehydrated foods are healthy, generally nutritious and an excellent choice for shelf-stable preservation without any additional ingredients going into the item.
But one downside with dehydrated foods is they contain significantly more calories, salt and sugar by weight compared to their unpreserved counterparts.
But as an option for increasing shelf life and reducing spoilage while making food easier to transport and still easy to prepare or consumed as is dehydration is an excellent option.
So the fateful day comes, and you are finally facing a true, prolonged SHTF situation. This is it, the big one.
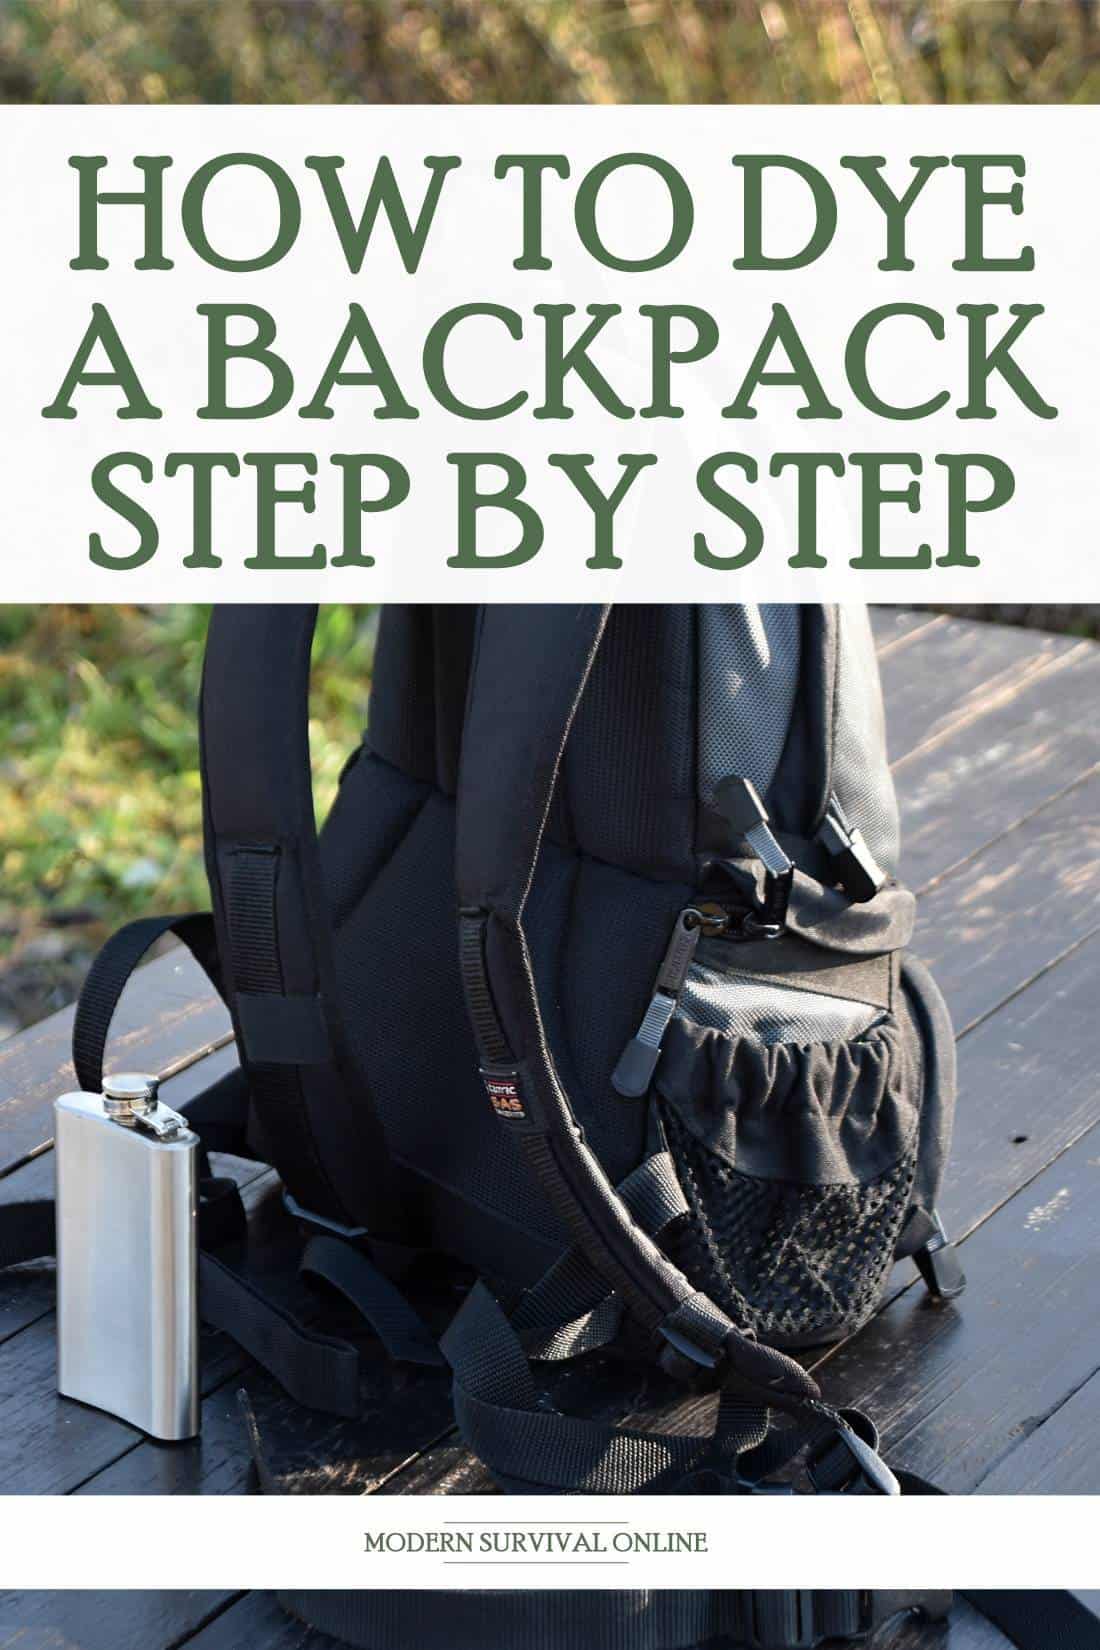
There’s just one problem: your bug-out bag, despite all of its better properties, is an entirely unsuitable bright and cheery color, one that is liable to attract attention, and get you spotted and subsequently shaken down for its contents. That is a bad move no matter how you slice it.
Lucky for you, you don’t have to be stuck with a high-visibility pack when the time comes to go seriously low profile. With just a few supplies, and a little bit of time and ingenuity you can dye your backpack a color that is more discreet and suitable for a camouflage base.
Nearly any backpack can be dyed, and if you take a little care in the process it doesn’t even have to be that messy.
The skills you learn for dyeing your backpack can also apply to many other garments and pieces of equipment, making this a simple skill that can serve you well for life.
In today’s article I will show you a couple of different methods for dyeing your pack, be it a bug out bag, get home bag, or any other kind of backpack.
Why Dye?
The most obvious reason to dye a light-colored backpack or any other piece of gear is too darken it order to improve concealment and reduce observability.
Bright, eye-catching colors are not going to help you stay hidden in any environment, unless you are carrying your backpack in a permissive, public setting where military patterns, colors and appearance is what will draw the attention.
I’m talking about a scenario where you are generally trying to avoid being noticed or spotted by anyone that is not part of your family or group.
When the balloon goes up, everybody puts their chips on the table, and strangers become unknown contacts, and that’s dangerous. Remaining hidden can be paramount, as the fight that you avoid is always one that you win.
You might think that dyeing sounds labor-intensive, messy, difficult and generally not worth the effort compared to just throwing a camouflage wrap or rain fly on your pack, but you should not count out this technique:
Dyeing any fabric is pretty much permanent, compared to a cover or wrap they can become lost or torn and compromise your concealment.
Compared to lesser coatings and colorings like paint, dye will not lose its coloring or wear away requiring reapplication except over a very long period of time.
Nothing short of a lot of time in the sun or straight bleach will damage dye, meaning you can count on your new color to stand up to bad weather and rough handling with no concerns of exposing you.
What Do I Need to Know?
There are a few material and condition factors that you need to keep in mind before you dive into dyeing your backpack. Both will affect your approach as well as the supplies needed and how long the process will take.
Only in very few circumstances though will you be unable to dye your backpack and I will address those below.
Material
Generally speaking, you’ll need to ascertain what material or materials your backpack is made of in order to select the right dye and use the right procedures.
The precise formula and steps you need to take depends on what product you are using and what the manufacturer recommends, but broadly speaking, when you are dyeing a natural fabric backpack, or one made with predominantly natural fabrics like cotton, canvas and wool you will use a dye suitable for those fabrics.
If you are dyeing a backpack that is made predominantly with synthetic fiber like nylon, polyester and derivatives you will need to use a dye that is specific for synthetic fiber, and typically take a few extra steps during the dyeing process to ensure that these tougher fibers can absorb the pigments.
One potentially tricky situation you might run into is finding out that your backpack uses a significant mixture of fabrics, something like half all natural cotton and half nylon, for instance.
In that case, there is no need to attempt dyeing only the specific parts of the backpack; that is a recipe for tears and misery! Instead, just remember the simple rule that when the pack is predominately synthetic fiber you use a dye that is specific for synthetics. That’s it!
Color
Your backpack’s existing color will dictate what colors are available to you for dyeing, as well as how well the dye job will work. A white backpack will accept any color with a high level of fidelity.
But assuming you do not have a white backpack, light earth tones or tans and light, pale and pastel primary colors will take dye better than darker colors.
As a general rule, if you already have a very dark color your dye will only succeed in tinting the pack a different color or shading it and making it even darker.
Also you’ll need to learn a little bit of color theory: If you start out with a blue backpack and try to dye it yellow, you will end up with some shade of green, not a yellow backpack at the end.
This is not something you need to be too concerned about, since your primary objective should be just to take a light or brightly colored backpack down to a darker shade that is easier to hide and camouflage in general.
Pretty much no matter where you are on the color wheel. With a little bit of ingenuity and research you can come up with a recipe that will get you an acceptable dark color.
Dirt
Dirty, greasy, grimy backpacks will not accept dye very well, leaving the finished product splotchy and not in a good way.
It is entirely possible that an old and nasty backpack can come out looking more like a cow or a tie-dye job with your original bright color poking through the darker areas. Theoretically this could give your camouflage more depth, but it is far more likely that is going to be a dead giveaway.
If you want to ensure that your dye job is uniform and penetrates the fabric all over, you need to make sure your backpack is free of grime and dirt. Give you a pack a good washing and scrubbing according to what kind of material it is made of before you get into dyeing it.
Damage and Wear
Curiously, very old backpacks or ones that have spent a lot of time in the sun or had an unfortunate run-in with peroxide, bleach or some other color dissolving agent will rarely take up dyes in the future with any sort of efficacy. Something is happening either on a microscopic structural level when your backpack gets mistreated so from a long life of use that prevents this from happening.
This can be disappointing if you have an old and sun-bleached pack that is otherwise fit for service and you want to repurpose it as a bug-out bag with a darker color, only to find after going through all the rigmarole and steps required to dye it did it has barely tinted the base fabric.
Generally speaking, if you have a pack that is so old it has lost much of its color all over, especially one that has been used and conditions of intense sunlight, don’t expect your dye job to make it look like new.
So with all of that understood, you’ll need to determine what materials make up your backpack, get it reasonably clean and be sure it is not so old, sun-bleached and worn that the dye has no chance of being absorbed into the fabric. Pretty straightforward, and once you have done that we are ready to get started!
Preparations
Prep Work Area
Make sure you are performing this dyeing operation in an area that will not be affected by spills and stains. If that is not possible, make sure you put down a heavy plastic drop cloth that will prevent the dye from contacting any surface you don’t want to get stained.
For obvious reasons, dye is a ferocious staining agent that you will have a doozy of a time trying to get out once it has made contact. Neither the author nor this website will be responsible for any divorces that arise from following these instructions. You have been warned!
Don Protective Apparel
You’ll be working with a powerful dye and also hot water. Heavy-duty rubber gloves with gauntlets are a good idea, as is a rubberized lab apron. Don’t wear anything that you cannot stand to see ruined when you are undertaking this task.
Dyeing Your Backpack – Natural Fibers and Majority Natural Fiber Blends (Less Than 35% Synthetic)
When I am dyeing anything I typically use Rit brand dye. It is affordable, effective, and available absolutely everywhere so you have a great chance of coming up with it in quantity no matter where you are.
Do note that Rit makes several product lines that are specific for natural fibers, which is a general purpose dye, and synthetic fibers, which you will need if your backpack is predominately nylon or some other man-made material.
The first set of instructions below assumes that you have a predominantly natural fiber backpack, and the appropriate dye.
Step #1. Determine Weight of Pack
Before you break out the rubber gloves you’ll need to weigh your pack. The weight of the pack determines how much dye you will need to do a good job. In general, one small bottle of dye or too small packets of powdered pigment will be needed for every 2 lb. that your pack weighs.
If you plan ahead and know you want to take your item from very light to very dark, go ahead and double the amount of dye that you use.
Step #2. Locate Container
To complete the dyeing operation you will want to use a large plastic or stainless steel vessel that is big enough to allow your unzipped pack to float freely in it. If you have to scrunch up or roll the pack to fit inside your container, your container is too small.
Note that while most fabric dyes will not stain steel containers, plastic is another story. If you are using a plastic container, make sure you’re okay with it taking on a new color or be prepared to throw it out when you are done.
Step #3. Fill Container with Water
A general guideline for the amount of water you should use is approximately 3 gallons for every pound that your item weighs. Your water needs to be hot: around 140 degrees Fahrenheit (60 Celsius).
Step #4. Add Salt
Salt serves as a color enhancer when you are dyeing natural fabrics, or predominately natural fabric blends. Add approximately 16 tablespoons of common salt; that is 250 grams.
Step #5. Add Detergent
A little bit of common dish detergent will help ensure that the dye binds evenly with your pack’s fabric. A single teaspoon of detergent is all that is required regardless of how much water you are using.
Step #6. Stir
Give your water with the additives a good stirring until everything is well blended.
Step #7. Add Dye
If using liquid dye, shake the ever-loving daylights out of the bottle before adding the prescribed amount that we determined above. If using powdered dye, dissolve it separately in pure water according to the package directions before adding it to the main bath.
Step #8. Stir
Give it all a stir again until everything is completely blended. Double-check to make sure you don’t see any clumps of powder dye floating in your solution.
Step #9. Wet Your Pack Separately, and Add to Dye Bath
Thoroughly soak your backpack separately with clean water prior to adding it to the dye solution.
Make sure that all buckles are unbuckled and compartments are open to allow full permeation of the dye. Remember, you want it to be floating as free as possible inside your container.
Step #10. Stir Pack
You will need to stir your pack constantly and slowly for at least 10 minutes to ensure even penetration and coverage of the dye. Ensuring full color penetration can take anywhere from 10 minutes to about an hour, although 30 minutes is the average.
You need to be stirring the entire time. You can pull out the pack with tongs or your gloved hand, and check it periodically for saturation, keeping in mind that a wet pack will appear darker than a dry one.
Step #11. Remove Pack
Once you have attained the desired color, remove your pack from the dye solution, and wring it out. Take care, as this part gets messy.
Step #12. (Optional) Use Color Fixative
At this point you may dunk the pack in a separate container full of color fixative solution that you have prepared according to the package directions. It will need to be stirred again for a period of time, but not as long as it did when it was in the dye.
Step #13. Rinse and Wash
Once you’ve completed all the previous steps, it’s time to rinse the pack thoroughly and completely in cool water until the rinse water comes out completely clear.
With that finished, all that is left to do is give you a pack a wash using mild detergent according to the manufacturer’s instructions.
Not too difficult. If you have a pack that is made completely from synthetic materials or is a majority synthetic fabric blend, you’ll need to follow the set of instructions below which are trickier than the ones for natural fibers since they mandate the use of far hotter water that you’ll have to keep near boiling for the entire process.
Dying Your Backpack – Synthetic Fibers and Majority Synthetic Fiber Blends (More Than 35% Synthetic)
Step #1. Determine Weight of Pack
Before you break out the rubber gloves you’ll need to weigh your pack. The weight of the pack determines how much dye you will need to do a good job.
In general, one small bottle of synthetic-specific dye will be needed for every 2 lb that your pack weighs. A pure polyester pack will need more.
Step #2. Locate Container
Dyeing synthetic fibers is not as straightforward as dyeing natural fibers. You’ll have to apply high heat the entire time, and that means a metal container is mandatory as well as something to heat it with.
If you have a smaller pack it is conceivably possible that you might accomplish this on your stovetop, but most stoves will struggle to heat a large enough vessel that can hold a full-size backpack.
An outdoor grill with a large burner box is ideal for the task, or a separate propane-powered utility burner apparatus that can be set on the ground.
Step #3. Fill Container with Water
A general guideline for the amount of water you should use is approximately 3 gallons for every pound that your item weighs. Your water must be heated to and maintained at a temperature of around 200 degrees Fahrenheit (93 Celsius) for the duration of the dye procedure. Use a thermometer to establish and monitor the temperature as you go on.
Step #4. Add Vinegar
Vinegar serves as a color enhancer when you are dyeing synthetic fabrics, or predominately synthetic fabric blends. Add approximately 6 ½ ounces of common vinegar.
Step #5. Add Detergent
A little bit of common dish detergent will help ensure that the dye binds evenly with your pack’s fabric. A single teaspoon of detergent is all that is required regardless of how much water you are using.
Step #6. Stir
Give your water with the additives a good stirring until everything is well blended.
Step #7. Add Dye
Ensure that any liquid synthetic specific dye is extremely well shaken before adding it to the simmering water.
Step #8. Stir
Give it all a stir again until everything is completely blended.
Step #9. Wet Your Pack Separately and Add to Dye Bath
Thoroughly soak your backpack separately with clean, warm water prior to adding it to the dye solution. Make sure that all buckles are unbuckled and compartments are open to allow full permeation of the dye. Remember, you want it to be floating as free as possible inside your container.
Step #10. Stir Pack
You will need to stir your pack constantly and slowly for at least 10 minutes to ensure even penetration and coverage of the dye. Ensuring full color penetration can take anywhere from 10 minutes to about to half an hour, although 30 minutes will typically only be required for high polyester content blends.
Nylons dye very rapidly. You can pull out the pack carefully with tongs to check it periodically for saturation, keeping in mind that a wet pack will appear darker than a dry one.
Step #11. Remove Pack
Once you have attained the desired color, cautiously remove your pack from the dye solution and wring it out- water will be very hot!
Step #12. (Optional) Use Color Fixative
At this point you may dunk the pack in a separate container full of color fixative solution that you have prepared according to the package directions.
Ensure that this water is very warm so you do not shock the fibers with a rapid temperature change. This can make your fibers brittle and vulnerable to damage or even crack plastic buckles.
Step #13. Rinse and Wash
Once you’ve completed all the previous steps, it’s time to rinse the pack thoroughly, and completely in warm water until it comes out completely clear. After that, turn the water temperature down to tepid or slightly cool and repeat, decreasing that temperature at the end of every cycle until it runs clear again.
Once your rinse water comes out completely clean with cold water, you are ready to wash your pack with mild detergent according to the manufacturer’s instructions, then you’re all done!
Conclusion
With just a little bit of setup and preparation it is entirely possible to take a serviceable, favorite pack that just so happens to be a little too garish in color, and tone it way down using fabric dye, getting it ready for camouflaging, or just making a little less noticeable when the time comes to bug-out.
The skills you learn dyeing your backpack can also be used to dye all kinds of other fabric items also, and this is one skill that can serve you well on your journey as a prepper.
getting lucid for me is already hard as hell, but when i finally get lucid i try everything to make my dream look as real as real life and never works, also i can never feel my dream body there
i already tried
- rub hands
- spin around
- touch stuff, feeling their texture (normally i touch walls)
- looking at hands
- telling my dream to increase it's vividness, or feel as real as real life
all of these failed, and when i fail i also start to lose lucidity eventually for some reason i can't understand. is it just me having this problem? it's like the 6th or 7th time it happened by now and i have no idea what to do anymore...
via Lucid Dreaming - Dream Views - Attaining Lucidity https://ift.tt/3oCILpm
Kentucky is a solid state for carriers of knives, and you can own pretty much any kind of knife you want while being broadly allowed to carry the same.
That being said, you should be aware that the state statutes do introduce some doubt as to what kind of knife you are allowed to carry concealed if you lack a valid concealed weapons permit or are under 21 years old.
This gets a little fuzzier once you consider the fact that Kentucky passed a “constitutional carry” bill in 2019, meaning that a permit was no longer required to carry certain weapons concealed.
Regrettably, though Kentucky has good preemption statutes for firearms they lack a similar statute protecting knives, so you’ll need to brush up on local county and city laws when traveling.
Read on a little bit farther and we will provide you with more details to help you get the lay of the land in the Bluegrass State.
What You Need to Know
What Kind of Knives Can I Own?: Any kind of knife.
Can I Carry a Knife Concealed Without a Permit?: Yes; any kind of knife if over 21, an ordinary pocket knife or hunting knife if under 21.
Can I Carry a Knife Concealed With a Permit?: Yes, any kind of knife. Note: KY passed a “permitless concealed carry law” in 2019.
Can I Carry a Knife Openly?: Yes; any kind of knife if over 21, an ordinary pocket knife of hunting knife if under 21.
General Ownership
Happily, there is no type of knife, blade length or specific configuration that is banned outright in the state of Kentucky.
You can own any kind of knife you want, including such commonly banned or restricted types as Bowie knives, dirks, daggers, push knives, butterfly knives, automatic knives or switchblades, gravity knives and so forth.
Unfortunately, Kentucky’s stalwart statewide preemption on firearms laws does not apply to knives, so you could potentially run into trouble in various counties and cities, with the larger cities of Louisville and Lexington being most likely to have knife laws that run counter to the general attitude of permissiveness in the state laws.
That being said, to my knowledge there has not been any major trial resulting from this discrepancy, but none the less ignorance of the law is no excuse at any level, and you are entirely responsible for obeying the laws of the place you are in.
Concealed Carry, No Permit
Concealed carry of deadly weapons, including most types of knives of any length, is legal in Kentucky without a permit so long as you are 21 years old or older.
This is thanks to the passage of a 2019 constitutional carry bill that allows for the carry of such weapons with no permit required. Prior to the passage of this bill one had to have a concealed weapons permit to carry any type of knife except an ordinary pocket knife or hunting knife.
Note that anyone under the age of 21 years old is only allowed to carry an ordinary pocket knife or hunting knife.
This is troublesome in Kentucky because, like the vast majority of states, there is no definition that one can use as a guideline for what constitutes an ordinary pocket knife, or a hunting knife.
This can leave room for you to get in trouble if you are under the age of 21 and carrying a knife that a police officer or a judge finds to be “unordinary” and not a hunting knife.
Concealed Carry, With Permit
If you are age 21 or older and are not a felon, you can enjoy the protection and freedom of constitutional carry in Kentucky, being allowed to carry any kind of knife you want concealed.
Open Carry
Open carry is permissible in Kentucky, but once again anyone that is under the age of 21 should exercise maximum caution and choose a knife that a reasonable person is likely to categorize as an ordinary pocket knife or hunting knife.
Prohibited Places
You may not carry your knife onto the grounds of any public or private school in the state of Kentucky, grades kindergarten through high school, including vehicles, events and athletic fields. Note that this restriction does not apply to any post-secondary schools.
Assessment
Kentucky is a solid-state for knife owners, and thanks for the passage of their constitutional carry bill in 2019 anyone who is aged 21 years or older can carry any type of knife they want openly or concealed.
However, anyone under the age of 21 may only carry what the state calls an ordinary pocket knife or a hunting knife, neither of which is defined in the state statutes. A lack of statewide preemption results in the deduction of a few points of what is otherwise a good score, but most local knife laws in the state are similarly permissive.
Important Kentucky State Statutes
KRS 237.104
(1) No person, unit of government, or governmental organization shall, during a period of disaster or emergency as specified in KRS Chapter 39A or at any other time, have the right to revoke, suspend, limit the use of, or otherwise impair the validity of the right of any person to purchase, transfer, loan, own, possess, carry, or use a firearm, firearm part, ammunition, ammunition component, or any deadly weapon or dangerous instrument.
(2) No person, unit of government, or governmental organization shall, during a period of disaster or emergency as specified in KRS Chapter 39A or at any other time, take, seize, confiscate, or impound a firearm, firearm part, ammunition, ammunition component, or any deadly weapon or dangerous instrument from any person. Local governments may establish reasonable restrictions limiting weapons in government offices and facilities.
KRS 527.020
Persons carrying concealed weapons in accordance with KRS 237.109 or licensed to carry a concealed deadly weapon pursuant to KRS 237.110 may carry a concealed firearm or other concealed deadly weapon on or about their persons at all times within the Commonwealth of Kentucky, if the firearm or concealed deadly weapon is carried in conformity with the requirements of KRS 237.109 or 237.110. Unless otherwise specifically provided by the Kentucky Revised Statutes or applicable federal law, no criminal penalty shall attach to carrying a concealed firearm or other deadly weapon at any location at which an unconcealed firearm or other deadly weapon may be constitutionally carried. No person or organization, public or private, shall prohibit a person from possessing a firearm, ammunition, or both, or other deadly weapon in his or her vehicle in compliance with the provisions of KRS 237.109, 237.110, and 237.115. Any attempt by a person or organization, public or private, to violate the provisions of this subsection may be the subject of an action for appropriate relief or for damages in a Circuit Court or District Court of competent jurisdiction.
Almost every time I read advice from someone experienced to newbies, the importance of consistency gets mentioned.
But what does it mean?
Doing something every day? Doing the same thing/techniques/routine every day? Just having lucid dreaming on your mind every day?
The same daywork? The same night-time routine?
Sometimes things work better when they are new or disrupting, sometimes they work better as they settle in.
What about days off (or even longer periods)?
What's this consistency to you and what type of consistency do you see as important?
And how it fits with the challenge of making enough effort so it works but also doing it casually enough so you don't burn out?
via Lucid Dreaming - Dream Views - Attaining Lucidity https://ift.tt/3bG0Opw
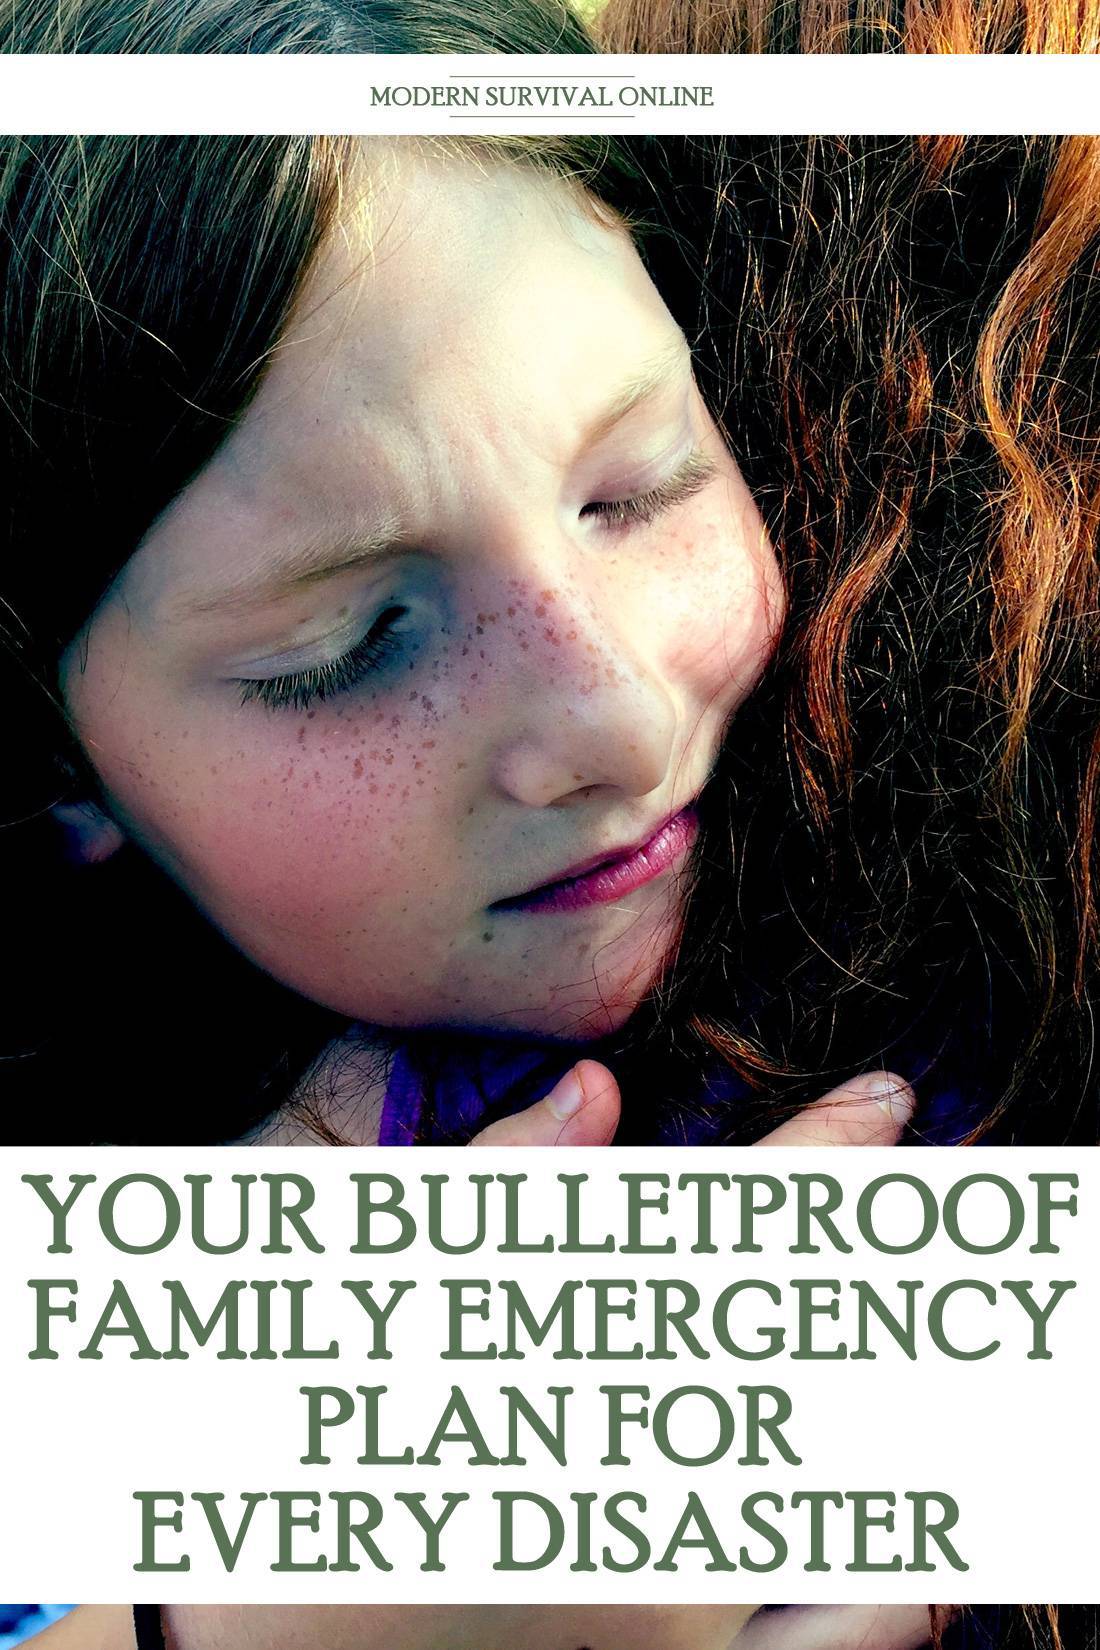
Prepping is sometimes portrayed as an endeavor that you undertake by yourself, for yourself, to ensure you will survive the collapse of society or the outright end of the world.
Survival of the fittest, the law of the jungle and the continuity of the competent, all that jazz. However, prepping is so much of the time actually about keeping yourself and the people you love or are responsible for alive, and through whatever might come.
Where well-intentioned preppers go wrong is assuming that they alone will be able to prepare hard enough for everyone in their family.
This is a classic fallacy, as preparing a family to deal with everyday emergencies, major disasters, and societal crisis is a team affair. You cannot approach preparing for any of these events as a family the same way you would prepare as a lone survivor.
More people to take care of means greater material requirements, greater complexity, and even greater stakes. But it also provides opportunity in the form of more hands to help, more minds to bring together and a constant reminder of what you are working so hard to achieve.
The task before you is great but we are here to help with a comprehensive guide that will allow you to forge a bulletproof family response plan for any conceivable situation. Grab your notepad, and let’s get started!
Have a Plan or You Plan to Fail
Getting your family prepared to deal with major trouble is significantly more complicated than slamming everybody into the minivan, and heading for the hills. That is indeed a plan, I suppose, but it’s not a very good one, especially when you have time to get ready right now.
Like the old saying goes, if you fail to plan you plan to fail, and the price for failure when your family’s safety is on the line is too terrible to contemplate.
Unfortunately, more people means greater complexity, more moving parts and more to account for in the realm of personal readiness.
If you consider the average family of four, the amount of supplies you will need in any given scenario is now multiplied, and you’ll also be tasked with keeping them focused and calm, or at least as calm as they can be under the circumstances.
What’s more, each and every person in your family must be accounted for before a plan can proceed, and when all of the players on this team are separated from each other at the onset of trouble the single, greatest challenge you might face is just rounding them up, or getting everyone together so you can take shelter or evacuate as the situation dictates.
It sounds like an awful lot to do, and it is, but hoping for the best is not a strategy and playing it by ear is not a plan.
Don’t worry, this guide will present to you a logical list of considerations and procedures that you can implement in order to put together your own family response plan, and it will do so in an easy-to-use format.
We cannot account for every, single variable that you might have to deal with in your specific situation, but we can cover most of them.
The first thing we will do is qualify our level of response by learning the difference between an emergency and a proper disaster.
Disasters vs. Emergencies
One common failure in a prepper’s personal plan is the assumption that a full scale, total response will always be necessary. When the starting gun goes off, or the balloon goes up, they will execute their plan to the letter, whatever else is happening- or more importantly, not happening!
As it turns out, not all crises are created equal. You won’t respond to events the same way every time and much of the time, thankfully, your full scale response will be overkill.
To overreact is to waste time, energy and resources, and this will do nothing but establish you as a histrionic in the minds of your family. Generally, what we as preppers are concerned with and what you should be concerned with for your family’s sake are disasters and emergencies. What’s the difference?
A disaster is a natural or man-made event that occurs on a large scale or over a wide area. These invariably will affect more people than just yourselves, and will often affect entire towns or cities, even regions.
As a rule, all you can hope to do to counter a disaster is either avoided it if there is time or shelter in place if there isn’t, and then deal with the after effects.
An emergency is far more personal, and usually takes the form of an injury, accidental or otherwise, or a health crisis.
Countering an emergency is usually a matter of taking the correct action in intervention, whatever it is called for. Living right and remaining alert will allow you to avoid the vast majority of personal emergencies.
Need some more examples? Check out the following list along with our cliffs notes for each.
Disasters
Flood. Anywhere that it can rain or any place that can hold standing water it can flood. Floods make rescue and evacuation exceedingly difficult and large quantities of standing or moving water are extremely dangerous. Cleanup in the aftermath of a flood is extremely involved and laborious. Avoiding a flood is a matter of getting out of the affected area before it gets too bad, while surviving a flood is usually only a matter of reaching secure high ground, and holding out. Expect to lose power, access to services and contamination of water supplies in the affected areas.
Tornado. Tornadoes are among the most powerful storms on earth, and are wind events capable of obliterating entire towns. Expect debris up to the size of train cars and even buildings to be hurled through the air. Getting caught outside is death, so surviving a tornado is a matter of taking shelter the moment a tornado is suspected or confirmed. A survival kit will help you sustain in the aftermath until help arrives. Local loss of utilities and services should be expected.
Hurricane. Hurricanes are the largest and most destructive storm systems that occur on Earth. Producing torrential rainfall, destructive storm surge, widespread flooding and packing nearly as much destructive wind potential as a tornado (along with spawning them) hurricanes are a thoroughly “complete” disaster scenario. Luckily, you’ll know they are coming for days or even more than a week ahead of time, and you should evacuate if at all possible. Surviving a hurricane is mostly a matter of being in a sturdy structure on high ground that is well equipped with provisions. No matter what happens, you’ll be dealing with the widespread loss of commerce and utilities in the aftermath.
Wildfire. Wildfires are increasingly common and growing more destructive as misguided “green” initiatives prevent proper care of forests that are long overdue for it. Wildfires can burn so hot and travel so quickly they can scorch the very soil and are capable of consuming entire neighborhoods, even entire towns when conditions are right. Your prospects of surviving a wildfire if overtaken are grim at best, and evacuation is always your safest bet. However, with enough time and elbow grease proper preparations may save you and your home. Wildfires generally only cause loss of services and utilities in the immediately affected areas, but depending on what is touched by the wildfire regional effects may be felt.
Earthquake. The subterranean movement of tectonic plates deep underground results in a rattling, heaving and shaking of the surface above. Powerful earthquakes are catastrophic, changing landscapes and leveling cities though lesser ones are still more than capable of collapsing buildings and causing widespread carnage. Surviving an earthquake is one part hanging on for dear life in the most protected position possible wherever you happen to be and one part having all your survival necessities in the aftermath thanks to a well-equipped kit. Depending upon the power of the earthquake a near total shutdown of society should be expected on the local or regional level.
Blizzard. Blizzards are prolonged winter storms that dump unbelievable amounts of snow on an area, while subjecting it to bombardment from sustained high winds and freezing, often sub-zero, temperatures. Blizzards usually make travel impossible, and all you can hope to do, assuming you cannot evacuate ahead of time, is outlast them. Your bug-in plan had better good if you want to stand a chance. Loss of power is highly likely, and the difficulty associated with traveling safely in blizzards means that other services will be degraded or absent.
Emergencies
Auto Crash. Automobile crashes are one of the most common and most dangerous emergencies that anybody can face. Especially in car-centric cultures (like that found in the U.S.), chances are you’ll be involved in an auto crash at some point in your life. Injuries can be severe, but you can avoid a bad outcome by learning defensive and performance driving skills, teaching your family good on-road behavior and learning to deal with the aftermath by brushing up on medical skills.
Fall. It sounds too comedic to be true, but more people are severely injured by falls in and around their home than any other common accident. The laughs may be there for onlookers, but it’s no laughing matter for the victim, who can suffer significant fractures, concussions and internal injuries. Having the medical skills to treat likely fractures, head-injuries, and spinal injuries can make all the difference for a fall victim.
House Fire.House fires rack up thousands of deaths and billions of dollars worth of damage every year, and are among the most common events that can befall you. A small but out of control fire in your home can quickly turn into a total conflagration resulting in the complete loss of your home and possessions. Most people that die in house fires actually succumb to smoke inhalation, not the flames themselves. Countering a house fire relies on having functional fire extinguishers close at hand, and if that fails, a well-rehearsed evacuation plan.
Home Invasion. When multiple bad guys bust into your home with the intent of subduing the people in it and then ransacking the home for valuables, you’re dealing with a home invasion. A brutal and particularly terrifying form of robbery, dealing with a home invasion is a matter of making your home less appealing to the bad guys, more difficult to force entry into and then being prepared to repel the invaders with lethal force if required.
Health Emergency. Health emergencies come in many forms, but some of the most common are heart attack, stroke, choking and syncope (fainting). Getting first-responders to the victim’s location is of utmost importance, but you can drastically improve their chances of survival by understanding their health risks, determining what has happened and applying the correct medical care if you are trained.
Mishap or Misadventure. Injury is out there waiting for you and in no short supply, oftentimes much closer than we would prefer. Working on a project in your home workshop can result in dreadful injuries from power tools. A day of training on the range could see you accidentally shoot yourself or someone else, or catch a ricochet. You could get lost hiking and be at risk of exposure. You might even suffer a terrible burn just trying to whip up Grandma’s famous pot pie recipe. You have to be prepared for anything, and though events like these are not as exciting or as alluring as major disasters, they are far more common and just as deadly.
There are many more disasters and emergencies besides the ones we have listed here. But as it turns out, aside from some specific, situational responses, you can rely on the same core preparations to get you through most events in either category.
Assessing Your Personal Risk Factors
Not every family’s risk profile is the same. In fact, most of them actually vary quite a bit! One essential part of prepping is analyzing what disasters and other emergencies are most likely to befall you and your family members.
Some of these events are universal, while others are more situational, and your lifestyle, living conditions, local climate and a variety of other factors will influence what you are more likely to face.
For instance, folks living along the northern border of the US and in most parts of Canada will be far more likely to deal with the hazards posed by winter weather and blizzards than people living along the Gulf Coast in the southern United States.
House fires will affect people more or less universally across all domains, but if you cook frequently, operate a fireplace or have a vintage house with old wiring, your risk goes up significantly, and it also goes up if you are a smoker.
Anybody can be the victim of a home invasion if you are unlucky, but your chances go up in areas where crime and that crime in particular are more common.
Automobile accidents don’t just happen to those who own and drive their own vehicles, but could it befall anyone who is on the road in any capacity, including biking alongside it or riding public transportation.
Assess your family in context, taking into account your local climate and typical weather conditions along with your family’s itinerary, routines and activities.
Family Member Considerations for Prepping
So now that we know generally what we are preparing for in terms of threats, we now need to figure out how the people we are preparing for are going to affect our plans. You might think that it will be best to get your plan down on paper first, but this is a mistake.
The considerations and variables introduced by the people in your family that you are responsible for are foundational to what actions you will take, and indeed what actions are even possible under the circumstances.
Your family members might not fall precisely into any of these categories, and that’s okay, because at the end of the day family is always elective.
Children
The primary consideration for any family that has them is, naturally, children. With few exceptions, children are treated as something like VIPs or precious commodities when it comes to disaster planning, as they are generally incapable of meaningfully contributing to their own protection, or the protection of the family.
They are the ones that mandate protection the most, and also consume considerable resources in long-term survival situations.
Generally speaking, the older a child is, the more capable they are, capable of learning and sticking to more complex responses and also contributing more meaningfully to the family’s survival.
The youngest children, generally aged 8 years old and below, are capable of following only simple instructions. Smaller children do have the advantage of being carried when the chips are down, though.
It is also worth noting that infants and toddlers in particular are especially vulnerable, and also requires specialized items and food for care and well-being. These items must be accounted for in your material preparations at all costs.
Some of the things you should be teaching your child as part of your family survival plan include:
how to operate communication devices to contact you
how to quickly and safely get to designated rally points
how to react to emergencies such as a house fire or an earthquakes
how to quickly get to their bug out bag
how to quickly get to their safe room
how to do age-appropriate long-term survival tasks, such as cleaning camp, doing dishes, scouting, and more
Elderly Family Members
Elderly family members are also precious like children, and less capable of taking care of themselves in addition to being more vulnerable overall, again like children.
However, the elderly are often excellent storehouses of knowledge, and lore so long as their mental faculties are holding up, and older folks in good shape can still perform useful tasks and help others in survival situations.
Particular challenges associated with the elderly are their low reserves of stamina and their susceptibility to falling prey to various illnesses and ailments.
Loss of mobility, a requirement for ongoing, specialized medical care and dependency upon various medications can make prepping around the elderly tough.
Elderly family members who are infirm can make on-foot movement impossible, and even sustained movement by vehicles difficult.
That being said, even older folks who are more or less chair bound can still perform some tasks, and having an extra set of eyes and ears is often useful, and at the very least they can keep an eye on children, while more capable adults tend to more focused tasks.
Pets
Pets are considered to be just as much members of the family as any human member by many folks, and if you have a dog, cat, bird, ferret, fish or some other animal companion that you are not willing to abandon to their fate you will have to plan accordingly for their care and transportation if required.
Depending upon the species and the situation this could be a trivial concern or hair-raisingly challenging.
Most dogs can at least follow along and stick with their human family easily enough if they are kept on a leash via a harness. Cats, well, cats will probably need to be consigned to a carrier or specialized backpack for safe and efficient transport.
At the very least you should prep a separate BOB for your dog or cat. In fact, there are pouches your puppy can carry if he is old enough, so you don’t have to worry about carrying more gear on your back.
Larger animals like horses or livestock will need to be transported in specialized, towed trailers or even ridden out of danger. Moving them any other way is likely to be impossible without specialized skills and a whole lot of luck.
As with infants, make sure you include specialized food, supplements, medicine and any other material needs for your animals with your other supplies when stocking up.
Special Considerations
Everyone’s situation in life is different, and special needs and requirements must be accounted for when prepping.
If you have a family member who is dependent upon insulin or must take other medication on the regular, your entire plan may well revolve around maintaining and sustaining their access to that medication. Certain plans or responses may be out of the question entirely if it jeopardizes in any way that access.
Also, physical limitations such as being bound to a wheelchair or even a temporary but incapacitating injury like a significant fracture resulting in immobilization can render some options unthinkable or practically impossible.
Getting someone in a wheelchair out of a danger area by vehicle is one thing, butwhat will you do if you are forced to evacuate on foot? Most wheelchairs do not do well in a cross-country setting, especially over genuinely rough terrain.
Family members who have been committed to care settings for any reason or are forced to undergo true “life-support” procedures like dialysis regularly will either have to be accounted for or left to their fate, and discussion of such must be undertaken as a family well prior to the onset of the need to make a decision on the matter.
Prepping around real life families is often not as easy as experts and articles would make it seem! Whatever you are facing, do not begrudge it. You can only do what you can do.
Multi-Family Unit
Certain families grow so close that they essentially operate as one large, singular unit, even though it might be composed of multiple, separate hierarchies whatever the interconnecting relations are.
For instance, two brothers who marry two sisters in the same town are likely to remain so close concerning their interactions that they face life and its challenges together, more or less. Other families may simply be such fast friends that they cannot imagine leaving one another to take their chances when the chips are down, choosing instead to go through it together.
Whatever your situation, if you are accounting for an extended family that is a family unto itself certain discussions should be had prior to embarking on any major planning.
Specifically, it is imperative that everyone be on the same sheet of music regarding priorities for the multi-family unit as survivors.
It would not do for one member of one family to emphatically demand that their family go its own way after group plans and agreements have been made to the contrary.
This is a matter of setting and managing expectations, and these are expectations that must be made accountable since the stakes will be so high. This is an especially big deal when planning for long or indefinite term survival scenarios.
We know what we are facing, and we know who family members are in context of our preparations, so what steps do we need to take to start bulletproofing our family against disaster? Read on and you’ll find out!
Note that the following steps are more or less universal to any family facing any disaster or emergency. This is the groundwork or foundational elements that will start hardening your family against a bad outcome.
Establish and Rehearse a Family Comms Plan
One of the scariest parts of having a family in times of trouble is the fact that trouble will likely strike when you aren’t all together. Kids have school, mom and dad have jobs, and grandma and grandpa live elsewhere.
These conflicting schedules and locations mean there are wide “gaps” for trouble to slip in without anyone else who cares knowing. Especially in major disasters, this separation is a massive source of anxiety.
The solution? Establish a family comms plan. At its most basic, this is a time that is an expected check-in on a daily or weekly basis, depending. If you don’t hear from someone in your family that you are responsible for within a set period of time, it is time to begin investigating.
In actual emergencies, be they small scale or legitimate disasters, families should have a plan on how they will check in with each other and via what means (cell phones, walkie talkies, HAM radio, signaling mirrors etc.).
Modern forms of communication may be unreliable depending on what has happened, so multiple, overlapping methods of communication should be established and committed to memory.
Keep in mind, communications might take the form of something as basic as a written note left behind for someone to find.
Factors you should account for in your family comms plan include:
Preferred Phone #’s, Text Services, Email addresses.
Alternate or Emergency Phone #’s/Email (Work, etc.)
Backup Contacts in Case Family Members Cannot Be Reached
Respond, Shelter in Place, or Evacuate?
Basic plans and priorities should be reviewed with every family member individually and as a group depending on the specific threat.
Put another way, what is expected of them during a given event, and what is the family’s overall plan during a given event? This will help reduce uncertainty, improve decision making and streamline the actions taken towards achieving a good outcome.
For instance, in certain disasters or situations all family members should be expected to head for home if able. If unable, where should they go next or attempt to seek shelter, i.e. where could family members who are then looking for them expect to find them?
For emergencies, this could also be something as simple as the indicated signal for trouble such as during choking.
It is especially instructive for children to tell them what actions they should take if mom or dad are injured or in trouble in various circumstances, such as found unconscious or otherwise unresponsive.
As terrible as it is to consider, certain circumstances might arise that mean family members have to attempt to rendezvous elsewhere when and if they are able. Every member of the family should know where this is and how best to get there
Practice Individual Responses to Emergencies and Disasters
Now it is time to get to the nitty gritty of preparation. Based on the determinations you made above of which threats are most likely to before your family it is time to practice the correct responses.
Practice makes permanent, and ingraining a hardwired, correct response to trouble will only improve your family’s chances of getting out of a bad situation intact.
This could take the form of increasingly intricate and challenging evacuation drills for house fires, seeking cover or appropriate hiding places for home invasion drills or even rendering CPR or applying a tourniquet as a form of first-aid practice.
The sky is the limit when it comes to meaningful, engaging practice, and training with your family.
Happily, we have substantial archives covering every conceivable emergency situation and disaster here on this very website and you are sure to find plenty of information and printed guides on drills that will help you prepare your family for whatever threats may come.
Keep Printed Guides and Emergency Contact Info Handy
The trick with being in a life-threatening or scary situation is it has a deleterious effect on memory and clear thinking.
Said another way, it is easy to forget things you thought you knew by heart during times of immense stress. Things like complicated sequences of numbers, addresses and other esoteric information can quickly get lost in the gray haze of “brain-melt” during high-tension scenarios.
Prevent this from becoming a problem by equipping each family member with a list of the most important emergency contacts and information, including contact numbers and emails, addresses, contact info for emergency organizations and any other facts or data that might help them when the chips are down.
This should be stored in all phones and smart devices as a matter of course, but paper copies can be kept in purses or wallets and stashed in the glove boxes of family vehicles.
Disaster Responses for Family Prepping
Preparing for emergencies is one thing but preparing for the huge, scary “big ticket” disasters that sometimes occur is another.
When it comes to prepping, you generally have two options for responding to disasters of any sort: you can bug out, or evacuate to someplace safer and wait it out or you can bug in, where you preferably batten down the hatches and take your chances at your home or other local shelter where you have pre-stocked supplies and equipment to help you go the distance.
Both are more or less valid, once again depending on your specific situation, your family and other variables. Ultimately, you should plan for and prepare for implementation of both so even if you have to make a snap decision in a time as life scenario you’ll have options.
We will go over some family specific information for both responses below.
Bugging Out
Bugging out is exactly what it sounds like: You grab your gear, grab your family, and head for the hills, or at least the figurative hills; you might head for a relatives or a patch of land you own a few counties over!
Bugging out is typically done when your home is rendered uninhabitable or a situation is expected to be so dangerous or so untenable that the notion of staying put for it is unthinkable.
You might choose to bug out with your family immediately, or you might be forced to do so if an ongoing situation deteriorates on the home front.
Consider the following to ensure you can implement a successful bug out plan when the time comes.
Bug Out Bags for Each Family Member
You never want to bug out without a BOB, or bug-out bag, which is one piece of luggage that all preppers love.
The bug-out bag is nothing more than a large backpack or rucksack that will carry all of the supplies and other items you need to sustain yourself and accomplish your survival objectives while making way to your bug-out location, or BOL.
Bug-out bags contain clothing, shelter items, food, water and tools to help you take care of business, or specific pet supplies should you decide to have such a bag for your pet.
Don’t fall into the trap of thinking that you will have a single, massive bug-out bag for your family to survive off of and that you’ll be strong enough to carry it all on your own.
The provisional needs of multiple family members will ensure that your pack will soon grow enormous, unwieldy and completely impractical. What is needed, instead, is for each family member to carry their own bug-out bag, if able, or at the very least have a smaller bag just for them.
Only by compartmenting needed gear intelligently can you insure that you’ll be able to carry it if needed and have enough for everyone. And when I say carry it, I mean carry it.
When the time comes to bug out, you must always plan for the eventuality that you’ll be forced to make movement on foot, for whatever reason. That means you’ll be carrying your survival supplies on your back and you must be up to the task!
Even if children and elderly can do nothing more than carry their own food that will be a huge benefit, so don’t be afraid to make any family member responsible for carrying something, so long as they can reliably do so and follow instructions.
Transportation Concerns
If you are afforded the opportunity to bug out using a vehicle, you should generally take it. Vehicles offer speed, shelter and a degree of protection compared to hoofing it. Traveling by vehicle is also far less laborious than traveling on foot.
However, you must account for not only having seating for every member of the family or your group, but also room for the cargo needed to take care of them, wherever you are heading. Failing to do this is only going to give shortage and lack a head start over you and yours.
Some families will choose to accommodate a large passenger compliment with a correspondingly larger vehicle, perhaps a van or a jumbo SUV.
For other families, a multi-vehicle convoy will make the most sense. Both are valid options, and both come with their own advantages, shortcomings and challenges.
Choosing BOLs and Routes
One thing you must plan for concerning bug outs is providing for multiple bug-out locations, and at least two routes to reach each. This way, if one of your bug-out locations is compromised or if heading towards it will mean heading closer to or into danger, you will have an alternative.
Likewise, having alternate routes to reach each of these locations will provide a hedge against stoppage, blockage or other hazards.
Bug-out locations may be structures or they might be bare land depending on your requirements and what you are prepared to do to survive.
An ideal bug-out location is a close friend’s or family member’s place who lives a good distance from your home so you can put plenty of room between you and danger as well as between you and other fleeing survivors.
Bugging In
Bugging in is the opposite of bugging out. Trouble strikes or disaster looms and you decide to go home, stay there and ride out the danger with a home field advantage and plenty of supplies.
If you are able, bugging in is almost always a better choice than bugging out, but don’t let yourself get suckered into sticking around during an unwinnable situation.
Bugging in correctly is mostly a matter of having the right supplies on hand to sustain life and deal with problems that will invariably crop up.
Creating a Survival Stockpile
The basis of successful bugging in, and preparedness in general, is accumulating a surplus of supplies along with some choice pieces of gear. This is a hedge against loss, shortage and the disruption of commerce that always attends major events.
To provide for your family, you should have at the bare minimum a 2-week supply of each of the following, and shoot for establishing a 3-month supply as a milestone:
Food
Water, bottled
Medicine
Toilet Paper
Hygiene supplies
Disposable plates, cutlery, etc.
Trash bags
Batteries
Baby Food/Diapers/Infant Care (if applicable)
Pet food and care items (if applicable)
Create Surplus of Most Vital Supplies / Meds
If you or any member of your family is dependent upon ongoing medical treatments, specific medications or any such supplemental care items you must have a way to obtain them ahead of time so that you can create a surplus capable of seeing you all through trouble.
This can be especially challenging if the item or drugs in question are not available on demand to the public, or if your access to them would be imperiled during any major event.
To further complicate matters, many medications have specialized storage requirements such as refrigeration or just short shelf lives.
Maintaining access to, and rotating your supply of these items is a challenge unto itself. Make sure to discuss your concerns with your care provider so that you may reach a solution, and do whatever is necessary to insulate yourself against being cut off from the supplies or treatment you need.
Providing for Backup / Off-grid Power Solutions
Since you are staying at home while bugging in, planning to provide backup power in the nearly certain eventuality that public power is lost or interrupted is a good idea.
This can be done in a variety of ways, with the most common and the most straightforward being the installation of a liquid-fueled generator.
Other options include solar arrays installed on the roof, or freestanding and whole house battery backup systems composed of multiple deep cycle batteries that can “bank” power to be used on demand.
Aside from allowing your life to go on more or less as it has inside your home, this could be a critical prep if you were depending on refrigeration for food storage or the preservation of medicine as discussed above.
Rural vs. Urban Prepping
One major consideration that every family prepper must take into account as whether or not you live in an urban or rural environment. The population density of the area where you live will dramatically alter all of your other preps and plans.
Rural prepping is often seen as ‘Easy Street’, or the ideal route to self-sufficiency; something to be strived and reached for.
The notion of small town or village living conjures up visions of neighbors helping neighbors and living in a place where everyone knows you and is at least nominally concerned about you.
This is sometimes true, if you can establish that ahead of time, but you shouldn’t think that you can roll into a rural area as part of a bug-out or similar plan and be greeted with open arms.
Such places are often insular, and by intention, their lack of people and infrastructure can create major challenges, especially when you need certain resources or services.
Conversely, urban prepping means you will be living in a literal sea of humanity. You will enjoy a tremendous concentration of resources and professional skill provided by various agencies and institutions, but that same sea of humanity might prove to be your biggest hazard. \
Desperate, scared people act irrationally, and not for nothing when the time comes to flee a city it will often prove the most harrowing and difficult part of your survival ordeal. Gridlock is a certainty and taking your chances on foot is certain to be perilous.
Not for nothing, cities are notorious for high crime rates, and such places experience skyrocketing instances of criminal activity during major crises.
You don’t need to necessarily uproot and move your entire family to mitigate the hazards and challenges posed by one locale over another, but you do need to be aware of them so you can work to mitigate them.
Conclusion
Prepping is a lifestyle change, and making that change as part of a family, for your family, introduces even more complexity to what is already a challenging affair.
But the security and degree of certainty that this provides is priceless, and well worth the upfront and ongoing efforts.
Use the guide we have provided for you to direct your family prepping efforts and you can save yourself a ton of work and research on the matter.
It should be no surprise to anyone even passingly familiar with self-defense concepts that New Jersey ranks as among the very worst states when it comes to ownership and carry of weapons of all kinds. Knives are certainly included.
New Jersey’s state statutes are overly long, worded in such a way that officials may spring the jaws of the justice system closed on anyone they please whenever they feel like it. This is a state where citizens will always be on the back foot if they choose to carry weapons, including knives.
Potentially any kind of knife is restricted in the state, and the wording of the statutes allows subjective judgments to be made based on interpretation.
Various test cases over the years support this assertion. It does not matter for the most part what kind of knife you carry and whether or not you carry it openly or concealed.
New Jersey’s law is simply too mercurial to provide any dependable determination of what knife is allowed under what conditions, and what knife is not. Brace yourself for the horror, and read on.
What You Need to Know
Warning:Ballistic knives, automatics/switchblades, dirks, daggers, stilettos, gravity knives and many more varieties besides are all subject to considerable restriction in the State of New Jersey.
The State has affirmatively ruled that self-defense is not considered a lawful purpose and justification for carry of a knife.
You should ostensibly be able to keep most kinds of knife in your home, but even this is not a certainty. See discussion below.
General Ownership
Several kinds of knives are banned for possession by type in New Jersey unless one has an “explainable lawful purpose”. Specifically, gravity knives, switchblades, daggers, dirks, ballistic knives and stilettos.
If you are in possession of any of those knives without an explainable lawful purpose you’re guilty of a crime of the 4th degree, and will face felony charges.
What is an explainable lawful purpose? That is a great question, and New Jersey nowhere defines that turn of phrase anywhere in the state statutes, instead relying on a torturous legal history by which they prosecute and extort money from citizenry over minor transgressions related to knives that no one cares about.
Tragically, legal precedent in New Jersey shows that there is some liability even when having any of those knives in your home as part of a collection; though nominally a lawful purpose carrying any of them anywhere outside of your home is decidedly not considered a lawful purpose. You have been warned.
Also note that any knife that does not explicitly fall into one of the mentioned categories above is still considered a weapon, and any person who has in his possession any other way, exact words of the text, under circumstances not manifestly appropriate for lawful uses is likewise guilty of a crime of the fourth degree.
One should also be aware that no knife having a blade of 5 inches or longer or an overall length of 10 inches or longer may be sold or transferred to a person who is under 18 years of age.
Concealed Carry, No Permit
The concealed carry of a knife that is manifestly legal may be carried for an explainably lawful purpose and is, nominally, legal to carry in the state of New Jersey without a permit.
I must impress upon readers with emphasis that the law regarding weapons, and that includes innocent, innocuous pocket knives, is always against you in the state of New Jersey, and you must plan and prepare accordingly.
Concealed Carry, With Permit
Concealed weapons permits do not grow on trees in New Jersey, and that is to say they are not easy to get.
But, even if you do have a concealed weapons permit or are able to obtain one, it does not grant you any additional permissions with regards to the carry of knives.
Open Carry
The open carry of knives in New Jersey is not manifestly illegal, but it is asking for trouble and you should never do it.
Prohibited Places
You may possess no knife, or anything approximating a knife, on any school property, school grounds within any school building or vehicle, at any school event or gathering.
Assessment
New Jersey is a balefully awful state for knife owners as the law is manifestly designed to set you up for failure.
As written, whether or not any given knife is legally possessed for a lawful purpose does not even depend on you being able to explain as much; if the arresting officer or the prosecutor or the judge or the jury thinks that you did not have a manifestly lawful purpose at the time you possessed a given knife you might be prosecuted for it.
This is not conjecture, and any violation of knife possession statutes in the state will earn you a felony.
Important New Jersey State Statutes
Section 2c:39-1 – Definitions.
(…)
h. “Gravity knife” means any knife which has a blade which is released from the handle or sheath thereof by the force of gravity or the application of centrifugal force.
(…)
p. “Switchblade knife” means any knife or similar device which has a blade which opens automatically by hand pressure applied to a button, spring or other device in the handle of the knife.
(…)
r. “Weapon” means anything readily capable of lethal use or of inflicting serious bodily injury. The term includes, but is not limited to, all(1) firearms, even though not loaded or lacking a clip or other component to render them immediately operable; (2) components which can be readily assembled into a weapon;(3) gravity knives, switchblade knives, daggers, dirks, stilettos, or other dangerous knives,billies, blackjacks, bludgeons, metal knuckles, sandclubs, slingshots, cesti or similar leather bands studded with metal filings or razor blades imbedded in wood; and (4) stun guns; and any weapon or other device which projects, releases, or emits tear gas or any other substance intended to produce temporary physical discomfort or permanent injury through being vaporized or otherwise dispensed in the air.
(…)
u. “Ballistic knife” means any weapon or other device capable of lethal use and which can propel a knife blade.
…
Section 2c:39-3 – Prohibited weapons and devices
(…)
e. Certain weapons. Any person who knowingly has in his possession any gravity knife, switchblade knife, dagger, dirk, stiletto, billy, blackjack, metal knuckle, sandclub, slingshot, cestus or similar leather band studded with metal filings or razor blades imbedded in wood, ballistic knife,without any explainable lawful purpose,is guilty of a crime of the fourth degree.
g. Exceptions. (1) Nothing in subsection a., b., c., d., e., f., j. or k. of this section shall apply to any member of the Armed Forces of the United States or the National Guard, or except as otherwise provided, to any law enforcement officer while actually on duty or traveling to or from an authorized place of duty, provided that his possession of the prohibited weapon or device has been duly authorized under the applicable laws, regulations or military or law enforcement orders. Nothing in subsection h. of this section shall apply to any law enforcement officer who is exempted from the provisions of that subsection by the Attorney General. Nothing in this section shall apply to the possession of any weapon or device by a law enforcement officer who has confiscated, seized or otherwise taken possession of said weapon or device as evidence of the commission of a crime or because he believed it to be possessed illegally by the person from whom it was taken, provided that said law enforcement officer promptly notifies his superiors of his possession of such prohibited weapon or device.
(2) a. Nothing in subsection f. (1) shall be construed to prevent a person from keeping such ammunition at his dwelling, premises or other land owned or possessed by him, or from carrying such ammunition from the place of purchase to said dwelling or land, nor shall subsection f. (1) be construed to prevent any licensed retail or wholesale firearms dealer from possessing such ammunition at its licensed premises, provided that the seller of any such ammunition shall maintain a record of the name, age and place of residence of any purchaser who is not a licensed dealer, together with the date of sale and quantity of ammunition sold.
(…)
i. Nothing in subsection e. of this section shall be construed to prevent any guard in the employ of a private security company, who is licensed to carry a firearm, from the possession of a nightstick when in the actual performance of his official duties, provided that he has satisfactorily completed a training course approved by the Police Training Commission in the use of a nightstick.
Section 2c:39-5 – Unlawful possession of weapons.
(…)
d. Other weapons. Any person who knowingly has in his possession any other weapon under circumstances not manifestly appropriate for such lawful uses as it may have is guilty of a crime of the fourth degree.
(…)
h. A person who is convicted of a crime under subsection a., b. or f. of this section shall be ineligible for participation in any program of intensive supervision; provided, however, that this provision shall not apply to a crime under subsection b. involving only a handgun which is in the nature of an air gun, spring gun or pistol or other weapon of a similar nature in which the propelling force is a spring, elastic band, carbon dioxide, compressed or other gas or vapor, air or compressed air, or is ignited by compressed air, and ejecting a bullet or missile smaller than three-eighths of an inch in diameter, with sufficient force to injure a person.
i. A person convicted of violating subsection a., b. or f. of this section shall be sentenced by the court to a term of imprisonment, which shall include the imposition of a minimum term during which the defendant shall be ineligible for parole, if the court finds that the aggravating circumstance set forth in paragraph (5) of subsection a. of N.J.S.2C:44-1 applies. (…)
…
Section: 2C:39-9.1: Sale of knives to minors; crime of the fourth degree; exceptions
4. A person who sells any hunting, fishing, combat or survival knife having a blade length of five inches or more or an overall length of 10 inches or more to a person under 18 years of age commits a crime of the fourth degree; except that the establishment by a preponderance of the evidence of all of the following facts by a person making the sale shall constitute an affirmative defense to any prosecution therefor: a. that the purchaser falsely represented his age by producing a driver’s license bearing a photograph of the licensee, or by producing a photographic identification card issued pursuant to section 2 of P.L.1980, c. 47 (C.39:3-29.3), or by producing a similar card purporting to be a valid identification card indicating that he was 18 years of age or older, and b. that the appearance of the purchaser was such that an ordinary prudent person would believe him to be 18 years of age or older, and c. that the sale was made in good faith relying upon the indicators of age listed in a. and b. above.
…
Section 2c:39-5 – Unlawful possession of weapons.
(…)
e. Firearms or other weapons in educational institutions.
(1) Any person who knowingly has in his possession any firearm in or upon any part of the buildings or grounds of any school, college, university or other educational institution, without the written authorization of the governing officer of the institution, is guilty of a crime of the third degree, irrespective of whether he possesses a valid permit to carry the firearm or a valid firearms purchaser identification card.
(2) Any person who knowingly possesses any weapon enumerated in paragraphs (3) and (4) of subsection r. of N.J.S.2C:39-1 or any components which can readily be assembled into a firearm or other weapon enumerated in subsection r. of N.J.S.2C:39-1 or any other weapon under circumstances not manifestly appropriate for such lawful use as it may have, while in or upon any part of the buildings or grounds of any school, college, university or other educational institution without the written authorization of the governing officer of the institution is guilty of a crime of the fourth degree.
(3) Any person who knowingly has in his possession any imitation firearm in or upon any part of the buildings or grounds of any school, college, university or other educational institution, without the written authorization of the governing officer of the institution, or while on any school bus is a disorderly person, irrespective of whether he possesses a valid permit to carry a firearm or a valid firearms purchaser identification card.