Monday, October 31, 2022

So, What Will Work After an EMP Attack? (Here are 10 Things that Will)

One of the most terrifying, and sadly most plausible, doomsday scenarios is that of a major EMP attack.

power line

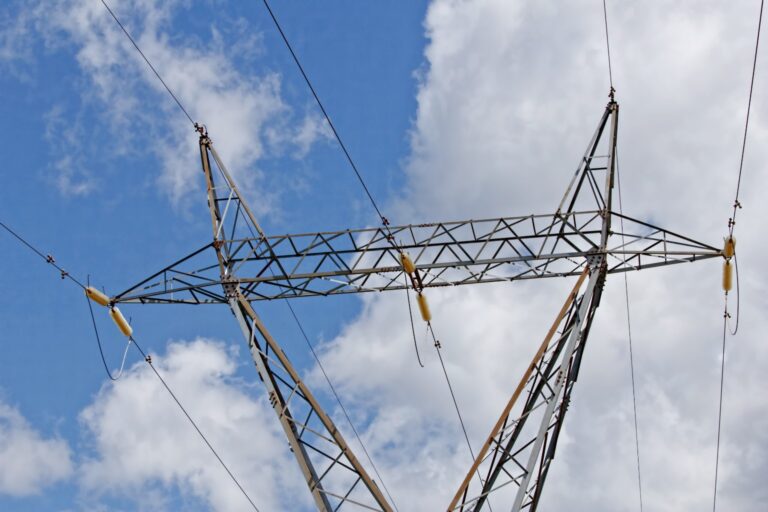
Whether it is caused by a high-altitude nuclear detonation or the deployment of a purpose-made EMP generator, either has the capability of plunging a society back into the pre-industrial era by destroying electrical grids and any technology reliant on a circuit board.

The first, second, and third-order effects are difficult to calculate, but suffice it to say that many devices, tools, and vehicles that preppers count on will be out of action unless specifically hardened or protected. This is difficult to do, especially for the things that we use every day.

A better option might be preparing for an EMP attack by learning what items are likely to work after such an event.

By acquiring these items ahead of time or even making their use habitual, you can better insulate yourself against the massive loss of capability attendant with a high-energy EMP.

YouTube Video

Power Tools

In what will certainly be a surprise to some readers, most power tools will work after an EMP, even battery-powered ones, so long as a few things are kept in mind.

First, the tool itself or the batteries must not be directly connected to the power grid when the EMP occurs. That will likely burn out the electric motor and render them useless.

Second, any specialized tools that make use of an electronic control panel or a circuit board for power regulation will probably be toast even if they aren’t connected to the grid.

Barring this, you can probably depend on electric- or gasoline-operated power tools in the aftermath.

Batteries

The previous entry should have tipped you off, but for clarity, pretty much all primary and secondary cells that we depend on in life will survive an EMP so long as they are not on a charging dock that is connected to the electrical grid.

The casing of a battery itself acts like a Faraday cage for protecting the electrolyte inside from the effects of an EMP, and so long as the terminals do not complete a circuit there is no way for the dangerous current present during the event to damage them.

It should be noted, however, that batteries that are presently connected to vulnerable devices might be destroyed or damaged from the immediate effects of an EMP on its host device, but you generally won’t need to worry about your survival batteries kept in storage at all.

Manual Tools

I hope this is something that everyone knows, but you should not forget that you can always depend on manual tools in the aftermath of an EMP when electric tools and devices fail.

Anything that relies on humans or animals for power will still function the same as it always has, from hammers and saws to more intricate tools like plows and mills.

If it was not dependent upon electricity before the event then you can count on it working after.

In fact, assembling a collection of manual tools that can supplement or even replace the capability of your more modern ones is a good first step in EMP preparedness.

Flashlights and Lanterns

Another surprise EMP survivor is the common flashlight, whether or not it has batteries in it. This rule of thumb counts for electric and liquid-fueled lanterns, too.

Considering how important these fundamental tools are in survival situations, you can breathe a sigh of relief knowing you won’t be left totally in the dark after an EMP.

Your best bet, if going electric, is to choose incandescent versions instead of the more modern LEDs.

LEDs themselves may or may not be directly vulnerable to EMPs depending on who you listen to, but more sophisticated versions of these lighting tools might rely on tiny circuit boards for power regulation and more. Simpler is definitely better in this case!

Compasses

A traditional magnetic compass, though it might be temporarily spoofed by an EMP, will return to normal function in the aftermath.

Because an EMP, even an extremely powerful one, is generally not a sustained bombardment of electromagnetic energy it will not permanently interfere with the polarity of the Earth’s own magnetic field that a compass depends on for orientation.

You’ll be able to depend on your compass to help you find your way once the event is over, although actually making your way could be another story entirely!

Mechanical Watches and Timers

Some timing devices do not depend on electricity at all to function or else depend only on battery power.

You’ll still have need of clocks and precise timers for a variety of purposes in any major survival scenario, particularly a long-term bug in scenario, and so it is a good idea if your timing devices will survive an EMP.

From wristwatches to alarm clocks and even something simple like a kitchen timer, a wide variety of mechanical timing devices deserve a spot in your EMP prep plan.

As mentioned above, in the case of battery-powered clocks or other timers that can also be plugged into a power outlet, don’t count on them surviving if they are plugged in when the event occurs.

Anything connected to the grid is probably toasted during an EMP!

Mechanical Pumps

From simply moving water to operating sprayers and even siphoning other fluids from a variety of vessels or holding tanks, pumps are rarely in the limelight in our society but are absolutely necessary for a variety of industrial and residential settings.

Depending on where you live and where you get your water from, you may or may not be able to depend on water coming from any taps you open.

If it stops flowing, having an alternative pumping system to supply your house would be a boon.

Similarly, having a variety of pumps to handle everything from watering the garden to giving your animals fresh water is great capability to have. Larger pumps that can move huge volumes are still an option if they can be operated by generators.

Most Pre-1980 Vehicles

Most folks who set out to prepare for an EMP do so with the understanding that your typical motor vehicle is going to be rendered immediately and probably permanently out of action.

This might not necessarily be the case! Though modern cars are marvels of technology- which you can read as packed full of computer chips, circuit boards, and other delicate, vulnerable electronics- it wasn’t always this way.

Vehicles from several decades ago either did not depend upon computers to operate or they were used only to supplement their performance, meaning you can still turn the key and get them going after an EMP.

The cut-off for generally reliable function post EMP for domestic and foreign vehicles alike seems to be around 1980, so look for older model years if you want an EMP-proof ride.

Solar Panels

One of the best possible investments you can make in EMP preparedness is a good set of solar panels, either larger ones that can supply your household needs, or smaller ones that can recharge your personal electronics.

Solar panels themselves are not directly vulnerable to the effects of an EMP, and so long as they are not connected to an electrical grid when it occurs. The worst that will happen to them is usually a tiny overall loss in efficiency.

A properly set up solar array can keep the electricity flowing when everyone else is scrambling in the aftermath.

Consider that if you were going to use solar panels for full-time or supplemental power for your house you’ll need to take special steps to protect them from the surge of energy that an EMP will cause.

Basic Appliances

Most basic appliances that you rely on will continue to function after an EMP so long as they are not connected to the electrical grid, as has been mentioned several times throughout this article.

Especially older-model appliances like refrigerators, freezers, washers, dryers, and the like. As with all electronics, if it does not have a sophisticated control panel it will probably be fine if it survives the surge of power.

Basic appliances that people use everyday like coffee makers can easily be run off of solar panels, above, and that means you don’t need to go all in on non-electric replacements so long as you plan properly.

things that will work after an emp pinterest


via Modern Survival Online https://ift.tt/GXI7UEs

Friday, October 28, 2022

Illinois’ Pepper Spray Laws: An Overview

Pepper spray is one of the best self-defense tools available to citizens in the United States. Highly portable, highly effective, and able to legally go nearly anywhere, this is one item that you should never go without. Even better, it is also legal in all 50 states.

flag of Illinois

However, there are some states that are infamous for their dim view both of self-defense and citizens’ rights to own and carry weapons.

Illinois is one such state, but we are happy to report that the state is surprisingly lenient when it comes to the carry of pepper spray and other defensive sprays. You can learn more about Illinois’ pepper spray laws in the rest of this article.

Your Illinois Pepper Spray Passport

The following facts are the most crucial, need-to-know points concerning the carry and use of pepper spray in Illinois.

  • Anyone that is 18 years old and does not have a felony record or have a suspended right to own weapons may carry pepper spray in Illinois.
  • All typical pepper spray formulations are legal, including genuine pepper spray and typical tear gas formulas.
  • Illinois notably does not have a specific capacity restriction on the law books, but the statute concerning defensive sprays states that they must be designed solely for personal defense. This means that extra large canisters might be suspect.

We will dive deeper into Illinois laws and requirements on the subject just below.

Can You Legally Carry Pepper Spray in Illinois?

Yes, it is absolutely legal to carry pepper spray in Illinois, openly or concealed, without any need for special permission or a concealed weapons permit.

However, city laws vary widely throughout the state, particularly in larger cities like Chicago.

You must double-check all city and other municipal laws when carrying your pepper spray, and never assume that just because the state law has you covered that you might not run afoul of local laws.

You can check section 24-1 concerning the unlawful use of weapons, and note that subsection paragraph 3 notes a specific exception for self-defense sprays.

Sec. 24-1. Unlawful use of weapons.

(a) A person commits the offense of unlawful use of weapons when he knowingly:

(3) Carries on or about his person or in any vehicle,

a tear gas gun projector or bomb or any object containing noxious liquid gas or substance, other than an object containing a non-lethal noxious liquid gas or substance designed solely for personal defense carried by a person 18 years of age or older; or

How Much Pepper Spray Can You Carry in Illinois?

There is no specific restriction concerning the capacity of a self-defense spray carried by civilians in Illinois.

Ostensibly, you could carry any kind of spray you wanted and in any quantity so long as it is designed to be expressly non-lethal.

However, as the above statute says the specific exception for self-defense sprays states that they must be both non-lethal and designed solely for personal defense.

It is that specific definition that gives rise to the concern that larger riot-sized canisters of pepper spray might not be legal for citizens to carry.

Those types of dispensers are usually designed, marketed, and sold for law enforcement use, not for civilian carry in typical civil settings.

Accordingly, dispensers of that size may not be legal to carry on or about your person or keep in your vehicle.

What Pepper Spray Formulas are Legal in Illinois?

Pepper spray and any common tear gas formulations are both legal in the state of Illinois, along with other, legacy self-defense formulations like Mace.

The most important factor that qualifies any pepper spray or other self-defense spray in the state is that it is nonlethal and does not cause any lasting harm to the target when used normally.

This means that so long as you buy and carry a typical dispenser and formula sold by a major and reputable manufacturer you shouldn’t have anything to worry about concerning the type of spray you have while in Illinois.

However, this might not be the case if you choose to buy from a lesser or unknown manufacturer of such products, or decide to brew up your own at home.

The negative legal consequences of such a decision are just not worth a couple of dollars in savings or any fantastical promises of effectiveness.

If your pepper spray flicks permanent injury on an attacker, you might have civil and criminal liabilities.

When Can You Legally Use Pepper Spray in Illinois?

You may use pepper spray in Illinois to protect yourself, another person, or in some cases property from the unlawful use of force.

However, in all such cases your use of defensive force must be proportional to the criminal use of force you are being threatened with imminently.

If someone is threatening to punch you, kick you, beat you up, etc then you are likely justified in pulling and using your pepper spray to deter them and allow yourself to escape.

You must never use pepper spray to win an argument, or just use it against someone who is verbally abusing you. Inappropriate use or willful misuse of pepper spray is a serious crime in Illinois.

You can check out sections 7-1 and 7-3 for more.

Sec. 7-1. Use of force in defense of person.

(a) A person is justified in the use of force against another when and to the extent that he reasonably believes that such conduct is necessary to defend himself or another against such other’s imminent use of unlawful force. However, he is justified in the use of force which is intended or likely to cause death or great bodily harm only if he reasonably believes that such force is necessary to prevent imminent death or great bodily harm to himself or another, or the commission of a forcible felony.

Sec. 7-3. Use of force in defense of other property.

(a) A person is justified in the use of force against another when and to the extent that he reasonably believes that such conduct is necessary to prevent or terminate such other’s trespass on or other tortious or criminal interference with either real property (other than a dwelling) or personal property, lawfully in his possession or in the possession of another who is a member of his immediate family or household or of a person whose property he has a legal duty to protect. However, he is justified in the use of force which is intended or likely to cause death or great bodily harm only if he reasonably believes that such force is necessary to prevent the commission of a forcible felony.

Frequently Asked Questions

What is the strongest pepper spray you can carry in Illinois?

Illinois has no specific restriction in the statutes on the potency or overall strength of any pepper spray or other defensive spray that citizens can carry.

All that matters is that the spray is designed to be non-lethal and is evidently non-lethal, causing no lasting harm when used normally.

Once again, if your pepper spray maims or permanently injures someone in normal use, it probably does not qualify as a self-defense spray at all in the state.

Will you go to jail if you pepper spray someone?

Yes, it is highly likely. In cases of serious self-defense, and even ones where you use something as relatively benign as pepper spray, it is highly unlikely that you will be cleared of wrongdoing at the scene.

Police tend to make arrests and then figure out all the facts later, which means you’ll probably be cooling your heels in a jail cell after your encounter.

You might be let out later, and you might need to be bailed out in the short term, but in all cases self-defense is serious business.

Make sure you have a plan for this eventuality, and never assume that you’ll be let go just because you pepper sprayed someone rather than beating them up or shooting them.

Is pepper spray considered a deadly weapon?

No, pepper spray is not considered a deadly weapon anywhere in the United States. Pepper spray and other defensive sprays are designed, sold, and intended to be non-lethal in normal use, however much temporary pain they might cause those affected by them.


via Modern Survival Online https://ift.tt/yqN87Ho

Monday, October 24, 2022

Michigan’s Pepper Spray Laws: An Overview

Pepper spray is legal in all 50 states, but nonetheless each state has its own laws that govern its ownership, carry and use.

flag of michigan

The way it is still one of the easiest weapons to obtain and carry and permitted almost everywhere, you’ll still need to fully understand the letter of the law in any state that you are visiting or residing in.

When it comes to pepper spray, Michigan is definitely a mixed bag. Michigan law specifies a set of standards by which one can choose a defensive spray to carry, and only sprays meeting that set of criteria may be carried.

A formulation that is too strong, carrying too much, or carrying a blend of certain ingredients might mean that your spray is illegal under Michigan law.

Luckily, it is not too terribly confusing, but it is definitely not anything goes when it comes to pepper sprays in Michigan. Keep reading to learn more.

Your Michigan Pepper Spray Passport

The following regulations are the most important out of all of Michigan’s statutes concerning the use and carry of pepper spray. Pay particular attention to the ones governing the size and type of spray that a civilian might carry:

  • Michigan law defines a legal “self-defense spray or foam device” as one and only one of the following:
    • 35 grams of CS tear gas and inert ingredients only
    • A solution of not more than 18% oleoresin capsicum
    • A solution of not more than 18% oleoresin capsicum with an additional ultraviolet dye.
  • Any similar chemical dispenser, even if it is a widely marketed self-defense spray, that falls outside of the above guidelines is illegal in the state of Michigan.
  • Note that only actual pepper sprays, OC, are mentioned specifically under the self-defense exemptions in Michigan law, not tear gases.
  • Pepper spray may not be sold to anyone under 18 years of age, but it may be legally carried by those under 18 years of age.

Can You Legally Carry Pepper Spray in Michigan?

Yes. It is completely legal to carry pepper spray or tear gas spray in the state of Michigan so long as it meets the state’s requirements for a legal device or other dispensers.

You may carry your self-defense spray openly or concealed, and you do not need the benefit of a concealed weapons permit or any other special permission to do so.

Also, note that you can keep your spray inside your vehicle if you choose at your convenience.

How Much Pepper Spray Can You Carry in Michigan?

The issue of capacity is a tricky one when it comes to Michigan law, especially compared to other states that either have no capacity restriction whatsoever or have a straightforward limitation.

In short, if you choose to carry a tear gas formula, it may only be CS tear gas, and you are limited to a capacity of not more than 35 grams, or about 1.2 ounces, and that includes any inert ingredients in the solution. For clarity: if carrying tear gas, only 35 grams and not a gram more.

However, if you choose to carry a pepper spray solution there is no specific capacity restriction, so long as the solution is a concentration of no more than 18% OC only or 18% OC plus a marking ultraviolet dye.

Make sure you read Michigan State statute 750.224d carefully since this contains specific restrictions both on formulation and on capacity.

750.224d Self-defense spray or foam device.

(1) As used in this section and section 224, “self-defense spray or foam device” means a device to which all of the following apply:

(a) The device is capable of carrying, and ejects, releases, or emits 1 of the following:

(i) Not more than 35 grams of any combination of orthochlorobenzalmalononitrile and inert ingredients.

(ii) A solution containing not more than 18% oleoresin capsicum.

(iii) A solution containing an ultraviolet dye and not more than 18% oleoresin capsicum.

(b) The device does not eject, release, or emit any gas or substance that will temporarily or permanently disable, incapacitate, injure, or harm a person with whom the gas or substance comes in contact, other than the substance described in subdivision (a)(i), (ii), or (iii).

What Pepper Spray Formulas are Legal in Michigan?

Pure OC and CS tear gas, nothing else. Notably, blends of these ingredients are illegal in Michigan.

You’re only allowed to carry a small quantity of tear gas or a larger quantity of a pure OC or OC with a marking dye as detailed above. No other formulations of defensive spray, of any kind, are legal in the state.

A stronger blend of OC, that is greater than 18%, is illegal as is any sort of tear gas-pepper spray blend.

When Can You Legally Use Pepper Spray in Michigan?

You can use pepper spray to defend yourself or someone else from the imminent use of unlawful force so long as your use of pepper spray is proportional to the threat.

For instance, if someone is threatening to beat you up or is threatening an even greater amount of harm, you’re almost certainly justified in pepper spraying them as long as it looks like they’re about to follow through with that threat immediately.

However, it is imperative that you read the exact letter of the law carefully. Section 750.224d is included below; notice how it states that only olio resin capsicum, pepper spray, is protected under the self-defense exemption?

Sure, you might assume that that includes all self-defense sprays, specifically tear gas that is conspicuously missing, but that assumption might get you hurt in court.

For this reason, and until such time as Michigan amends or updates the law, I would recommend carrying only genuine pepper spray while in the state.

In all other cases, you’ll notice that the included section of the law details that the misuse or criminal use of any self-defense spray, pepper spray, or tear gas, is a misdemeanor that is punishable by up to two years in jail, a fine of up to $2,000 or both.

You never, ever want to play around with any self-defense spray as a joke, and you cannot spray someone to settle an argument or just because they are insulting you. You have been warned!

750.224d Self-defense spray or foam device.

2) Except as otherwise provided in this section, a person who uses a self-defense spray or foam device to eject, release, or emit orthochlorobenzalmalononitrile or oleoresin capsicum at another person is guilty of a misdemeanor, punishable by imprisonment for not more than 2 years, or a fine of not more than $2,000.00, or both.

(5) Subsection (2) does not prohibit either of the following:

(b) The reasonable use of either of the following by a person in the protection of a person or property under circumstances that would justify the person’s use of physical force:

(i) A self-defense spray or foam device containing not more than 18% oleoresin capsicum.

(ii) A self-defense spray or foam device containing an ultraviolet dye and not more than 18% oleoresin capsicum.

Frequently Asked Questions

What is the strongest pepper spray you can carry in Michigan?

The strength of the spray you can carry in Michigan is dependent upon its type. If you’re carrying pepper spray, you may carry a solution with no more than 18% OC in it. Tear gases are limited by overall capacity, but not by potency.

Will you go to jail if you pepper spray someone?

It is likely, yes. It is a pretty rare thing after a genuine self-defense encounter to be cleared by the police at the scene.

It is more likely instead that you will certainly be detained and likely be arrested, so expect a trip to jail. Whether this is a long and scary stay or a quick and relatively benign stay depends on the totality of the circumstances.

However, if you use your defensive spray and appropriately or wantonly misuse it you might be facing genuine prison time.

Is pepper spray considered a deadly weapon?

No. However, the requirements for self-defense sprays in Michigan are quite a bit more stringent than in most other states, as detailed in this article.

Your best bet, to make sure you are indeed carrying a legal dispenser, is to purchase your spray in Michigan from a known and trusted retailer that can advise you on such things.


via Modern Survival Online https://ift.tt/TxBg6dy

Friday, October 21, 2022

All Pepper Spray Laws by State

When it comes to self-defense, being properly prepared is vital. This entails mental preparation, physical preparation, and of course material preparation- having the right tools.

self-defence pepper gel

In America, plenty of people carry guns and knives for self-defense but there is little attention paid to humble pepper spray.

That is a major mistake, since pepper spray is highly effective, and one of the only ranged less than lethal tools that citizens have easy access to. And perhaps best of all, pepper spray is legal in all 50 US states.

However, each state has its own laws governing pepper spray, and some are more restrictive than others.

You’ll definitely want to stay on the right side of the law anytime you are talking about self-defense, so today we are bringing you this primer it will tell you everything you need to know about carrying and using pepper spray, as well as links to a thorough overview for each state’s pepper spray laws.

YouTube Video

Where is Pepper Spray Legal?

Pepper spray is completely legal in the United States, in one form or another, both according to federal law and to the laws of all 50 states.

Now, as you might expect state laws do vary, and a certain formula or size of canister that is legal in one state might not be legal in another.

Generally, pepper spray laws are not too complicated from state to state, but it pays to stay on top of them to avoid any confusion and possible charges or fines. For more details, you can read the dedicated pepper spray laws articles by clicking the highlighted states from the following table

Alabama Alaska Arizona
Arkansas California Colorado
Connecticut Delaware Florida
Georgia Hawaii Idaho
Illinois Indiana Iowa
Kansas Kentucky Louisiana
Maine Maryland Massachusetts
Michigan Minnesota Mississippi
Missouri Montana Nebraska
Nevada New Hampshire New Jersey
New Mexico New York North Carolina
North Dakota Ohio Oklahoma
Oregon Pennsylvania Rhode Island
South Carolina South Dakota Tennessee
Texas Utah Vermont
Virginia Washington DC Washington State
West Virginia Wisconsin Wyoming

Is it Illegal to Walk Around with Pepper Spray?

No. It is entirely legal to carry pepper spray openly virtually everywhere. You can keep a can of pepper spray clipped onto your belt, a purse strap, or on a keychain.

This fact alone makes pepper spray worthy of consideration as a defensive weapon. It is possible to have pepper spray close at hand and instantly accessible without violating the law or raising too many eyebrows.

Certainly compared to guns or knives, a visible can of pepper spray is innocuous, and looks almost harmless.

This is a level of social acceptability that you just won’t get for more serious weapons, even in places and in states where open carry is legally permissible.

Is it Illegal to Conceal Carry Pepper Spray?

No. Pepper spray can be concealed even in places where other concealed weapons are forbidden or regulated.

You can toss pepper spray into a piece of luggage, put it in your pocket, keep it inside a jacket or inside a compartment of your vehicle at your discretion.

So long as the type and size of spray that you are carrying is legal in the jurisdiction where you are, you rarely, if ever, have to spare a thought toward the legality of concealing it.

Most times, keeping a weapon of any kind out of sight is the very best policy, minimizing your disturbance of others around you while drawing the least possible attention, and affording you the potential element of surprise against your attacker if and when you are attacked.

Are Pepper Sprays, Foams and Gels all Legal? 

Usually. Though pepper spray is something of a catch-all term, it also describes a particular mode or medium for dispensing spray, in this case as a fine aerosol mist or stream.

However, you should know that pepper spray comes in other forms for specific applications or preferences.

Foams are one popular option, providing a little bit of extra and breezy conditions while also minimizing the chances of cross-contamination or splashback at the cost of overall effectiveness.

Gels are another option, although one that is decidedly less popular, but they have an advantage in bucking the wind, like foams, and also help to prevent splashback. Either can work well when in an area that is crowded with other people.

But, don’t assume that just because pepper spray is legal in an area, all types are likewise legal. Some states don’t allow foam or gel, restricting citizens to carrying aerosol only!

Can I Pepper Spray Someone if they Threaten Me?

Not necessarily. Just because pepper spray is a less than lethal defensive tool does not mean you can use it against people for any insult or trespass against you.

Pepper spray must only be used in cases of legitimate need of self-defense. You should never, ever use pepper spray to settle an argument, against someone who has insulted you over any sort of practical joke or mischief.

Most states have serious penalties for people who criminally misuse pepper spray!

What is Considered Self-Defense?

Self-defense, at its most technical, is the use of force against someone who is using unlawful force against you, or is it imminently threatening to use unlawful force against you.

To further explain the concept, self-defense is only justifiable in the eyes of the law when a person reasonably believes that the force is necessary to prevent the imminent use of unlawful force against them, and the defensive force is proportional to the threat they face.

Even though pepper sprays typically do not inflict any serious or lasting injuries, they are usually considered adequate and proportional for responding to physical threats of violence, e.g. being punched, kicked, pushed or having someone invade your personal space in a threatening manner.

You can, of course, use pepper spray against someone who is threatening you with any sort of deadly weapon, but in such cases you are certainly justified and responding with a deadly weapon of your own, though you shouldn’t hesitate to use pepper spray if it is all you have.

Frequently Asked Questions

What is the Strongest Pepper Spray Allowed by Law?

Most states do not have any law restricting the potency or strength of a pepper spray that you are allowed to carry, although a few do.

Generally, the defining characteristic of a pepper spray is that it inflicts no serious injury and no truly lasting harm. It is hideously painful, sure, but the pain will subside over time.

So long as a pepper spray meets this criteria and the rest of a state’s criteria for civilian use, you won’t have any issues.

Can You Go to Jail for Pepper Spraying Someone?

Yes, you can! Pepper spraying someone as a prank, in response to verbal harassment, to win an argument or for any other silly or petty reason is definitely going to land you in jail.

The charges associated with such an act vary from state to state, but some states will charge such an action as a felony. You have been warned!

Something else to keep in mind is that even in clear-cut cases of self-defense you are unlikely to be cleared of wrongdoing at the scene, and police will almost certainly detain you and might take you to jail until things get figured out.

For this reason, you should talk over such an eventuality with your family attorney, or with an attorney that is fluent in dealing with cases of self-defense so you’ll know how to react and how to handle it.

Are Pepper Spray and Tear Gas the Same Thing?

No. You might hear the terms pepper spray and tear gas used interchangeably, and throughout our law series on this subject you’ll see the term self-defense spray or defensive spray pop up.

Are these all just synonyms? Not exactly: Though pepper spray is used as a catch-all term much of the time to describe self-defense sprays, the actual chemical composition of these sprays can vary greatly, and have varying levels of effects to say nothing of legality from state to state.

pepper spray laws pinterest


via Modern Survival Online https://ift.tt/Gj94Z8p

Monday, October 17, 2022

Alabama’s Pepper Spray Laws: An Overview

Self-defense is serious business, and in these increasingly uncertain times going armed is a good strategy. However, carrying a handgun does not cover all of your defensive bases. This is where pepper spray can fill in the gap.

flag of Alabama

Pepper spray can help you deter an attacker before you are forced to go hands-on, and is entirely acceptable for use in situations where escalating to lethal force with a firearm or other weapon is questionable at best and outright illegal at worst.

The best part is that pepper spray is legal all across America, and Alabama is no exception.

Alabama has hardly any restrictions concerning the ownership and carry of pepper spray for citizens, but there is plenty you’ll want to know before you add it to your EDC. Keep reading to find out.

Your Alabama Pepper Spray Passport

The following facts are the most important things to know if you plan on carrying pepper spray in Alabama:

  • The state of Alabama permits citizens to carry all common formulations of pepper spray or other defensive sprays, including OC and tear gas along with blends of both.
  • There is no capacity restriction on pepper spray in Alabama. You may legally carry as much or as little as you want.
  • It should be noted that any misuse or unwarranted use of pepper spray in Alabama is a felony charge, so don’t play around with it or use it unnecessarily!

Keep reading to get the rest of the story on Alabama’s laws concerning pepper spray carry and use.

Can You Legally Carry Pepper Spray in Alabama?

Yes, you sure can! Anyone who is allowed to legally possess pepper spray can carry it openly or carry it concealed, or in their vehicle, in any way that works for them.

Notably, you can carry pepper spray pretty much anywhere in the state, including places of private business that have no weapons policies or signage up.

Some of the only notable exceptions are sensitive or restricted state and federal installations and the secure area of an airport beyond the security checkpoint.

This alone makes pepper spray an invaluable addition to your defensive tool set since it can go in so many places where other weapons cannot if you don’t have a special dispensation.

How Much Pepper Spray Can You Carry in Alabama?

Great news, you can carry absolutely as much pepper spray as you want on or about your person in Alabama. You can carry a single canister or dispenser of any size or multiple smaller units. It doesn’t matter.

Although it might sound like overkill, this is something to think about seriously depending on the circumstances and the threats that you are worried about.

Having more of the hot stuff on tap means you have more opportunities to solve a tactical problem, and the increasing likelihood that you might be assailed by multiple attackers means that you could be going pretty heavy on the trigger when the time comes.

Especially for people who might be facing a threat from rioters or mobs, larger canisters with greater range are definitely called for.

What Pepper Spray Formulas are Legal in Alabama?

Alabama hardly regulates defensive spray formulations at all. The only thing you need to ensure is that whatever solution you choose is designed not to inflict great bodily injury or death, or else cause lasting harm or disfigurement. So long as it is intended to be and is functionally non-lethal, you are good.

This means that all commonly available pepper spray formulations as well as both types of tear gas formula are okay for carrying.

Similarly, you can carry a defensive spray that is some other type of chemical or is a blend of any of the above if it suits your fancy.

That being said, it is your responsibility to be sure that your spray fits the above criteria and you should never carry a homebrew spray or some other aerosol chemical to serve as a defensive spray.

This is particularly important because Alabama does not take any Mercy on people who misuse pepper spray or other defensive sprays! More on that in a moment.

When Can You Legally Use Pepper Spray in Alabama?

Alabama permits the use of pepper spray and self-defense when it is used to stop the imminent or ongoing use of unlawful force against yourself or a third party.

Note that you do not have to wait until you or another person is at risk of death or great bodily injury.

Pepper spray is typically considered a proportional force to someone punching, kicking, or pushing you, and can be used to repel such an attacker or someone who is repeatedly invading your personal space.

Alabama state statute 13A-3-23 talks more about the use of force in self-defense. A partial transcript with the relevant paragraph is below.

Section 13A-3-23

Use of force in defense of a person.

(a) A person is justified in using physical force upon another person in order to defend himself or herself or a third person from what he or she reasonably believes to be the use or imminent use of unlawful physical force by that other person, and he or she may use a degree of force which he or she reasonably believes to be necessary for the purpose. A person may use deadly physical force, and is legally presumed to be justified in using deadly physical force in self-defense or the defense of another person pursuant to subdivision (5), if the person reasonably believes that another person is:

Frequently Asked Questions

What is the strongest pepper spray you can carry in Alabama?

Alabama does not impose any restrictions on the potency of any defensive spray that a citizen may carry so long as it is otherwise legal.

As we learned above, this means that the spray is both designed to not cause any lasting harm and in use does not cause any lasting harm.

Practically speaking if you purchase any kind of defensive spray from a known and reputable major manufacturer you shouldn’t have a thing to worry about.

If you try to brew your own or take your chances with some fly-by-night company that promises their product will melt your attacker’s flesh right off of their bones, you might be in for a nasty surprise.

Will you go to jail if you pepper spray someone?

It is possible that you could go to jail if you pepper spray someone, even if you are the victim of a criminal attack.

The pepper spray is usually considered a minimal amount of force compared to other weapons, it is still force and is treated accordingly by law enforcement.

Most notably, Alabama is fairly unique among other states by specifically categorizing the misuse of pepper spray as a felony, so you can’t afford to get this wrong!

Section 13A-6-27 has more to say on the matter.

Section 13A-6-27 – Use of pepper spray, etc.

(a) The crime of criminal use of a defense spray is committed if the perpetrator uses a defense spray including, but not limited to pepper spray, foam and any other self-defense chemical spray against another person in the commission of a crime or against a law enforcement officer while the law enforcement officer is performing his or her official duties.

(b) Criminal use of a defense spray is a Class C felony.

Is pepper spray considered a deadly weapon?

No, pepper spray is not considered a deadly weapon in the state of Alabama.


via Modern Survival Online https://ift.tt/AurVs2B

Friday, October 14, 2022

Alaska’s Pepper Spray Laws: An Overview

A great case can be made for every citizen to carry pepper spray for self-defense. No other option can do what pepper spray does as effectively and conveniently.

Alaska flag

When lethal force is too drastic an option but resorting to hand-to-hand might entail too much risk or escalation, reaching for pepper spray is the right call.

And luckily enough for everyone pepper spray is legal across the entirety of the United States in one form or another.

No matter who you are, there is some variety of pepper spray that will not only work for you but also be legal in your locale.

But as you might expect, some states are more permissive than others. Alaska, for instance, is extremely permissive when it comes to formulation, size, and carry.

There is a lot to like about Alaska law in this regard, so keep reading and we will tell you everything you need to know about carrying pepper spray in the last frontier.

Your Alaska Pepper Spray Passport

The following is the bare minimum you need to know before you start carrying pepper spray or another defensive spray in Alaska:

  • Alaska places no restrictions on the size or capacity of any defensive spray that a citizen wishes to carry. Tiny, pocket-size sprayers and extra large riot or bear canisters are both completely legal, and everything in between.
  • Alaska similarly has no laws restricting what type or formula of pepper spray or any other defensive spray citizens can own or carry. OC and tear gas formulas are both allowed, as a blend. So long as the spray is designed to cause no serious or lasting injury in use, it is legal.
  • Alaska is one of a few states that specifically categorizes pepper spray and tear gas spray in its own special category of weapons called defensive weapons. These are specified in the state statutes as weapons being not designed to cause great bodily injury or death when used normally.

There is a lot more to learn, so keep reading.

Can You Legally Carry Pepper Spray in Alaska?

Yes. Pepper spray is completely legal to carry in Alaska, pretty much anywhere and in any way that works for you.

You can carry pepper spray concealed or openly, keep it in your car, or otherwise transport it any way that you need to so long as it does not go beyond the security area of an airport or into a sensitive government installation.

Furthermore, citizens are not required to obtain a concealed weapons permit or any other special permission to carry pepper sprays in any way whatsoever.

How Much Pepper Spray Can You Carry in Alaska?

Alaska places no restrictions at all on the size or capacity of pepper spray or other defensive sprays that any citizen is allowed to carry.

You can carry a tiny pocket or keychain-sized dispenser that is good for a couple of half-second bursts or an extra large canister that is suitable for breaking up a riot or dealing with dangerous wildlife.

What Pepper Spray Formulas are Legal in Alaska?

Luckily, Alaska places no restrictions on what type or formula of defensive spray a person can carry.

Legitimate pepper sprays, OC or oleoresin capsicum, are of course okay as are typical tear gas formulations or any blend thereof.

Other chemical formulations like those employed by Mace brand sprays are likewise fine. Suffice it to say that Alaska is quite liberal concerning what constitutes a defensive spray.

However, you can’t carry any chemical concoction or noxious homemade brew that you want to and consider it a legitimate defensive weapon just because it is an aerosol and comes out of a can.

Only weapons that are not designed and in effect do not cause any serious harm, great bodily injury, disfigurement or death are viable defensive sprays.

In short, so long as you stick with common commercially available pepper spray or some other formula you shouldn’t have any problems.

Something else to keep in mind is that Alaska, unlike most states, has categorized pepper spray and other chemical defensive sprays as their own separate class of weapon, defined specifically in section 11.81.900 of the state statutes. Partial but relevant section of that text is below.

Sec. 11.81.900. Definitions.

(a) For purposes of this title, unless the context requires otherwise,

(20) “defensive weapon” means an electric stun gun, or a device to dispense mace or a similar chemical agent, that is not designed to cause death or serious physical injury;

When Can You Legally Use Pepper Spray in Alaska?

Broadly speaking, so long as you have a reasonable belief that another person is about to unlawfully use force against you or a third party you may use your pepper spray on them in an effort to prevent or halt that use of unlawful force.

To be perfectly clear, you need not wait until you or someone else is at risk of suffering death or great bodily injury before reaching for the pepper spray.

Now, even though pepper spray is considered under the law a far lesser amount of force compared to deadly weapons like knives, clubs, guns and so forth you still can’t go around pepper spraying people on a whim or just because you get in an argument or verbal altercation with them. That will easily land you in jail.

Alaska state statute section 11.81.330 details the justified use of force in self-defense. Partial but irrelevant text of that section is below.

Sec. 11.81.330. Justification: Use of nondeadly force in defense of self.

(a) A person is justified in using nondeadly force upon another when and to the extent the person reasonably believes it is necessary for self-defense against what the person reasonably believes to be the use of unlawful force by the other person, unless

(1) the person used the force in mutual combat not authorized by law;

(2) the person claiming self-defense provoked the other’s conduct with intent to cause physical injury to the other;

(3) the person claiming self-defense was the initial aggressor; or

(4) the force used was the result of using a deadly weapon or dangerous instrument the person claiming self-defense possessed while

(A) acting alone or with others to further a felony criminal objective of the person or one or more other persons;

Frequently Asked Questions

What is the strongest pepper spray you can carry in Alaska?

Alaska does not place any particular restriction on the strength or potency of any defensive spray formulation.

The most important factor is that the spray is not designed to cause lasting harm or injury, and does not in use directly result in any such harm or injury.

Will you go to jail if you pepper spray someone?

That is a possibility. Out of all the defensive weapons that a person might use in the United States, pepper spray has the best reputation.

That being said, it is unlikely that you will be cleared at the scene if you are forced to use it on someone unless there’s a preponderance of evidence that you were justified in your actions.

Is pepper spray considered a deadly weapon?

No, and are specifically categorized as a defensive weapon under Alaska State law. Defensive weapons are those that are designed not to inflict serious bodily harm or death.


via Modern Survival Online https://ift.tt/yfsxKIV

Monday, October 10, 2022

Camping Checklist: 15 Items to Always Bring

Camping is an enjoyable recreational pursuit and a valuable prepper skill at the same time, and one that you would be well served to partake of.

man camping in the woods
the woods somewhere in Ohio

Camping allows you to get out into nature and disconnect from the stresses and static that are so attendant with modern life.

It is a great way to recharge your batteries, but it is also a necessary task if you are ever forced to bug out as a direct consequence of an SHTF event.

Camping proponents from various schools of thought all have their take on what “real” camping is and what it isn’t, but generally we are referring to moving into a wilderness area on foot carrying what supplies you need with you on your back or sourcing them from the surrounding area.

Sure, it is possible to camp using an RV or your vehicle as a base, providing many of the same amenities that you have at home but in my opinion, this does not capture the true spirit of camping.

Heading into any natural environment entails a certain amount of risk without proper camping knowledge, and whether or not you are going out for an overnight pleasure jaunt or an extended, multi-day expedition there are some supplies you simply should not leave home without, no matter what. Below is a list of 15 items that you should always have with you when camping.

1. Water

Water is an essential survival resource that you cannot afford to be without while in the wilderness. You can survive for weeks without food but only a couple of days without any water.

Even before a couple of days is out, you’ll be so badly debilitated from dehydration that you’ll find it increasingly difficult, if not impossible, to put in the work necessary to survive. Trust me; a death by dehydration is absolutely grueling.

The obvious solution to this survival requirement is simply to have water on hand at all times.

A large water bottle or canteen will get you started, but remember that since water is so heavy you won’t be able to carry all of it that you’ll need on foot. Plan on acquiring more water from natural sources while you are out. That brings us to…

2. Water Filter

If you are going to be refilling your water supply from natural sources you’ll want a water filter to make it safe to drink.

Modern, compact, high-efficiency water filters are nothing short of marvelous and are capable of removing every trace of debris, dirt, and nasty, invisible germs from the water you find turning it clear and refreshing in the process.

There are way too many filters on the market to even begin listing them here, but there is a variety, and a price, to suit every requirement.

Some units act like an oversized straw that will allow you to drink directly from any water source while others screw in or integrate with your container and filter as you collect the water.

Everyone has their preference, and both are viable, the important thing is that you have one.

3. Flashlight or Headlamp

If you have never been camping before you’ll probably be pretty surprised to see just how dark the world is when you are away from civilization.

Being anywhere near a large settlement greatly increases the overall ambient levels of light, even in the middle of the night, compared to the remote wilderness.

The darkness hides many dangers, not the least of which is the simple danger of becoming disoriented or tripping over something that you can’t see.

Prevent this unhappy and unfortunate occurrence by investing in a quality flashlight or headlamp and bringing along some extra batteries.

Flashlights, as a rule, are more versatile and have greater throw range than headlamps, but headlamps don’t require hands, obviously, and work best as close-range utility or navigational lighting.

4. Outwear, seasonally appropriate

Probably the single, biggest mistake I see people make when camping is forgoing the inclusion of appropriate outerwear to keep themselves warm when temperatures drop.

You might live in a temperate zone in the middle of summer, but that doesn’t mean that conditions cannot change such that you could be at real risk of hypothermia.

Nightfall always sees the temperature decrease, and if you get wet or soaked with sweat from perspiration and then have to put up with even a gentle breeze you’ll be shedding heat like crazy.

Don’t risk it, since exposure is statistically the single biggest killer of people who find themselves in an outdoor survival situation.

Even compared to running out of water, exposure kills very quickly, and as little as a couple of hours when conditions are just right, or rather perfectly wrong. A warm jacket and headgear might make all the difference in a survival situation.

5. Fire-Starting Kit

Probably the most fundamental tool that you won’t rely on when camping, or in an outdoor survival situation, is that of fire.

Fire has done so much for mankind that it is no wonder that it is central in virtually every myth from every age around the world.

Fire keeps us warm, provides light, cooks our food, chases off predators and, not for nothing, gives us a much-needed mental boost when we are in the middle of a hostile and unforgiving wilderness.

Naturally, you’ll always want to include a fire starting kit in your camping gear. Much effort and ink have been spent discussing virtually every permutation of what makes the ultimate fire-starting setup.

Generally, a couple of cheap but reliable lighters, an alternative fire starter like a ferro rod, and some hot-burning tinder are sufficient so long as you can find some usable fuel in the surrounding area.

6. Hiking Boots or Shoes

It drives me crazy and furthermore is more than a little depressing. I’m referring to people who wear inappropriate shoes or other footwear out into the wilderness.

I cannot count the number of people who have trotted out into the woods or elsewhere wearing flip-flops or some other contrived, fashion-forward footwear when they should be wearing functional boots or shoes that will protect their feet both from unstable terrain and from the many hazards that lurk on the ground.

There has been more than one legitimate survival situation developed because someone was out on a pleasurable excursion in easy country but injured their foot, and so was unable to move or was unable to move at anything faster than a snail’s pace.

You don’t want either to happen to you, so make sure you wear lightweight, quick drawing but tough hiking boots or trail shoes whenever you head out camping for real.

7. Knife

Talk to any seasoned outdoorsman, hunter, guide, or camper and ask them which tool they are completely unwilling to leave behind during their travels, and they will likely tell you that it is their field knife.

The camping knife, field knife, survival knife, bush knife, or whatever you want to call it is another elemental tool that is well worth the wait and space in your pack when you head out camping.

More than anything else, the knife will help you accomplish the many chores and tasks that you’ll have to attend to in the wilderness and around camp, and just as importantly it can also serve as a formidable weapon when push comes to shove or shove comes to antler if you take my meaning.

We don’t need to get into all the details right now, but you’ll never go wrong with a compact, stout fixed blade knife, and a sturdy secure sheath to keep on your belt.

8. Space Blanket

Space blankets, also called emergency blankets, are those crinkly, silver, or copper-colored giant foil blankets you often see wrapped around people at the scene of an accident or disaster.

The reason you see them is that first responders carry them, and the reason that first responders carry them is the same reason you should carry one when you are camping: They are ultra-compact, ultra-lightweight, and can keep you surprisingly warm despite their next-to-nothing mass.

Space blankets accomplish this more or less the same way that wrapping some hot food in foil helps keep it warm after it’s been cooked.

The reflective, metallic surface of the space blanket bounces infrared radiation, that’s heat energy, back at your body that would otherwise be lost to the surrounding atmosphere.

Pretty neat, if you ask me and these devices are so affordable and so effective they always deserve a place in any camping pack.

9. Ground Pad

Whether or not you prefer to use a sleeping pad without camping, if you even need one, a ground pad is an essential item.

Why? For starters, and in almost every instance you will find the ground to be pretty damn uncomfortable to rest on, full of irregular depressions and protrusions, roots, rocks, pebbles, jabby sticks, twigs, and all sorts of other detritus that will make getting meaningful rest difficult or impossible.

It will also keep your body out of direct contact with the ground which always acts like a giant heat sink and can chill you, especially in cool weather.

Your ground pad can be a solid, rollup piece of dense, springy foam or an inflatable type that you blow up using lung power or a tiny, included pump for the purpose.

Both have their proponents, and both kinds have their advantages and disadvantages, but the important thing is that you have one.

10. Bug Spray

Bug spray is a non-negotiable inclusion in a camping kit, as far as I’m concerned. You might think mosquitoes, biting flies, and other aggravating critters are intolerable when you’re trying to enjoy some cocktails on the back patio with friends.

Believe me, you have never experienced the infernal misery that is the teaming cloud of biting insectoids it seems to be present in every corner of untouched wilderness.

It stands to reason you will want a can of bug spray so you don’t get covered with welts and lose your mind from aggravation.

There are lots of good bug sprays on the market, but generally you will want to use one that contains DEET as they are the most effective against the most voracious and potentially dangerous biting critters.

If you are worried about odd chemicals being absorbed by your body, you can also make use of all-natural formulations that seem reasonably effective.

11. First-Aid Kit

A first-aid kit should be an automatic inclusion in any wilderness excursion. There is ample opportunity to get injured while out and about, camping or not, and a first aid kit can prevent a minor injury from turning into a major problem.

Remember, the risk of infection is a far greater risk, and much more likely, out in nature than it is in our clean, tidy, and sterilized society.

A passable first-aid kit will have supplies for treating minor boo-boos and illnesses and also a few things for more substantial injuries.

Band-aids, antiseptic wash, first aid tape, individually packed doses of medication for various ailments, liquid stitch or super glue, burn cream, bug and sting treatment, tweezers, moleskin, rolled gauze, and ace wraps will take care of most problems.

12. Duct Tape

Duct tape is the butt of many jokes and gags since you can apparently do anything and make anything with it, but this nearly mythical reputation is actually well deserved.

Duct tape can be used to:

  • craft needed tools
  • repair your equipment
  • prevent blisters
  • craft your knife into a spear
  • stop a leaky tent from ruining a good night’s sleep
  • hold together a blown-out backpack
  • keep a damaged flashlight functioning

Truly, there is no end to the problems that can be solved by duct tape.

But, not all duct tapes are created equal. The quality of the fabric backing and the stickiness of the adhesive means everything, and for a wilderness survival situation you want more of both.

You should definitely invest in the more expensive brands of duct tape for inclusion in your camping kit.

My favorites are Gorilla brand duct tape and T-Rex tape. Note that you can wrap the length of this tape around a thin object like your flashlight to reduce its overall size and weight in your pack.

13. Ziploc Freezer Bags

You might have done a double take at seeing this inclusion on the list but we are taking Ziploc freezer bags with us not for carrying delicious leftovers into the field, though they can do that too, but instead because they are a supremely useful piece of gear to have and also a worthy piece of a survival kit.

Heavy-duty zipper bags can be used to keep gear dry, keep messy items from contaminating the rest of your gear, or even hold water reliably in a pinch when you need to carry more with you.

It is even possible to cut one open and fashion it into a wound dressing or chest seal for penetrating injuries. Pretty cool if you know what you are doing.

You would be wise to invest in genuine Ziploc brand freezer bags with the traditional, clicky zipper strips instead of that strange slider that never seems to work as well. These really do hold up and will go the extra distance when you need them to.

14. Tarp

A tarp is another one of those sublimely multi-purpose pieces of gear that you will wonder how you ever got on without once you start taking it camping with you.

A common, sturdy tarp can be used for all kinds of purposes, including fashioning into a shelter as a tent or bivouac, a ground cover, a windbreak, a sunshade, a privacy screen, and even a rain catcher. That is a lot of capability for a single piece of lightweight gear!

As with so many items on this list the devil is in the details. You want a heavy-duty tarp that is durable, water-resistant, and packing strong, sturdy grommets but not one that is so heavy it will weigh you down.

You might not be able to find one that fits the bill at your local hardware store, so order one if you need to and you’ll be glad you have it.

Consider getting one that is brightly colored, or at least brightly colored on one side so you can use it as an emergency signal if you get into a jam.

15. Cordage

A sizable roll or hank of cordage is another one of those items that you truly cannot get along without when camping. You’ll use cordage to set up and secure your tent or tarp, hang things from nearby trees, craft tools, and all sorts of other endeavors.

You are limited only by your imagination and your skill with knots, so consider this your call to action to start brushing up on your not tying skills.

Everyone has their favorite cordage, but chances are you’ll wind up carrying some variation of paracord, that supremely strong and ubiquitous string that is all the rage and every sphere of outdoor activity.

This is with good reason, as paracord provides an excellent cross-section of extraordinary strength, versatility, and modest cost, but if you want to reduce bulk and don’t plan on doing any life or death maneuvers with it you can use an accessory cord to much the same effect.

Conclusion

Camping is always a worthwhile excursion and you can make sure you are prepared for an enjoyable, meaningful, and safe outing by taking along the right gear.

The items included on the list above represent some of the most universally useful things that any camper could want, no matter the situation.

camping checklist pinterest


via Modern Survival Online https://ift.tt/cDpjixs

Friday, October 7, 2022

Air Drying Vegetables Step by Step

Drying your veggies is an excellent way to preserve your harvest, as well as a great method for making your own long-lasting and nutritious snacks or meal sides.

air dried peppers

Dried vegetables are tasty and make for an interesting and sustainable alternative to other methods of preservation.

If you’re a prepper, there’s a good chance you’ve already used air dried fruits or vegetables in some form or another, usually that of a handy snack on the trail or when out in the bush.

While fresh veggies might be more expensive these days, dried vegetables are typically far more costly still, and you have to content with a significantly smaller selection at your local grocery.

It is easy to feel like you are getting taken for a ride when buying dried veggies! Worse yet, you can’t predict when you’ll be able to get fresh veggies in an emergency scenario.

Fortunately, long-term homesteaders and preppers with some old world skills can make their own dried veggies at any time and wherever the opportunity arises. You won’t even need a dehydrator!

Air drying vegetables is a simple process that is as reliable as long as the climate in your area permits it. We’ll show you how to make gourmet dried vegetables whenever you want in this article!

Dried Vegetables Are Historically Popular!

Air-dried veggies may seem unusual, but they’ve been a part of human diets for millennia.

They are now brightly colored, neatly packaged, and readily available in a plethora of snack options, soup mixes, recipe starters, and other contemporary forms, but the reality is that air drying vegetables is an ancient method that people all around the world use to this day.

Our predecessors, like us, dried their veggies for the same reasons we do today: to enhance shelf life, provide vegetables as a portable meal, eliminate waste and provide emergency options when crops just didn’t come in! Now as then, you won’t need any fancy gadgets, either, when you want to dry your veggies.

Vegetables can be dried naturally by using nothing more than air and sun, a straightforward process that just requires good weather and some easy labor on your part.

All you need is some space, time, and attention to detail- nature will do the rest! The following sections will arm you with the info you need to prep your first batch of veggies for air drying.

Are All Vegetables Suitable for the Air Drying Process?

In short, most are, yes. Vegetables can be air dried without using any chemical preservatives or electricity, and it’s a straightforward process that may be utilized to keep most types for a long time.

Every vegetable has its own set of advantages and disadvantages, however.

Beans may turn into delicious snacks easy to eat out of hand, but if not carefully prepped could turn to dust if over-dried! Don’t be hesitant to start over if your end product does not meet your expectations or needs.

The fact is that not all vegetables are created equal when it comes to air drying. The ones that are, all share the following characteristics:

  • Low Moisture
  • Can Be Sliced Thin
  • Firm Flesh

By way of a “for instance”, tomatoes, tomatillos, and okra are three of the edge case veggies you are still capable of reliably drying. Anything more soft and saucy than that and you’ll be dealing with a desiccated husk after you’re done.

Similarly, if you can’t thin your veggies out by slicing, paring, or other prep it will be harder to dry it out properly. As an example of the “best in class” veggie for drying, check out eggplant. Eggplant slices are ideal for air drying!

Some veggies just don’t work well with air drying. The following ones are not great candidates for the drying process:

Cucumbers – Too watery with fragile flesh.

Lettuce – Turns into stringy nothingness.

Cabbage – Same as lettuce.

Broccoli – Crumbles.

Cauliflower – Crumbles.

However, in the end, almost any vegetable may be air dried if the circumstances are correct and you put out the effort. In the following section, we’ll go through what happens step-by-step when you dry your veggies using the classic air drying process.

Air Drying Vegetables Step by Step

The following method is a time-perfected way to air dry any vegetable without the need of specific appliances or equipment.

You’ll require several days of hot, dry weather, a few basic kitchen items, and some patience in your prep as well as some continued attention (but only periodically) throughout the process. If you can manage that, you’ll be eating delectable dried veggies in no time!

Here’s the overview of the process. The step-by-step details are below:

  • Wash and Prep: This is a must-do to avoid mold or germs developing. Trim, slice, or dice, or cube your vegetables into pieces no thicker than 1/8th to 3/8th of an inch.
  • Boil and Blanch: This optional step can help your vegetables retain their color and flavor. Particularly useful for the tougher veggies. Steaming may be used instead of boiling, but whichever you use make sure you blanch them to stop the cooking process!
  • Dry Thoroughly: Blot with paper towels, or a clean cloth towel, to dry your produce. Alternately use a salad spinner if your veggies will stand up to it.
  • Rack and Cover: On your drying rack or pan, arrange your veggies in a single layer, separated by at least an inch between each piece. Cover the vegetables with a coarse cloth or mesh to allow air and sunlight through while keeping insects, dust, and dirt out. Place the rack in a sunny spot outside. Direct sunshine will speed up the drying process by increasing the temperature of your produce.
  • Flip: Every three hours you’ll need to turn the veggie pieces over. Nothing to it!
  • Repeat: Every 3 hours for several days, repeat the flipping process until your veggies appear well dry.
  • Check: Once your veggies look dried out, check a piece of them to make sure before you finish up. You can cut or snap them to verify that the interior is thoroughly dry.
  • Freeze: This vital food safety step guarantees that any remaining germs are destroyed, and your now-dried veggies will keep for a long time.
  • Finished: All done. Place your produce in an air-tight container to keep it fresh.

Air Drying Veggies Requires Appropriate Weather Conditions

Before you go out to start prepping your vegetables, keep in mind that weather conditions are an inescapably crucial component of the process!

In general, the ideal average monthly temperature in your region should be about 95°F (35°C) for at least 5 days at 60% humidity or less. It’s not a good idea to dry veggies at low temperatures or with a lot of moisture in the air.

Mold will grow if the temperature is too low or the humidity is too high, spoiling your product. If the overall climate in your area isn’t cooperative for drying veggies for an extended period, it’s time to consider using a contemporary, electrical method.

Also, this approach flat out will not work if your area is always chilly or damp. Instead, consider smoking or something else to preserve your veggies However, assuming that your region is consistently hot and sunny, or that you have consistently hot seasons, you should not have any issues.

Step #1. Wash and Prep Your Veggies

The first step is to clean the veggies you’ll be drying and then trim them to an appropriate size. This is a crucial step since it removes any dirt, wax, or other contaminants that might negatively impact your finished product or make you sick.

If necessary, use fresh water and mild soap if required. Do not use harsh chemical cleaners since they may also harm the flavor and nutritional value of your produce.

This stage is especially crucial for items with preserved skins because leaving the skin on exposes them to a greater risk of contamination from harmful microorganisms.

After that, it’s time to prepare. Remove the stems and hulls from your veggies if necessary. Some rinds and skins become quite hard and inedible when dried, and so some people like to skin or peel their veggies to make them more appetizing to consume after being dried.

If you wish to use smaller veggies as ingredients in other meals, you may choose to dry them whole, though be advised this will dramatically increase the time it takes to complete the process.

If you choose to remove the peel or seed of the vegetables, do so gently and carefully to prevent losing too much flesh. A paring knife, vegetable peeler, or microplane can usually get the job done.

Take your time and use caution while cutting; if you’re not careful with your knife or peeler, use a chainmail glove for safety.

Step #2. Boil and Blanch

The blanching process is the next stage. This technique does not need to be employed for all vegetables, but it aids in the removal of more difficult varieties. Doing so will soften them and make them more likely to dry evenly.

You may cook your veggies in boiling water for a minute or two, or steam them over boiling water until they are just beginning to cook, but no longer.

Then immerse them in an ice water bath to stop the cooking procedure and help them maintain their texture. Remove them immediately from the bath once they chill, a few minutes at most.

Step #3. Dry Thoroughly

After boiling and steaming your vegetables slices, it’s time to drain and dry them. Allow all of the remaining moisture to drain off first before transferring them to a colander or clean baking rack.

Then, lay them out on a cutting board or work surface covered with clean paper towels. Remove any excess moisture from the veggies by dabbing them with a clean paper towel.

Don’t smash them to release their liquids! All you have to do in this step is gently lift away any surface moisture. This is an essential stage that must not be skipped.

Alternatively, all of the liquid from your veggies may be whisked off using a salad spinner and then immediately carried on to the next stage. Only try drying with this device if your veggies can hold up to it. More delicate veggies might well be damaged in the process!

Step #4. Rack and Cover

The veggies should be set on the rack and ready to dry. Any food-safe pan or tray will suffice: cooling rack, Teflon-coated baking dish, cast iron pan, glass dish. It’s all acceptable.

Arrange the slices in a single layer on the rack with no two pieces touching. Check that your veggies are just one layer thick before you begin drying them. Don’t stack or crowd your veggies as this will result in uneven drying!

Once all of the veggies have been placed on the drying rack, drape a mosquito netting, fine gauze, muslin, or cheesecloth over them to effectively seal your produce.

Any of the above will work as long as it is food safe and allows plenty of light and air to reach your produce. To keep pests and dirt off of your veggies, they must be wrapped in something.

Make sure your cover is safe from insects. Insects are found all around us, and they may scale any surface and are tiny enough to crawl beneath the screen’s edge, no matter how secure it appears.

Keep one eye out for them as a single insect touching your veggies might quickly grow into hundreds or thousands of bugs that will destroy the rest of the crop.

Place the rack outside where it can freely get air and sunshine after it has been packed, covered, and ready to go.

If you can place the rack on a hard surface like a concrete or metal one that will aid in faster drying by reducing moisture levels and increasing sun exposure to your pan’s bottom.

Use anything sturdy that you can to raise your rack off the ground for better ventilation. This will help speed up the drying process.

Step #5. Flip

After three hours, remove the screen and turn the veggies over. Simply flipping each slice from one side of the rack to the other ensures uniform drying and prevents sticking or mold growth on the vegetables. Replace the screen tightly when you’re done.

During this time, I use a clean tool or a nitrile glove to avoid germs from taking hold of my vegetables.

Given enough light and near total dehydration, any harmful germs should be hard-pressed to survive, but I’ve heard of many people getting sick even off dried veggies due to unsafe handling practices.

After that, be sure the cover is secure and leave your vegetables out for an additional 3 hours before flipping them over once more.

Step #6. Repeat Process

The drying process will take two days or more of bright light and high temperatures. During this time, you should check your veggies every three hours or so.

Bring your vegetables in before the sun goes down at night because condensation and falling temperatures are likely to put moisture back into your produce, ruining your efforts!

On the next day, when it has warmed up again, put the rack where you originally placed it and repeat the flipping process every three hours. Depending on the kind and weather, your veggies should be nearly dry and ready to eat or store after two days of this process or more.

Step #7. Check

After your veggies appear ready, it is critical that you inspect them:

  • Open a slice to see whether it’s still wet within.
  • Bend them: if they snap or break apart, the are probably done enough.
  • If they flex and flex without breaking, they’re still too wet.
  • If the vegetables aren’t yet cooked, return them outside and turn them more frequently.
  • Make certain your vegetables do not fall apart as soon as you touch them. That’s probably a bit too dry!

Even after drying is done, your veggies should still have some texture and firmness to them. This is because the moisture level in the vegetables has been drastically reduced, rather than totally eliminated.

If you can reduce the amount of moisture in any vegetables to or below 15%, it will keep for a long time. To be clear, if you do want your veggies crunchier or want them to last as long as possible, go ahead and dry them out as much as you believe is necessary!

Step #8. Freeze

Almost done! Once your veggies have been fully dried, bring them inside and refrigerate or freeze them.

This is a crucial phase that eradicates any remaining germs on the outside of your vegetables, similar to pasteurization.

Even a brief snap freeze of this duration should be enough to destroy any remaining pathogens while improving the quality of your produce.

Step #9. Finished

All done! You may keep your veggies in an airtight container or bag now for long-term storage and dispensing. Be warned that, due to a lack of circulation, too many vegetables packed in a single container might spoil.

I prefer to store them in smaller, separate bags so that if one batch spoils, it doesn’t affect the others. Vegetables dried this way will keep for many months, but because they are so delicious, I tend to consume them quite quickly. You probably will, too!

Air Dry Vegetables for Convenience and Longevity

Drying your own produce is a fantastic way to save money, enjoy the health benefits of more vegetables in your diet, and have control over where your food comes from.

This article contains simple, step-by-step directions for air drying your veggies. You’ll be able to eat home-dried veggies in no time if you follow these suggestions!

air drying vegetables pinterest


via Modern Survival Online https://ift.tt/Vx0C3fh

Monday, October 3, 2022

Air Drying Fruits Step-by-Step

One of the best ways to preserve fresh fruit is by air-drying it. This process removes most of the water from the fruit, which helps to prevent spoilage.

dried apple slices

It also concentrates the flavor and nutrition of the fruit, making it a valuable addition to your food storage plan.

Whether you’re air drying vegetables, fruits, meat, or other foods, this practice is a great skill to learn for preppers because it is so sustainable and requires basically nothing in the way of equipment, just a little bit of cooperative weather.

But whoever you are, this method will save you a small fortune over buying overpriced dried fruit at the grocery store, which is sold at a considerable markup.

If you want to save money while supplying yourself with plenty of dried fruit for use as snacks, including in other recipes or as a component in trail mix then keep reading.

In this article, we will walk you through the steps of air-drying fruit so that you can do it yourself at home!

People Have Been Air Drying Fruit Pretty Much Forever

It is easy to believe that the dehydration or drying of fruit is a modern practice made possible by countertop gadgetry and factory production.

After all, what do we see in such abundance at the grocery store and the corner gas stations if this wasn’t the case? A reasonable deduction, but just not true! 

 Air drying fruit is an ancient practice, conducted for millennia by people all around the globe at various times in history.

Our ancestors, wherever they might have been, did it for the exact same reasons that we do it today.

They did it to prevent the loss of hard-earned crops, to make fruit more convenient for storage or transport, and to provide ready-to-eat calories for long journeys or other tasks far from home.

Our ancestors did it all with the power of the sun, warm temperatures, and dry conditions. Nothing more!

Now as then, you can do the exact same thing, without the benefit of any electricity or other modern contrivances.

It is also far easier and less labor intensive than you might be thinking. Keep reading to get the full story.

What sorts of fruits are suitable for air drying?

You can dry out pretty much any fruit as long as you pay attention to the details of the process.

Now, not all fruits are as palatable as others when dried out but you can generally make use of whatever you have on hand.

Commonly dried fruits that are delicious and respond well to the process include bananas, apples, pears, apricots, figs, and of course grapes which turn into raisins.

Now, it must be noted that every fruit will exhibit its own unique characteristics in response to the drying process and as a finished product.

Everyone knows that raisins are significantly sweeter and chewier than grapes, but if you don’t pay attention during the drying process and ensure they are handled correctly they might spoil rapidly.

Apricots by comparison dry out more quickly and have a longer shelf life, all things being equal, but they are decidedly not as sweet as some other fruits.

However, both are nutritious and totally Worthy of inclusion into your survival rations, and most other tropical fruits like bananas, pineapples, mangoes and the like will also work just as well.

As always, be prepared to experiment and tweak your process depending on your results.

Now, let us get on to the instructions.

YouTube Video

Air Drying Fruit Step by Step

The following technique, which is both easy and effective, reliably and simply air dries fruit of all kinds.

You’ll need some warm weather, a few basic tools and things from your kitchen, and a little bit of care and attention throughout the process, but you can expect this method to succeed every time when conditions are met.

The steps are: Wash, Peel and Slice, Treat, Pat Dry, Cover and Place, Flip, Continue, and Freeze.

Caution: The weather must cooperate if you want to successfully air dry fruit using the process below. You’ll need temps of at least 90F for 5 days continuously in your area, with a humidity level of 30% or less to get the process working as anticipated.

Drying fruit is not going to happen when temperatures are low or humidity is high! If the overall climate in your region won’t allow you to dry fruit for the required time or is totally uncooperative, you’ll have to find another way to do it.

Keep reading to get detailed, step-by-step instructions.

Wash

The first step is to wash your fruit. It is imperative you remove all wax, dirt, grease, and any other contaminants that could reduce the quality of the finished product, or potentially even make you ill.

Do this gently in cool water, taking care not to bruise or break the flesh. You can let soft fruits soak for a few minutes if they’re very dirty before gently brushing them off.

It should be noted that you should never, ever use any serious chemical cleansers during this process, as it is more likely they will be drawn into the flesh of the fruit as moisture is evaporated.

Peel and Slice

Once the fruit is clean, it’s time to peel and slice it. It should be noted that not everyone likes to peel fruits like apples and even bananas.

It is often done to improve the taste and texture of the finished product, but sometimes the skins add an interesting element and vital nutrition when dried.

How you do this will depend on the type of fruit you’re drying. However, if you decide to peel, make sure you preserve as much of the flesh as possible.

Sloppy peeling is wasting fruit that you could be eating! For example, peeling oranges is optional but recommended as it makes them look better and taste better when dried.

After you have peeled the fruits it is time to slice them to size so they will dry efficiently.

Slicing thickness is also a matter of personal preference but generally speaking, thinner slices dry faster than thick ones, but if you should slice them too thinly your fruit will desiccate into nothing.

Make sure you are diligent about keeping the sizes of your slices identical so that your fruit will reliably dry out at the same time.

Treat

This next step is optional but highly recommended, especially if you plan on storing your dried fruit for an extended period of time.

Slicing fruit exposes more surface area to the air which means it will also spoil faster. To prevent this, you can treat your slices with a weak solution of lemon juice or ascorbic acid (vitamin C powder) and water. This will help to preserve the color and flavor of your dried fruit.

You can pick up ascorbic acid at most health food stores or any shops that sell vitamins in abundance.

Pretreating the fruit is the picture of simplicity once you have it peeled, sliced, and prepped.

All you’ll need to do is mix up the solution according to the package directions and then immerse your fruit pieces in it completely for about 5 minutes.

Note that while you can use the same batch of ascorbic acid, vitamin C, or lemon juice for multiple immersions of fruit pieces you’ll only get about three revolutions before the solution has lost its potency so make sure you keep it fresh if you are making a big batch of dried fruit.

It is also worth pointing out that ascorbic acid solution does not last a very long time once it has been prepared, losing potency over time.

Don’t make this stuff up ahead of time if you are planning a big siege of fruit drying over days or weeks as you might lose your crop! Mix it up fresh every time you need it.

Pat Dry

Once you’ve treated your fruit, it’s time to pat it dry with a clean towel or paper towel. This step is important as wet fruit will not dry out properly.

Ultimately you may place it on a wire rack to drip dry or place firm fruits inside a salad spinner to centrifuge most of the moisture off of them.

Be diligent, and gently blot off any remaining surface moisture or vitamin C solution. Take care of that you do not crush or damage your fruit as it is already been through a lot, and the quality of the finished product will be reflected in your prep and prior handling.

Note that while it is possible to omit this step it is definitely going to affect the quality of your drive fruit, and pieces that are significantly wetter than others may not dry evenly or might take considerably longer to dry.

Cover and Place

The next step is to get your fruit pieces on a tray or pan and get them covered so that you can place them outside to dry.

Ideally, you will use some kind of metal baking sheet or any other hard bit of cookware. You can use a cookie sheet, cast iron griddle, large pan; pretty much anything that is food safe.

Simply place your pieces directly on the pan and spread them out so if they aren’t touching.

Note that your pieces will shrink up as they dry, but don’t look into this too much and overload your pan anticipating on recouping real estate as this will only slow the drying process!

Next, cover your drying surface with a layer of cheesecloth, muslin, or other breathable fabric.

This fabric should be thin and airy enough to allow plenty of air and light to get through to the fruit but thick enough that it will prevent birds, insects, dust, and dirt from getting at the fruit pieces.

You don’t need me to tell you that you must keep an eye on your fruit while it is drying on the tray outside! There will be plenty of thieves in the animal world that will be entirely eager to get to them.

Then, place your tray full of fruit pieces, tightly covered, anywhere in a sunny spot outside, and preferably get it up off of the surface using bricks, stones, a tray stand, a trivet, or anything that will allow air and heat to circulate all around the pan.

Placing your pan over a solid and non-porous surface made of metal, stone or concrete is best as this will cut down the amount of moisture in the air around your fruit pieces.

Flip

After 3 to 4 hours, remove the covering cloth and flip your fruit slices over to allow the other side to dry. Simply flip it over in place so the other side can dry evenly.

If you are smart, you will use a gloved hand or some other kitchen utensil that is clean to flip the fruit in order to reduce the number of bacteria and other contamination that will contact it.

It is true that intense direct sunlight, high temperatures, and the drawing process will kill bacteria and other germs, but it is still entirely possible for some to persist or re-contaminate your fruit due to careless handling practices. Don’t do it!

Once you have flipped the fruit over, recover it tightly and leave them in place, adjusting the position to keep them in the sun if possible.

Continue

Continue to do this every 3 to 4 hours while the sun is up until the fruit is completely dry. You should expect the process to take a minimum of two days in ideal conditions with certain fruits.

This process can take anywhere from a few days to a week depending on the type and thickness of the fruit and other factors.

Know that you must bring your fruits inside with you after the sun goes down and the day starts to cool off.

Plummeting temperatures along with an increase in condensation during the nighttime hours will negatively affect your fruit, possibly spoiling it but definitely hampering the process.

When the sun rises and the temperature starts climbing the next day, place your fruit, covered, back outside and repeat the process, flipping it every 3 to 4 hours.

Once you believe the fruit is properly dried, take a piece and cut or tear it open to examine the interior. Once it is adequately dry, you are nearly done!

Freeze

Freezing your fruit for a couple of hours prior to removal for long-term storage ensures any bacteria that might be on the surface perish. This will significantly reduce the risk of food poisoning and also extend the life of your harvest! 

Finished

Once the process is complete, you can store your fruit in an airtight container or in the freezer. You can keep it at room temperature for up to a year.

If you want to extend its shelf life even further, you can freeze it in an airtight container for up to two years or even longer.

Air Drying Fruit for Health, Sustainment and Savings

By following the simple process outlined above you can air dry fruit the same way our ancestors did.

Air-drying fruit is a great way to enjoy healthier snacks, sustain yourself through preservation, and save a ton of money over buying overpriced fruit at the grocery store.

Done correctly and paying attention to proper Storage procedures, your dried fruit can last anywhere from a year to two years.

Do you enjoy dried fruit? Have you ever tried for yourself using traditional air drying or modern electric methods? How did the process work out for you? Let us know in the comments below!

air drying fruits pinterest


via Modern Survival Online https://ift.tt/Gz8FRsD