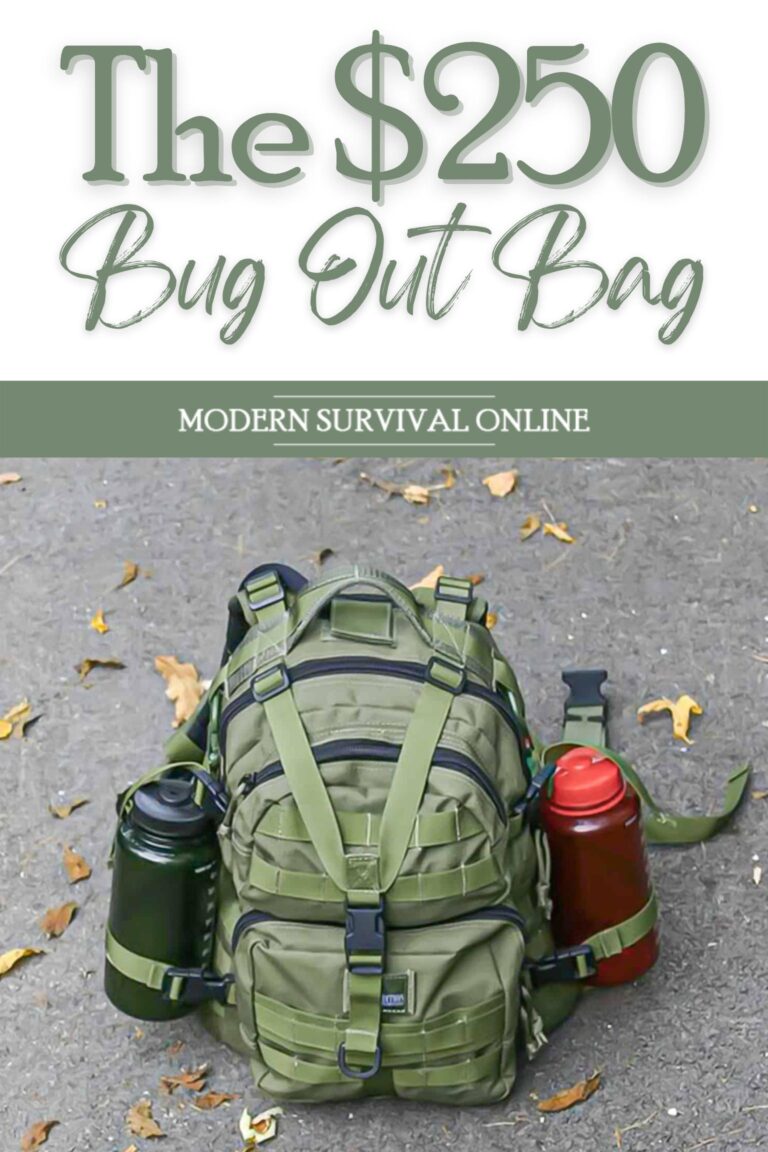
Welcome to the second in the trilogy of Bug-out bags, here we look at putting together a bug-out bag within certain budgets. Today we will be looking at how to put together a bug-out bag for $250.
A bug-out bag is vital for a prepper, you might carry it in a vehicle or have it handy for a quick escape.
On a budget, a $250 B.O.B is a good bug-out bag. There is a lot in this bag and what I found when putting one together, for this article, was that when you think hard about what is out there, and where to shop, you can survive a long time with one.
My advice would always start with the survival kit, they are an amazing collection of items throughout the price range and a must for your B.O.B.
It is something that will eat into your budget but is worth it as you can fish with the fishing gear, start a fire with the fire kit and carve a wooden spear using the tactical knife, leaving the rest of the budget for other important things, like the dry sacks.
If I was building a B.O.B for someone on this $250 budget, the items on the list would be a must as everything on this list is perfect for survival.
The person receiving it wouldn’t have to worry about if they could survive when needing to flee a bad situation. They just grab and run knowing that they will be okay.
Normally a bug-out bag will have various items, like survival kits, however, the main focus is having enough food and water to get you past the chaos unprepared people will create, as chaos is infectious and people will do things to make sure they have supplies or take to sell on.
At least with the survival kit you can supplement the food bars with fish and meat as well as learn to recognize what you can forage like mushrooms and berries, as well as where running bodies of water are.
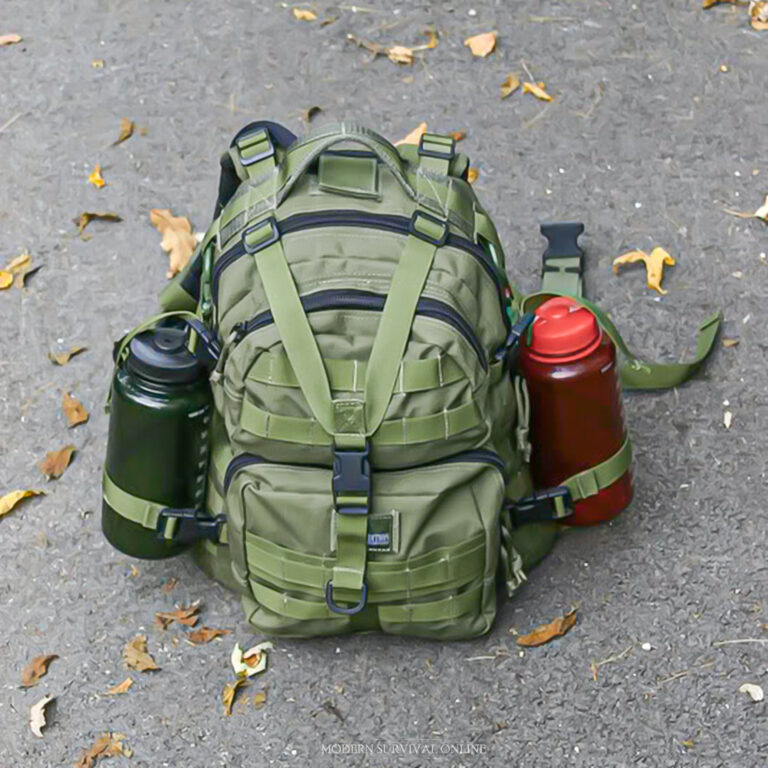
The Rucksack
Cicilin Lightweight Hiking Backpack 40L ($17.39)
I chose this backpack because for the price it looks good and the price range does not eat into your budget as much as other bags.
This bag has two zip compartments to fit all the supplies in and it has two loops to attach something like a sleeping bag.
It has two mesh pockets for your water bottle and crowbar. The front zip section can be used to store your waterproof coat.
Water
Fimibuke 1 Gallon/4.546 liter bottle ($12.23)
The bottle will be enough for one person for four days. The bottle has markers that allow you to track how much you have drunk over the day, which is aided by a built-in straw and handles.
The bottle is also BPA-free, which is good. This water bottle will fit nicely in the mesh pockets.
Joypur Portable Water Filter Mini Straw ($14.99)
This allows you to drink from a body of water and filter out foul toxins. It is capable of filtering 5000 litres or 1009.846 gallons of water.
The straw you can put into the same mesh pocket as the water bottle.
Water is so important for your survival. You can’t survive long without it, your body needs plenty of water over the day.
Food
Orgain Organic Plant-Based Protein Bar 12 pack. ($9.99 brownie flavor)
These are plant-based, gluten-free, non-dairy-soy-free, lactose-free, kosher, non-GMO or Vegan protein bars.
This box will give you either an 11-day supply (2 a day) or 4 day supply (3 a day)
Food is also important for your survival. If you can not move, you can not survive. The bit you can survive longer without food than you can water.
The list has a lot of important items that are worth having on you: a fishing kit to get fish from a stream or a tactical knife to make a spear from a solid piece of wood.
This kit looks impressive. Whether you’re starting out as a prepper or have preps already, this is still a good kit to have on you, with some extras it will also make a good vehicle breakdown survival kit. I might look at getting a few myself.
Mutai Knife Sharpener Pen. ($7.99)
The retractable rod will sharpen straight-edge knives and serrated edges.
Your knife will need a sharp edge as a dull edge is no good, so maintaining a sharp edge is a must.
You can’t create a wood spear, you can’t cut a fish or an animal or cut rope properly.
Dry Bags and Waterproofs
Pimoys 6 Pack Waterproof Dry Sacks. ($13.75)
This 6 pack comes in 2.5L, 3L, 3.5L, 5L, 8L which you can use to store items.
I use these and they are very good.
You can use the 2.5L for electrical items and their wires.
3L for dry underwear and socks as if you manage to cross water your feet will be wet if your boots get soaked then your feet are in danger of having problems that were last seen in trench warfare.
3.5L for the second set of dry clothes and a towel. Being dry is an important factor in long-term survival. You need to maintain your core body temperature.
5L you can use to store your other supplies to keep them dry.
8L you can use to line the bag, which is what I do, double the waterproofing.
This is what my main bergen bug-out rucksack looks like. I will be getting more of these for my webbing pouches and side pouches.
Anyoo Waterproof Rain Poncho ($18.99 X-Grey)
This is a nice waterproof poncho that has a cap peak and a neck toggle and has snap press studs to create a more waterproof coat.
This has eyelets or grommets so you can use paracord to create a shelter, which is really handy and you can collect rainwater this way as well as hand the poncho this way for drying.
You can also wear this over your rucksack as well or a rucksack up to 50L.
Crowbar
Edward Tools Gooseneck Wrecking Bar. ($19.95 12 inch)
Strong and rustproof. This item can do serious damage with any end you choose and being 18 inches gives you more length to hold and use as a lever when opening objects, while being rust-proof and dropped forges will help it survive for a long time.
Windows, doors, pallets, or as a self-defense tool, this wreck what gets in the way, and when it comes to your survival, that is important, as you might need to open a crate full of MRE’s or Water bottles or even fight for your life, so something strong and reliable is important.
You can store this using the side straps and one of the mesh pouches of the rucksack to store it.
Hygiene, Comfort, and Communications
The Nobleman face cooling and Body Cleaning Wipe Pack. ($6.99)
Hygiene is important when surviving, if you’re clean then you feel better, even if you’re traveling long distances to survive while tired, hungry, and/or thirsty
Being unhygienic can lead to you falling sick and you can not have this when trying to survive, you become vulnerable and that is never a good position to be in.
ABtakkat Portable Solar Crank Radio ($19.90)
Keeping an ear out for broadcasts could save your life, be it a government emergency broadcast or a broadcast from other survivors, this is also important if you can’t replenish your rations, but most importantly, you can not survive alone.
This is a solar and crank charger device meaning that either the sun or your power will the battery charge, the battery itself also powers the built-in LED flashlight/torch.
Don’t Die in the Woods Emergency Blanket (4 Pack. $24.99)
Made of heatflex Mylar, this is one of the world’s toughest blankets and you get four in durable packing.
They will easily wrap around one person or cover two people while you use one or two more to use as something to sit or lie on.
You can use the carabiners to clip each pouch to your bag loops or store them in the bag.
A $250 bug-out bag is a good intermediate kit and from this list, we can see that you have a good chance of surviving for a short time, however, some of these bug-out bags might end up allowing you to survive longer due to being able to fish and hunt using the survival kit.
Ask any prepper what the most vital piece of gear they own is and 9 out of 10 times they’ll tell you it is their BOB.
The bug out bag is an essential, some would say pivotal, piece of kit for any savvy and properly equipped survivor.
It is not a stretch of the imagination to assert that your survival plans may well revolve around having the BOB with you when you need it.
But we as preppers ask an awful lot from our BOB’s. They have to be our mobile armory, store room, pantry and medicine cabinet.
They even have to carry our shelter. When the chips are down we cannot afford to get it wrong, and that means we can’t afford to get anything wrong with our BOB’s.
Accordingly, preppers are always experimenting, innovating, improving and tinkering with their beloved packs trying to squeeze an extra ounce of efficiency into their current setup.
Everyone has their own way of doing things, but it stands to reason that there are few among us who have all the answers.
Chances are, there is an innovative tip, trick or procedure that you are aware of, something you could use to improve your own BOB in some way.
In the following article we have gathered together 25 pieces of prepper lure that you can use to improve your bug-out bag.
All Things to All People?
Before we jump into our list straight away, keep in mind that the following tips and tricks might not apply to you, your equipment, your situation or even to your pack itself.
Additionally, you won’t necessarily be able to implement every single tip on this list to produce some sort of “ultimate” bug-out bag. You’ll notice as you read through the tips below that some of them are mutually exclusive.
That’s okay, and you should consider each of these as a standalone nugget of wisdom that might be the missing piece for your personal perfect setup, or just something that you had never considered previously.
In short, treat it like a grab bag, or a buffet: take what you like or what works for you and discard the rest without worrying over it.
With that said, let’s get to the list!
25 BOB Tricks and Advice Almost No One Knows
1. Remove Carried Water
One great way to improve your bug-out bag is to get rid of all that water that you are probably carrying.
What on earth?! Has this guy gone mad?! No, I am entirely sane, reader, but for a great many prepper who plans on bugging out in an area where natural water sources are absolutely abundant and regularly encountered along or near every bug-out route, it makes sense to simply ditch the heaviest component, ounce per ounce, of the average survival loadout.
By doubling down on water filtration and sterilization equipment, you’ll be able to partake of plenty of clean drinking water only when you need to fill it up.
2. Stitch It Right!
Many preppers focus on getting the right gear, but fewer focus on learning how to repair that gear.
No matter what you’re talking about, there’s a good chance you’ll break something, something important, in the middle of an SHTF scenario.
If you are unlucky and that happens to be your bug-out bag, either a strap popping loose or, even worse, a panel tear you could be up a creek without a paddle.
It is nonetheless possible to stitch up modern synthetics if you have strong thread and appropriate needles.
Dental floss makes excellent improvised stitching material since it is so strong, flexible and lightweight, meaning you should always keep a roll in your pack, even if you don’t floss yourself!
3. Add Power Support
The modern prepper is just as likely to go afield with an assortment of electronics that are going to make his life easier and help him accomplish the things he needs to get done.
Our parents and grandparents who were or are preppers might think such a thing sacrilege, but technology marches on, and marches with us!
But, electronic gadgets of all kinds require electricity to function, and if you want to keep them charging or just sipping power to top off while you are on the move, it would be wise to incorporate power banks and routed cables into your bug-out bag so you can easily hook up and stow your device within easy reach while you walk.
4. Keep It Quiet!
Anyone who has ever served as an infantryman or even in certain capacities during a law enforcement career knows how critical noise discipline is to mission success.
There are all kinds of situations where making noise could directly lead to you being killed, and keeping quiet will never hurt you.
Reducing the noise that your BOB makes will improve your auditory awareness of your surroundings and possibly help you detect trouble before it gets you.
Take the time to meticulously and ruthlessly go through your pack as you have it loaded and silence every bang, squeak, clang and rattle.
5. Enhance Ergonomics
You are going to become intimately acquainted with your pack anytime you take it afield and have it loaded heavy.
You will begin to learn all too well the intricate and interesting ways that it makes you sore, chafed and raw.
If anything about the way your pack rubs you the wrong way, literally, you need to take care of that now before you were in the middle of a real-life situation.
Don’t be afraid to modify your pack with new components, or have professionals modify it for you, for better fit, comfort, and ease of carrying.
The pain and aggravation you save will translate into better physical and mental performance, an edge that adds up over time.
6. Make It Visible
Not every situation is best served by being a super sneaky camo-clad assassin.
Sometimes you need to remain visible, even enhance visibility, so that you can be rescued or just to make it easy for other people in your group to see you in adverse conditions, at night or over long distances.
Since your BOB is likely a large object and will be covering a significant fraction of your person it makes sense to enhance the BOB’s visibility in such times.
Fluorescent covers, reflective panels or even brightly-colored cloths or bandanas tied on can do the trick.
7. Check the Weight
If there is one thing pretty much every prepper with a brain cares about concerning their BOB it is cutting weight.
Saving ounces, ditching redundant gear and getting the BOB and its contents as lean as possible can become an obsession.
Funny, then, how few preppers actually take the time to weigh the BOB with its contents to know exactly what they are dealing with and better inform themselves how they can further improve it.
Remember, if you cannot measure something it is hard to turn it into meaningful data!
When you are tinkering with your loadout, weigh your pack after you make changes so you can better inform your decisions.
8. Use Pack as a Ground Cover
One large and bulky item that some peppers choose to carry is a sleeping pad. Inflatable or foam, this is one of the more difficult items to carry in a well-equipped bug-out bag, even if it doesn’t weigh very much.
They take up a lot of room and generally get relegated to external storage- not an ideal solution.
You can dramatically reduce this burden or perhaps even eliminate it entirely by using your bug-out bag itself as a ground cover when you break down for rest or sleep.
Obviously, this will work best when you unload the contents from your BOB, but if you are making a long stop or you are just a minimalist packer this is an easy way to eliminate that bulky pad.
9. Add a Hydration Bladder
If for whatever reason you need to carry a significant amount of water as part of your provisions and you’re going to be moving on foot you should think about adding a hydration bladder to your bug-out-bag.
Though not as popular as they once were, for a variety of reasons, these are still the things to beat when you went to easily access your water and drink on the move.
Aside from carrying a substantial quantity of water these beat water bottles and canteens hands down for ease of access.
The time and aggravation you save trying to fish your water bottle out of its holder not to mention taking off and then putting the pack back on will add up to a significant gain in efficiency.
10. Visual Inspections Save Lives
If there’s one thing that I’ll bet right now you aren’t doing with your bug-out bag, it is inspecting it for damage, wear, and defects.
It’s funny how we can miss the forest for the trees, and spend so much time fretting and fussing over what goes into the bag that we forget the bag is a piece of equipment unto itself, equipment that also requires a suitable amount of care to ensure that it functions as intended.
If you get in the habit of giving your bug-out bag its own “12-point inspection” every time you pick it up, set it down or otherwise mess with it pretty soon you’ll become so intimately familiar with it you’ll notice when stitching starts to loosen up, when a panel looks a little worn or when something else is going to go wrong. Then you can nip the problem in the bud!
11. Consider a Scabbard
If you have a long gun or even a bow, as part of your bug-out complement consider adding a scabbard to your pack in order to carry it more efficiently.
Carrying a long gun or a bow on your back in addition to a large backpack is challenging, and typically leads to frustration.
It is far easier to control both when you keep your weapon in your hands, but there are times, many times, you’ll need your hands free while underway.
A scabbard will keep the load close to your body and with a little tweaking keep the weapon accessible if you need it.
12. Blend In!
In stark contrast to the other tip above, there are times you’ll need to blend in order to avoid detection, and that means you’ll need to camouflage yourself and your gear to match the surrounding terrain and foliage if any.
Camouflaging your bug-out bag could be as simple as pulling on a dedicated camo cover, rigging up an old laundry sack into a sort of “BOB ghillie” or even spray painting it.
13. Lose the Tent Poles
Some preppers choose to carry tents as a dedicated shelter option when they bug out, and if you are carrying a tent that relies on dedicated tent poles or even a multi-part frame you should consider ditching them.
Invariably these are some of the bulkiest items in your load, and sometimes the heaviest, also, considering what little they do.
Most environments will provide natural or man-made replacements in the form of sturdy branches or some other similar item.
If you already carry a walking stick or trekking poles you can use those to set up your tent effectively.
14. Waterproof It!
Water is a life-giving resource but it is also the enemy of pretty much all man-made goods. You want to keep water off yourself and also off your gear, and that means you need to waterproof your BOB.
This can be accomplished with a built-in or separate rainfly, a commercial waterproofing compound or even a classic, natural material like beeswax, the same thing your granddad probably used!
Whatever option you go with, always test it for integrity before you need it, and in the case of rub-on substances stay on top of maintenance and periodic reapplication.
15. Pack with a Process
You should endeavor to pack your BOB with military precision, the same way, each and every time you pack it.
Once you have determined the final loadout, you should then prioritize knowing where everything goes so you can put it back together quickly should you need to pack up and move with haste, but also so you know where everything is in the dark, by feeling alone.
16. Carry Fragiles Intelligently
Face it, some items we are going to carry are just plain delicate, and improper packing can lead to breakages and ruin no matter how carefully and how gently we move them.
It could be fresh eggs or fresh-picked berries, glassware, or some other incredibly delicate item that you don’t want to break.
What is the solution, aside from wasting even more space and weight with a crush-proof container that you might not have?
All you need to do is tie up your precious cargo in a bindle made from a bandana or similar cloth and then hang it from the outside of your pack.
So long as you don’t take a tumble or set your pack down carelessly this will function as a sort of suspension system to cushion the goods.
17. Condense All Non-Essential Packaging
There are quite a few things you’ll carry, food, in particular, that is guilty of hideously wasting space on superfluous packaging.
Assuming there is an internal package or wrapper that will maintain preservation, sterility or whatever you should remove and discard these bulky outer packages in order to save room and a little bit of weight.
18. Add Quick Access Pouches
No matter who you are there will be a few tools or other goods that you will want to access regularly while on the way during a bug out.
It could be a pocket knife, a compass, a small monocular, or even a bag of gummy bears.
Instead of cramming these items into your pants pockets where they could be difficult to access and certainly subjected to copious perspiration consider mounting compact pouches to your pack’s belt or shoulder straps to keep these items handy and safe.
19. Ditch the Bridge!
Hands-down one of my most hated “innovations” that you’ll find on modern backpacks is the periodic, head-scratching, and downright infuriating addition of a bridging strap that runs between your two main shoulder straps, connecting them about where your shoulder blades are.
Bottom line, these straps suck and force you to carry the pack far lower and less efficiently than is nominal.
I don’t know who these straps were intended to help, but they aren’t human beings! If these straps detach, detach them, and if not consider cutting them off if it won’t compromise your main straps.
20. Use a Load Journal
This is a great tip for people who practice regularly with their bug-out bags, or just those who go camping and hiking as a sort of trial run for a live event.
Create and keep a load journal, which is nothing more than a small notebook you can use to detail when, where, and how you use a particular component of your loadout.
After several outings, you can review this low journal and see which items you included that you thought you needed, but turned out not to.
Delete them unceremoniously unless you have a damn good reason for hanging on to them.
21. Avoid Exterior Loads When Possible
One of the worst and most amateur mistakes you can make with your BOB is to start lashing all kinds of crap to the outside.
While it is true that extremely large, awkward or bulky items cannot be reliably carried inside the main or secondary compartments, this practice is to only be employed when you have no other choice.
You don’t want to go banging around looking like an old-time prospector with pots, pans, raccoon tails, blankets and all sorts of other curios hanging off of your pack. It is inefficient and will wear you out quicker.
22. Pack Smarter!
When packing your BOB, pack it smart, with as much weight as possible close against your back and carried below your shoulder blades.
As you add items to the pack heavier items should be placed close or as close as possible with the lightest items on the outer layer.
The other consideration you should manage is how often you need to access a given item.
Keeping in mind your load order, items you’ll need more regularly or quickly should be kept closer to the zippers, or panel opening.
23. Ditch the Sub-loads
Some folks that carry a lot of gear in a pack rely on stuff sacks, boxes and other containers to organize their goodies.
Only for the most crucial items or the smallest do I encourage this practice, because the sum total of all these containers adds weight but more importantly in this case gobbles up precious volume in your pack since there’s always a dead space that you can’t take advantage of due to the containers.
Better to pack your items loosely so you can take advantage of every single cubic inch.
24. Solarize It!
We’ve already talked about carrying electronics afield as a prepper, and if you are one of those folks that means you probably have a power bank and a solar charger that you are going to use to feed those hungry little gadgets.
If you are smart and take the time to rig up a reliable attachment system, you can hang your solar panel from the top or front of your pack so we can get a little sunlight while you are on the move.
25. Dye It!
If you have a light-colored pack and you are no longer happy with the color or it doesn’t serve your purposes you can dye your pack, straps and all, wholesale.
All you need to do is come up with some fabric or nylon dye, get yourself a large, sturdy container that can withstand boiling water, and then mix up the dye with water according to the package instructions before immersing your pack in the prescribed amount of time.
The end result will be a new, low-profile color!
Conclusion
There is your list of 25 slick and hard-earned BOB tips. Chances are you found at least a few on this list that you are eager to try, and there is no time like the present.
You might find that one of these was the missing link to set up your personally perfect bug-out bag. Give these tips a try and let us know what you think in the comments.
No prepper needs to be told how important water is in a survival situation. When it comes to material needs, the only resource more important than water is oxygen.
Depending upon your environment, you might have water all around you when you need it, but the irony is that the water could be of uncertain safety or even completely undrinkable in the case of sea water.
When you are dehydrated, if your choice is to take your chances on drinking questionable water or die, what are you supposed to do?
You had better figure it out fast because no one can live very long without any water intake.
A few days at most without a drop to drink and you are history, and chances are you will be incapacitated days or hours before you breathe your last.
Dehydration is an assault on your body, and the negative effects pile up quickly further complicating your situation and making your chances of survival slimmer by the hour.
It is virtually impossible to undersell the importance of clear, drinkable water in a survival situation.
This is why everyone that calls himself a prepper must know how to procure clean drinking water no matter the environment and no matter the source.
To do that you should be able to call upon several methods, improvised or not, in order to make your water safe to drink. Today we will share with you 10 proven methods for purifying your water.
You Should Not Rely on Only a Single Method for Purification
Though there are many ways by which one can purify water to make it safe, or at least safer, to drink one common problem I encounter out here during my travels in prepperdom is the reliance, or rather I should say complete dependence, on only a single form of filtration to cover all of your survival bases.
Though this is understandable thanks to the preponderance and reliability of our modern purification methods, it is still a big mistake. Let me tell you why.
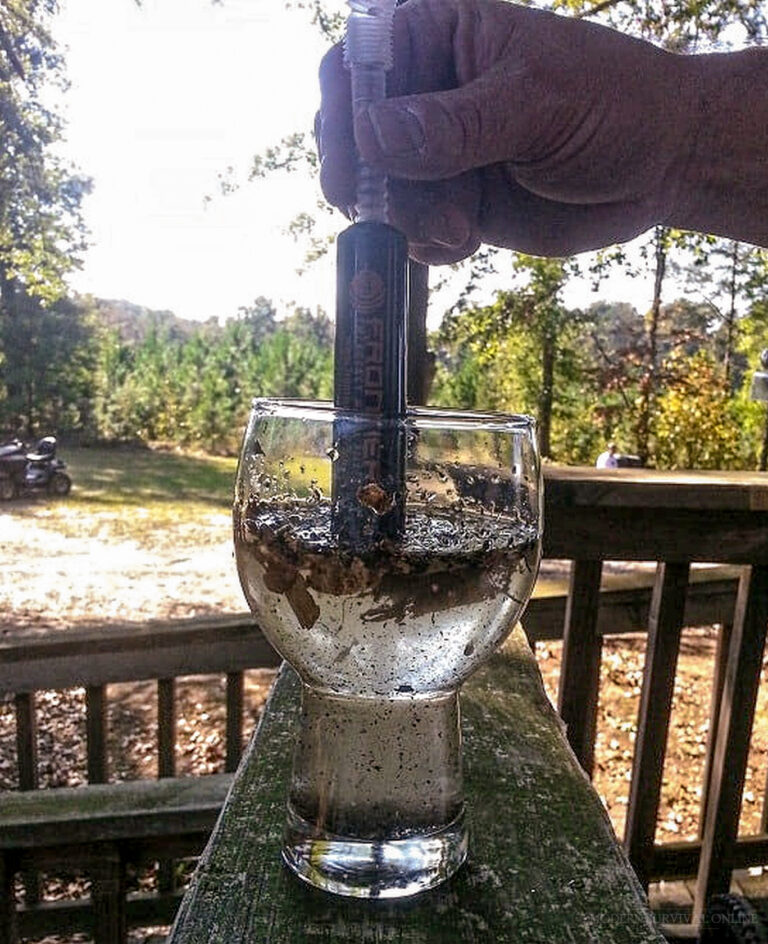
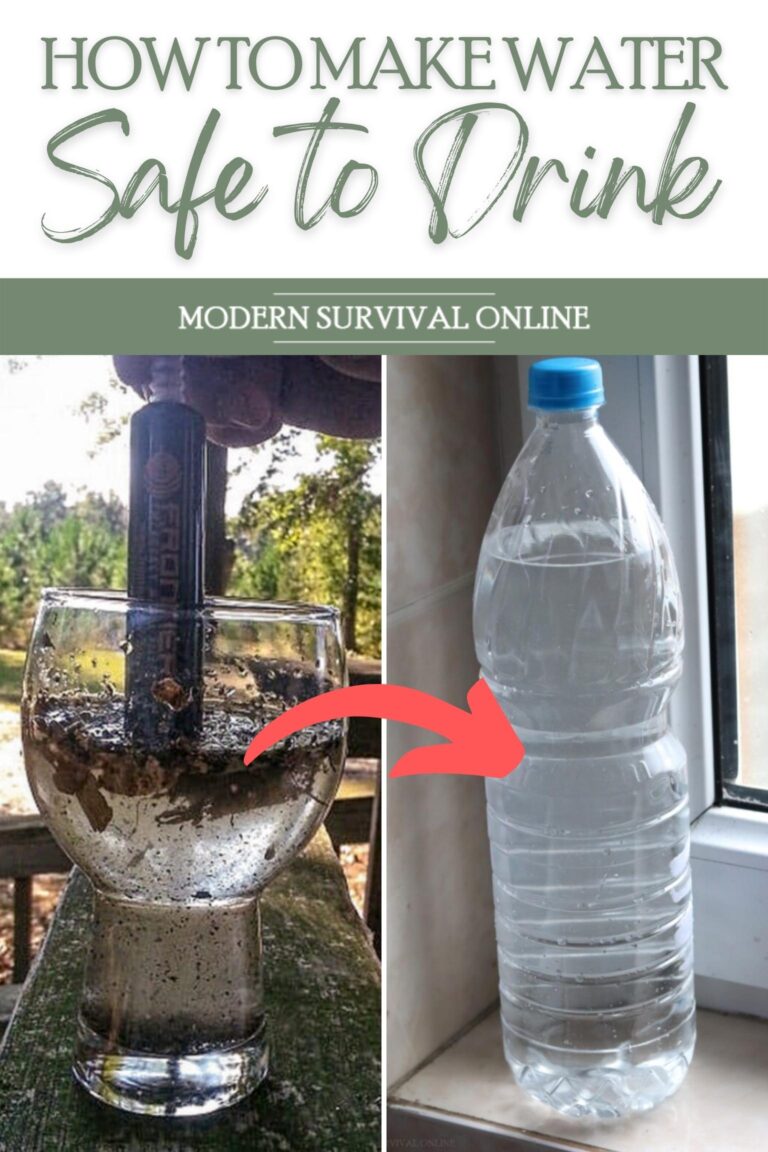
Take our modern water filters for instance. I don’t know any prepper and virtually no hiker, camper, or other outdoorsy personality that doesn’t have a water filter or two as part of their full-time kit.
These wondrous compact water filters can allow you to drink clean water directly from a source that is so hideously nasty you can scarcely stand to look at it.
To say they are efficient and effective is an understatement, and furthermore, they are as compact and lightweight as they have ever been. What a time to be alive!
The problem is that dependence only on filtration through the use of a commercial water filter is a dependency you can ill afford in a long-term survival situation.
What will happen when you need to purify water but your filter is broken, worn out, lost, or otherwise unavailable? What will you do, die?
If that doesn’t sound like a happy outcome you had better have a plan B, and furthermore plans C and D.
These plans should consist of alternative technological methods for filtering water as well as a comprehensive practical understanding of how you can improvise or employ field-expedient methods for purifying water.
Anything else means you are only one bad turn away from losing access to clean drinking water and then you might as well go on and start the clock on your survival. Anyway, sermon over; let us get on to the list!
How to Make Water Safe to Drink: 10 Ways
Boiling
For many peppers, boiling is probably the first technique they learn for purifying water.
Boiling is absolutely effective, but it is a limited form of purification because it will only reliably eliminate biohazard threats like bacteria, viruses, parasites and certain other microscopic nasties that you don’t want to ingest.
Unfortunately boiling will not eliminate the vast majority of chemical contaminants and it won’t do a thing about heavy metals and other dissolved solids.
But this does not mean boiling should be discounted entirely in favor of other methods. Many of the aforementioned pathogens can lay you low or even kill you if you contract them.
That’s just one more thing you cannot afford in the middle of a survival situation. The other shortcoming in regards to boiling is that it requires a sustained source of intense heat to raise your collected quantity of water to 212° F.
Note that you don’t have to boil water continuously for 30 minutes or anything like that in order to kill the germs hiding within a minute, maybe two for insurance, and you’ll be good to go.
These tiny infectious critters cannot withstand high heat to say anything of sustained boiling, so boiling your water longer than that wastes fuel and time.
Where boiling really shines is when you are only able to bring another modestly effective method of purification to bear that can remove the aforementioned solids.
A quick spin through a primitive filter followed by boiling is enough to render most water taken from natural sources plenty safe enough to drink under the circumstances.
Remember that boiling won’t solve all your problems related to purifying water, but it will never hurt.
Filtering
Filtering is a time-tested and highly reliable method of purifying water and has been used since times of ancient antiquity all the way through today.
The trick with filtering is that its effectiveness can be highly variable depending upon the quality of the filter.
You might also be surprised to learn that you don’t necessarily need a modern, high-efficiency filter to produce clean-enough and safe water from most sources.
On the other hand, the latest generation of technological marvels can produce water that is astoundingly, unbelievably pure, so don’t count them out!
The key to understanding effective water filtration is knowing what you can expect from the filter, specifically what size particles it can effectively catch while allowing the water to pass through it.
A coarse or minimally effective filter might only catch large objects floating in the water or the largest particles of dissolved sediment.
At the opposite end of the scale the finest, most incomprehensibly effective filters can even filter out individual viral organisms and dissolved solids only a few molecules in size. Remarkable does not begin to describe it!
But you can even improvise a filter that is impressively effective. By arranging various media in layers utilizing a funnel-shaped container you can allow water to steadily trickle through while leaving ever-smaller contaminants behind.
A layer of gravel on top of a gauze mesh followed by a layer of clay and then a layer of ground charcoal before a final stage cloth layer will catch quite a lot, accepting microorganisms and dissolved heavy metals.
A good plan is to rely on a purpose-built emergency water filter while also knowing how to improvise a field-expedient filter in a pinch.
Giving your found water the old, reliable combo of filtration followed by boiling will take care of 99% of your problems.
Solar Purification
Solar purification is a clever method that is perfect for lazy preppers or just peppers who have a lot of things to do and don’t have time to oversee a complicated or involved purification method.
Solar purification relies on ultraviolet radiation, the most abundant source of which is our sun, to bombard bacteria, viruses and other microorganisms living in the water.
This is most easily achieved by compartment a smaller quantity of water in a clear container, be it glass or plastic, and then simply leaving it in direct sunlight.
It really is that easy, and the only other prerequisites for successful employment are clear skies, plenty of sunlight and water that has hopefully been at least minimally filtered to reduce cloudiness.
Water that is extremely murky in essence provides places for germs to hide, and that means your attempt at disinfection may not be 100% successful.
Time is another factor, and you should leave your sourced water in the sun for at least 12 hours, up to 24 hours if you have overcast skies or intermittent direct sun.
That sounds like a long time to wait for disinfection, and it is, but consider that you should have an easy time doing multiple batches of water at once.
This makes it especially effective for mass production of purified water while also saving a considerable amount of fuel that you would otherwise spend on boiling.
Bleach
Bleach has many uses during survival situations, especially those where you are bugging in. It is great for sterilizing surfaces, cleaning tools, and getting particularly nasty germs off of your skin with high reliability.
It is also excellent for purifying water by killing any microorganisms that might be hiding inside. It’s true: standard, unscented, non-thickened chlorine bleach is all that is required for this procedure.
The process is simple and requires adding only a minuscule amount of bleach to a given quantity of water before agitating it and then letting it sit for about half an hour to do its work.
So long as the water has a definite smell of chlorine at the beginning of the process you can be sure you added enough to do the job.
Note that chlorine breaks down in the presence of oxygen, eventually completely neutralizing so you can rest comfortably knowing that your water will be safe to drink so long as you follow the formula precisely.
It is duly effective and can be relied upon to destroy viruses, bacteria, and other microorganisms like parasites that can make you sick but it is not a miracle additive.
Bleach will do nothing to remove or disrupt other chemical contamination and it is only highly effective on water sources that are relatively clear.
If you cannot manage to filter your water even a little bit of bleach might not be the best first step.
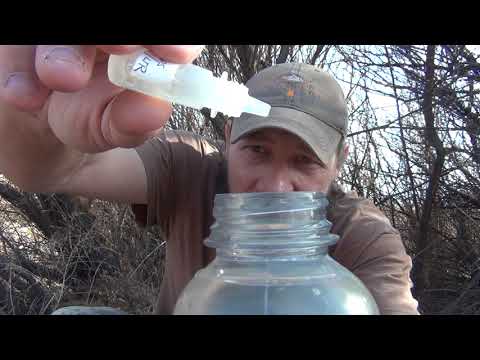
Iodine
Iodine is a time-tested and true method of chemical purification for drinking water, and even a small vial of iodine can purify lots of water reliably.
Iodine works very much like bleach and other chemical additives by destroying hostile microorganisms that would love nothing more than to infest you and make you ill.
It is effective against the vast majority of pathogens that are commonly encountered in natural water sources, making iodine a common standby for campers and hikers.
Iodine is not without its drawbacks, the first among them being the need to precisely measure how much you are adding to a given quantity of water and also the fact that it will significantly, and negatively, impact the taste of the water.
It also does nothing against chemical or heavy metal contamination.
One more thing to be aware of is it is far from unheard of for some people to have an iodine allergy, and though rare it should not be taken for granted so endeavor to check before committing to treating communal water sources with iodine.
Iodine also has a shortcoming in that it is typically prepared and carried in a liquid state, thus making evaporation or loss through leaks or spillage a perennial concern.
Despite these drawbacks, iodine is a well-understood and thoroughly tested method of purifying the water you can trust.
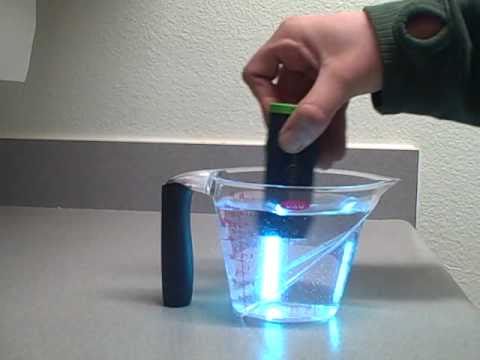
U.V. Light Sterilization
UV sterilization is a comparatively high-tech method of purifying water and another one that only works on biological threats.
The principle is well understood and certainly effective: by bombarding a water source with UV light microorganisms are destroyed.
This technique can be adapted to both field and home use through the use of compact and increasingly portable UV light pens which are inserted into your water bottle before being switched on, nuking the germs from point-blank range!
At home, larger lamps can be employed utilizing bulbs or emitters with a specific light frequency.
UV sterilization is thorough and virtually effortless but it does have drawbacks, namely the reliance on electrical power for operation.
Also, this technique loses efficacy rapidly as turbidity of the water increases, with it failing almost entirely in cloudy, murky water.
This means that this option is only at its best when starting with a clear or nearly clear source or after effective filtering.
Nonetheless, being able to forgo chemical additives for removal of microorganisms is attractive, especially when you are in a setting where electricity is assured.
Also, as you probably already determined, it does nothing to remove solid contaminants including heavy metals.
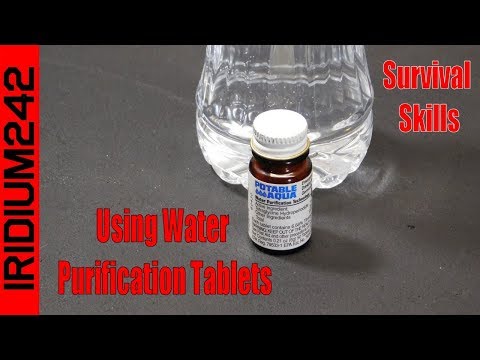
Sterilization Tablets
Sterilization tablets are one of the most plentiful and most user-friendly purification options available to preppers today, and are in wide-ranging use with military forces, NGO’s and civilians who are forced to rely on local water sources in remote locations or undeveloped Nations.
One of the most popular, AquaTabs, relies on troclosine sodium to do the dirty work and they are undoubtedly effective against an extremely wide array of microorganisms.
Various other brands rely on different chemicals, but the end result is the same.
Sterilization tablets can be extremely convenient since they are solid, have sturdy packaging, and are lightweight and compact making them easy to carry.
However, this form factor along with their mode of operation does introduce some challenges that have to be overcome: They are typically designed for insertion into a standard size canteen or water bottle so that the dosing formula is certain.
You’ll have to do a little bit of math if you are working with a larger or unknown quantity of water.
Certain chemicals can actually be particularly hazardous if ingested in too great a quantity or if concentration in the water is too high, so caution is advised.
Additionally, most tablets take a certain amount of time to work, anywhere from 10 minutes to upwards of a couple of hours.
Lastly, as a rule, they all change the taste of the water and usually not for the better. This is a major hang-up for some people but not for others, so be prepared before you commit!
Cilantro
Stop! Don’t close that browser tab! I know you probably think you have stumbled across some hippy-dippy, crystal-rubbing, crunchy granola method for purifying your water but I promise it isn’t like that- and respected scientists back me up!
As it turns out, through some bizarre quirk of vegetable life, common cilantro is capable of doing something that very few other methods of water purification can do.
Cilantro can bind and therefore remove heavy metal contamination at the molecular level in water. No fooling!
I won’t begin to attempt to explain how it is able to do this and why the process works, but suffice to say that large-scale studies, even a few major inquests conducted by major universities, have proven this out.
The process works exactly how you are imagining it. Grab your water, drop a big bunch of cilantro in it, give it a stir and then wait.
24 hours later your water will be free of heavy metals, or at least the quantities will be greatly reduced.
This is an incredibly important capability for anyone who might be sourcing found water near human settlements, because it is these water sources that are geometrically more likely to be contaminated with dangerous heavy metals, materials that are very difficult to remove any other way.
Cilantro is kind of a one-trick pony, however, because it will not remove other dissolved solids, germs or anything else. Still, keep this specialized trick in mind!
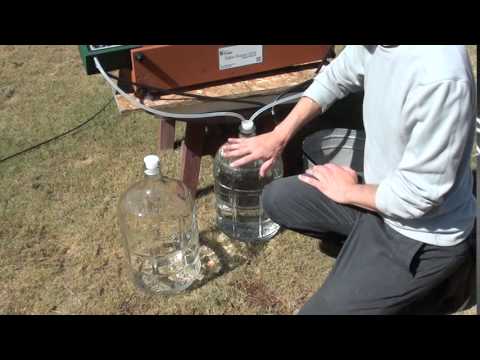
Desalination
Desalination is the process whereby saltwater has its salt content removed. Or maybe you are removing the water from the saltwater and leaving the salt behind.
Whatever, and however you want to think about it what is important is that this process allows safe drinking water to be made from the most plentiful sources of water on earth that just so happens to be one that is in no way safe to drink.
You don’t need much imagination to understand how crucial this technology is, especially when at sea, or for anyone who lives near the coast.
Desalination occupies a strange place on our list because it is not a typical technology that preppers will call on in the context of survival.
Desalination is typically employed at a very large scale to generate safe public water for coastal communities, especially ones in hot, arid environments or access to freshwater is anything but guaranteed much of the time.
That being said, there are small-scale, end-user desalination devices that can fit on your boat, vehicle or even be nominally carried around.
These could very well be the key to your survival if you ever wind up marooned, lost at sea or trapped aboard a disabled vessel.
History provides many examples of the lost and the damned dying of thirst at sea due to a lack of fresh water to drink in the exact same situations. There is simply no other way to make use of seawater for survival.
Distillation
Distillation should not be confused with desalination, although you can employ distillation as a purification method to desalinate seawater. Confused? Don’t be.
Distillation is simply a process by which water is evaporated from one container and then condensed in another.
Something really cool happens when the water sublimates to steam, it leaves all contaminants of every kind behind, and when it condenses and it’s new container what is left behind is pure, super clean water.
If this sounds like the ultimate method by which water might be purified, you are not far off but there is a catch.
Distillation typically requires two things, though sometimes it can get away with only requiring one but nonetheless the requirements are substantial.
First, it requires lots of time with even distillation appliances that are electrically powered taking quite a bit of time to produce a drinkable quantity of water.
Second, the reliance on heat to evaporate the water means its distillation is typically a “fuel hog” method, with the only exception being solar distillation which takes advantage of the sun as a heat source.
In the end, you won’t be generating much water with distillation but it remains an essential method for purification because it can render even the nastiest and most contaminated water safe to drink.
This might make it the default choice when dealing with seawater or other sources of otherwise completely undrinkable water.
Conclusion
Obtaining safe drinking water is non-negotiable for survival, and you won’t have long to regret it if you fail in this regard.
It doesn’t matter what kind of disaster or environment you are dealing with the need for hydration is ever-present and never-ending.
Rolling the dice on a questionable source of water might only accelerate your demise. You need not take that chance so long as you provide several methods of purification, both modern and improvised.
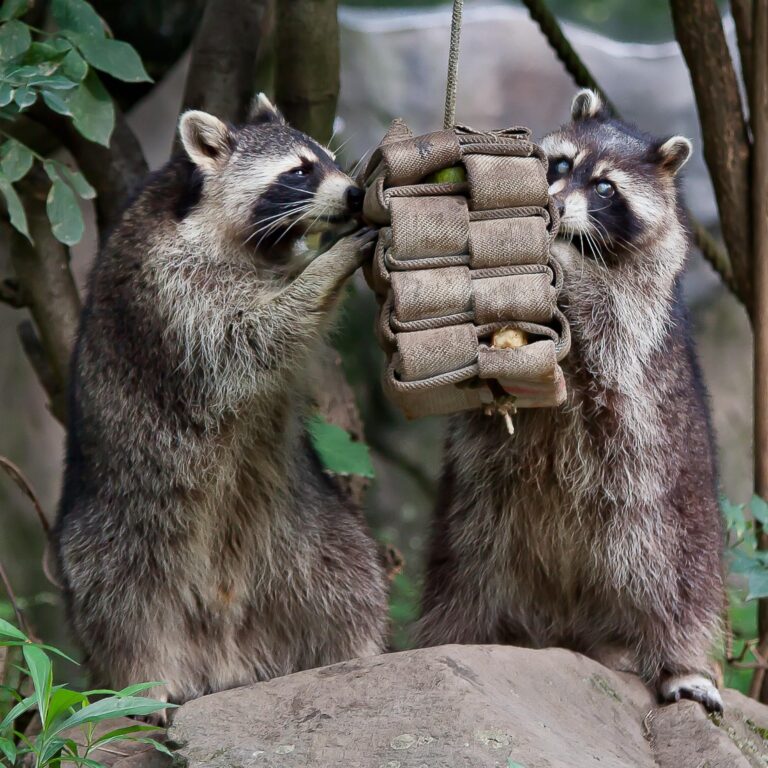
Raccoons are one of the most iconic North American animals, and instantly recognizable thanks to that adorable ringed tail, charming black mask and those expressive, dexterous paws so very much like human hands.
Sure, raccoons are cute, but they are also an enormous pain in the butt in many settings, especially one where you are responsible for provisioning your own food.
They raid gardens, steal animal feed, break into sacks of seed and scatter the trash all over the place in quest of food.
I will bet most of our readers appreciate communing with nature and would rather leave animals alone than be forced to relocate or dispatch them, but sometimes enough is enough.
You can be certain that where you see one raccoon others are sure to follow, and if you don’t nip the problem in the bud you’ll soon have an army of the fuzzy little thieves roaming all over your property.
Since raccoons are intelligent, wary, and primarily nocturnal pursuing them conventionally is usually a poor investment of effort and time that is better spent on other pursuits.
This makes traps, both lethal and non-lethal, your best bet for efficiently ridding yourself of the nuisances.
In this article we will share with you eight traps that will catch you a raccoon in short order.
Know Your Quarry
Compared to hunting or other forms of direct intervention, utilization of traps requires even more creativity and ingenuity if you want success.
Not only must you understand the best traps to use, where to place them and how to trigger them but you must also thoroughly understand your quarry, both its habits, preferences and other motivators besides.
When we consider the raccoon, what are its standout qualities and characteristics that we can leverage to our advantage and turn against it?
One of its primary characteristics is its dexterity, as the four paws function nearly as well as hands, allowing them to grasp and manipulate all manner of objects in their search for food.
Raccoons are also highly intelligent and adaptable, and this means that your traps must be certain in effect or at the very least proof against the animal’s efforts to escape it. Easier said than done!
Raccoons are also superb climbers, and are renowned for climbing trees downward head-first, utilizing those dexterous paws again as well as their strength to make it look easy.
This tells us that certain approaches we might employ against other animals will not work on raccoons because they could scale their way out of a trap or avoid it by climbing around it.
However, the number one thing that drives raccoons is also the number one thing we can exploit: their extreme drive to procure food.
You might say that raccoons are the gourmands of the animal world, or if not gourmands at least one of its most voracious but least picky eaters.
Raccoons will eat all kinds of stuff, and oftentimes the stinkier the better. Anything from tuna and roast chicken or pork to marshmallows, kitchen scraps and other unmentionables.
All you’ll need to do to lure a raccoon into your trap is to smartly place a little bit of bait.
Consider the list of traps below. All of them are functional for catching raccoons, and quite a few of them are ideal.
We have included both lethal and non-lethal traps to cover all potential outcomes as well as your specific requirements.
Lethal Traps
Lethal traps are exactly what they say on the box: When successfully triggered they have a high likelihood of killing the target or severely injuring it.
These traps are what you want to use if you do not have the time or inclination to relocate the target, or if you have been dealing with raccoons that are entirely too persistent.
Compared to non-lethal traps, lethal traps have additional considerations that must be accounted for prior to locating them. Make sure you read the appropriate section after our trap list for more info.
Conibear / “Body Hold”
The conibear or body hold trap looks for all the world like a supersized rat trap and is designed to do exactly what you’d expect, clamping and squeezing the body of the target animal.
It accomplishes this by means of single or sometimes dual bars that snap shut when the trigger is activated.
If it is working as intended, it will clamp the animal by the neck or around the torso, cutting off the flow of blood and or preventing respiration, killing it.
In case of a hold around the neck, death usually occurs very quickly either by the rapid loss of oxygenated blood to the brain or by the breaking of the spinal column.
Body hold traps are one of the most regulated types of traps, so make sure you check all applicable local and federal laws before employing them.
As long as you are able to you will find they are one of the most versatile and effective traps around.
They can be configured in a variety of situations to varying kinds of terrain and it is easy to entice a raccoon into activating it through the use of bait, per usual.
Other clever uses of body hold traps entail placing them just before or just after a hole or small passage that a raccoon regularly passes through or at the base of any location where they typically mantle or climb.
Drowner
Like many traps, the operation of the drowner trap is in the name. A drowner trap is in effect a modified pit trap, only the pit is full of water that is too deep for the animal to stand on the bottom and keep its head above water.
After they become exhausted from swimming the animal will eventually drown. Drowner traps are highly effective against small animals like rodents and raccoons and are dependably lethal.
Designed and implemented properly, drowner traps require no resetting, only periodic checking and pose no threat to any humans except the very smallest children.
This can make them a good option for families with kids and larger pets or livestock. You won’t have to worry about horses, cows, or even large dogs getting into trouble with one of these traps.
Implementation is one area where you can get creative, as I have seen these traps installed via a dugout in the earth with a camouflaged teeter-totter board placed over it, a length of PVC pipe strung out over the water container with some bait placed in the middle and other equally ingenious but functionally simple designs.
The key thing to remember is that raccoons are excellent climbers and fairly athletic. Any container you employ must be slick-sided so the animal cannot climb out, and deep enough where they cannot easily jump out from the water.
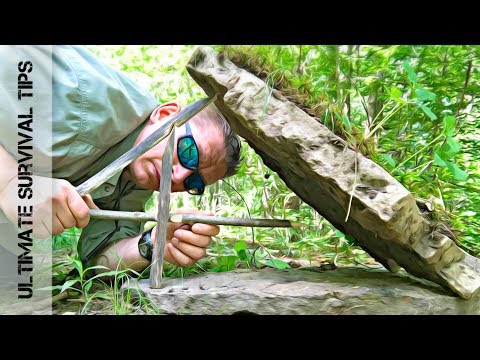
Deadfall
A deadfall trap is any one that crushes the target with a large, heavy object. These traps are ancient, and have been used by many cultures around the world throughout history, and are still in use today.
The major advantage of a deadfall trap is how adaptable it is, and how comparatively simple a triggering mechanism is.
You can even set them up on a primitive remote utilizing nothing more than string or twine attached to the prop stick that you tug from a nearby concealed position when the animal is in the kill zone.
Victim operated deadfalls typically rely on the animal attempting to grab or eat a piece of bait attached to the trigger which subsequently topples it.
The rule of thumb with a deadfall is that the weight should be at least five times that of the target.
Keep this in mind depending on the size of your raccoon, as you don’t want to maim it and let it escape, and you don’t want it to activate your trap without inflicting any damage whatsoever, as it will be doubly cautious next time around.
Deadfalls work well when placed along regular routes of travel or near common feeding areas, especially ones where raccoons are used to receiving a certain kind of food.
You will find good success with a deadfall trap if you “season” the area where you plan on placing it with free handouts for a short time so that the intended target can become acclimatized both to the food and to being fed at a particular location.
Even with the presence of the deadfall, it won’t be long before he cannot resist moving in for a bite, and then you’ll have him.
Plunger
Plunger traps are a type of mechanical spike trap, only instead of letting the victim blunder into a fixed set of spikes and relying on momentum and the weight of the target to impale it the plunger trap uses springs or other articulating mechanisms to drive a spike or multiple spikes into the target animal.
Small versions of this trap are typically employed to kill moles and other subterranean animals, but larger, above ground versions, work equally well on raccoons.
The advantage of the plunger trap is that they are highly lethal and will typically pin the animal in place, meaning that if the animal is maimed or otherwise suffering and you are nearby you can quickly move to dispatch it without having to track it.
However, you must use care in placing both the trap and its bait so that the animal is not enticed to simply reach in for the bait before triggering the trap, as this will result in a hit to one of the limbs which might not be fatal or even secure the animal in place.
Generally speaking, these traps are adaptable, work when entered from either direction, and are one of the best for exploiting raccoons’ food-driven nature.
They are, however, extremely gruesome in operation, and so may not be the best choice if you have any sensitive bystanders or are a bit squeamish yourself.
Non-Lethal Traps
Compared to lethal traps, non-lethal traps represent a much, much lower chance of severely injuring or killing the target animal.
They are ideal for people who would rather catch the animal and humanely relocate it instead of dispatching it.
However, depending upon the design of the trap a risk of injury still exists, particularly if the animal actuates it in an unusual way.
Though most non-lethal traps are by design significantly more humane than lethal traps, it is up to you to check the status of the trap regularly.
Even animals that are held without a scratch on them they still die of exposure, dehydration or starvation, all of them fates far worse than most physical trauma.
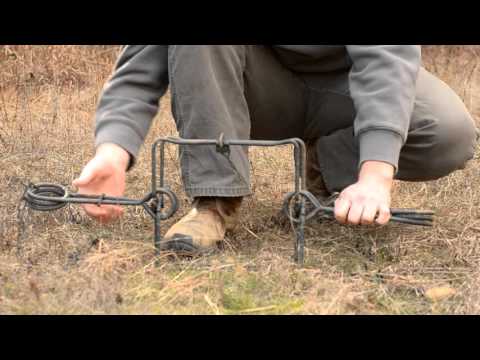
Foot Hold
Foot hold traps are a cousin to the conibear trap above, designed as you would expect to grip the lower leg or paw of the target animal and hold it in place until you can come along and capture it or dispatch it yourself.
Compared to the gruesome, steel-toothed, or studded “bear” type traps of old, modern foothold traps are designed with padded jaws or even a certain amount of standoff built into them that will prevent the worst of the crushing and disfiguring injuries typically inflicted my older varieties of this type.
Foothold traps are excellent for a wide area approach because they are easy to set, easy to bait, and generally reliable.
However, special care must be taken with setting for raccoons because you will only reliably have one of the raccoon’s limbs caught and it will work furiously to free itself from the trap.
Any foothold trap you employ for the purpose must be securely emplaced for this reason.
Also, consider utilizing specialty raccoon triggers with your foot hold traps. Compared to levers, toggles or pressure plates a raccoon trigger must be squeezed or clutched by one of those nimble little forepaws before it will be activated.
These triggers are intended to prevent non-target animals like dogs and cats from activating a trap even if they step in it. More on that after this section.
Pit
Like so many of the other traps on this list, pit traps are exactly what they say in the name. It is a big pit, either an open hole in the ground or a large container above ground for the purpose.
A pit trap delivers the target animal into its clutches via a short or long drop, and considering we are dealing with a raccoon it should be a shorter drop rather than a longer one if you don’t want to hurt or kill the little critter.
Activation for pit traps can work very much according to the methods laid out for drowner traps above, only the animal should be dumped into a dry hole or container where it will mill around contemplating your inevitable arrival.
However, pit traps present a special challenge when trying to catch raccoons because they are such adept climbers.
Leave a raccoon the smallest toe hold or a textured surface and they will climb right out of it with nary a care.
This makes designing an effective pit trap, compared to a drowner trap, challenging because the only other way to ensure that the target animal stays in the trap is by designing some sort of cover that will activate consequently and then enclose the animal.
Cage
Ounce for ounce one of the most effective traps for raccoons just so happens to be the most humane.
Cage traps are extremely effective when set up properly, and function by luring in the Target raccoon using a little bit of bait, once again.
Once inside, the raccoon will activate the trigger, typically a panel on the floor of the cage, which will shut the door behind it and trap it in a cage that is ready for transport.
There are all sorts of ways to employ a cage, and they can be placed near typical routes of travel, near habitual feeding areas or even loaded with a baby or young raccoon that has been separated from its mother in order to lure her in so you can catch them all at once.
Once the raccoon is in the cage, you may dispatch it at your leisure or, preferably, take it somewhere far, far away from your home before releasing it back into the wild.
As always, check for odious local laws to make sure you are obeying them before catching and relocating any wild animal.
Perhaps the only drawbacks to cage traps are their size, as they tend to run a little bit large compared to all of the other traps on this list and that can make them difficult to emplace in close quarters or cluttered terrain, be it an attic or dense foliage.
Snare
Snares are probably the most versatile and adaptable of all the traps on our list, and suitable for catching small critters or large, raccoons included.
Snares typically work similar to a foothold trap, so long as they work as intended, and will hold an animal in place either as long as it keeps pulling or until the news is manually released.
You must keep in mind that any snare, particularly one that is set a little larger, runs the risk of catching the animal around the neck or body, making death or serious injury a significant possibility.
However, compared to the other traps on this list snares seem to be the ones that suffer from a reduced success rate, and for that reason, professional trappers will set many snares instead of just one or two.
This is fine for you, however, because a good snare is comparatively quick and easy to set up once you have the appropriate wire and toggles.
More so than most of the other non-lethal traps on this list, make sure you check on your snares regularly because they will be easily fouled if they miss and also because they run a higher risk of significantly injuring or killing their quality compared to the other non-lethal ones.
Consider the Consequences of Placing Lethal or Non-Lethal Traps
Before you place any lethal or non-lethal trap with the intent of catching a raccoon you must think through every, single factor that goes into your decision.
First, what will you do if one of your traps injures or maims a raccoon but it escapes? Will you try to track down and dispatch the wounded animal? Ethically, that responsibility falls on you.
Second, consider the hazard posed to people and pets by any trap, but particularly lethal ones.
Some dogs and many cats fit into the same size category as a raccoon, and you’ll be beside yourself if the trap you set out for a raccoon, nails your dog or the neighbor’s cat.
Also, you are responsible for any damage that occurs as a result of you setting a trap, particularly for traps you set that are not under more or less constant supervision.
You must take pains to ensure you do not catch any non-target animals or injure any human or animal passersby.
This can be done by cleverly reasoned placement of the traps, using the right kind of bait, or just avoiding areas where humans and non-targets are likely to be or reach.
You must always be especially cautious when using body hold and plunger traps, as these are capable of inflicting serious wounds even on adult humans.
A Raccoon in Your House Usually Means Babies!
It will be irresponsible of me not to mention one of the most common trapping mishaps undertaken by homeowners who are trying to get a raccoon out from under their deck or out of their attic.
Raccoons that take up residence in people’s homes typically do so for a purpose, and that purpose is the rearing of the young.
That raccoon is probably a mother, a mother who has stashed her babies someplace warm, dry, and safe that has nearby food sources!
When you trap the mother and either take her away or kill her you will leave behind her babies behind, who will then eventually start making a racket and causing problems all on their own.
This will necessitate going back to collect them or potentially even being forced to trap them all individually.
A far better strategy is to carefully observe or track the mother and find out where she has nested her babies.
Once you have found her nest, and mom is away, all you’ll need to do then is collect the little ones and place them inside a specially designed cage trap that has a partition for them.
Make sure you place some nesting material, food and water in there with them before leaving it nearby.
It won’t be long before mom comes back and seeing her babies trapped will stop at nothing to get to them, quickly entering and activating the trap.
Then you’ll have mom and babies all in one bundle and you’ll be able to relocate them together to safer pastures- just ones that are far from your home!
Conclusion
Raccoons can be persistent and aggravating pests, but take heart. Once you are tired of dealing with them you have many options for trapping them, both lethal and non-lethal.
There is a trap for every setting and situation, so no matter where you live and what kind of raccoon problem you are dealing with you can be sure that on the list above you’ll find at least a couple of traps that will be perfect for your purposes.
With a little bit of ingenuity and a dash of patience pretty soon your raccoon problem will be over.
Preppers are correct and honorable for working so hard to protect their families and the people they care about from all of the many dangers and disasters lurking out in the world.
It seems there is never any shortage of pain and suffering that can be brought on by natural disasters, man-created catastrophes, and good old-fashioned misadventure and accidents.
But if peppers have a blind spot, it is dangers of a more esoteric nature, things that won’t necessarily blow your house down, or punch holes in you.
Economic calamity is one such threat, and among the various economic risks to your well-being, you could have the misfortune to endure hyperinflation is, without question, one of the most severe.
In the span of a day, hyperinflation can drain your savings and make what cash and other resources you have on hand nearly worthless.
It can push the price of everyday commodities like food, water, gas, and electricity out of your financial reach, dooming you and your family to poverty and squalor in a shockingly short period of time.
This is something just as dangerous and just as deadly as any natural disaster, and you’ll need to know what you are doing if you have any hope of countering its effects. We will give you the straight story on hyperinflation as well as ways to combat it in this article.
Hyperinflation Defined
Hyperinflation is exactly what it sounds like, nothing more than extreme inflation. If inflation is simply the rising cost of goods and services over time, hyperinflation is the extraordinarily fast and dramatic increase in the cost of goods and services in a short period of time.
Hyperinflation is often so severe that the cost of goods can increase radically day by day, sometimes multiple times a day, and consequently the purchasing power or value of a given currency goes lower and lower in accord.
Hyperinflation causes a multitude of secondary and tertiary economic effects in addition to its primary symptom of rendering standard currency essentially worthless.
Hyperinflation is the cause of all those old-timey newsreels that show people wheeling wheelbarrows full of cash or coin into a bakery to buy bread, or even resorting to burning it because it is worth less than firewood.
Hyperinflation is not some pie-in-the-sky economic theory. It has happened before and will happen again, including to prosperous, First World nations.
Since the beginning of the 20th century alone there have been dozens of instances of hyperinflation seizing nations in its strangling grip, and the consequences have much of the time been extremely ugly, both for governments and citizens.
What Causes Hyperinflation?
Hyperinflation is itself the cause of the attendant economic collapse, much of the time, but even this harbinger of hard times has its own prerequisites, though they are not always easy to spot.
That being said, multiple studies conducted by venerated economic theorists and financial experts have shown that there are several typical triggers or conditions that make hyperinflation likely, or at least possible. They are listed below.
Use of Paper Currency is a Prerequisite
It seems that the use of paper currency, or any fiat currency, is a prerequisite for hyperinflation to occur.
Studies have shown that no genuine onset of hyperinflation occurred in societies where currency was issued in valuable commodities or had itself some intrinsic value as material.
The nuts and bolts of why this is so is beyond this humble writer, but suffice it to say that it is true.
This, however, is a particular problem for us in the 21st century because no modern nation issues anything except the paper currency and comparatively worthless coinage.
This alone means the stage is set for hyperinflation by virtue of the type of currency issued, and nothing more. All that is required to see hyperinflation take hold are other events or ideal conditions.
Commercial or Industrial Sector Problems
Anytime critical or flagship industrial or commercial concerns that are important to a nation’s economy, or just to a crucial sector of its economy experienced a massive downturn resulting from damage, embargo, product loss, loss of access to needed resources, manpower, and so forth it can set off a domino effect of economic stresses that may eventually result in hyperinflation.
This is particularly likely when commercial or industrial stoppages or shortages result from destructive events like war, catastrophe, sabotage and so forth.
What’s worse is that these events dovetail with any other economic stresses already underway, often leading to a basically unstoppable downward spiral that will inevitably result in hyperinflation.
Widespread Civic Uncertainty
There is always a risk of hyperinflation whenever civic uncertainty takes hold in the collective consciousness of a nation.
Anytime most people lose faith in their government, in their markets, or in their nation’s future outlook it can lead to a major chilling effect on economic activity.
This chilled economic forecast leads to reactions like panic buying, selling of stocks and bonds, and other, typical panicky behavior which will turn into sort of a self-fulfilling prophecy and lead to-you guessed it- hyperinflation.
Once again, this uncertainty can be the cause of other problems that lead to hyperinflation or can result from other problems that contribute to hyperinflation.
You might think of hyperinflation as the inevitable light at the end of the economic tunnel; we all get to it eventually, but the bad part is the light is actually an oncoming train ready to flatten us!
Military Conflict: War, Police Action, etc.
Mass and prolonged deployments of military forces, especially in open conflict of any kind, are inevitably a major drain on the piggy bank of any nation, even the richest.
The warhawks and the sycophants who make the military industrial complex what it is will tout the economic stimulation created by all those defense sector jobs, but the bottom line is that war will only ever push a nation into economic stress.
Not for nothing, returning militaries no longer bring with them massive baggage trains of plunder or binding resolutions that assure them preferential access to the defeated enemy’s resources.
The result is nervous civilians spending more frugally on luxuries while hoarding basic commodities, and if this behavior is not arrested it will lead inexorably to hyperinflation.
Of course, it should go without saying that any nation that is actively touched by ongoing war will typically experience severe hyperinflation.
Reckless Printing of Money Against Gov’t Budget Deficits
And we come to it at last, the perennial and typical fountain from which all economic woes flow inevitably downhill to soak the cold and shivering civilian masses below: Financial impropriety on behalf of the government!
More than any other cause, the reckless printing of fiat currency against government debt is the number one cause of hyperinflation.
In the vast majority of recorded instances in the 20th century, this has been the central factor in something like 70% of cases.
Yikes. No matter who you are, no matter where you live, frankly there is nothing you can do, practically, to stop this.
The time to have voted these people out and get honest, financially prudent, and committed leaders into office was 20 years ago, no matter what year it is currently!
Through trickery, clever accounting, and sleight of hand they can keep the economic “reaper” at the end of the driveway for a time, but invariably the butcher’s bill must be paid and financial calamity in the form of hyperinflation will be the inevitable result of such malfeasance.
What Does Hyperinflation Cause?
Hyperinflation results in many subsequent effects, effects that will be felt by virtually every citizen in the land, with scarce few exceptions. All you need to know is that none of these effects are good.
Sharp, Sustained Increases in Price of Goods/Services
The most iconic effect of hyperinflation, if you want to call it that, is a severe, sudden and sustained increase on the price of goods and services, felt most keenly concerning the purchase of everyday commodities like food, electricity, water, fuel, and building materials.
Short-term increases of 10 times the otherwise typical price are common, with increases of 20, 30 or even 40 times the normal price entirely on the table.
Imagine how devastating this would be to your personal finances if now only the most rudimentary of groceries in sparing quantities took up your entire food budget for weeks or months at a time.
How would you procure food? How hard could you work just to supply your family with a pauper’s meal?
Panic Buying and Hoarding of Goods by Civilians
Right before hyperinflation properly takes hold, or immediately after it sets in, panicked throngs of people will start snapping up basic comestibles and everyday commodities, from coast to coast.
This crushing demand resulting from panic buying will snap the already frayed threads on the supply side of the equation, resulting in massive shortages that may very well never be replenished under the circumstances.
Basic goods like grains, beans, fuel, bottled water, toilet paper and other essentials that we perpetually take for granted will become incredibly precious.
The meat will become a luxury. This will in turn only fuel additional fear and unrest and further perpetuate the downward spiral of hyperinflation.
Mass Unemployment and Foreclosure
When people are forced to choose between putting a meager meal on the dinner table or paying on their mortgage or monthly rent the food will almost always win out after a few meals are missed in the beginning.
Despite the dire circumstances, you need not think for a moment that Banks and landlords will show mortgages and tenants any mercy.
Now, as in times past, foreclosures and evictions will sweep the nation, dispossessing and making homeless countless millions of people.
Worse, the economic turmoil and societal upheaval that invariably follows in the wake of hyperinflation- like a school of sharks following a ship at sea- will see many employees get the boot, or lose their jobs because their employers are forced to shut down or radically downsize.
The loss of income, nearly worthless though it may be, will further perpetuate the pain and loss being experienced by the average citizen.
Further Devaluation of Currency
As the prices of goods and services rise and rise and rise the buying power, and ergo the value, of the currency in the affected nation will continue to sink and sink and sink.
This is, once again, a synergistic factor that seemingly has no end until rock bottom is finally, painfully, plumbed.
Domestic and international markets will respond and confidence in the affected currency will likewise plummet.
Domestic investors and citizens alike may very well attempt to cash out early and invest in foreign currencies instead to protect themselves, and this will only serve to further weaken the ailing domestic currency.
With several revolutions of this, the affected nation’s currency will be suitable only for kindling or toilet paper, if it is even worth that.
Devaluation or Loss of Paper Assets and Savings Funds
The meteoric descent of paper money will affect all other intangible assets and investments, and in historic instances of hyperinflation, people have seen various assets and lifelong savings essentially evaporate into meaninglessness under the weight of various economic factors.
This means that whatever you have accumulated, invested and saved will not be safe from the ravages of hyperinflation.
Certain investments, hard commodities and perennially valuable genuine assets will keep their value or at least be relatively unaffected, but most traditional stock and bond portfolios and savings accounts will be decimated.
Increase in Societal Unrest and Crime
You cannot subject an entire society to the ravages of hyperinflation and all of the attendant pain, loss, and degradation without turning them half-mad with grief.
People will be rendered inconsolable in the face of what is happening, and with rumbling tummies and no end in sight plenty will turn to crime, petty or grand, in order to survive or to take revenge on the people they perceive as part of the problem.
Anything that you have might be worth an attempt by someone who does not have it, and some will even be willing to take your life in the bargain.
On top of everything else, people will be forced to keep their backs to the wall and keep an eye on their fellow man for the duration and for some time after.
Preps to Protect Yourself and Family from Hyperinflation
I hope that by now you have a firm understanding of how serious a threat to your well-being and the well-being of your family hyperinflation is.
It is no joke and not just the provincial buzzword of economic nerds in tacky suits and dorky glasses.
Your entire world will change when hyperinflation strikes and you very well may no longer be able to recognize life as you knew it in your own country.
Effectively preparing yourself and your family to endure and persevere in the face of hyperinflation generally involves a two-pronged approach:
Material preparation. Acquiring the goods and capabilities that will allow you to sustain life more or less as you have known it for the duration
Financial (or asset) preparation. Take steps ahead of time to improve your financial position so you will not fall prey to the severe devaluation of currency inherent to hyperinflation.
Read through the preparatory steps below.
Material Preparation
Stock Up on Food, Water, and Necessities
As mentioned throughout this article, hyperinflation is going to drive the costs of typical, every day supplies so astronomically high that you will quite literally go bankrupt trying to buy milk and eggs.
The obvious solution is to stock up now while those supplies are plentiful and cheap.
Stockpiling supplies in your home and regularly rotating them ensures that you and your family will be able to eat, bathe and maintain your household more or less as you always have.
You should be gunning for a 6-month supply of everything you use on a regular basis, minimum.
Be Ready to Defend Yourself and Your Possessions
One of the dark side tales that rarely gets mentioned in the same breath as historical instances of hyperinflation is the predation that will be inflicted on people in the “haves” category by those in the “have-nots” category.
The old expression that society is only three missed meals away from anarchy is entirely, grimly true.
You’ll need to be ready to protect yourself, your family, your possessions, and your holdings from people who would take them from you out of malice or desperation. It is an ugly thing to consider, but you’ll need to get guns and plenty of ammunition alongside other tools like large canisters of pepper spray so you’ll have options for every possible, ah, people problem.
Prepare to Self-Supply Utilities
One of the first economic casualties after the onset of hyperinflation will be utilities like electricity, water, natural gas, and so on.
If you have access to water sources suitable for drinking and washing that is one overpriced commodity you won’t have to buy.
Likewise, if you can create your own electricity by any means, be it solar, windmill, gas generator or some other device you won’t be paying the power company through the nose just to turn on a single floor fan.
There is no reason the average citizen who is dedicated to the task cannot make themselves fully capable of living off-grid in times of trouble.
This is something you should research and begin implementing now before the chips are down, and there is plenty of information on this website that can help you do just that.
Stockpile Premium Bartering Fare
As previously mentioned, society as a whole is not going to take this whole hyperinflation thing well at all. Not well at all…
Despite the depravity and dispossession that will be commonplace people will still yearn for small comforts and luxury items, along with vices.
Things like candy, tobacco products, beer, wine and hard liquors, luxury cosmetics or personal hygiene items and so forth will vanish like smoke at the onset of hyperinflation and if you have a sizable stockpile of any or all of them you will be a broker of some importance to people willing to pay any price to get their fix or to enjoy a nicety from times gone by.
Make it a point to stock up on all these items even if you do not partake of or use them yourself.
Consider it a cheap investment that will serve as a sturdy barricade against the ravages of hyperinflation.
Someone who is desperate to get a little nip of nicotine might trade you food, tools or other genuine valuables for even a single pack of cigarettes. No reason you shouldn’t capitalize…
Financial / Asset Preparation
Improve Income “Antifragility”
One source of income is not going to be enough to weather the storm of hyperinflation, and it is barely enough to get through modern life right now in normal times.
You should focus on diversifying your income streams through any means. Learn another skill, and pick up a second job or part-time gig.
Moonlight as a service provider in any sector if you are proficient in any non-traditional skills that you could tutor or teach to other people.
Start a small family business and get your kids and spouse involved. Invest now while you can still recoup your initial investment and make use of your profits.
You want multiple “baskets” with multiple “eggs” in them. This is the only way you’ll stand half a chance of persisting through a period of hyperinflation with any income at all.
Slash Optional and Elective Expenses
It is time to audit your personal expenditure spreadsheet with a big, fat, red marker.
Anything that you can cut now will mean more money that you’ll have on hand later or, if you are smart, more money you can invest in things that will not suffer from hyperinflation later, things like the stockpile of food and other goods I mentioned in the previous section.
Make it a point to replace expensive luxury choices with more economical and practical ones. Stop eating out so much.
Stop buying designer clothing and vehicles to impress people you don’t even like. Stop spending on stupid shit, in other words!
I’m not saying you need to live like a penny miser, and Lord knows I like certain expensive brands myself, but you should be living meaningfully and buying things that genuinely improve your quality of life, not trying to meet a standard set by people who are not your betters that will only result in financial ruin.
Buy “Inflation-Resistant” Investments
Many traditional investments will not endure the acid test of hyperinflation, but some of them will.
Ones you are doubtless already familiar with include precious metals and other inherently valuable commodities.
Gold and silver have long been checks against inflation and they remain so, and if you have plenty of on-hand gold and silver you’ll be able to get anything you need while hyperinflation is ravaging the economy.
Also consider other traditional, perennially valuable investments like land, real estate, and livestock.
Here and gone again investments like collectibles are, as always, a bad choice and among the worst investments you could have during hyperinflation as people will be worried about survival and survival alone, not nostalgia.
Reduce and Pay Off Debt Pronto
One of the single, best things you can do to set yourself up for success in times of hyperinflation is to eliminate debt now by any means necessary, and particularly you should work hard to eliminate any debt or loan with a variable rate.
If you can’t do that, refinance ASAP in order to lock in a fixed rate so you won’t get screwed later when the banks and credit card holders decide to cut your throat and shank your rate right to the moon. Eliminating debt eliminates vulnerabilities.
Anything you cannot pay on will be repossessed one way or the other, and don’t delude yourself into thinking your mortgages or anyone else who holds your debt is going to suddenly grow a conscience and forgive it under the circumstances: most didn’t in the past and they sure as hell won’t this time around.
Conclusion
Hyperinflation is a devastating economic condition that can ruin entire societies and completely topple the existing social order.
With common goods and provisions rendered completely unaffordable for most and tectonic waves of eviction, foreclosure and dispossession ripping communities apart, hyperinflation cannot be countered, it can only be endured.
But endure it you can if you take the right steps now to insulate yourself and your loved ones against the worst of its effects.