Wednesday, February 28, 2018

The Transgender Agenda – Tyranny in Disguise

by Isabella

On first glance, it may seem easy to believe that the transgender movement is about freedom. We live in America, right? And in America, people should be free to live and express themselves as they please. If someone wants to live their lives as the opposite sex, so be it.

But anything longer than a first glance to any American, will show the agenda goes far, far beyond this. Even proponents of the transgender agenda hardly stop at freedom and generally whiz right on by to acceptance, tolerance, respect. They don’t really want freedom from transgender individuals. They want the rest of the world to believe exactly as they do.

The trouble is, exactly what the avid proponents of transgenderism believe is that humans can traverse gender as they choose or feel. This is, of course, when it gets down to it, patently false.

With the exception of a very miniscule portion of the population who experience a physical deformity called hermaphroditism, pretty much every human on earth has a gender which is determined by their genes from very early infancy in the womb (and yes, babies in the womb are also human, but that’s another topic for another day).

Gender is not fluid, and when a person has plastic surgery, takes hormone-blocking drugs, and wears the typical attire of the opposite sex, they do not, at any point in time, become the opposite sex, unless we are all in agreement that we are pretending.

The scary thing about the transgender agenda lately is that they don’t seem to be pretending. They seem to genuinely believe that gender is malleable, and, even worse, that anyone who disagrees is a hateful bigot. Us hateful bigots are quickly being pushed to the outskirts of society as the delusion takes hold of our whole country.

The National Delusion

Take the very recent example of an elementary school principal in Massachusetts who decided that he wanted to live as a woman. He wrote a letter to the parents of his young students, explaining that his gender confusion had haunted him his whole life, and that he was now publicly announcing his transgenderism and would slowly, in front of the young children over whom he was responsible, be transitioning to live as a woman.

That’s pretty crazy, for sure, but we’re getting used to this by now.

What’s really insane, is how the press wrote about this man.

The Principal’s name is Tom Daniels, who will now be using the name “Shannon.”

This person who would like to be called Shannon Daniels, like, last week, when he claimed he was a she. He’s a man. He looks like a man, talks like a man, walks like a man, and clearly is a man.

But because he woke up one day and decided to announce to his K-6th grade students that he was a she, despite the fact that every sensible bone in your body will tell you he is most definitely a he, we’re calling him “she” now.

And by “we”, I mean the mainstream media. This is a quote from a USA Today article on the Principal’s decision to come out as transgender, which is titled Massachusetts elementary school principal announces she is transgender:

A Massachusetts elementary school principal has announced that she is transgender, telling her school community in a letter she has “never felt completely happy or at peace.”

Shannon Daniels, previously known as Tom, is the principal at the Stanley Elementary School in Swampscott, a prosperous town northeast of Boston.

“I got to the point that I thought I would never be able to reveal my true self,” she said in the letter. “Frankly, the prospect of doing so was terrifying. … That has changed.”

In the letter, 52-year-old Daniels, who transitioned from her gender assigned at birth (male), said she identifies as both male and female. She now plans to present herself as female and use her middle name, Shannon, as her first name.

“Transitioned from her gender assigned at birth (male)”?! Gender isn’t assigned at birth, it’s clearly apparent in the physical features of the baby. This observation would be easily backed up by a quick glance at the chromosome of any one of the baby’s cells. He wasn’t “assigned” the gender of male, he is a male.

Tyrannical Transgenderism

There is a book that is often used as a benchmark for what tyranny looks like. It is 1984 by George Orwell, and ever since it was first published in 1948, it has constantly been referenced to indicate when society is dangerously flirting with the type of totalitarian mind control exhibited in the oppressive fictional government of Orwell’s imaginings.

One of the most notable themes of the book is the patriotic language that Big Brother’s government of Oceania uses to describe their war efforts abroad. At one point, their military alliance with Eastasia dissolves and they go to war with them instead.

However, the announcement comes as if it has always been fact, and they subsequently rewrite history accordingly, announcing to their citizens through the ubiquitous telescreens and propaganda that “Oceania was at war with Eastasia: Oceania had always been at war with Eastasia.”

Principal Daniels is a woman. She has always been a woman.

This is not an isolated incident. Slowly, over the past decade, the transgender agenda, supported enthusiastically by the leftist media and even the enthusiastic defenders of political correctness in Washington, have changed our national conversation about transgenderism so that any language that falls outside of their carefully constructed delusion is considered “thought crime”, which was a heinous offence in Oceana.

It’s not enough that we treat transgender people with respect and try to work together as a nation to address their trials and challenges with compassion. No, that’s not what they want. They want us all to pretend their delusion is reality.

This is, at its core, tyranny, and it sets a terrifying precedence for those who choose to speak truth that transgenderism is a mental illness and ought to, for the sake of the people afflicted with it most of all, be treated as such.

Writer Stella Morabito of The Federalist agrees, and wrote back in 2014 that: “The transgender movement has strong totalitarian overtones that Americans (especially certain senators) don’t fully understand. How else to describe a crusade with such far-reaching consequences for First Amendment rights?”

“The legal destruction of gender distinctions will inevitably dissolve family autonomy, thereby uprooting freedom of association. Free expression becomes “hate speech” if one doesn’t fall into line with the directives of the transgender lobby or its pronoun protocol. Freedom of religion takes a direct hit any way you look at it.”

The transgender agenda strikes at the core of the invaluable liberty we enjoy in this great nation, and it is vitally important that we recognize it as such before it is too late.

Thinkpol – The Thought Police of America

One of the most chilling features of the novel 1984 is the concept of “thoughtcrime” which is enforced by “thinkpol”, or, literally, the thought police. In our own little version of Oceania here in the US, laws are being formed to literally ban acknowledging the reality of one’s gender.

In California, a bill was passed in October which dictated that caretakers of elderly people who did not use their “preferred pronoun” would face fines and even jail time.

Fox News reported:

Among the unlawful actions are “willfully and repeatedly” failing to use a transgender person’s “preferred name or pronouns” after he or she is “clearly informed of the preferred name or pronouns.”

The law states that if provisions are violated, the violator could be punished by a fine “not to exceed one thousand dollars” or “by imprisonment in the county jail for a period not to exceed one year,” or both.

Morabito describes a bill, Employment Non-Discrimination Act (ENDA) that passed in 2014 that on the surface appears to be a simple non-discrimination bill for employers, but in reality, sets a noteworthy precedence about gender:

The [ENDA] is based on the assumption that one’s perceived “gender identity” does not always “match” your sex “assigned” or “designated” at birth. So, the thinking goes, the law should allow a more ambiguous array of gender identities: male, female, both, neither, or something else entirely. It’s not an overstatement to say that tENDA is a huge step, mostly under the radar, to codify a new definition of humanity.

A 2016 law passed in New York would also make incorrect pronoun usage punishable by fines up to $250,000.

The NYCHRL [New York City Human Rights Law] requires employers[, landlords, and all businesses and professionals] to use an [employee’s, tenant’s, customer’s, or client’s] preferred name, pronoun and title (e.g., Ms./Mrs.) regardless of the individual’s sex assigned at birth, anatomy, gender, medical history, appearance, or the sex indicated on the individual’s identification.

Most individuals and many transgender people use female or male pronouns and titles. Some transgender and gender non-conforming people prefer to use pronouns other than he/him/his or she/her/hers, such as they/them/theirs or ze/hir. [Footnote: Ze and hir are popular gender-free pronouns preferred by some transgender and/or gender non-conforming individuals.]

Look at this language–it’s insane! These are made-up words used by people who are simply in denial about the biological reality of their body.

It is one thing to strongly feel you would be more fulfilled in life if you lived as the opposite sex, and to expect the government to write laws to protect you from discrimination or violent crime. But to demand everyone use made-up pronouns to refer to you in casual speech when you make an exerted effort to make your gender difficult to determine because you want to pretend you don’t “conform” to “gender norms”?

These are blatant violations of free speech that essentially set legal traps for anyone who dares go against the forced cultural norm that gender is fluid and we have to go along with whatever anyone says that they are.

Think of the reality these laws create: if we can pretend a person who is clearly a man, like Principal Daniels, is, in fact, a woman, and we can’t question anyone’s preferred gender pronoun, what does this mean for a big, burly man who walks into a woman’s room and cannot be asked to leave because he simply says he is a woman?

This is a scenario opponents of transgender bathroom initiatives have been proposing for a few years now, and it only becomes more and more realistic as time goes on, and other dangerous laws are passed.

Blackwhite-Denying Reality

Another noteworthy concept in the oppressive Oceana government contained in the pages of 1984 is that of “blackwhite”, the idea that one can eventually fully convince themselves that black is white, or, in an example that is most useful for our discussion, that a man can be a woman or that a person can have no gender at all.

This is a tried-and-true method for the transgender agenda, and, as you can see from the news coverage of Principal Daniels, it’s working. It doesn’t matter how obvious one’s biological gender is, the left is determined to completely deny reality.

Take for example a recent case in the UK. A woman, Christie Elan-Cane, who identifies as “gender non-conforming” or something to that effect, has been working her way through UK’s court system on a quest to obtain gender-neutral passports.

The Guardian reports:

“Legitimate identity is a fundamental human right but non-gendered people are often treated as though we have no rights,” Elan-Cane said. “The UK’s passport application process requires applicants to declare whether they are male or female. It is inappropriate and wrong that someone who defines as neither should be forced to make that declaration.’’

Elan-Cane, who was born a woman but began transitioning after surgery, believes individuals should be given more than the binary choice of being a man or a woman.

Notice the blatant denial of reality. First, in Elan-Cane’s language, as she clearly believes she is without gender, when her biology would dictate otherwise. Second, notice the journalist’s choice of words “was born a woman but began transitioning,” fully believing this woman can traverse her biological gender. Furthermore, he goes on to repeat Elan-Cane’s belief that “individuals should be given more than the binary choice” of being male or female.

That’s just it–biology dictates whether you are male or female, not the government. But when the government starts dictating whether one is male or female…that is when we have entered into the realm of blackwhite.

Terrifying.

The Family and the Thought Police

In 1984, Orwell describes the family structure in the oppressive regime of Oceana:

“[The children] were systematically turned against their parents and taught to spy on them and report their deviations. The family has become in effect and extension of the Thought Police.” (Orwell, 1984, p. 133)

The children in our new transgender regime are in fact being targeted, and the result of their new brainwashing at school is being used to prosecute their parents.

The schools are rife with the transgender agenda, teaching children as young as Kindergarten that gender is fluid. One horror story from last year involved a Kindergarten “transition ceremony” about which the parents of other students were not informed.

The 5-year-olds went home crying and worried they would turn into the other sex, but the school stood by the teacher’s decision to read books about transgender TV child star, Jazz Jennings, and then change a little boy’s clothes in the bathroom to present him anew to the little ones as a girl. One pediatric expert called this bizarre display “traumatic” for the poor children involved.

In Ohio, a confused and clearly psychologically ill teenager who believes she is a boy is currently facing emancipation from her parents because they refuse to let her transition.

Despite the fact that the drugs and surgery she wants would alter her life forever and she is only seventeen years old, a judge will soon decide if the parent’s authority still stands simply because they would prefer their daughter seek counseling rather than the extreme surgery the nearby cutting-edge Children’s Hospital Transgender Clinic wants to perform on her.

In Canada last year, it’s even worse. The province of Ontario recently passed a law that would remove children from the home of parents who do not support their desire to “transition”.

So as our schools brainwash our kids into thinking it’s perfectly possible to change gender at will, the government tells these kids if their parents don’t approve of life-altering surgery or hormone-blocking drugs, they can just go live with another family if they choose.

Robbing Us of Our Humanity

In Morabito’s sobering article on the transgender agenda, she poses the question, why should we care?

“Because erasing gender distinctions, especially as they apply to childbearing and rearing, would serve to legally un-define what it means to be human,” she answers. “A new legal definition of human—as neither male nor female—would apply to you whether you like it or not. Already, there is social pressure for everyone to comply with the gender theory notion that biological facts are mere ‘social constructs.’”

At the end of the day, this is truly what is frightening about the pressure the transgender agenda has applied to American citizens. They have successfully redefined humanity itself, and if they can do that, they can do anything.

Once it becomes illegal to speak the truth about gender, which it already has, it means that a lie is being enforced at the end of a gun. In America, our Constitution recognizes that our rights are not given to us by the government, but by God. And God created humans male and female. By attempting to erase this important distinction of individual humans, the heart of liberty itself has been struck.

We must fight back before it is gone completely.


via Modern Survival Online http://ift.tt/2owTG6b

Monday, February 26, 2018

Quantifying Latency in Cheap RC Transmitters

For those just starting out in the world of RC, a low cost transmitter like the Flysky FS-i6S can be very compelling. But is buying a cheap transmitter setting yourself up for failure down the line? The general feel in the RC community has been that cheaper transmitters have higher latency or “lag” on their inputs, which is precisely the kind of thing you want to avoid when flying along at 40+ MPH. As such, the general wisdom has been that your transmitter is one area where you don’t want to cheap out.

Wanting to put that theory to the test, [Marek Baczynski] set out to compare the response time between the Flysky FS-i6S and the more established Taranis X9D. In the video after the break, he uses his Saleae logic analyzer to time how long it takes movement on the transmitter sticks to get interpreted as servo commands at the receiver.

[Marek] connects the logic analyzer directly to the gimbals of both transmitters, allowing him to see user input before any processing is done by the electronics. It’s particularly interesting to see how the smooth analog curves of the gimbals are converted to a “staircase” digital output.

The final results of the latency test end up being fairly surprising. To put it simply: the cheaper Flysky radio not only more accurately interprets the user’s input, but does it considerably faster than the Taranis. [Marek] says he was so surprised by these results that he re-ran the test three times to verify.

But even taking into account the apparently higher fidelity of the cheap radio, he cautions you shouldn’t swap out your gear just yet. Higher end transmitters have a number of other features which make them worth hanging on to, even if the newer generation of radios is slightly faster. The real takeaway from this video is that if you’re just getting into the RC game, these cheaper transmitters aren’t necessarily the kiss of death the community makes them out to be.

Experiments like this and the recent detailed analysis of common hobby motors show just how seriously people take the world of RC. It’s unlikely this single experiment will quell the debate about “cheap” RC transmitters, but perhaps it’s a start.


via Radio Hacks – Hackaday http://ift.tt/2F5ONuh

Lucid Dreaming | Why did I become lucid?

Iv been on a journey for the past year where iv meditated everyday....I'm now at 2 20min sessions a day.I haven't done alot towards lucid dreaming untill yesterday.I listened to a podcast with Robert waggoner for an hour.Was so good and interesting and made me exited to do one thing which he mentioned which was to call out in the lucid dream and ask 'show me something important.
By the time I went to sleep roughly 15 hours later due to a wake night shift I instantly had a lucid dream where I also did what I wanted....asked the question out loud.
Do you think the excitement and challenge of wanting to do something specific in a lucid dream improves your chances? I knew I was also on the verge of rem rebound....plus I did something new.....I slept facing the left which I never do....maybe the sleep position change or the excitement? Or even the fact that I spent an hour fixated on lucid dreaming?
Thanks =D


via Lucid Dreaming - Dream Views - Attaining Lucidity http://ift.tt/2ConJ8H

Sunday, February 25, 2018

Top 12 Best Small Towns for Preppers to Live in

by Megan

When SHTF most experienced preppers know it’s important to prepare to hunker down in place or get the jump on the masses and head for their bug out retreat that has been well prepared in advance. But for anyone still in the planning stages of strategic relocation, how do you decide where to relocate or where to buy your bug out retreat? In this article we’ll talk about the criteria that are key to a good prepper location as well as how to ferret out the best small towns for preppers to live in.

Recommended Must Have Criteria for a Good Property Location

Everyone has their own idea of what their little piece of heaven should look like. For most preppers there are some recommended must have criteria. The more of these criteria your property has, the better you will be able to build a sustainable life before, during, and after SHTF.

  • Plenty of fresh water sources available on property and nearby areas
  • Good soil and accessibility to water for growing food and raising livestock
  • A moderate climate or one that you are fully prepared to live in without power.
  • Several hundred miles away from potential targets, nuclear power plants, and military installations
  • Property or at least a region where livestock can graze naturally
  • Land that is free of restrictions that might prevent you from living off-grid prior to or following SHTF such as state and local zoning, easements, HOA rules, etc.

What Makes the Best Small Town for Preppers?

Okay, we all know that most people cannot live in a vacuum and the lone wolf prepper mentality isn’t going to cut it for most of us. This means we are going to need our neighbors during and after a SHTF event if we’re going to survive long-term. It makes sense to include those people living in the small town around your ideal prepper property in your network. So, in addition to the above criteria for your property, what kinds of qualities make the best small towns for preppers to live in?

  • A town where you can live a relative normal life until SHTF
  • Relative proximity to conveniences such as medical treatment, employment, and other amenities.
  • Away from large cities and urban centers (the average person can travel up to 25-30 miles in 3 days)
  • Reasonably close enough if you need to commute
  • Look for a community of like-minded people
  • Values that are aligned or at least tolerant of your own values, morals, behaviors
  • Free of mining, drilling, commercial farms, factories, or other types of industries that could pollute the air, water, or ground.

Choosing the Best Town

Okay, so now that we know what we’re looking for in a property and in the best small towns for preppers, below are some recommendations. Keep in mind that choosing a strategic location is a very personal decision and often times means prioritizing between desirable factors based on what your own needs are at the time.

This means someone with health problems that require continued maintenance may need to live closer to town than is suggested simply to have easier access to medical treatment prior to a SHTF event. If you aren’t able to get further away from cities and urban centers or must stay close for one reason or another, you may need to ramp up security and defensive measures to balance things out.

For those who are more experienced and skilled with living off-grid, you can risk being further isolated. If your skills are still limited, you’ll need to depend more on neighbors and small-town amenities before and after SHTF, so you’ll want to stay closer.

The list of top 12 best small towns for preppers to live in given below is simply intended as a guideline to get you thinking about the areas and towns you may want to consider. It is definitely not a definitive list of best small towns for preppers to live in, nor is does it come close to including all the small towns you should consider for your strategic relocation. Your personal situation may lead you to remove or add other small towns from our list.

How to Narrow Down Your List of Small Towns

The first thing to do when you start your strategic relocation research is to narrow your search to the areas or regions that are the best for preppers to consider and suit your own lifestyle needs. To do this, you may want to ponder over several factors in addition to the ones mentioned above including:

  • Water Rights and Laws
  • Crime Rates
  • Climate and Weather
  • Population Density
  • Government Level of Intrusion
  • Gun Laws
  • Home Schooling Laws
  • Employment Opportunities
  • Alternative Energy Regulations
  • Political Climate
  • Business License Regulations
  • Health Code Laws (septic/sewer)
  • Disposal of Hazardous Materials and Untreated Waste Laws

Some of the issues above may be more important to you than others. Several of the issues will matter more in the months and years leading up to a SHTF and not as much after a SHTF event.

Top 12 Best Small Towns for Preppers to Live In

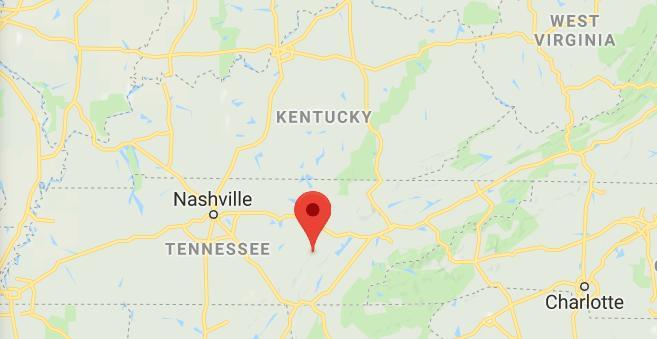
Pikeville Tennessee

#1. Pikeville, Tennessee

Pros

  • Approximately 2,000 residents
  • Low taxes, low property costs
  • Rainwater collection permitted
  • Longer growing season (260 days)
  • Great natural resources for off-grid living
  • Tennessee River area
  • Plenty of seclusion
  • Located in Sequatchie Valley-bonus

Cons

  • Less than 40 miles from Sequoyah Nuclear plant


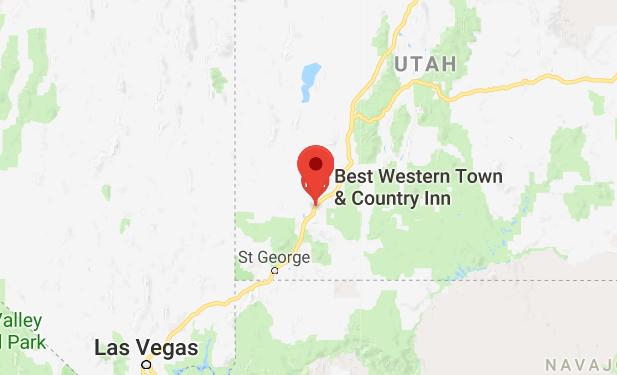
Cedar City Utah

#2. Cedar City, Utah

  • Population 25-30,000 people
  • Great mountain views
  • Independent attitude


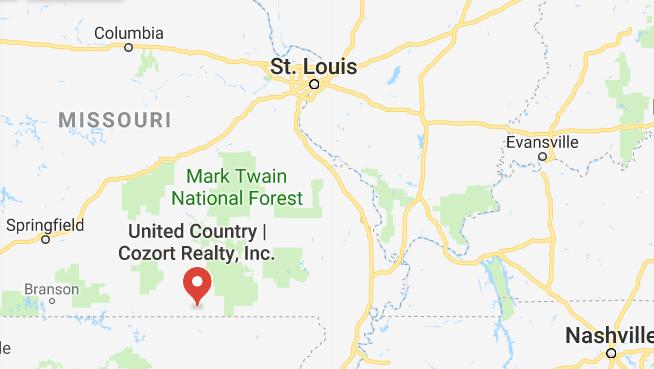
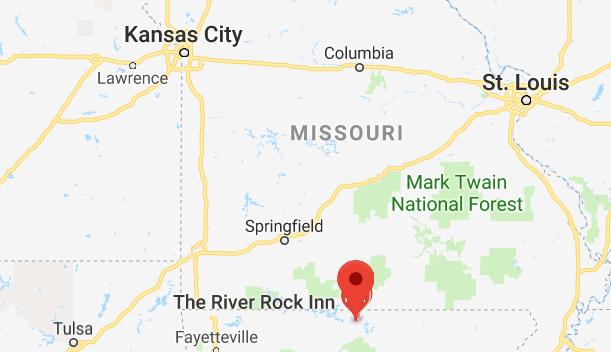
Thayer or Alton Missouri

#3. Thayer or Alton Missouri

Pros

  • About 2,000 residents
  • Southern Missouri location
  • Good fishing and hunting areas
  • Very gun friendly state
  • Most counties allow you to live in any type of home you wish outside city
  • Missouri encourages off-grid living; one of the best for off-grid living

Cons

  • Rocky soil may necessitate raised bed or alternative gardening methods


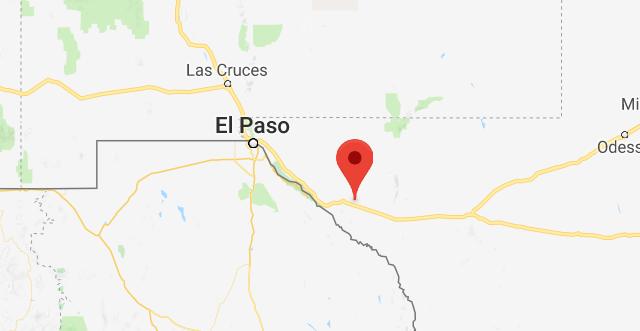
Sierra Blanca Texas

#4. Sierra Blanca, Texas

Pros

  • Land at less than $1K per acre
  • Abundant solar exposure
  • Away from large cities
  • No building codes or DIY project restrictions


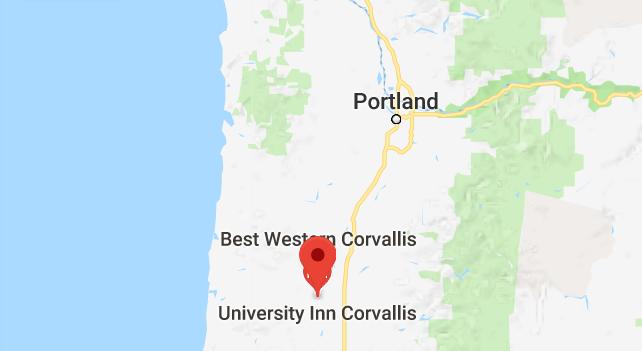
Corvallis Oregon

#5. Corvallis, Oregon

Pros

  • Oregon names one of the safest places to avoid natural disasters
  • One of better states for off grid living
  • Home to several off-grid communities (see below)

Cons

  • Tougher building and zoning codes in some counties (Osage is building friendly)
  • Recent reports indicate some Oregon counties fine residents for using rain barrels
  • May be too “yuppie” for some preppers
  • Gun laws can be restrictive


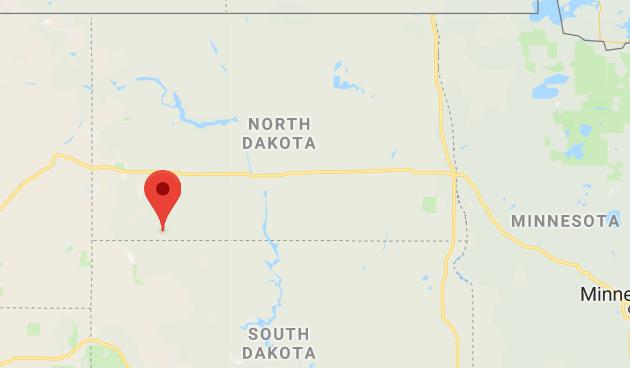
Hettinger North Dakota

#6. Hettinger, North Dakota

Pros

  • Only home to around 1,000 people
  • Southwest part of the state
  • Reasonably priced land

Cons

  • Colder winters; more snow


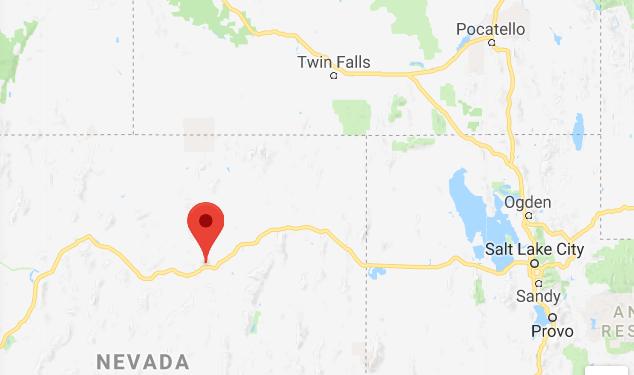
Carlin Nevada

#7. Carlin, Nevada

Pros

  • Around 2,000 people
  • Cheap land

Cons

  • Hot high desert


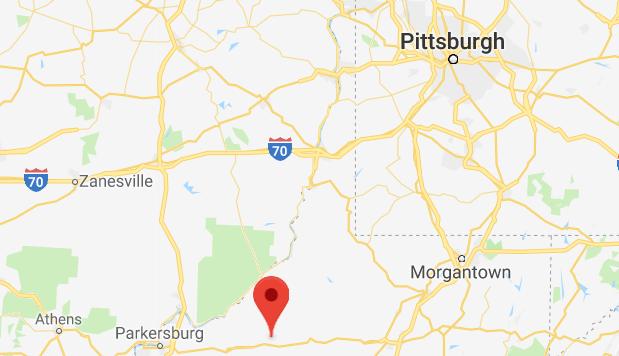
Pennsboro West Virginia

#8. Pennsboro, West Virginia

Pros

  • Less than 1,200 residents
  • Railroad history and 100-year-old tunnels
  • Friendly townsfolk
  • Good area for trapping and hunting
  • Land as low as 1K per acre

Cons

  • Zoning restrictions can vary significantly by town-do your research


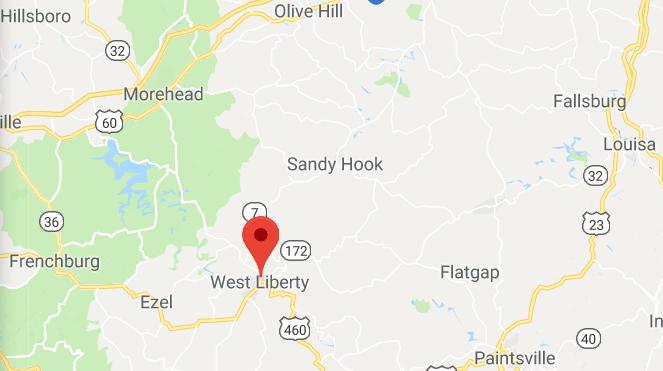
West Liberty Kentucky

#9. West Liberty, Kentucky

Pros

  • Population about 3,000 residents
  • Eastern part of state
  • Some large tracts of land as low as $500/acre


Mountain Home Arkansas

#10. Mountain Home, Arkansas

  • About 13,000 residents
  • In the Ozark Mountains


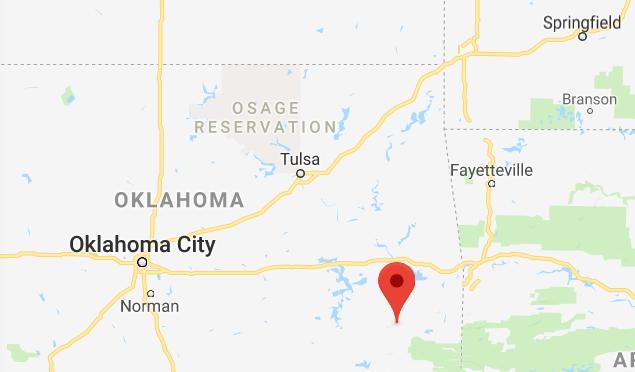
Red Oak Oklahoma

#11. Red Oak, Oklahoma

  • Around 500 people
  • Southeastern part of state
  • Land at less than 1K per acre


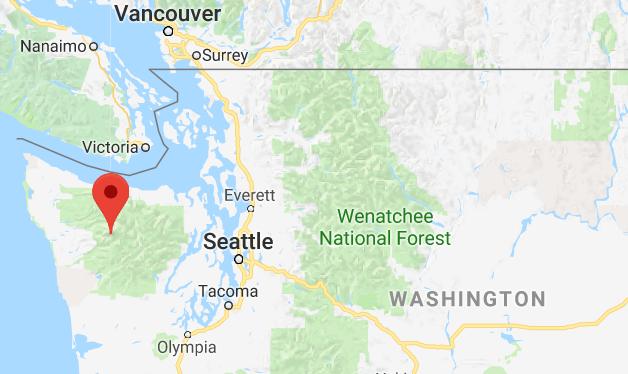
Olympic Peninsula Washington State

#12. Olympic Peninsula in Washington State

Pros

  • Gets cold in winter but survivable
  • Lots of fishing and wild game for food
  • Edible mushrooms and vegetation

Cons

  • Washington State has stricter building codes and laws.
  • Not as gun friendly as other states
  • Crime rates and drug activity high in some areas of state

Best Regions or General Areas to Consider

If you don’t care for any of the best small towns for preppers to live in list we’ve chosen, below are some wider areas and regions you can consider.

The Appalachian Area

Near the mountains in Tennessee, Kentucky or West Virginia

Pros

  • Good opportunity for growing crops
  • Moderate weather climate all year
  • Good water availability
  • Stay west of the mountains to protect against the masses who may migrate from the east coast. (Roughly ⅔ of the population of the United States is in the eastern half of the country)

Cons

  • This is a popular area for preppers, so it may get more populated in coming years

The Ozarks Region

Oklahoma, Missouri, and Northwest Arkansas

Pros

  • Good water availability (freshwater springs in Southern Missouri)
  • Agricultural area
  • Popular area for preppers

Cons

  • Risk of drought
  • Summers can be very hot

Low Population Areas of Florida

Pros

  • Endless small lakes
  • year round growing
  • no winter weather worries
  • large elderly population won’t be able to flee
  • The Gulf coast north of Tampa is less populated

Cons

  • Stay away from Orlando and right along the east coast, also South of Tampa to Everglades is densely populated.
  • Population density from south Florida will flee north so choose out of the path of looters and members of the golden horde
  • Building an underground shelter is unlikely due to high water table
  • Bugs and Insects are prevalent
  • In recent cases courts have ruled living off grid even with solar power and rainwater catchments violates the International Property Maintenance Code.

Eastern Panhandle of West Virginia

  • Balance of affordable, defendable, self-sustainable properties
  • Reasonable commute to D.C., far enough to not be targeted
  • Government of West Virginia is very hands off
  • Less oppressive regulatory government
  • Slightly higher taxes
  • Likeminded neighbors (freedom, individualism, self-sustaining lifestyles)
  • Friendly firearm state

Southern States from Eastern Texas to Georgia

Pros

  • Moderate weather and decent growing season
  • Most areas friendlier regarding firearms laws
  • East side of North Georgia mountains low taxes and few restrictions

Cons

  • May have stricter laws in some areas regarding septic and water line hookups

South Louisiana

Pros

  • Bountiful water supply with high groundwater
  • Year-round crops
  • Swamp provides access to food

Wisconsin along Lake Michigan

Pros

  • Resources are abundant
  • Short growing season
  • Clean well water
  • Inland lakes
  • Hunting
  • Kettle Moraine Forest has plentiful herbs (wild berries, asparagus, etc.)
  • Organic dairy farmers for cheese, milk, etc.
  • Excellent spring water

Cons

  • Land isn’t cheap

Consider Established Off-Grid Communities

Intentional Living Communities are not well-suited for everyone and most politically conservative preppers will want to steer clear of these areas simply due to the fact that residents are generally more left-leaning politically and some may even prohibit use of guns.

Keep in mind these communities are often “ruled” by a committee of residents so there may be rules or regulations you must agree to abide by in order to move in. But if are looking for a likeminded community in exchange for giving up control over your own property, then one of these may be a consideration for you.

Earthaven

  • North Carolina Mountains, outside of Asheville
  • sustainable focused planned community
  • solar and hydro power
  • 320 acres with more than 60 residents

Three Rivers Recreation Area in Central Oregon

  • more than 600 off grid homeowners
  • 4,000-acre community
  • solar power electric, satellite TV, high speed internet
  • variety of price ranges for homes

Breitenbush

  • more than 50 permanent residents
  • off grid community
  • heated by geothermal wells

Taos, New Mexico

  • Greater World Community
  • 1st Earthship division
  • solar powered
  • eco-friendly buildings of adobe or recycled tires
  • 634 acres of green space

Dancing Rabbit Ecovillage

  • Northeast Missouri
  • More than 40 residents
  • sustainable living focus
  • simple living, renewable energy, homes from reclaimed materials

So, the best way to choose the best small towns for preppers to live in is to make a list of all the issues and criteria that are important for your family and the lifestyle you want to create and then narrow your list down to three or four areas or regions.

Once you have that shortlist, explore the areas to find the best small towns for preppers in those areas. Be sure to consider state and local zoning regulations and building codes to avoid buying property in an area with restrictions that will keep you from living as you wish prior to a SHTF event.


via Modern Survival Online http://ift.tt/2ES8Rx2

Thursday, February 22, 2018

How to Make Your Own Soda

by Isabella

Delicious, bubbly soda is one of the greatest delights of modern life. But did you know you won’t have to give it up when SHTF? That’s right!

You can make your own refreshing soda drinks right at home, before or after a crisis! There are several different options for making your own soda, and all involve at-home culturing. Just like sourdough or sauerkraut, you can ferment sugars and fruits in water for an extended period of time and then carbonate in an airtight container to produce a delicious, bubbly drink.

Here are some of the most popular:

Water Kefir

Water kefir is made from water kefir grains which can be purchased commercially and fermented in water to create the water kefir drink. Note that these “grains” are different from milk kefir grains, which are a slightly different strain of bacteria. This is by far the easiest way to  make soda at home, all it takes is a jar, water kefir grains, some sugar, and maybe fruit or fruit juice of choice to flavor!

It only takes a day or two to ferment, and then another day to carbonate, and you can keep it going on your counter continuously or store the grains for future use. Read on for some instructions!

Kombucha

Kombucha is all the rage lately, and for good reason! It is delicious, very cheap and easy to make at home, full of incredible health benefits and–best of all–can be carbonated to a delightful fizz!

It is made using black tea, sugar, and a SCOBY, which is essentially a mushroom that grows in the concoction you brew with the other ingredients. No, really!

You can buy a SCOBY commercially, grab one from a friend (if they’re brewing their own kombucha, they’re no doubt up to their ears in it already!), or grow one by pouring ⅓ of a bottle of store bought kombucha into a jar, covering with cloth and a rubber band, and leaving for a week. When a filmy substance has formed at the top of the jar, there’s your SCOBY!

Ginger Bug

A ginger bug is a culture that you grow yourself, using ginger and sugar. It is how old-fashioned ginger ale and root beer were made, so it’s ideal for survivalists to know about! Using grated ginger, sugar, and water, you let ferment until they get bubbly, and then use as the culture for many types of sodas.

Whey Soda

Whey is very easy to use to ferment juice and quickly and easily make your own at-home sodas. Whey is the white, liquid byproduct of making cheese or yogurt or separating curds from, well, whey.

Most people don’t realize this, but you can actually use it to make soda! First, some whey is added to fruit juice and water, and then that is let to sit for a few days. Next, you can carbonate to make it bubbly!

These types of homemade sodas are all really handy to know about but it’s not just for their refreshing taste. They all happen to be rich in probiotics, which can help support a healthy gut. This is particularly important in a survival situation, as the elements and the distress of a disaster will be wreaking havoc on your immune system, and you might even have sick or injured people with you.

A healthy gut means a healthy immune system–so these delicious sodas are great medicine too!

Water Kefir Directions

OK, so that’s a rundown of some basic ways of making soda. Let’s get down to the nitty gritty now and make some ourselves!

Here’s how to make water kefir, the first type of homemade soda we mentioned.

First, you will need to find yourself some kefir grains. You can easily purchase these online, or find a local fermenting group online and see if anyone has some to spare. This is what they look like:

kefir grains

Once you have your kefir grains, you might need to activate them, by leaving them in a little bit of water with sugar for a few days.

When they are ready to use, proceed with brewing:

1) First, fill a ½ gallon jar until nearly full with filtered water. Additives like chlorine might inhibit the fermentation process, so filtered is the best.

2) Next, add ¼ cup white sugar and stir to dissolve.

3) Then, add your kefir grains.

adding kefir grains

4) Cover the jar with a paper towel, piece of cloth, or coffee filter, and a rubber band. Let sit for at least 24 hours.

5) After 24 hours, check to see if the solution is bubbly at the top. It won’t be carbonated, but you’ll see “activity”, meaning some light foaming at the top, bubbles on the inside, or any sign of life:

bubbles forming in homemade soda

6) Once the solution is “active”, you can strain out the grains and drink as it is–or move on to carbonation!

Carbonation:

1) Take your active water kefir, add some molasses, fresh fruit, or fruit juice. This will provide the sugar for fermentation.

2) Put in another ½ gallon jar with an intact lid and rim, or a flip-top bottle.

3) Pour the water kefir into your container:

water kefir in containers

4) Seal tightly:

homemade soda ready for refrigeration

5) Now, let sit for 12-24 hours. WARNING: There is a chance if left too long this could blow up. Check regularly for bubbles (if you remove the top it will “hiss” when it is properly carbonated)  and keep somewhere will no one will be harmed if the container explodes!

Once carbonated, refrigerate and enjoy!

A quick note: fermenting is an inexact science. You might find that you need to tweak the fermentation time, amount of ingredients, containers, etc. to get the desired results.

Perfect your process while you still have the internet, which is full of handy resources for making water kefir and other delicious fermented sodas!

diy soda pinterest


via Modern Survival Online http://ift.tt/2GASVj8

At 71,572 KM, You Won’t Beat This LoRa Record

A distance record for LoRa transmission has been set that you probably won’t be able to beat. Pack up your gear and go home, nothing more to achieve here. At a superficial reading having a figure of 71,572 km (44,473 miles) seems an impossible figure for one of the little LoRa radio modules many of us have hooked up to our microcontrollers, but the story isn’t quite what you’d expect and contains within it some extremely interesting use of technology.

So the folks at Outernet have sent data over LoRa for that incredible distance, but they did so not through the little ISM band modules we’re used to but over a suitably powerful Ku-band uplink to a geostationary satellite. They are also not using the LoRaWAN protocols of the earthbound systems, but simply the LoRa modulation scheme. So it’s not directly comparable to terrestrial records such as the 702 km we reported on last year, and they are the first to admit that.

Where their achievement becomes especially interesting though is in their choice of receiver. We are all used to Ku-band receivers, you may even have one on your house somewhere for satellite TV. It will probably involve a parabolic dish with a narrow beam width and an LNB whose horn antenna is placed at its focus. It would have required some skill and effort to set up, because it has to be pointed very carefully at the satellite’s position in the sky. Outernet’s mission of delivering an information service with the lowest possible barrier to entry precludes the extra expense of shipping a dish and providing trained staff to align it, so they take a very different approach. Their receiver uses either an LNB horn or a small patch antenna pointing at the satellite, with none of the dishes or phased arrays you might be used to in a Ku-band installation.

You might wonder how such a receiver could possibly work with such a meagre antenna, but the secret lies in LoRa’s relatively tiny bandwidth as well as the resistance to co-channel interference that is a built-in feature of the LoRa modulation scheme. Even though the receiver will be illuminated by multiple satellites at once it is able to retrieve the signal and achieve a 30 kb/s data rate that they hope with technical refinements to increase to 100 kb/s. This rate will be enough over which to push an SD video stream to name just one of the several examples of the type of content they hope to deliver.

It’s likely that the average Hackaday reader will not be hiring satellite uplink time upon which to place their LoRa traffic. But this story does provide a demonstration of LoRa’s impressive capabilities, and will make us look upon our humble LNBs with new eyes.

Via ABOpen.


via Radio Hacks – Hackaday http://ift.tt/2BGRf8G

Lucid Dreaming | Please help my daughter understand this dream

I'm writing to interpret my 11 year old daughter's dream. My mother (her gma) who she was very close to and who's been a parent to her all her life recently passed away. This dream left my daughter very upset, very quiet and distant. Said it was the worst dream ever.. she described it like so..


A war is happening and she and her family have taken shelter. She can hear loud bombs going off and low air planes. While in this shelter she sees her grandma in the distance,she runs towards her to hug her and as she touches her she transforms/morphs into a man, a stranger. It keeps happening thru out the dream. She sees her grandma, goes to touch her and she turns into a stranger. She says she is freaking out in the dream saying 'im hallucinating, I'm hallucinating'

What's your opinion


via Lucid Dreaming - Dream Views - Attaining Lucidity http://ift.tt/2Ccuk5X

Wednesday, February 21, 2018

An Especially Tiny And Perfectly Formed FM Bug

It used to be something of an electronic rite of passage, the construction of an FM bug. Many of us will have taken a single RF transistor and a tiny coil of stiff wire, and with the help of a few passive components made an oscillator somewhere in the FM broadcast band. Connect up a microphone and you were a broadcaster, a prankster, and probably set upon a course towards a life in electronics. Back in the day such a bug might have been made from components robbed from a piece of scrap consumer gear such as a TV or VCR, and perhaps constructed spider-web style on a bit of tinplate. It wouldn’t have been stable and it certainly wouldn’t have been legal in many countries but the sense of achievement was huge.

As you might expect with a few decades of technological advancement, the science of FM bugs has moved with the times. Though you can still buy the single transistor bugs as kits there is a whole range of fancy chips designed for MP3 players that provide stable miniature transmitters with useful features such as stereo encoders. That’s not to say there isn’t scope for an updated simple bug too though, and here [James] delivers the goods with his tiny FM transmitter.

Gone is the transistor, and in its place is a MAX2606 voltage-controlled oscillator. The on-chip varicap and buffer provided by this device alleviate some of the stability issues suffered by the transistor circuits, and to improve performance further he’s added an AP2210 low-dropout regulator to catch any power-related drift. If it were ours we’d put in some kind of output network to use both sides of the differential output, but his single-ended solution at least offers simplicity. The whole is put on a board so tiny as to be dwarfed by a CR2032 cell, and we can see that a bug that size could provide hours of fun.

This may be a small and simple project, but it has found its way here for being an extremely well-executed one. It’s by no means the first FM bug we’ve shown you here, just a few are this one using scavenged SMD cellphone parts, or this more traditional circuit built on a piece of stripboard.


via Radio Hacks – Hackaday http://ift.tt/2FjzwDR

Saturday, February 17, 2018

AI Listens to Radio

We’ve seen plenty of examples of neural networks listening to speech, reading characters, or identifying images. KickView had a different idea. They wanted to learn to recognize radio signals. Not just any radio signals, but Orthogonal Frequency Division Multiplexing (OFDM) waveforms.

OFDM is a modulation method used by WiFi, cable systems, and many other systems. In particular, they look at an 802.11g signal with a bandwidth of 20 MHz. The question is given a receiver for 802.11g, how can you reliably detect that an 802.11ac signal — up to 160 MHz — is using your channel? To demonstrate the technique they decided to detect 20 MHz signals using a 5 MHz bandwidth.

Their answer was to create training data representing a limited bandwidth sample of the signals of interest. Then using computer learning techniques, the system discovered how to detect signals of interest and reject the others. The results were quite good with detections well below the noise floor when using the full 20 MHz range. However, even at 5 MHz bandwidth, the results were pretty impressive.

This actually isn’t the first time we’ve seen a system that learns about RF signals. While it isn’t quite radio, we also think emulating Alan Turing is a pretty neat trick.


via Radio Hacks – Hackaday http://ift.tt/2EzeJex

How and Where to Hide Your Guns

by Tara

Hiding your guns, extra ammunition, cleaning kits, and repair kits, is a great idea for many reasons. Not only is finding great hiding spot important when tucking away firearms, you also must prepare the weapon to weather life underground or for exposure to the elements so it is still functional an ready to fire after you retrieve it.

When hiding weapons, you must take into consideration how deep you are burying the cache, what type of material the housing unit is comprised of, and not just possible exposure to water, but moisture, a well.

Reasons to Hide Your Guns

The decision to hide guns at all, has sparked some very heated debate on the survival boards. Some posters called it a ridiculous act at best, and an exercise in futility, at worst. Perhaps the reason some folks calling themselves preppers mocked the idea of hiding weapons is because they assumed the motivation behind such an act was only to protect them from confiscation. The posters said if the government was confiscating guns, they would find the hidden ones, you would get caught when you shoot it, and severe punishment, maybe even death, would be levied on those Americans caught hiding guns.

One poster aptly said if the government started confiscating guns, most gun owners probably would already have been shot down while holding their favorite firearm in their hands. I am definitely a subscriber of the “cold dead hands” mindset, but that does not mean I believe neglecting to hide guns, for a vast array of reasons, is ever a bad idea.

While living for eight long years under an increasingly socialistic liberal and anti-Second Amendment regime, concrn about gun confiscation were constantly surfaced by gun owners for largely logical regions, based upon the way the political winds were blowing at the time. Today, we have a gun-loving patriot in the Oval Office, but since the occupant of the People’s House can change every four years, I doubt the worries about gun confiscation ever truly dissipate.

After all, ammo sales just spiked enormously (315 percent, in fact)in California in preparation for a new strigent anti-Second Amendment law went into place. The first day of 2018 brought with it restrictions on ammunition purchase in the Golden State. Now, gun owners can no longer purchase ammo online and have it sent to their homes. Instead, the ammunition is send to a licensed gun dealer and the buyer can only have it handed over after going through a background check.

Besides government gun confiscation, there are a plenty of good reasons to hide some of your guns and ammunition.

Theft

During both good times and bad, like a SHTF scenario, a single attacker or entire marauing horde could get inside your home and clean you out…quickly.

Fire

If you do not have enough space in your safe for all of your guns, ammo, cleaning kits, and firearms repair parts, as well as your bows and arrows, they would be either ruined or burnt to a crisp during a fire. The odds of fires starting and spreaing rapidly will vastly increase during a doomsday disaster.

Survival

If you have to flee your homesteading survival retreat, prepper compound, or bug in location, either temporarily or permanently, you will want to be able to get your hands on guns and ammo as soon as possible.

Get Me Home and Bugging Out

If you work or go to school away from your bug in location or bugout retreat, hiding caches of guns, ammo, cleaning supplies, reloading supplies, and a repair kit along the routes you may travel to get there only makes good sense.

Where to Bury or Hide Your Guns

• In a secret room that is fireproof
• Handguns can be hidden in voids and false bottoms cut into kitchen cabinets, the floor, dresser drawers, and closet.
• In decoy outdoor furniture
• Fake straw and hay bales
• Inside junk cars and appliances to help avoid being discovered by metal detecting devices.
• Buried in the ground anywhere that is not likely to flood.
• In a hollow log or tree.
• Inside a wood case secured firmly inside a couch frame so it will not be detected or rattle when the couch is moved or flipped over by thieves. The best way to prevent detection of the case hidden inside the couch frame is to completely remove the fabric frame covering on the bottom of the couch and replace it with a new liner after securing the case inside.
• In a case inside bags of livestock feed
• Commercially manufactured furniture designed specifically to hide weapons or other valuables.
• In a waterproof container sunk inside your well, rainwater catchment system, or pond.
• Soda pop, deodorant, hairbrush and similar types of small decoy safes are great for hiding ammo and even derengers.
• Fake light sockets are too small to hide guns, but they can hide ammo and keys to locked caches.
• Using the inside of your staircase as a hiding spot would give you a lot of storage. Making sure the opening to the stairs that lift up to reveal the hidden nook make this spot for a weapons cache vulnerable. If you go this route, hide some type of valuabe in the opening to the thieves or marauding horde members think they have struck pay dirt and then hide handguns and ammo in false bottoms on the underside of stairs further back and up and away from the obvious storage spot.

How to Bury Your Stuff

There are pros and cons of every suggestions on this list. What matter far more than where you choose to hide your gun, I am sure you have tons of great covert spot picked out already, is HOW you choose to hide your firearms.

Buring caches made out of PVC pipe because it is waterproof has become a very popular way to hide firearms and other valuables. Yes, when sealed properly, a PVC pipe is definitely waterproof, but that does not mean the inside of the pipe will not fill with moisture, be impacted by moisture if buried above the frost line, or worse yet, be found by someone (be it a government confication agent, metal detecting hobbyists, or a member of a marauding horde) with a metal detector.

When burying a weapons cache inside any type of case in the ground, you should always bury some type of metal above and/or around it.

Bury something of far lesser value also made of metal above your hidden weapons so the person swinging the shovel or metal detector will think they already found the treasure and stop digging. You can also half-submerge or bury in the dirt common junk items, like old car parts, scrap metal, etc. for the same purpose.

Protecting Hidden Guns From Moisture

Preventing moisture from damaging your the ammunition and guns hidden in your survival cache should be a top priority. If you do not do this right, you could dig for an hour with your bare hands to get to the life-saving weapon only to find a ruined piece of junk.

• Bury or hide the weapon in a spot where the air temperature will be as stable as possible.
• Make sure no two pieces of metal are touching each other.
• Always bury the gun cache below the frost line to decrease both dramatic temperature changes.
• Shrink wrapping or vacuum sealing the gun and the ammo is highly recommened.
• Wrap the cache in some type of insulation. Depending upon your climate, wrapping the guns and ammo in some type of insulation might be wise as well. You may have to dig up or collect your weapons cache during warm winter month to remove the insulation to avoid “sweating.”
• Store silicia gel or desiccant – a hygroscopic substance that is often used as a drying agent, with your ammunition, especially if the ammo is several years old already or is going to be stored for the long term.
• Wrap the boxes of ammo and accompanying desiccant inside a towel together before dropping them into your cache or hiding spot – even if you are using a metal ammo can as a weapon cache.
• Tupperware containers, large plastic totes, and plastic coolers all make sturdy and weatherproof caches. You will be able to store wider items in a cooler than you can a piece of PVC pipe – at least PVC pike portable enough to pack into the woods with you to hide.
• Always seal the lids on your PVC pipe or plastic storage containers serving as a weapons cache with silicone or a similar sealing agent. Duct tape is the prepper’s best friend, but will not get the job done as well as silicone when it comes to protecting the contents of the cache from moisture.
• Oil or grease your firearms up well before putting them in a weapons cache. Over oiling or greasing them is actually best. Gently but firmly wrap the oiled guns or rifles in a towel before putting them in a cache to hide.
• Grease up you empty ammo mags and wrap them in a towel as well, before storing them in a weapons cache – never store ammo in the mags or you will have metal touching metal and that is not a good thing during long term storage.
• Invest in Pelican case if burying a shotgun or rifle, they provide a great protective covering for the essential self-defense and hunting weapons.
• Store not just ammo and mags but handguns in your metal ammo cases as well. They are large enough to hold ample mags and ammo and still accommodate space for your pistol. Keeping all of the item in one compact case will make for a whole lot less digging when you rush to find them. Army and Navy depot still sell metal ammo cases for a reasonable price, as do most gun and agricultural stores, like Rural King and Tractor Supply.
• The deeper you have to dig to get well below the frost line, the more durable your cache must be. Building a wood or metal box around a plastic cache might be necessary, to protect the content inside.
• When you determine what the frost line is for your area, dig one foot beyond it just to make sure you are not only correct, but give a little extra protection to the weapons and related materials, in your cache.
• Consider breaking the gun down, greasing all part, and wrapping them separately before storing them in a cache. It will take you a minute or two to put them back together, but you will likey be dealing with far fewer oxidation issues this way. If at all possible, remove wood stocks from your firearms before storing them to better preserve them.
• Pack sensitive weapon accessories, like scopes, flashlights, and night vision attachments with a lot of desiccant and insulation in a cache you have sealed abundantly well with silicone.
• Some gun owners have had great success with taking rounds of ammo out of their cardboarad boxes and storing them in vacuum sealed bag with desiccant or silicia gel. You run the obvious risk of having metal touch metal with this type of storage, but according to the folks who had tried it for the short term (about 12 months) the gel or desiccant did its job well and there were no moisture or corrusion problems.
• If you are going to bury the weapons cache and plan not to touch it for at least five to 10 years, bury it at least five feet below ground to allow for erosion, animal digging, flooding, etc. Thing will work their way out of the ground over time. We call all the cool junk we are still finding around our 56-acre survival homesteading retreat “Terry’s Treasures” in honor of the former owner. Some of the cool junk, things as large as livestock gates, were simply allowed to lay where they fell and were reclaimed by the earth over time. It took several weekend spend working on our farm road with the tractor and our backhoe after heavy rain to find treasures inching their way back out of the ground.
• Stashing gun repair tool and a hefty cleaning kit in your weapons cache is highly recommended. You need to be prepared for a gun that is not in full working order, at least not immediately and to deal with ample surface oxidation.
• Due to movement of the soil, it is not recommended to leave a cache in the same underground spot for more than a couple of years.
• If you are planning on leaving a weapon cache underground without digging it up to check on it every few years, grease the heck out of every single crevice of the rifle, shotgun, or handgun before wrapping it up and putting it in the cache – even if you are using a Pelican case.
• Nitrogen-purging, ample grease, or cosmoline might be necessary, for the preservation and functionality of the firearm, if it has been stored for a decade or more.


via Modern Survival Online http://ift.tt/2Hm1OhP

Thursday, February 15, 2018

Important Skills to Survive During and After an Avalanche

by Ryan

Skiing, snowboarding, or just climbing an untouched snow canvas is about the best thing ever. Unfortunately, we know the bad side of winter sports and mountain expeditions: avalanches.

As any snow guide will tell you, an avalanche is the most ruthless treat that nature can throw your way. Ski resorts have been buried under tons of snow and 25 people succumb to avalanche-related accidents each season on average.

Although this number seems pretty low, you don’t want to be the one to take it higher. That’s why it pays to have several important skills that could help you survive during and after an avalanche.

What causes an avalanche?

Although avalanches do occur naturally, studies show that a large proportion is triggered by the skiers, snowboarders, or climbers themselves. Animals, extremely low temperatures, and earthquakes are other known causes.

Sure, snow trucks on the road below the slopes could also cause mild tremors that could break the hell loose on you.

What should you do in case of an avalanche?

Jump upslope

If the avalanche starts happening right on your feet, the chances are that it’s you who have triggered it. Your reactions in the first few seconds determine how huge this misfortune will impact on your survival.

Safety experts recommend jumping upslope beyond the fracture line. Well, this might be a little bit hard to do since fracture lines develop and start racing down the slope in a split second.

But several people have survived dangerous avalanches just by doing this. Jumping uphill protects you from being caught in the moving mass of snow.

Move to the sides

In the event that the avalanche starts above you, the wisest thing to do is to begin moving to its sides as fast as possible.

Avalanches are fiercest at the center. It’s also pretty difficult to fight your way out if you are caught in the middle since this is where the snow is at its highest peak and volume. Being caught around this place could lead to fatalities and be buried too deep to survive.

However, if you are quick enough to dash to the side, you could avoid being swept altogether. Take care though not to lose your footing as you do so.

If time does not allow you to get out of the way completely, then the next thing will be to protect yourself from being swept.

Ditch your backpack

At this point, what’s more important is getting away with your life. Losing anything that adds weight to your body adds to your odds of surviving. Letting go of your backpack, climbing poles, and any other heavy equipment makes you more buoyant. This minimizes the chance of being buried too deep into the snow.

By the same breath, letting go of some of your light items will increase your chance of being saved in case other rescuers locate them on the surface of the snow.

But wait. I don’t mean losing anything that might increase your survival chances including an avalanche shovel, transceiver, or a probe. These will come in handy in case you get buried. So, losing them can be a counterproductive move to increase your survival chances.

Hold onto a tree

The ability to grab onto a tree or a rock depends on whether or not you’ve already being swept off your feet and the velocity of the snow.

If you are near a tree during the first few seconds and it’s a less powerful avalanche, grabbing it may save your life. Even if the fast-moving snow roughs you up, holding on for a longer time minimizes the probability of being buried too deep.

But do know that the roughest avalanches could uproot trees and rocks. Again, if you’ve already being swept downhill, trying to grab stationary objects can result in serious injuries that might make things even more difficult for you.

Crouching behind trees and rocks in a big avalanche is also somewhat dangerous since these stationary objects tend to slow the snow forcing it to pile and bury anything around them.

Backstroke uphill

In case the snow topples you, the National Centre for Snow and Ice advises thrusting upward using swimming motions. This isn’t easy. But it has been found to increase survival rates in dangerous avalanches.

To do this, you want to dig your feet to the bed of the avalanche and get a foothold to slow your descent. Note that your feet should be facing down the slope to allow you to backstroke with your arms.

This is quite different from what you may have heard: body surfing the snow. You will be at a higher risk of being buried if you try to body-surf an avalanche since this technique tends to take you to the heart of the fast flowing snow.

The turbulent snow at the foot of the avalanche could disorient you and minimize your ability to dig your way out if you are buried.

On the other hand, backstroking keeps you afloat. This enables you to keep your head in the air. It also increases your chance of not being buried too deep.

What if you get buried anyways?

 Know the way up

In the event that you are buried, stop fighting against the snow and strategize on how you will increase your chances of getting out.

Keeping one hand pointed toward the surface of the snow will help you not to lose focus of the way up. Don’t worry in case the turbulence makes this impossible though.

The spit test is another sure way of knowing the direction of the surface. Simply clear some space around your face and spit. Thanks to gravity, the liquid should flow downwards- the opposite direction is the way up.

Create a pocket of air

Once you are buried, your biggest threat is asphyxiation- being deprived of oxygen. Lack of air plus the freezing condition under the snow leaves you with about 15 minutes of survival. But you could take this to around 30 minutes by increasing the amount of air around you.

Drowning in snow is quite different from drowning in water. This is because there is a lot of air around you. Putting your arms across your face helps in creating a pocket of air that may allow your rescuers enough time as they dig towards you. Pushing the snow with your body also compacts it to create more room around you.

Remain calm albeit rather hard

If you are lucky to be just a few inches from the surface, you could use your hands or avalanche shovel to climb out.

However, fighting out of that trap might be hard if you are buried deep in the snow. So, rather than jeopardizing the little energy that you have and the oxygen within your air pockets, it would be advisable to remain cool and wait for rescue.

This is the last thing that you’ll want anyone to tell you after being clobbered by debris and hard snow right, left, and center. But it could be your last line of defense. Remaining calm helps you to breathe slowly and conserve energy and air as you get rescued.

Shout for help

If you can hear the rescuers within where you are buried, shouting may help them locate you much faster. This eliminates their likelihood of digging at the wrong place. Remember that every second counts in this struggle.

How to increase your safety during an avalanche

Take a course on avalanche safety and survival skills

The best way to increase your survival rate on the slopes is by preparing adequately for an avalanche and knowing what to do in the event of one. It’s, therefore, important to take an avalanche course before charging out into the backcountry.

Among other things that you’ll learn in this course is how to scout for safe slopes and how to tell the likelihood of an avalanche. Knowing how to dig and rescue a snowboarder or skier who has been buried is crucial for the safety of the team too.

Carry the right survival equipment

No matter how skilled you are, avoiding being buried during an avalanche is never 100% guaranteed. As such, you need to arm yourself with a few tools that increase your survival odds. They include;

Avalanche beacon

This is one piece of safety gear that you don’t want to head to the slopes without. Also known as a transceiver, this device sends signals at 457 KHz to other beacons to help locate the wearer.

The best part about this gadget is that it can switch from sending to receiving signals from other transceivers. It increases its beeps as you get closer to another beacon.

Worth pointing out is that an avalanche transceiver should always be harnessed to your body rather than being put in your backpack. This minimizes the chances of losing it in case you lose your bag.

Helmet

Most fatalities in avalanches occur when the victim sustains injuries on the head. If you are swept over by an avalanche gliding at 50-80 MPH, you become pretty much vulnerable to being clobbered by tree trunks and rocks among other debris.

A helmet minimizes the risk of head trauma that could make you pass out. This increases your ability to fight more and more.

A probe

This is a collapsible, lightweight stick that helps in determining the current snowpack in case a friend is buried. It also helps you identify the ideal place to start digging.

An avalanche shovel

While this tool is of much help when digging for a person who has been caught in the snow, you could also use it to dig your way out. Importantly, it should be collapsible, straightforward to use, and high-volume.

Airbag

No, I don’t mean taking your car’s airbag to the snowy slopes. I mean an avalanche airbag. This is a balloon system that is incorporated to your backpack. It has an activation handle that inflates it when pulled. Doing this in an avalanche keeps you afloat thereby minimizing the risk of being buried.

Conclusion

Avalanches are hard to predict as they are hard to fight. But you could increase your odds of survival by being prepared for it before heading to the backcountry. The right way to do this is by taking a safety course and arming yourself with the right tools always.

Do you have other skills that you would like to share with other skiers, snowboarders, and climbers? Have you ever been caught in a raging avalanche? We would like to hear about your experience and how you survived in the comments!

About Ryan

Ryan is founder of cleverhunters.com a blog about outdoor activities and hunting at night. He writes a lot of articles about night hunting tips and review related products. You can also find useful information about outdoor activities in his blog.


via Modern Survival Online http://ift.tt/2ErAm06

Wednesday, February 14, 2018

This IS Your Grandfather’s Radio

Tube radios have a certain charm. Waiting for them to warm up, that glow of the filaments in a dark room. Tubes ruled radio for many decades. [Uniservo] posted a video about the history and technology behind the 1920’s era Clapp-Eastham C-3 radio. This is a three-tube regenerative receiver and was advanced for its day.

If you are worried he won’t open it up, don’t despair. Around the ten minute mark, your patience will be rewarded. Inside are three big tubes full of getter and bus bars instead of wires. Add to that the furniture-quality case, and this is a grand old radio.

One interesting thing about this receiver is that it uses a special kind of transformer known as a variocoupler where a coil rotates inside another to adjust the regeneration. It turned out that the tubes were newer than the radio, so [Uniservo] replaced them with more age-appropriate tubes.

Unfortunately, the radio is silent for now because of open audio transformers. We hope he’ll get it working and make another video of it actually operating.

Regenerative receivers have pretty good amplification performance with a low parts count. That’s because the amplifier operates near oscillation where the gain at the selected frequency is very high. It is pretty easy to build your own using technology a little newer than these tubes. If you want to dive into the theory, we’ve done that, too.


via Radio Hacks – Hackaday http://ift.tt/2o6eEYB

Tuesday, February 13, 2018

Returning A Lost Sheep To The NASA Fold

About three weeks ago, we reported that a satellite enthusiast in Canada found an unexpected signal among his listening data. It was a satellite, and upon investigation it turned out to be NASA’s IMAGE satellite, presumed dead since a power failure in 2005 interrupted its mission to survey the Earth’s magnetosphere.

This story is old news then, they’ve found IMAGE, now move on. And indeed the initial excitement is past, and you might expect that to be it from the news cycle perspective. But this isn’t the Daily Mail, it’s Hackaday. And because we are interested in the details of stories like these it’s a fascinating read to take a look at NASA’s detailed timeline of the satellite’s discovery and subsequent recovery.

In it we read about the detective work that went into not simply identifying the probable source of the signals, but verifying that it was indeed IMAGE. Then we follow the various NASA personnel as they track the craft and receive telemetry from it. It seems they have a fully functional spacecraft with a fully charged battery reporting for duty, the lost sheep has well and truly returned to the fold!

At the time of writing they are preparing to issue commands to the craft, so with luck by the time you read this they will have resumed full control of it and there will be fresh exciting installments of the saga. Meanwhile you can read our report of the discovery here, and read about a previous satellite brought back from the dead.

Picture of IMAGE satellite: NASA public domain.


via Radio Hacks – Hackaday http://ift.tt/2ChlDmv

Friday, February 9, 2018

Lucid Dreaming | Getting clear about MILD

I am just fine tuning LaBerge's MILD practice, and I am looking for some clarification.

So I see that the idea is to "re-watch" the dream you've just had, but this time imagining yourself turning lucid in it.

Since most dreams have a string of possible moments where this could happen, is it better to pick just one moment in the dream and replay that single one over and over again ? Or to watch through the whole dream, imagining myself turning lucid at each of those moments ? i.e turning lucid several different times, in response to the various dream signs that I might have picked up on ?"Here's me turning lucid when I met my old school friend, here's me turning lucid when we were served weird food at the restaurant, here's me turning lucid when I realise we're both dressed as batman".

I tend to do the second - mainly because I enjoy variety ! But maybe it makes me a bit less focused than taking the "repeat the same moment multiple times" approach ?

So what do other people do ?


via Lucid Dreaming - Dream Views - Attaining Lucidity http://ift.tt/2EU7YoC

Thursday, February 8, 2018

Lucid Dreaming | EMDR and lucidity

I'm having some (free) EMDR - Eye Movement Desensitization and Reprocessing Therapy to deal with some bullying issues from my childhood.

Several years ago I tried very hard to lucid dream but failed to achieve very much. Then the night after my second session of EMDR I found myself lucid twice in the same night with some amazing visuals, but not much control.

Just had my third session yesterday and last night I got lucid again, twice. The second dream was the longest ever and I did all sorts and again the visuals were breathtaking - I looked at tree bark and then the flowers and the colours were just stunningly beautiful. I threw fireballs from my hands. I said my own name and knew exactly who I was in the dream. I can't wait for my next EMDR session next week!

What is this all about? It seems to be a very powerful way to induce lucid dreaming...

Anyone else experienced this?


via Lucid Dreaming - Dream Views - Attaining Lucidity http://ift.tt/2nQ2Vx8

Wednesday, February 7, 2018

5 Easy To Grow Plants For A Survival Garden

by Contributing Author

One of the best ways to be prepared for the many uncertainties that life hurls at us is to grow our own food. Gardening can be a vital skill to learn ahead of time, before a disaster strikes. There can be a decent learning curve if you’ve never raised your own food before. You need to take the time now to learn how to grow your own food! Luckily, if your goal is to raise a survival garden that will keep you alive in an emergency there are a handful of easy to grow plants that can help sustain you during a disaster, and are easy to save seeds from to plant from year after year.

Here are 5 Easy to Grow Plants For a Survival Garden

For all of these plants, make sure when you purchase your initial seed stock that you pick open pollinated types. This means that you can save your seeds every year, and even build up a stock of seeds in your freezer in case of a crop failure, all with just one, single time purchase. Hybrid or F1 varieties of seeds will produce seeds, but when you plant them, you will not necessarily get the same variety that you had the first year. Another advantage of saving your own open pollinated seeds is that the plants will adapt over time and become more resilient to your particular climate.

Don’t be discouraged if your first attempts don’t always succeed. Try again the next year, and the next, until you’ve mastered a few essential crops. Some people seem to have a natural green thumb, but there are others of us who need to learn through trial and error. If you’re new to gardening in general, and not sure where to start, check out Easy Ways To Get Started On A Spring Garden for ideas on how to prepare now, even if it’s too chilly to start planting.

Beans

One of the best resources to have in a disaster situation is legumes, because they are a complete protein source when paired with other foods. Beans are also very easy to grow, and can produce a large crop. There are two types, bush beans and pole beans. Bush beans will not need any sort of trellis, and so are probably the better choice for a scenario where you may not have many resources available. Of course if space is limited in your survival garden (such as an apartment patio), pole beans will make more use of your vertical space.

You can also choose between snap beans or dry beans. Snap beans are meant to be eaten fresh and green, before the bean inside has matured. Dry bean varieties are most likely the best choice for an emergency situation as you can store them for long periods of time without cooling or preserving.

Beans should be planted once the soil has warmed up a bit, and after there is no chance of a frost that will kill them. You can keep planting them in batches every few weeks until the middle of summer in order to increase the amount you harvest and grow all the way until your first frost in the fall.

Plant them twice as deep as they are wide, and space them four inches apart. You can harvest the green pods as soon as you’d like to eat fresh. The plant will produce more if you pick them. If you leave them on the plant the pods will dry and you can harvest dried beans. Shell them all, and save the biggest and nicest ones for replanting. Let them all air dry at room temperature for two weeks, and then store them until it’s time to eat!

Potatoes

Potatoes are another hearty, filling food that can keep you going even with very other nutrients available. Thankfully they are quite easy to grow. In fact, you can even grow potatoes from sprouting grocery store potatoes, although you will probably get more if you purchase seed potatoes developed for your climate.

No need to wait for your ground to warm up for potatoes, you can start as soon as it’s defrosted enough to dig. Plant your potatoes with two-threes eye per piece twelve inches apart. Cover them with a bit of soil. As your potato plants grow taller, mound soil or straw around the stem. This encourages the plant to produce more roots, and more roots means more potatoes. You’ll want to keep any developing potatoes completely covered from sunlight so they don’t turn green and toxic.

When your plants start producing flowers you can eat the small “new” potatoes. If you want bigger potatoes, wait until the plant starts to die back in the fall and carefully dig the potatoes out. You can save potatoes to plant again the next year. Try not to plant them in the same spot though, because it can cause diseases to build up in your soil. Once you have a disease problem, it’s best to start over with new seed potatoes if you can.

The handy thing about potatoes is they can be planted just about anywhere, in any sort of container. You can dig a trench and plant them in the soil. They grow in containers as well. Or you could even fill a garbage back with a mixture of straw and soil and grow them in that! Some people recommend growing potatoes in straw only, but they do grow a bigger crop if there is a more acidic environment, so mix in as much soil as you can.

Tomatoes

Tomatoes are a popular first plant for most gardeners and there’s a reason why. They’re are easy to grow in many areas, prolific, and are delicious when eaten or preserved in many different ways. Their bright red fruit can be an important burst of nutrition in a less than ideal circumstance, and even a basic salsa or ketchup can make the most boring of foods a little more bearable.

Tomatoes are generally started indoors and then moved outside once the weather has warmed up. If you live in a warmer area they may spring up all by themselves as volunteers in your garden. There are many different varieties of tomatoes for all sorts of different purposes, so you may want to try a few before deciding which variety to really focus on and save seeds from.

When planting your tomatoes plants outdoors, space them two feet apart in a sunny spot and plant them deep into the ground. Tomatoes are related to potatoes, and will also grow roots out of the stem. Planting a bit of the stem underground helps your plants to develop a strong root system and to be more resilient. Water them deeply once a week, and keep picking the fruit all season long!

To save tomato seeds, cut your best tomatoes in half and squeeze the pulp and seeds into a cup or bowl. Add a few inches of water and let it ferment for two days. Rinse off the pulp and spread the seeds out to dry before storing them.

Lettuce or Chard

It’s a good idea to have a leafy green of some sort in your survival garden. Fresh salads will be quite the luxury during a disaster! Salad greens can be grown in containers, directly in the ground, in shady spots, and even indoors! Some of them will even reseed themselves without any help from you and come back year after year.

Plant your lettuce all season long so you have a continuous supply of it. Keep the seeds and seedlings moist, and keep them in the shade to prevent your greens from bolting. You can pull or cut the lettuce when it’s big enough to eat. Sometimes if you cut it, the roots will send out more leaves and you can get a second or third crop from the same plants.

Make sure to leave at least one lettuce plant to harvest your seeds from. The flowers will produce seed heads, and the trick is to harvest the seeds when they are fully dry, but not to lose the whole batch in a strong wind! You can cut the seed heads, and let them dry in a bag to avoid losing them all. Once they are completely dry shake the seeds head out to separate the seeds from the stalk and little bits of fluff.

Squash

Well, we all know the jokes about zucchini being so prolific you have to sneak onto neighbors porches just to get rid of, but an abundantly producing food source can be a real boon. If you pick a winter squash to grow such as butternut or pumpkin you can store it through the winter, and even harvest the seeds as well.

Plant your squash seeds about one inch deep, with about 2-3 seeds every few feet. The exact spacing depends on what type you are growing. Squash likes to grow in heat, so make sure your soil has warmed up and there’s no chance of a frost killing it. Water it without getting the leaves wet, but try to keep the soil moist.

If you are growing softer skinned summer squashes like zucchini, harvest them when small, and the plant will grow more. If you are growing thicker skinned winter squash, wait until they are fully developed before picking them. Once the vines have died, you’ll know it’s time. Squash can cross pollinate with each other, so if you’re going to save your seeds, you’ll need to pick just one variety to grow in your garden. Summer squash will need to be left on the vine so that it’s seeds will mature. Winter squash seeds are mature when the squash is. Just scoop out the seeds, wash off any string or pulp and dry them.

Growing these five plants now will help you learn the skills you need to provide yourself and your family with food in the future. These easy to grow plants can keep you well fed and alive even with very few other food sources available. Learn how to start your own survival garden and save the seeds this year!


via Modern Survival Online http://ift.tt/2FT3DkB