I can’t do the traditional WILD with keeping the awareness during the whole process. I either can’t fall asleep or can’t do the transition. The way how I am able to “WILD” is by setting an intent to notice that I am dreaming later, when the dream starts (or to notice the end of the transition). Although it sounds a little bit MILDish, I still do it as WILD, but the anchor keeping me connected with the real world is as subtle as it can be.
Today, I was unable to sleep, tired after several hours of low quality sleep (including a string of FAs, with one very low quality lucid), I decide to get up but I feel groggy, so I just put a big cushion under my head and close my eyes again, thinking that I could try to WILD or just closed my eyes and watch HI/dreamlets for a while.
My mind wanders, I daydream a bit and watch HIs and dreamlets and minidreams and my daydreaming mixes with it. It’s all unstable, going from thought to thought, from image to image. I interact with it through my daydreaming. I am keeping my consciousness but I would say I lost “situational awareness”.
At some point, there was some music and I said to myself, that this music is in my head and not outside, so I can try “listening in” (I read something Raduga-related the day before but only briefly). I was able to make the music louder and I started to see outlines of a room through my eyes (a different room than my real room). It worked! I also tried some phantom movements. But it receded slightly and I felt myself in a bed again (a different bed than my real bed, this was a dream bed). I focused on the music again and it again worked but my vision was still bad and I had an idea to open my dream eyes, I did it and it worked. Then I slowly tried to get up, worried about moving in reality, but at that point, I realized it is more stable than I thought and simply got up, I was lucid and standing in the room. Then I had a short LD.
After waking up from this at first, I thought I WILDed but then I realized, that I actually did the whole "transition" while I was already dreaming. And that what I thought was a HI/dreamlet was actually a dream. Maybe an unstable and just formed dream, but a dream. The whole experience took between 20 and 25 minutes.
We have these definitions:
WILD - going directly to the dream, staying conscious for the whole time
DILD - realizing “I am dreaming” after a period of unconscious sleep or in the middle of the dream
I see the possibility of something in-between (getting to the dream after a period of semiconscious, confused, HI-drunk state). It’s like setting for yourself a path of breadcrumbs and then following the path. Never losing the path but somewhat forgetting what I am doing and what the breadcrumbs mean, just knowing that there is something good at the end of the path.
A similar in-between technique for me is VILD. It can have these outcomes for me:
a) I slip into a semi-lucid dream, I think I am still daydreaming but I am in fact dreaming.
b) At some point, I realize “I am not visualizing this” or “this is not a daydream anymore” and get lucid.
c) I slip into unconscious NREM sleep but then the moment I start to dream, I notice that I am dreaming (“wait, I am not visualizing this”).
d) I have a DILD later, although it usually isn’t “I am dreaming, this is not real” realization but more like “I am doing something conscious and that what I am doing is dreaming”. Like noticing that something is happening, not questioning reality.
I see c) and d) as clear DILDs. a) is basically a failure but can be good fun and is only a small step from turning into b). b) is the in-between situation or following breadcrumbs. I daydream with the intention to notice when the daydream changes into a real dream and this eventually happens (although it can take me a while to notice).
What do you think? Are these all DILDs? Can a clear-cut line be drawn to separate WILDs and DILDs (MILD-like, achieved through autosuggestion)? Where do you draw the line? Or is there a grey spectrum between these?
via Lucid Dreaming - Dream Views - Attaining Lucidity https://ift.tt/3dYoYfp
Compared to bygone eras you don’t have to work too hard to convince most preppers to include electronic devices of all kinds in their survival plan. This is largely due to the availability and affordability of portable, completely self-contained off-grid sources of power.
Two of the most popular are solar and hand-cranked chargers, with an increasingly vocal contingent of proponents recommending the hand crank to the exclusion of all others.
Are hand-cranked chargers really better than the ubiquitous solar charging arrays? Yes and no, as hand crank chargers definitely have advantages that solar chargers lack, but conversely solar chargers have advantages all their own. The biggest advantage of a hand-cranked charger is that it’s not dependent upon clear access to the sun to harvest electricity.
If you’re one of those preppers who isn’t planning on giving up your electronics when the time comes to bug out, you are in luck because, through the rest of this article, we’ll be taking an honest look at and comparing hand-cranked chargers against solar chargers.
I will tell you up front that both are totally viable, and both potentially deserve a place and your gear cache. You just need to decide which one is best for you.
Go Hand-Cranked for Power on Demand
Hand-cranked chargers have one considerable advantage over their solar charger cousins: So long as you or someone else has the time and can supply the elbow grease your hand-cranked charger can generate electricity for any device that needs it, or just to store in its internal battery or a separate power cell.
Hand-cranked chargers are never fast, but the faster you crank it, the faster you can fill up.
In tandem with this advantage, solar chargers are completely independent of considerations like weather, being indoors or underground, or the time of day. This might sound like a convenience feature, but it is more than that.
What if you desperately need to charge your devices before heading out at first light? What if the outside is dangerous due to something like nuclear fallout, a chemical leak, or some other hazard? The ability to create power without any dependence on the outdoors or the weather can be huge in certain circumstances.
Even better, many of the more modern hand-cranked chargers are more than just a method of power generation.
They often include additional options and features such as flashlights, onboard power storage so they can function as a battery bank, and even emergency radios able to receive NOAA and government broadcasts.
If you are like me, and I would say most other preppers, having multi-function tools that save weight and save space in your BOB is a boon that you cannot pass up.
Disadvantages of Hand Crank Chargers
Despite all the benefits they have to commend them, it isn’t all good news with hand crank chargers. Their single biggest drawback compared to solar charging arrays is that they require you or someone else to be continually invested in operating them.
Whereas a solar cell or some other passive form of power generation will operate completely independently so long as it is positioned correctly, with a hand crank charger, if you aren’t turning the dynamo, you aren’t making any juice.
In most circumstances, this means you are turning that crank and not doing anything else. Sure, you can walk straight ahead on more or less even, level terrain and turn the little crank, but anything that is more involved or requiring more attention is probably going to be out of the question.
Whether or not this will be a problem for you is largely dependent upon chance. What other tasks do you need to accomplish? What else needs your attention?
How much time do you have to spare for turning the crank and filling your batteries? Is doing that the best use of your time or are you neglecting something even more important in a desperate effort to gas up your gadgets?
Hand crank chargers are excellent so long as you have the time and or the manpower to spare to operate them.
Lacking either of those two things you probably will not be producing enough power quickly enough to keep your devices charged. The trade-off in being able to produce power on demand is convenience.
Solar Charging for Multi-Tasking Convenience
Solar chargers seem to grow more capable, more portable and less expensive every day. No wonder they are such a popular option for preppers who want to supply their own off-grid power!
The single biggest advantage of a solar charger is it enables you to effortlessly harvest power from the largest and most plentiful power source in our solar system, namely the nearest star: our sun!
All you need to do is find a clear spot where you can see the open sky, unpack and unfold the solar charger, activate it if required and then aim its panels directly at the sun.
From there it will harvest the sun’s radiation before converting it to electricity stored in an onboard or attached battery pack ready for use.
On a good day with a wide open sky, a solar charger can quickly fill up a battery pack, while you are busy doing other things.
Your solar array can be busy gobbling up power from the sun while you are setting up or breaking down camp, procuring food, or doing any one of innumerable other tasks required to survive.
Disadvantages of Solar Chargers
The biggest disadvantages of solar chargers are probably what you are already thinking, namely the fact that they are completely useless without an open view of the sky, and that they’re efficiency is greatly degraded by bad weather, overhead cover, or just the approach of nightfall.
Anytime the sun is not out or is concealed your solar charger will not work as well or even be made useless
This could be a major showstopper if you are forced underground or indoors for any reason. If you had a hand-cranked charger in the same situation you’d still retain the capability to generate electricity even if you must invest directly in procuring it.
The other disadvantage of solar chargers is that they still require a modicum of babysitting because they need to be aimed to face squarely at the sun, and the sun moves throughout the day, meaning you’ll have to reposition your array at regular intervals.
Though this is a minor inconvenience compared to the necessity of running a hand crank charger, it must still be attended to, and if you forget you might not be setting off with a full tank using your solar charger.
Also a solar charger is hardly what you would call a viable option while you are on the move. Though you can strap the panels to your backpack and allow them to gather what solar radiation they can while you are walking, this is nowhere near as efficient as properly in placing it unless you are traveling through an area that is bombarded by copious full value sunlight.
Conclusions
Hand crank chargers are definitely a viable option compared to their solar charger cousins and both have advantages and disadvantages. The biggest advantage of a hand-cranked charger is that you will not need to depend on good weather, daytime hours or open sky in order to generate your own electricity.
The trade-off is that you or another member of your group will have to invest in actually generating electricity by turning the crank that runs the dynamo in the charger.
So long as this sounds like a good trade to you and adequate for your purposes you would be wise to invest in a hand crank charger!
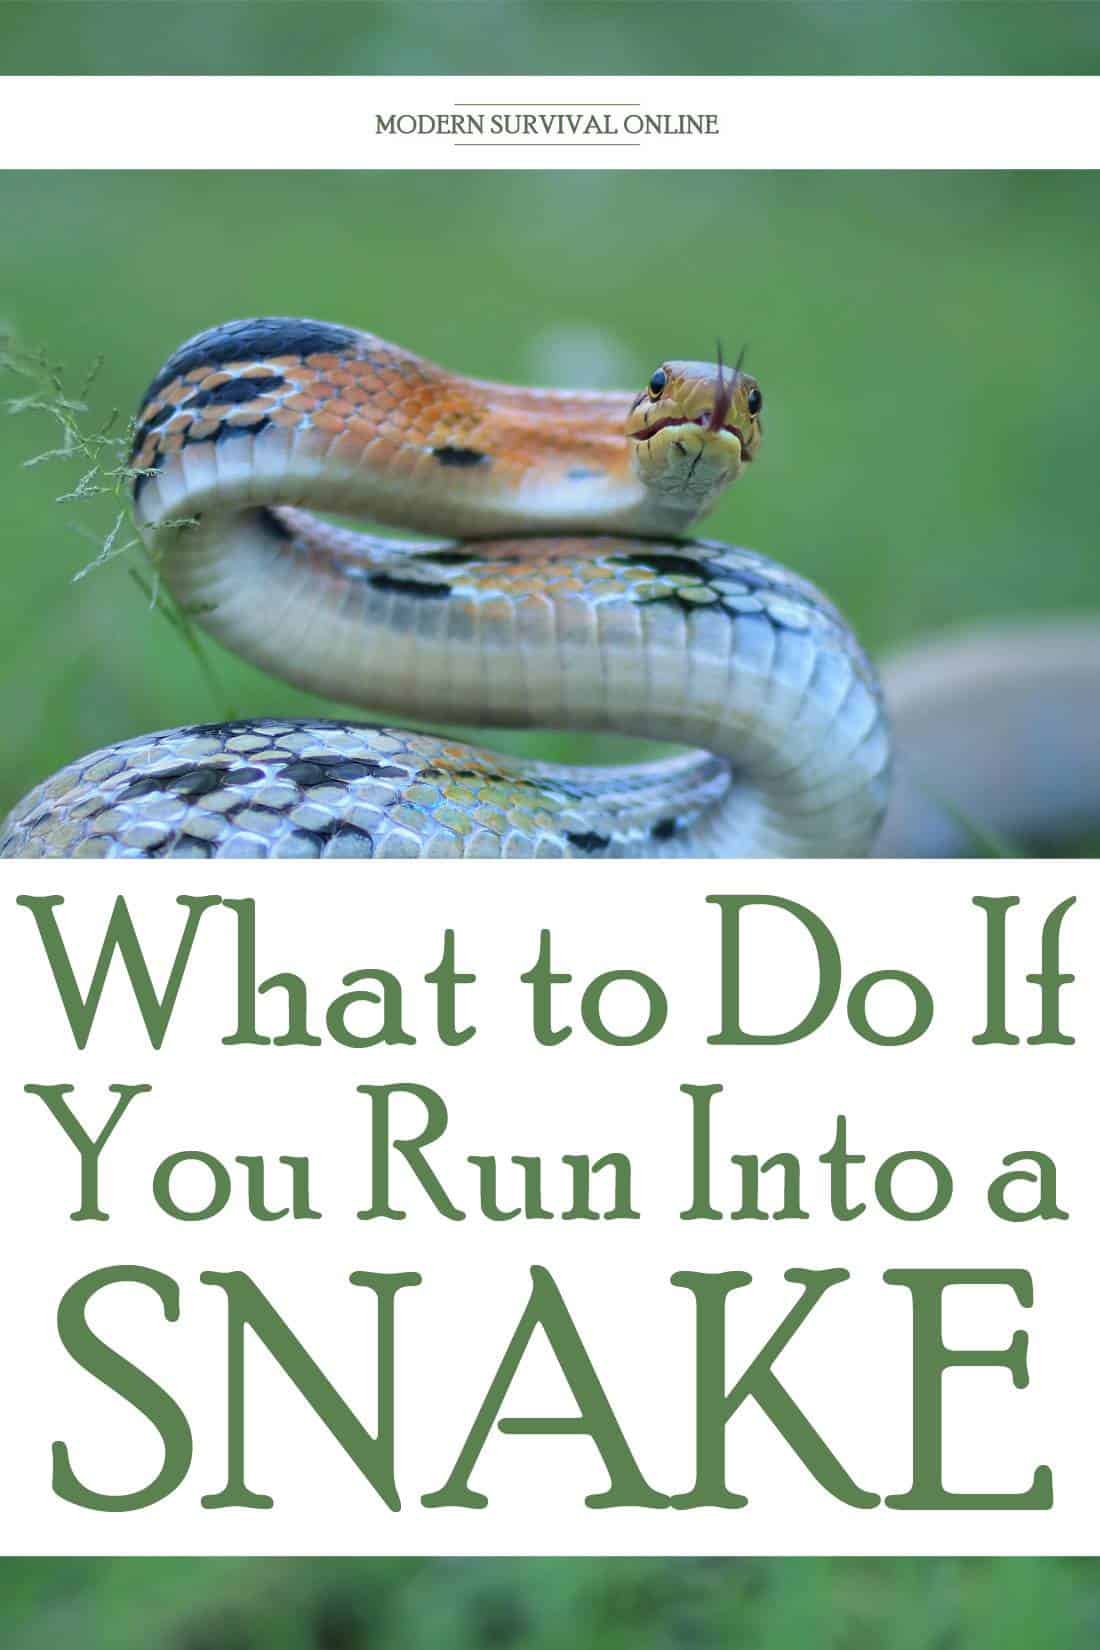
Pretty much anywhere you live in the world you can be assured you’ll eventually run into a snake in your travels. These slithering, cold blooded reptiles give many people the willies and often inspire panic.
Though the vast majority of snakes are not venomous and nearly harmless to people a close encounter with a venomous snake can turn into a life-threatening altercation, and even a bite from a non-venomous snake can have serious consequences. Do you know how to handle one of these close encounters?
What should you do if you run into a snake? In virtually every circumstance your best course of action is just to back away smoothly, but quickly. Never try to handle a snake, and only if the snake presents a definite impediment to movement or an ongoing threat should you attempt to move it out of the way, or dispatch it.
Whether you live in a snake-populated area, and have to deal with them on your homestead or just anticipate running into them regularly in your travels on the trail, you need to have a plan for dealing with snakes. There is quite a bit more to consider, and we will get into it throughout the rest of this article.
They Really Are More Afraid of You
It is clichéd advice, but snakes are almost invariably more afraid of you than you are of them, even if you are seriously snake-phobic!
Smaller creatures, including reptiles like snakes, always have to be cautious that they are not trod upon by larger mammals and that includes humans. The typical behavior of a snake that is threatened or fears being stepped on is to scoot out of the way.
Unless you corner the snake or are dealing with a particularly aggressive snake (either through temperament or some other instinct of self-preservation), you will rarely have to worry about a showdown with one of these creatures.
This is good news because interacting with any snake, even when you think you have positively identified, entails some significant risks.
Should you spot a snake in your way or happen upon one suddenly, you don’t need to scream, shout, and lose your wits. Simply back up away from the snake smoothly but quickly and, as the distance increases, so too does safety.
Spotting the Snake Ahead of Time is Essential
Of course, to avoid a snake you must first detect it and then alter your path accordingly. This might not be the easiest thing in the world to do as many snakes blend in well to their environment, and some employ masterful camouflage that makes them virtually invisible if they aren’t moving.
You must pay attention to where you are putting your feet and what is ahead of you wherever you go if you are in snake country, especially when they are most prone to being out and about or moving.
Going through the world completely oblivious or in “condition white” is a great way to suffer an accident, including a snake bite!
You must also pay attention to where you were putting your hands, as reaching up to grab a branch or an overhead ledge could see you coming far too close to the snake, threatening it or even worse grabbing it directly in which case a bite is all that certain.
This advice is especially crucial whenever there is ground cover or other concealing factors that could help hide a snake or provide it shelter.
Know What Snakes Are in Your Area
You can give yourself an edge if you brush up on what snakes are common in your area. Knowing quite literally what the snake looks like means you’ll be better informed on what to look for, hopefully noticing the snake before it is too late. It will also pay to bone-up on their habits, typical behavior and where encounters are most likely.
For instance if you live in an area where copperheads are common, you’ll know that they are extraordinarily well camouflaged and extremely difficult to detect among the detritus common on forest floors.
To make matters even worse, you would also know that copperheads are notorious for remaining perfectly still and motionless when they feel threatened, this being their primary defensive behavior: simply avoiding notice.
That definitely wouldn’t help you avoid a copperhead for obvious reasons but it would inform you that you need to be especially on alert in copperhead country. Consider also the preponderance of rattlesnakes on the North American continent.
Mature rattlesnakes are generally quite likely to issue their infamous warning “buzz” when they feel threatened, and this auditory signal is intended to help you notice and locate the snake, and then go the other way. Unfortunately, this warning buzz is not guaranteed, so don’t get lazy.
Weather and Season May Make Encounters More Likely
All snakes are cold blooded, and this means they are overwhelmingly dependent upon the climate to regulate their body temperature. Snakes will become more active when the weather is warmer and less active when it is cooler, and clear or partly cloudy weather will see the snakes move more often in order to catch some rays or get into the shade depending on what they require.
Also the season and time of day plays a significant part in a snake’s activity level, with many snakes being more active at dawn or dusk because that is when they’re typical prey items are more active.
You can also depend on running into more snakes in the early days of spring since they will be shaking off the winter chill and on the move more regularly.
Unless you live in a part of the world that simply does not have any snakes, places which are notably few and far between, you can never completely let your guard down.
But you can use your knowledge of endemic snake species along with an informed opinion of their activity levels based on local conditions to drastically decrease your chances of a bad run-in with them.
No Choice: Dealing With a Snake
Despite your best efforts to avoid it, or perhaps because of the snake’s location, you now have no choice but to get rid of it one way or the other.
Maybe it is in the middle of a tight and impassable trail that you cannot detour around, and you certainly cannot risk stepping over it. Perhaps it is too close to the house and is a known venomous or otherwise dangerous snake that could endanger children or pets. What should you do?
If you are in a nature setting such as near your campsite or on the hiking trail one good option is to use a long trekking pole, walking stick or a sturdy branch to gently prod the snake in to hopefully vacating its resting place.
As mentioned above, most snakes are not looking for trouble and are definitely afraid of humans, so with a little luck they will just take off into the underbrush.
If the snake is near your home or some other settlement and you need it gone, permanently, your best bet is to call wildlife management or a conservationist that will come and collect the snake to relocate it but, more importantly, get it out of your hair.
Even dangerous snakes are vital parts of the ecosystem and you should take some pains to avoid killing them if possible.
However, if that strategy is not an option for you, or there is simply no time to waste, you’ll need to dispatch the snake.
Snakes are not tough opponents, but can be tricky to deal with due to the necessity of getting close to them in order to strike them with a melee weapon, or the necessity of actually hitting them with a firearm. They are definitely small targets, and most people are not good shots.
A great option for dealing with snakes is a shotgun loaded with birdshot from a modest distance, since these loads will greatly increase your chances of hitting it and the dense pattern of small shot is likely to completely obliterate the snake.
With any other firearm stand back, take careful aim and try to hit the snake in the head. Lacking a gun, you may use any long-handled garden tool with an edge or blade on it, and an effort to decapitate the snake.
Use maximum caution, and understand that even the snake’s severed head may still envenomate you with a bite!
Conclusion
So you might be deathly afraid of snakes and fear such an encounter, a run-in with a snake is usually nothing to worry about.
Most snakes will actively try to avoid you and assuming they don’t it is easy enough for you to avoid them, so long as you watch where you are putting your feet and hands.
You’ll need to take care if you’re in any place where snakes are common, and especially be vigilant when the season or weather makes it likely that snakes will be on the move.
Lots of people ask me, 'Was that a lucid dream?' so I wrote a blog about it on my website: https://benjhenry.com/lucid-dreaming/ There's also a link to a Facebook group for anyone who wants to say hi!
via Lucid Dreaming - Dream Views - Attaining Lucidity https://ift.tt/3duy3MA
Most preppers who have spent any amount of time amassing the skills and gear they will need to take on a survival situation, or tackle apocalyptic conditions are familiar with the bread-and-butter items needed for the task: Food, tent, water filter, bush knife, etc.
These are the items that most typically think of when considering gear that might save the day. But there is a humbler class of survival gear that could wind up being just as important, one most people would never consider their use in a survival context.
Some common items and even things that you would throw away as trash might turn into vital survival tools in the right circumstances.
Some of these quirky and characterful items have uses beyond their intended purpose, where others can be improvisationally utilized when purpose-made gear is not available, lost or worn out. Regardless, these surprisingly useful items deserve a place in your kit.
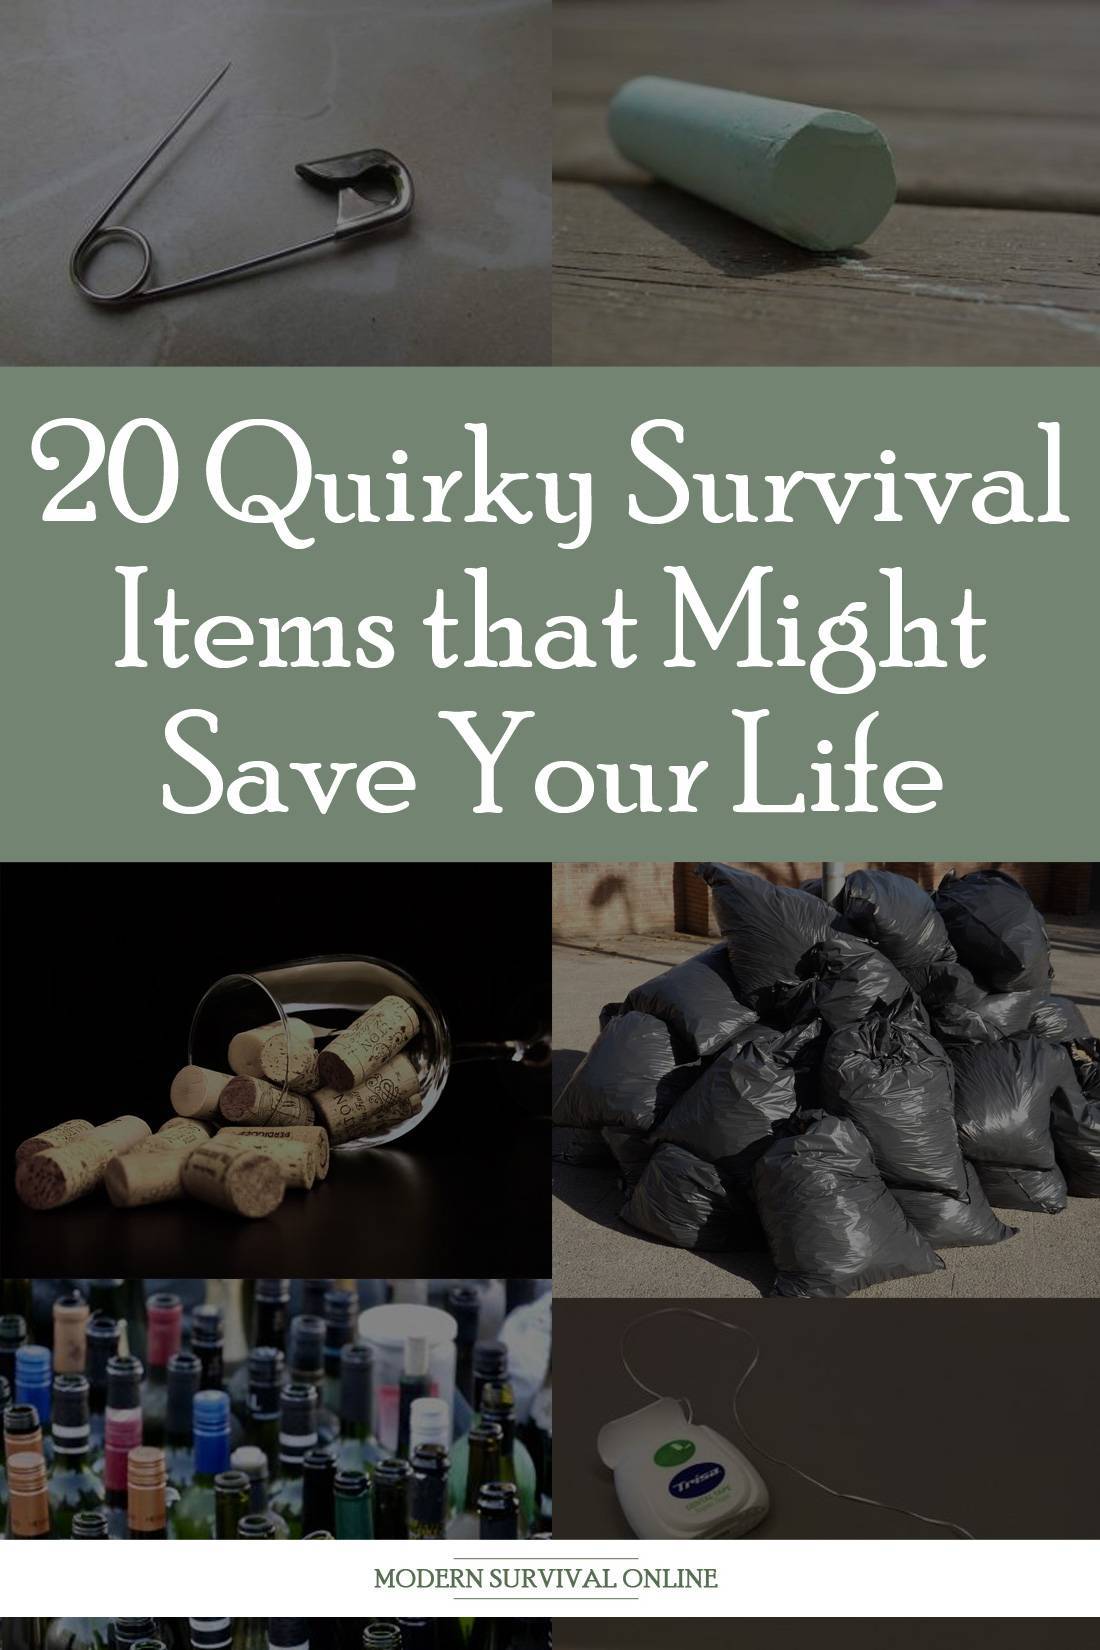
Below you will find a list of 20 quirky survival items that just might save your life when the chips are down and many of them can be used in ways that you would least expect.
You don’t have to include every single one of these in your kit, but you should definitely learn how to employ all of them. We will get into the list just below.
1. Pencil Sharpener
The humble pencil sharpener is a surprisingly useful survival tool in certain contexts. You can employ a pencil sharpener with dowel rods, thin branches or twigs and even, believe it or not, pencils to produce sharpened points on a variety of wooden objects, and even some others.
The usefulness of a sharp stick is not debatable, though it might produce a few chuckles. Sometimes, a sharpened stick is just the right tool for the job!
The sharpened points produced by a pencil sharpener are useful in all kinds of constructions, from trap triggers and fishing hooks the weapons like spears, gigs and arrows.
You can even use a sharpened stick as a stake for secure lashing points and other constructions. As the cherry on top, the thin paper-like shavings produced by a pencil sharpener make excellent if short-lived tinder.
If you plan on adding a pencil sharpener to your kit, spring for a durable one.
2. Floss
Floss is obviously super useful for keeping your teeth clean and healthy, even in a long-term survival situation, aside from oral hygiene and has another survival power; flaws make some excellent and bodaciously strong cordage out of all proportion to its cost and diameter.
Floss makes an excellent lashing for a variety of applications, including securing arrow and spear heads to shafts. It also has some utility for tying off heavier loads when it is braided or employed with more secure attachment.
Floss also makes a pretty good tripwire or snare for smaller game. No care must be taken in the latter application since the captured animal can easily chew through it if able to reach it.
Floss is so compact and so lightweight there’s almost no reason why you shouldn’t have a spool or two tucked in your kit.
3. Toothpaste
Might as well keep the surprising survival uses of toiletries going with toothpaste.
Just like floss, taking care of your teeth during a survival situation is just as important as everyday life, especially when living through a long-term or indefinite term event. But toothpaste is good for more than just keeping your pearly whites in tip-top shape.
Toothpaste is a mildly abrasive quality to it that makes it a surprisingly good metal polish, and you can use that polishing quality to shine yourself up a reflective signaling mirror or the bottom of an aluminum soft drink can in order to focus the sun’s rays to start a fire.
Toothpaste also works well as an improvised cleaning agent to help you remove nasty, sticky messes from your hands or your gear that can then be easily washed away with water.
4. Dryer Lint
Dryer lint is one of those strange survival supplies that the old-school preppers knew about, but as time goes on it seems the newer generation has either omitted it or forgotten about it entirely.
Dryer lint has no purpose for most people and is only bound for the trash can, unless someone is a weirdo who collects it! Well, call us weirdoes with them, I suppose, because you should be keeping a portion of your dryer lint, too!
Dryer lint is an excellent fire-starting material, burning very hot and quickly. You should collect and compress dryer lint so that it can fit into a small capsule for easy storage and safekeeping.
The old-fashioned film canisters were perfect for the task but you can use anything that is reasonably waterproof. All you need to do is fluff it up a little bit before putting a flame to it and it will catch fire instantly.
5. Glass Bottles
You might think a glass bottle has no purpose after it has been drained of its contents but you would be mistaken. A glass bottle can be put to use in several survival scenarios, not the least of which is as a ferocious impact and lacerating weapon.
No one needs any instruction on how the nasty shards resulting from a broken glass bottle can be put to gruesome use on defense or offense at close range.
Beyond that, the glass fragments that you can harvest from a glass bottle can be scattered on a hard surface to serve as a noisemaker and early warning system if trod on.
Even if they are detected by human adversary, they will have to slow down to cross them quietly or attempt to move them, buying you time. You can also bury a glass bottle that has the wide bottom knocked off facing up as an improvised pit trap for small game like mice.
6. Aluminum / Steel Cans
You should never be too quick to pass up a source of quality metal in a survival situation, especially one where you are already very limited on what supplies and gear you have access to. The common, humble soup can or soda can is capable of being crafted into all kinds of useful devices, or repurposed for its raw material.
Soup cans and other steel cans in particular can easily be crafted into small stoves for heating and cooking, and with a little time and patience can be cut in folded into a variety of useful shapes, including weapons.
The thinner, more flexible aluminum cans may be fashioned into fishing lures, choker-style hooks, arrowheads and more.
As mentioned above, the bottoms can be polished into a type of concave lens, useful for starting a fire or even signaling. Don’t be so quick to kick the can down the road! You might be throwing away a useful resource.
7. Books
And I’m not talking about useful survival manuals and other prepper-centric books either! I’m talking about any other kind of book, new or old, soft cover or hardback, big or small. You can repurpose books for all kinds of surprising and interesting survival uses.
One of my favorite techniques is to create a book safe out of it, a compartment able to hide valuables or sensitive materials in plain sight.
Another use that might become very important indeed, especially during a pandemic, is the tearing out of their pages to use as toilet paper. Simply crumple and uncrumple the page a few times to soften it, and you’ll be ready to go, literally.
That same paper also works well as an aid to fire starting and if you care to stack or arrange multiple books in a row they even make surprisingly decent improvised armor against gunfire. A bookcase full of old books at a strategic chokepoint in your home can shield you from bullets!
8. Mouse Traps
You might consider adding mouse traps to your survival stockpile, and not just for keeping pests away from your stash and your shelter although they will do that with chilling efficiency.
The mechanism of a mousetrap is, by design, an extremely efficient and sensitive trigger that you can repurpose for other traps of various purposes, with one of my personal favorites being setting up a snap light on the bed of the trap and stringing it with a tripwire in a visible place.
If a person, or large animal, hits the tripwire it will activate the trap cracking and illuminating the snap light.
Also one should not forget that mice and other rodents are a common and undervalued source of animal protein for food during survival situations.
Consider that you can bait and set a flotilla of mouse traps for far less energy and a higher chance of return than larger traps for bigger game. You might be better off pursuing the “quick nickel” school of trapping for calories.
9. Chalk
There are few preppers who undervalue the usefulness of writing utensils in a survival situation, since you will be scribbling down notes, vital information, sketching maps and so much more.
But what preppers do underestimate is the necessity perhaps of leaving messages on natural materials or improvised writing services. This is where chalk comes in handy.
Everybody used chalk at some point in their childhood, either in school or out; doodling on the sidewalk, solving a problem or completing an exercise on a blackboard and more.
You can do much the same with chalk in a survival situation and though it is far from the most permanent form of marking it is much faster than etching or engraving.
You can also rest easy knowing that your message or markings will eventually disappear entirely from exposure to water and wind. Chalk can also be ground to act as a desiccant and sprinkled upon a flat surface to provide a visual indication of the passage of people or small critters.
10. Panty Hose
Pantyhose are a truly strange item for survival, but despite what misgivings you might have the material they are made from is uniquely capable of certain tasks.
First and foremost, the ultra-fine elastic mesh the pantyhose are made from makes it a great option for pre-filtering water, or even incorporating a second- or final-stage filter in an improvised water purification setup.
Second, it makes a great insect or fishnet. Pantyhose also have some utility, if you can take the time to fashion several together, as a mosquito mesh or netting that is capable of blocking even the smallest insects like noseeums.
Lastly, pantyhose are surprisingly adept at preventing blisters, and if you are worried about blistering your feet during some particularly hard work or hard tracking ahead as you should be you can slip on a pair under your socks to give your feet a little extra protection and earn yourself some better mileage.
Remember: Laugh all you want, but blisters can be show stoppers, something you can ill-afford during a real survival scenario!
11. Steel Wool
Steel wool is a handy if unconventional survival item for preppers. It can of course be used for its typical purpose of removing rust, buildup another unwanted deposits from metals of all kinds, but it also makes a wickedly good fire starter in conjunction with a 9 volt or AA battery.
All that you need to do is take your steel wool, roll it up into a rough tube shape, and then pull out and tease the ends of the roll into a thin tapering section on either side.
Get your firewood ready and your tinder in place, then cautiously touch one end of the steel wool to the negative terminal on the battery and the other to the positive terminal.
In no time you will see segments of the steel wool glowing like a hot coal, more than hot enough to get your tinder going even in unpleasant conditions.
This is often far faster and more reliable than trying to utilize any primitive method of fire starting, so remember to make use of this if you have much in the way of junk but little in the way of proper survival gear!
12. Snare Wire
Snare wire is another good addition to your survival toolbox for its intended purpose, catching small and medium-sized critters, but also for its additional uses as high-strength cordage that will resist abrasion and even use as a tripwire for early warning systems.
Snare wire works beautifully for lashing arrowheads or spearheads to their shafts, and so long as you have a blade capable of cutting with it you can work with it with little difficulty.
Cutting snare wire is one application where having wire cutters on your multi-tool or built into your knife sheath will definitely pay off. This will save the primary blade from a little bit of abuse.
13. Zip Ties
Zip ties are a useful lashing component that no prepper should go without. They are fast and effective for securing all kinds of things to something else, creating quick loops for routing or hanging cordage, securing a bundle of like sized items, making hasty attachment points on gear and more.
These work beautifully for securing trap components or creating temporary hold-downs that will show evidence of tampering or passage if broken or forced. You can even use the tapered end of a small zip tie as an effective handcuff shim.
The largest varieties can also help in creating temporary splints for broken bones when used cautiously. As an attachment point that is fast and truly secure for light and medium-duty applications zip ties cannot be beat, and you would be wise to include a variety of sizes in your survival kit.
14. Cigarettes
It stands to reason that quite a few of us will want a smoke to help calm our nerves during the stressful business of survival, but aside from giving you some perk and soothing your nerves, cigarettes have other survival uses.
For one, they make excellent bartering fodder, especially for people who are not getting their nicotine fix under the circumstances and tobacco, even processed tobacco, has mild analgesic properties that could come in handy if you are lacking in proper medical supplies.
Also, don’t forget that pretty much the entirety of a cigarette is designed to burn steadily, and they make a halfway decent fire starter especially when you need one that burns a little bit slower.
Also, despite the health hazards of long term use nicotine is a noted mental stimulant, and if you need some serious pick-me-up for a grueling task or a long march ahead, smoking a cigarette is one way to give yourself a little pep, and still good as a social bonding activity despite the negative connotations.
15. Liquor
Liquor is another vice that you probably don’t want to be imbibing on the regular during a survival situation no matter how bad the outlook is. You will be at your best when you are sharp and sober, but that doesn’t mean liquor doesn’t belong in your survival stash.
Very much like cigarettes, high-proof liquors are excellent trade materials because there will be plenty of people looking to numb the pain of the trials and travails they are currently going through.
And now as in years passed, liquors also have some utility as disinfectants, and can be used for everything from rinsing an open wound in a pinch to clearing nasty germs and other mild infections from your feet.
Also, not for nothing, anytime alcohol has a proof of 80 or above, it can be expected to reliably ignite, with anything over 100 proof burning very well. Remember: Most alcohol will burn with a blue flame, and some even burn almost invisibly so remember that if it appears like your alcohol failed to light.
16. Safety Pins
Safety pins are another innocuous item that seems to be beneath notice for serious survival purposes, but they nonetheless can do the job in a pinch. The spring steel that safety pins are fashioned from works excellently as fishing hooks and with a little shaping as suturing needles.
A handful of safety pins can easily be attached to a sturdy stick for use as a gig or arrowheads for birds and small game. Safety pins can also be fashioned into a variety of trap components like toggles if the situation calls for it.
Also don’t forget the utility of safety pins for attaching things to other things, particularly fabric. Safety pins work great for temporary repairs of busted zippers and buttons, and can be used in a series to hold a gash in fabric together.
Safety pins are commonly used for attaching casualty reports, or other important medical information to victims or patients who cannot communicate on their own behalf or reliably.
Sometimes the most reliable form of communication for the situation at hand will be a written note pinned to something visible.
17. Tampons
Tampons are another uniquely capable survival tool but not for the reasons you are thinking. Old, Fuddian prepper lore tells us that tampons work great as a tool for treating gunshot wounds, but this is far from the truth as there is no way a tampon can deal with the hemorrhage produced by a gunshot wound.
But what tampons can do is work as a rudimentary filter straw for drinking from found water sources, keeping the larger and nastier particles out of the water you are drinking.
If you don’t need a tampon for water filtration, the cotton wadding found inside is highly dense, fibrous and burns readily, making it a useful bit of tinder.
The plastic hole of the tampon also has a variety of uses in improvised construction. Don’t forget that you can always use tampons as trading fodder during a long-term grid down situation, as most women will not be willing to go without.
18. Corks
Common cork, be it from a wine bottle or cork paneling, has a variety of uses for the savvy survivor. Cork makes a great fishing bobber, so including a wine cork with your survival fishing kit is a great idea.
Cork is also excellent for dampening sound and you can use it to line the inside of noisy containers to reduce your sound signature when traveling with your BOB.
Lastly, cork paneling is easy to puncture (as you probably know), and it is an easy thing to incorporate a panel of cork with foliage and other detritus in the local area to make a sort of camouflage trapdoor over a hide or a trap.
It is not ideal, but cork soaked in any flammable liquid can be easily lit and will burn steadily for some time, making this a great aid for getting a stubborn fire going.
19. Condoms
Never leave home without your prophylactic! You never know when you might need a condom, but hopefully you aren’t worried about random hookups in the middle of a major SHTF situation.
Despite this, a condom can save you a lot of grief all the same. Condoms made from latex and other synthetics are incredibly stretchy and can actually make effective if fragile water bladders so long as they are not treated with spermicide.
You can also use a condom to replace a lost cap on a bottle or jug that can serve as an improvised canteen, and they also work wonders for covering the muzzles of long guns to prevent the infiltration of rain, mud and sand.
20. Garbage Bags
Garbage bags are a prepping superstar if you are surviving on a budget or just about all out of supplies.
Common garbage bags and especially the heavy-duty can liner-type will take care of all kinds of survival tasks, including water collection, shelter creation, ground cover, being fashioned into a poncho and even made into a sleeping bag.
The latter is a trick that the homeless living in many cold climates are well acquainted with. If you take two large can liner style trash bags, cut the bottom out of one before taping them together into one large bag, and in stuffing the interior with newspaper you will have a surprisingly effective sleeping bag that will keep out moisture and cold.
Combined with some appropriate cold weather clothing, this might keep you alive when everything else fails. Don’t go anywhere without a couple of trash bags in your kit, and remember that so long as you have a roll of these useful bags you can do all sorts of things!
Conclusion
Survival is a risky endeavor, one that is best approached with the right gear and supplies in hand. But sometimes, through accident or just plain bad luck, you won’t have the right gear or you’ll lose or run out of it.
This is where repurposed or discarded items can save the day if you can supply a little ingenuity. Take the time to review this list, and commit these items to memory so you can have a good “Plan B” when you need it!
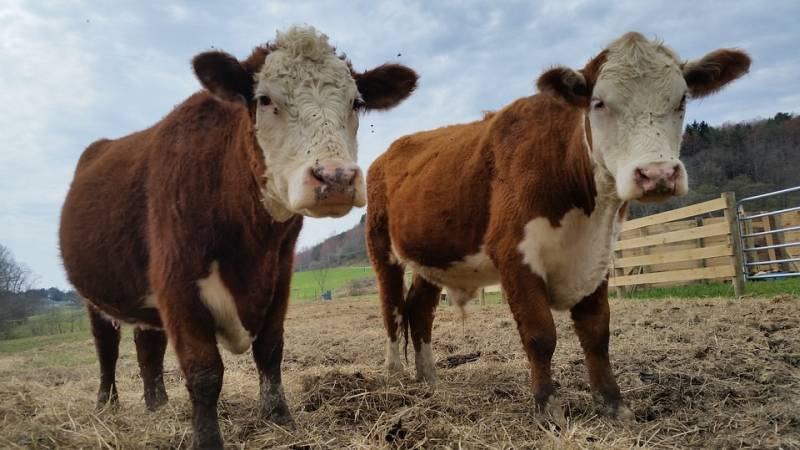
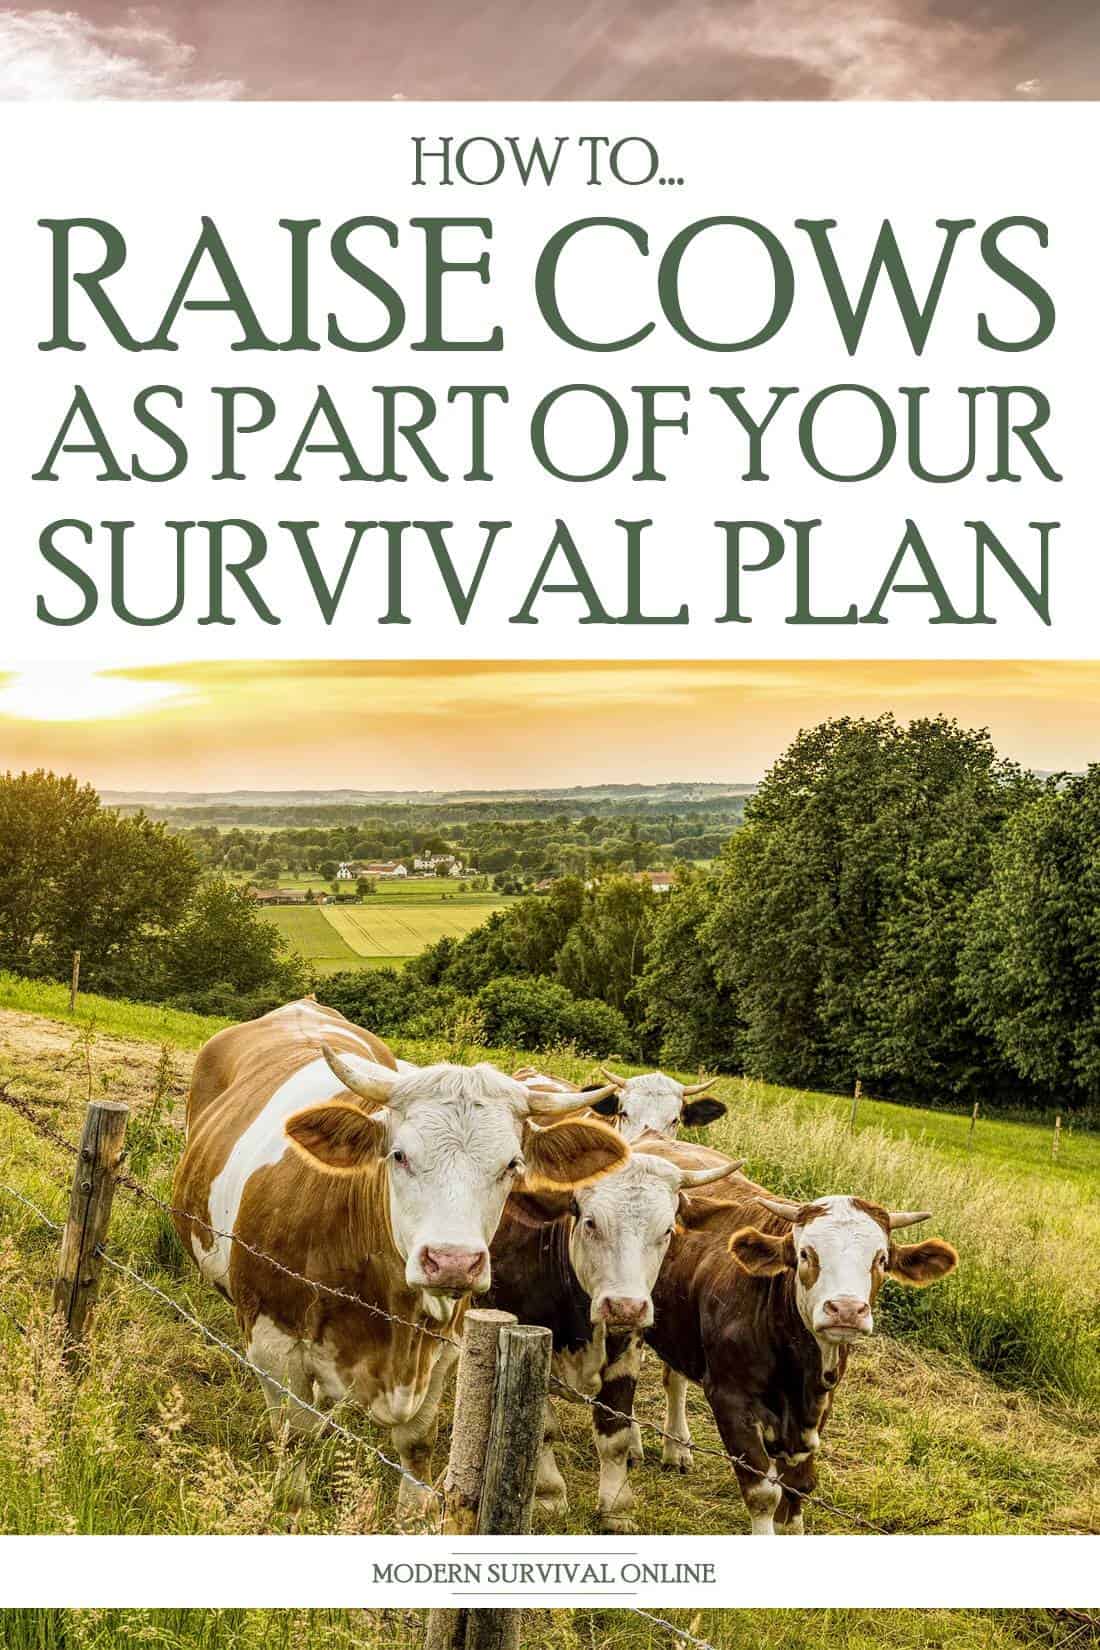
Raising cows as part of your survival plan is not for every prepper – I feel the need to just throw that out there right off the bat. Keeping cattle is an excellent idea for some survival homesteaders, but will prove disastrous for others.
Cows are arguably harder to raise than poultry birds, but they do have their advantages for the serious homesteader and farmer – and can be a valuable asset in a long-term survival scenario.
HAW – How You Homestead
Preppers must first evaluate the “HAW” of your self-reliance operation before seriously considering cows as part of your survival plan.
H = How You Homestead – Can you butcher a large animal on-site by yourself (or with members of your family and survival tribe), and are you able to properly process and store that much meat – even in an off grid situation?
A = Acreage – How much acreage your survival homestead encompasses make a massive amount of difference when contemplating keeping cattle on a prepper retreat.
These large animals need to eat, not just graze during warm weather months, but also when there is four inches of snow on the ground.
To sustainably keep cattle, even miniature breeds like Dexters, you need enough acreage for both grazing pastures and hayfields.
In addition to needing enough acreage dedicated for cattle use, you must also have the hay baling equipment and help necessary to harvest the food source for winter months.
Not only do you need the equipment, but the fuel to put in tractors to operate it – or horses-drawn hay baling equipment, which once again leads us back to the acreage issue because those horses will need to eat too.
W = Where You Homestead – If you homestead in an urban area, keeping cows as part of your survival plan is definitely out. Suburban survival homesteaders are increasingly adding livestock to their bug in plans, as well.
Keeping a miniature dairy cow on a 3-acre suburban homestead may sound like an enticing idea, but you also need space to store enough hay and grain feed to allow the cow to survive just one winter.
Cows roughly consume 2 percent of their body weight per day in hay. Mini cows weigh approximately 450 pounds… That’s a lot of hay to store on a backyard survival homestead.
The general rule of thumb related to space needed to keep miniature cattle breeds is two acres for every mini cow.
If the survival homestead is in a rural area (which is where every single prepper should live, anyway) keeping standard size or miniature cattle is by far a more feasible prospect.
But, if your prepper retreat is not secluded, keeping the cows that graze in a field near the road WILL require armed supervision 24/7 for the herd during a long-term disaster, which will surely include a breakdown of society.
Our survival retreat is located on 56 secluded acres in a rural area – we are perfect candidates to keep cows as part of our survival plan.
The cattle can be kept far from view, which mutes any noise or smells they create, be wintered over as many years as needed and still be fed, and can water securely from two different natural water sources that are also far away from anyone’s view.
You don’t necessarily need this much land to sustainably keep a few head of cattle, but these types of feed, water, and seclusion attributes must be present on your homestead to successfully raise cows.
Unless you are going to keep beef cattle only until disaster strikes, quickly butcher them and put up the meat, you could get by with a less favorable HAW set up.
But, if the cows were positioned in a visible place, like a rural survival homestead near a road or in a suburban backyard, odds are neighbors and motorists will remember there used to be beef on a hoof in that field and may try to take the food from you at gunpoint.
There are many, many benefits of keeping cows as part of your survival plan. But, only if you have the space, equipment, and seclusion to raise them as covertly as possible, keep them alive when the SHTF, as well as process and store the beef so it remains safe for human consumption.
Cattle Keeping Legal Hurdles
Preppers who live in a rural area should be able to keep any type and number of cows on their land as they want – but not always. Some local laws or deed restrictions could throw a massive wrench in the raising cows as part of a survival plan efforts.
While extremely unusual, even some rural acreage deeds could restrict the type or number of livestock that can be raised on the land.
Before investing hundreds to thousands of dollars buying cows and preparing for their upkeep, always read every single word on the property deed and review local ordinances pertaining to both residential and on-site commercial livestock keeping.
If there are restrictions on keeping cattle in a rural area they are most likely to involve:
Type of fencing.
Distance fenced pastures are from either a property boundary, public road – or both.
Limitations on home butchering for residential or commercial purposes.
Allowable number of bulls kept on a single property.
Suburban preppers who want to keep cows may be legally allowed to keep one or several cows – though likely of a miniature breed only.
If the suburban retreat is located in a right to farm state, the odds of being able to lawfully keep such large livestock tends to be higher.
Cattle Requirements
Space Requirements
As noted above, a miniature cow can be kept on just a few acres of grazing space during the warm weather months. A standard-sized cow should have at least one and a half to two acres of grazing space to feed it entirely from the growing hay or grass in the field.
The land the cattle are kept on does not need to be a flat pasture area. Cows will go most places that horses will venture into, as well.
On a wooded or partially wooded survival retreat, even slightly to moderately sloped or steep terrain can be cleared to make a grazing area for the cows.
Cutting out trees, removing stumps, ripping out briars and then tilling the ground before planting quality livestock grass or hay seed will help you create a grazing space to feed the herd of survival cows.
This is, however, not an overnight process. Expect it to take up to 24 months to clear the land and cultivate a grazing area.
Once you have made the decision to include cows in your survival food security plan, you need to get an accurate idea of how much keeping just one cow – be it a beef or a dairy breed, is going to cost.
Water Requirements
A mature standard size cow can drink roughly 1 gallon of water per 100 pounds of body weight during winter months. That daily intake amount doubles during warm months.
A lactating heifer will almost always require two gallons of water per 100 pounds of body weight.
If you do not have at least one natural water source that can accommodate the water needs of your survival herd, your water or electric bill if you have a well, will increase substantially.
If the natural water source is a pond, ice may need to be manually broken during the winter months to ensure the herd has continual access to it.
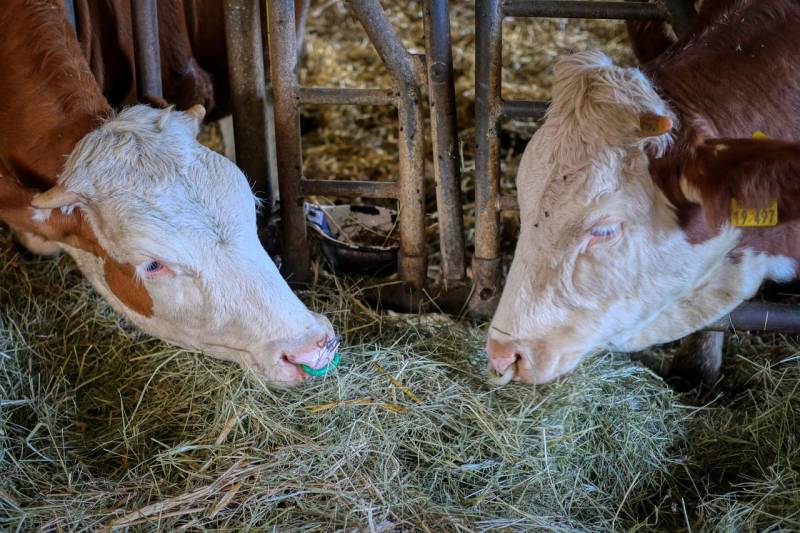
Grain Feed
If the cows cannot live entirely on the pasture you possess or the hay you either bale or stockpile, grain feed will need to be added to their diet.
A 50-pound bag of the cheapest all stock sweet mix feed runs roughly $8.50 per bag. A 50-pound bag of cracked corn is typically less expensive and runs between $3.50 to $6 per bag.
A standard-sized cow that weighs at least 700 pounds should be provided a feed ration that contains 11 percent crude protein and roughage from hay.
Feeding grain is not required, and is often recommended against due to the possibility for the grain to gather in the animals’ intestines since they don’t possess the necessary enzymes to digest starch.
A diet that involves too often or too high of a grain ration can speak a Clostridium perfringens overgrowth. This bacteria can cause sudden death in bovine, and may be more common in feedlot cattle.
Cattle feed is typically available for purchase in three different varieties: pellets, block feed, and sweet feed mix.
Salt blocks and mineral blocks should also be made available to the cattle herd as free choice supplement. Salt blocks are especially recommended during warm weather months.
Bulls should also receive extra minerals and nutrients prior to the start of the breeding season.
If calves are separated from their mothers either by choice or necessity, creep feeding will be necessary to supplement the young animal’s diet – this is especially important during the weaning process and when raising beef calves. Creep feeding basically means the calf is granted grain and mineral supplement through a “creep feeder.” A creep feeder is a livestock feeder that boasts opening large enough for a calf to get its head inside to eat, but has too small of an opening for a yearling or mature heifer or cow to do the same.
Hay Requirements
Mature cows consume 2 percent of their body weight daily – that’s about 24 pounds of dry matter for the average cow.
Pregnant and lactating cows of course, consume more food on a daily basis. It takes roughly six round bales of hay to feed a cow over the winter if its feed is not supplement with a grain ration.
Health and Medical Expenses
Learning how to treat or prevent common cow illnesses and injuries yourself – and especially how to use natural remedy ingredients you can grow yourself, will not only cut down on medical and health expenses, but better ensure your cattle herd can be cared for after a SHTF event, when calling a vet is no longer possible.
Many of the vaccines that are recommended for cattle are sold over the counter at agricultural supply stores like Tractor Supply and Rural King – as are the syringes and other livestock first aid items you can stockpile for use during a long-term disaster. Some of the vaccines require refrigeration, and have a shelf life of just six to 12 months.
Shelter
Cows and not typically kept in stalls or necessarily in a barn, like horses. A sole or pair of dairy cows may have a stall, and get turned out everyday after milking, but beef cattle are typically provided with a run shed or a lean to in order to protect them from the elements.
A run shed is similar to a barn in construction style, but it often (at least on a residential scale) has just one large open area to run the animals in at night and then back out again in the morning so they can graze.
Fencing
Cows are strong and large animals. Do not let their slow moving out in a bucolic pasture fool you – these farm beasts can run.
When panicked, a single cow or an entire herd can stampede and run as fast as they can away from what frightened them with complete reckless abandon – or a single thought about what they are trampling upon in the process.
The fencing that contains cattle must be strong; electric fencing that keeps your horses contained is not going to cut it here, folks.
Only the first cow that runs in a panic at an electrical fence will feel any pain, the rest will simply follow the herd straight through the opening into whatever lies beyond.
Wood fencing is a decent choice to contain cows, but that alone is not recommended either. Cows will push up against their fence and often use it as a scratching post – even if you provide them ample and better back scratching options.
Barbed wire is also a decent cattle fencing, but it does pose multiple potential problems, as well. First, cows can push through it when in a panic or knock it down when using it as a scratching post also.
When barbed wire snaps because it has been pushed on by livestock, or if a deer runs through it, because a tree fell on it – or a host of other reasons, cattle can become tangled in it and sustain a potentially deadly injury.
A cow that has a leg tangled in barbed wire will most often panic while trying to jerk free – sometimes causing the wire to dig more deeply into a leg or even neck.
Metal fencing options are the safest and when properly installed, the sturdiest option to contain cattle. The most common types of metal fencing for cows include woven wire, high tensile wire, and thicker and less flexible, metal cattle panels.
If you cannot afford to purchase the more expensive metal woven wire or metal cattle panels route to fortify a pasture in the safest way possible, consider using wood with strangs of electrical fencing affixed to it in a manner to deter cows from coming close enough to the pasture border to rub against it.
Regardless of the type of cattle fencing you choose to fit both your budget and terrain, wood posts and not metal “T” posts will be necessary to set the fencing no further than four feet apart – to maintain a durable and sturdy fence.
Cattle Fencing Costs
The actual cost of the various types of cattle fencing and posts will vary by location and the date that you happen to be reading this post. The sticker prices noted below are accurate for the date of publication in my region of Appalachia.
Solar Energizer (Charger) for a 10 mile span of fencing – $170.00 to $199.00.
650 feet of solar fencing poly rope $70 or 650 feet of polywire – $30.00. Attachment clips for either type of solar fencing typically run roughly $4 for a bag of 25 connectors for wire fencing. If you’re going to attach electrical fencing rope to wood fencing panels or posts you will need insulator screws that cost approximately $13 for a bag of 20 pieces.
100 feet of four foot tall woven wire fencing costs about $95 per roll.
A 16 foot long section of cattle panels that stands 50 inches tall costs about $22.
A 2,000 roll of high tensile wire runs approximately $155 per roll – for the non-electric version. An 8 pound bucket of fence staples that can attach this type of fence in between wood fencing panels or as a topper for any kind of livestock fencing to wood posts or trees costs about $28. These fence staples can also be used on barbed wire fencing.
A 1,300 foot long roll of barbed wire costs approximately $70.
Treated wood posts large enough in diameter to create sturdy supports for cattle fencing costs roughly $19 each. Every homesteader, farmer, and prepper I know cuts their own wood posts from their land. But, if you do not treat these posts, they will have a shorter lifespan and ultimately rot, causing the fence to weaker or collapse.
Cattle Size Types
As noted above, cows come in different sizes. The type that best suits your survival food security plan needs will depend on both your level of experience as well as size and location of your prepper retreat.
Cows, unlike bulls, are generally docile in nature – but not always. I have seen aggressive cows break a keeper’s ribs and even a hip by ramming them into a fence.
Turning your back on a cow, even a sweet older dairy cow you have milked for years, is highly unwise. I have been seriously tempted to visit a buffalo farm in our county to see about buying a few heads.
Sure, they are not known to be as docile as a cow – but that’s the point. No one in our survival tribe would ever even think about letting their guard down and becoming complacent if we kept buffalo, like they have learned to regret doing around the herd of survival cows.
Standard Cattle Breeds – Breeds of this type weigh at least 600 pounds when mature, but typically grow to weigh 1,600 pounds. A 1,000 pound cow yields roughly 610 pounds of usable beef, on average.
Guinea Cattle – These are a smaller type of cattle that are not quite large enough to be considered full size, but are too big to be deemed a miniature breed. Mature guinea cattle weigh less than 600 pounds but more than 450 pounds. They are a good breed choice for medium 10 to 20 acre survival homesteads.
Miniature Cows – Cattle of this type are also often called dwarf cattle. Both heifers and bulls exist in miniature breed varieties. Miniature cows weigh approximately 450 pounds on average.
Cattle Classifications
Before heading out to a livestock auction in search of cows for your survival plan, you need to learn the proper lingo and classification system to ensure you are buying exactly what you wanted.
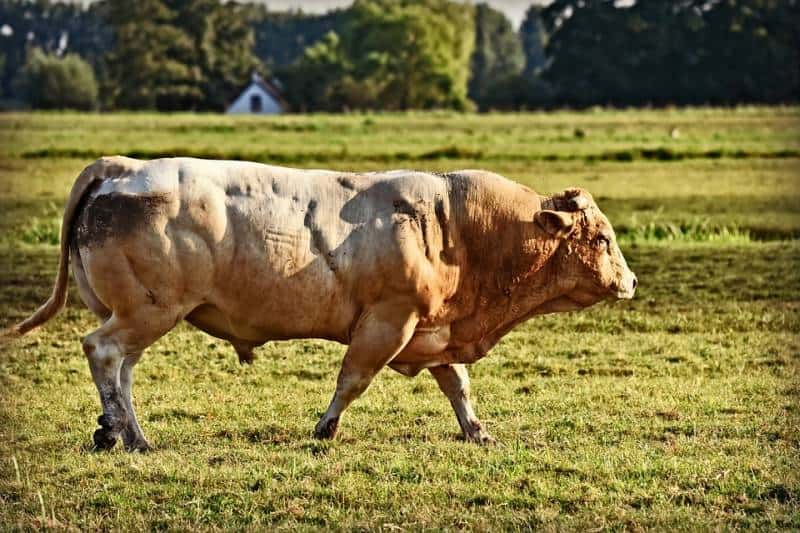
Bulls
Unless the cattle will be kept either for dairy purposes or only until the SHTF and then butchered, you will need to also keep a bull or bull semen for the herd to remain sustainable.
A bull is a mature intact male member of the bovine classification. His purpose is breeding only. A bull is an expensive and precious part of the cow survival plan – the herd will not have longevity without him. Eating your breeders should only be considered if the family was both literally and absolutely starting during a long-term disaster.
Bulls will hit approximately half of their mature weight by the time they are 14 months old, on average.
Just one bull, if he is of good quality, is able to bread roughly 30 calls on an annual basis.
Bulls are not kept in the same pasture as the cows. Only once about every 40 days are the bulls allowed to mingle with the ladies for breeding purposes. Overbreeding a bull can often cause not just severe medical problems for the bull or cow, but can lead to the aborting of calves by the cow, or even the death of what was once a quality breeder.
Newbie cattle ranchers are not typically equipped with the skills to work with a mature bull. Keeping a bull in a fence is also a lot more problematic than keeping a herd of heifers and calves inside a fence – which can be frustrating enough.
Buying bull semen to inseminate the heifers in your herd is an excellent alternative now, but is not sustainable in the long run.
Bull semen must be stored in liquid nitrogen to stop it from degenerating over time. Putting bull semen in a standard residential freezer would not even come close to chilling it to the minimum -112 degrees F it requires to remain stable.
When placed inside a refrigerator freezer or deep freeze, the bull semen would only remain usable for a maximum of three days.
Cows
A female member of the bovine family that has calved at least once is known as a cow. A cow will boast a thicker stomach and wider hips than both steers or bulls.
It takes 24 months for a cow to mature to a good butcher weight.
A cow should not be bred until it weighs a minimum of 600 pounds if it is a standard breed and is also at least 15 months old.
The gestation period of a cow is roughly 285 days.
While a cow can be bred any time of the year, farmers typically schedule breeding so calves are born from late February to May to avoid the added expense of wintering over extra animals unnecessarily.
Cows are typically kept solely for breeding purposes until they have gotten too old to regularly produce quality calves. Then, like aging dairy cows, are butchered, and their meat is hamburgered because it will no longer be top quality, and sometimes a little tough.
Heifers
A heifer is a mature female bovine that has not yet produced a calf.
Heifers are typically far less expensive to purchase than a cow because the animal’s breeding track record is yet unproven. But, purchasing a heifer that is “in calf” will generally cost more than buying a straight heifer.
A heifer’s body will feature more slender hips, and a less bulky belly than a cow because she has not yet calved.
Steer
A steer is a mature but castrated member of the bovine family.
Steers are raised solely for their meat.
A steer can be more aggressive than a cow, but is far less aggressive than a bull.
It takes roughly two years for a steer to reach a prime beef cattle butcher weight.
Calves
The term calf or calves refers to either a young female or a male member of the bovine family.
When a calf hits the seven month to one year old mark, it has been weaned and is now classified as a yearling.
Once the calf is weaned, the cow must continue to be milked on a daily basis to prevent her milk from drying up.
A calf from a standard size cow usually weighs between 70 to 80 pounds when it is born.
Within an hour or less after being born a calf is up and walking around, and wanting to nurse vigorously for the first time.
Calves need between five quarts to two gallons of milk per day. Stockpile a cow’s milk substitute to provide nourishment for calves in case the momma cow dies, becomes sick, injured, or simply cannot produce enough milk for the calf or calves she birthed. During a survival situation, losing a calf on top of the loss of a cow, could place the family in a life threatening predicament.
Cattle Types
Cattle are most often classified as being either beef or dairy breeds. While any cow, heifer, or steer can be used for meat and any bred mature female cow can be milked, some breeds are simply better at producing both quantity and quality of either staple food item.
When devising a plan to raise cows as part of your survival food security options, it may be best to purchase a dual-purpose cattle breed. Members of this classification can equally or nearly equally well produce a prime beef yield, as well as milk.
Dairy Cows
To keep a cow and calf pair that garners most of their feed from grazing, you should have three acres dedicated to the animals.
Dairy cows look a bit different than beef cattle breeds. A diary cow will often look “boney”, and possess especially large udders.
A quality dairy cow of standard size is capable of producing between three and seven gallons of milk on a daily basis.
Dairy cows are typically milked twice a day. Keeping up with this task is crucial to continue the milk flow until the cow is once again bred.
Miniature dairy cow breeds produce roughly two to four gallons of milk per day.
When in search of a top quality dairy cow that will also be used for breeding, purchase one that has a valid EPD card to reference. These livestock cards will allow you to trace the most likely traits the cow will pass onto her calves.
A dairy cows production typically peaks when it hits three to four years old.
Dairy calves are not treated the same way as beef calves on most farms or homesteads – at least when not in the midst of a SHTF situation. After the calf has nursed from its momma for three days to ensure it consumes all of the nutrient rich colostrum in the first milkings after birthing, the young animal is pulled off of the teat and bottle fed.
This process occurs to prompt early weaning so the animal can be sold or even butchered as veal, and all of the milk from the cow can be consumed or sold.
A beef cow and steers will have a far more muscular and filled out body style than that of a dairy cow. Beef cattle breeds are quite stocky, and have no visible boney features – like rib or hip bones showing. Beef cattle also have a flat and not a bony back.
The average lifespan of beef cattle is only 18 to 24 months because the animals are slaughtered, while their meat is still young and tender.
A bull from a beef cattle breed often lives up to 15 years old.
A breeding beef cow typically lives to be 10 years old, but slaughtering cows of this type for hamburger is fairly common by the time they are eight years old.
The hamburger meat acquired from a single cow is equal to at least 720 quarter pounder hamburgers. The hamburger meat from one cow would also provide one hamburger daily for each member of a family of four to enjoy for roughly six months.
No fewer than 100 different types of medicine are harvested from cows – including both estrogen and insulin.
One 3 ounce serving of beef will give the body about 10 percent of the recommended daily allowance of selenium, zinc, protein, riboflavin, vitamin B12, vitamin B6, niacin, choline, and phosphorous.
Learning how to tan the leather from slaughtered beef cattle will give you the material to make coats, bags, satchels, equine tack, belts, and a host of other useful items.
A typical sized standard bred cow produces enough leather from its hide to make a gross of baseballs or 18 volleyballs – you might need that many sports balls during a SHTF situation, but the example gives you an easy to grasp visual of how much leather you would have to work with for more important purposes.
Leather is not the only beef by products that can be useful after slaughtering a cow or steer. Other beef by products can be used to soap, margarine, gelatin, crayons, and marshmallows. The hooves, horns, and bones from beef cattle can be used to make combs, gel capsules, and fine bone dinnerware. The hair and hide can be made into glue, paintbrushes, and insulation.
The fatty acids and fats from the harvested beef cow or steer are commonly used as active ingredients in floorwax, shaving cream, candles, insecticides, synthetic rubber, deodorant, hydraulic brake fluid, shampoo, and paint.
Dual Purpose Cattle Breeds
A dual purpose cattle breed can give you the best of both the beef cattle and dairy cow world. Dual purpose cattle breeds may not have as quick of a growth rate or produce the same level of bulk as top beef cattle breeds, but will consistently offer an above average quality of meat that is also of excellent quality.
Dual purpose breed cows will also offer more milk than a straight beef cattle breed and a quality tasting milk.
A survival homesteader that has only so much land or so much money to spend – or is limited on both, could greatly benefit from raising a dual purpose cow as part of their food security survival plan.
A dual purpose cow will offer ample milk in-between breedings, and still produce calves that will develop into quality beef producers – giving you the best of both worlds.
Heritage Cattle Breeds
These types of cattle breeds will not bulk up as quickly as modern breeds, nor will they mature as quickly as common dairy breeds, but they are still very much worth considering as part of any prepper’s food security survival plan.
Heritage cattle breeds, as well as heritage breeds of all other types of livestock, tend to be more independent keepers, extremely hardy and disease resistant in their native environments, and excellent for free range grazing, foraging, or browsing.
The influx of factory farms in the United States has nearly wiped out many traditionally raised types of livestock in favor of cross-breeding to achieve the biggest bulk in the shortest amount of time.
Heritage livestock breeds are raised as naturally as possible and not injected with concoctions that intend to increase their weight or excess antibiotics.
The ability of heritage breeds to withstand severe winters or hot summers, reproduce or birth without human intervention, and thwarts parasites and bacteria can be quite advantageous on a survival homestead during a long-term disaster when calling a vet is simply not going to be a realistic option.
Top 10 Best Cow Breeds For Preppers
Hereford
This breed is perhaps the best beef producer. Cows are excellent mothers, all breed members have a lot of farm sense and respond quickly when a predator is about.
Hereford cattle are also known for their longevity, which is a plus for a prepper who wants to establish quality on-site breeding operation.
This large beef cattle breed are among the most intelligent, docile, and quiet of beef producers. A prepper with a keen on on OPSEC when adding cow raising to a survival plan.
This hardy and massive dual-purpose cattle breed is used primarily for beef production today, but has traditionally been used also as dairy cows and as draught livestock.
These dairy cows all stars are known to produce up to nine gallons of milk on a daily basis. Brown Swiss dairy cows create a sweet milk that has a four percent butterfat count.
They are known to be a docile breed that is incredibly compliant even when being milked for the first time.
This miniature cattle breed is another great dual purpose option for the survival homestead.
They are docile breed that is known to be hardy in both cold and warm weather climates. The mini powerhouses can be easily trained as draught livestock to pull small carts and wagons.
You really cannot get a juicier cut of steak from any beef cow breed like you can the angus. This breed is one of the most popular beef cattle breeds not only in Texas and the United States at large, but around the world.
Even though Angus cows are cultivated for meat the vast majority of the time, the cows do generate a nice tasting milk in ample qualities, as well.
A multi-purpose cattle breed that is a steady and consistent producer of milk and meat and strong enough to even be used for agriculture drafting chores.
Cattle in this breed weigh in at up to 1,200 pounds on average. A Guernsey dairy cow is capable of routinely providing seven gallons of milk daily.
Guernsey cows are also excellent breeders, attentive bovine mommas, and throw a high average of healthy calves. The milk from these dairy cows is excellent for cheesemaking.
Cattle of this breed are known to be quite docile and fairly quiet, as well. Jersey cow milk from this breed has a deliciously high butterfat count, that makes it a poor choice for cheesemaking.
Jersey cows have been a mainstay on American family farms and homesteads since before we even became a nation.
For small acreage survival homesteaders who want a docile and reliable milker, Jersey cows and bulls also come in a miniature version, as well.
This beef cattle breed is a miniature version of the famed Angus.
Lowline Angus cows rarely ever grow taller than 42 inches – making them a superb choice for both small acreage survival homesteaders as well as those new to keeping cattle. They are substantially hot climate hardy and provide a nice taking milk too.
Cow mommas from this breed are known to be great calvers and incredibly attentive to their offspring. The milk from a Lowline Angus is quite comparable in quality to the standard size Angus breed.
There are literally hundreds to thousands illness types that could affect the survival homestead cattle herd. The ones noted below are the most common – and potentially the most deadly.
Clean living conditions, a proper diet, maintaining a de-worming routine, and shelter can go a long way in preventing many but not all, of these dangerous conditions.
Stockpiling herbal supplements and recommended vaccinations can also help keep the beef and dairy cattle healthy and producing.
Scours
This is the animal version of diarrhea. Scours can be mild and caused by nothing more than a feed change or heat, or it can be severe enough to be considered life threatening if not treated both promptly and properly.
Dehydration caused by scours that has gone undetected or untreated can cause the loss of the meat or milk producing animal in a matter of just a few days.
Milk Fever
This is primarily a dairy cow disease that often occurs right before the cow starts the calving process. Milk Fever is a metabolic disease that is caused by a drop in blood calcium levels – hypocalcaemia.
To save a cow with this condition an IV treatment is nearly always necessary. Giving the cows calcium pills in the weeks prior to the anticipated calving can help prevent the development of milk fever.
Pneumonia
This cattle disease is often referred to as a “silent killer.” By the time a homesteader notices a member of the cattle herd has pneumonia, it is often too late to save the animal. Signs of bovine pneumonia include a cough, runny nose, fever, and lethargy.
An antibiotic is needed to kill the bacteria that caused the pneumonia, but getting the scours that accompanies the illness under control to prevent dehydration is equally essential to a possible recovery.
Mastitis – This condition involves a swollen udder tissue and mammary gland problem. Mastitis causes the death of a copious amount of cows annually.
Treating this bovine disease also requires the administration of an antibiotic. Cows must still be milked during the illness and treatment, but the milk is not suitable for use for either humans or animals.
Hoof Rot
Hoof health is as essential to the well-being of a cow just as much as it is to a horse, and other livestock.
When the inside of the hoof or hooves becomes deteriorated due to an injury to the protective covering, a bruise, or unusual growth, it is more susceptible to hoof rot.
Signs of a potential hoof rot condition include a stubborn unwillingness to move, or limping. To treat hof to, clean the area and then dry it thoroughly.
This condition sometimes needs an antibiotic to kill or prevent infection. Keeping the ground in the cattle shelter area dry and cleaning it regularly can also help prevent hoof rot.
Pinkeye
This is a bacterial and contagious condition in cows, just like it is in humans. A cow with pinkeye will have a cloudy look to its eye or eyes that tear up frequently.
An antibiotic will be needed to treat pink eye but a slightly warm damp cloth dabbed onto and around the eye (while wearing gloves) can soothe the pain associated with the condition and bring down the swelling.
Now that you are armed with the knowledge you need to determine if raising cows as part of your survival plan is for you, what breed or breeds might work best of your farm, and husbandry basics, it is time to focus on opening up your wallet, and buying a few heads.
The best time to buy cattle is in the fall, from a price perspective. Farmers who do not want the expense of wintering over an excess cows, heifers, or yearlings will head to the livestock auction, or otherwise post their animals for sale.
Waiting until later in the fall will garner you the best savings, but you may face a reduction in selection or quality.
Some cow breeds carry a far higher sticker price than others. If you purchase what is known as “grade cows.” Cattle of this type are not purebreds, but are often still top quality beef cattle or milkers.
Buying locally can also increase your chances of getting a good deal and a quality herd starter or new addition.
Local farmers, ranchers, and homesteaders will likely have the breeding pair on site for you to view and even breeding records you can review – do not expect to get such an extensive amount of information at a livestock auction.
Also, buying directly from a local keeper eliminates the middleman who charges the seller a fee at auction – which is then recouped in the bidding reserve price.
Ask to view a vet inspection card whether you are buying locally, from a private seller outside of your region, or at a livestock auction.
If the auction cannot provide such a document, at a minimum ask to see and review thoroughly the rules governing health checks on all livestock that are offered up for sale.
The degree of verified health information can vary greatly from auction to auction, but any reputable livestock auction house will have health guidelines all sellers must adhere to before placing a number on an animal and placing it in the lineup.
Before purchasing a cow, heifer, calf, or bull review its legs to ensure they are healthy and strong and free from hoof rot.
Lead or watch the animal walk around to ensure it does not have a limp, and that the legs are all evenly proportioned – and the back hock is just slightly recessed.
All breeds of cattle but dairy cows in particular, should have visible wide pin bones, review any animal you are thinking about purchasing for this physical characteristic.
Look at both the teats and the udders of cows – especially dairy cows. A medium size cow should have udders and teats in proportion to her size and not large ones.
Big is not always better if this part of the cow’s anatomy is out of sequence with the rest of her physical attributes. The udder should be pliable when touched by firm at the base if the ligament in the cow’s vulva area is truly healthy.
The udder should hang above the jock joints and not below it if the cow is in top physical condition.
A cow’s teats must point directly down to the ground, and not be angled if they are properly positioned and fully healthy.
The teats should also be spaced apart at even space intervals.
A cow that stands in a calm state when it is approached is a good sign the animal will be docile and compliant. You should be able to get within 36 inches of a cow even upon a first meeting, without it taking off or showing visible signs of agitation.
A cow that decides to move away from a stranger that has gotten within the 36 inch boundary should do so fairly slowly and calmly if it likely also possess a calm and easy to control demeanor.
A cow, heifer, or steer that refuses to be separated from the rest of the herd even for a few moments without becoming agitated is likely going to be difficult to work with and may have either skiddish or aggressive tendencies… or both.
Check the nose of the cow, calf, steer, heifer, or bull carefully. While a little bit of moisture inside the nostrils is not a bad thing, any animal with a snotty nose or bubbly moisture coming out of its nose could be sick – perhaps with a contagious illness.
If a heifer is between seven to 12 months old and has been around a bull, you may want to pass her by – no matter the price.
While getting a good deal on a heifer that may be in calf might sounds like a great idea, if you are new to cattle keeping and coupled with a heifer that is new to giving birth, you might be biting off more than you can chew.
It is not uncommon for heifers to have difficulty calving the first time, unless you know how and when to help her or can get a vet to the survival homestead in time, odds are you could lose both the heifer and the calf she is trying to deliver.
The coat of the animal should be smooth, even taking into account the thicker fur that comes in for the winter months.
Look the animal’s body overly entirely for signs of bald spots, places where the hair is less deep than it is elsewhere, or signs or boils. The presence of any of these issues could indicate a health issue of either small or major significance.
Conclusion
Raising cows as part of your survival plan may be one of the wisest prepping decisions you have ever made – but cattle husbandry is not for everyone.
For every person who starts keeping cows, who successfully raises them and enjoys the bounty of the endeavor, there is likely one person who has experienced an epic failure, and lost a lot of money in the process.
Knowing what you are getting yourself into as well as what your survival homestead, and you can handle on a daily basis no matter what the weather brings, greatly increases your chances of achieving success.
As with all types of livestock keeping, raising cows so they remain healthy and producing meat and – or milk all begins with proper husbandry tactics.
A clean and safe living space along with quality pasture areas and hay are at the foundation of creating such an environment for your cattle herd.
Learn as much as you can about not only proper husbandry practices, livestock first aid and the health needs of the animals – and then cross-train other members of your family or survival tribe so they are armed with the same knowledge and skills.
Making sure the family has meat and milk for the duration of the long-term disaster (even if you become ill, injured, or die) will require at least one other person being able to pick up where you leave off in the barnyard at a moment’s notice.
Taking care of these large animals is not a small job, nor is it one you should expect yourself or anyone else to master overnight. Practice, as they say, will make perfect.
Develop a solid husbandry routine while learning how to milk, humanely slaughter, butcher, and preserve the food you are raising to make raising cows an integral part of your food security plan.