Amateur radio operators and shortwave listeners have a common enemy: QRM, which is ham-speak for radio frequency interference caused by man-made sources. Indiscriminate, often broadband in nature, and annoying as hell, QRM spews forth from all kinds of sources, and can be difficult to locate and fix.
But [Emilio Ruiz], an operator from Mexico, got a little help from Mother Nature recently in his quest to lower his noise floor. Having suffered from a really annoying blast of RFI across wide swaths of the radio spectrum for months, a summer thunderstorm delivered a blessing in disguise: a power outage. Hooking his rig up to a battery — all good operators are ready to switch to battery power at a moment’s notice — he was greeted by blessed relief from all that noise. Whatever had caused the problem was obviously now offline.
Rather than waste the quiet time on searching down the culprit, [Emilio] worked the bands until the power returned, and with it the noise. He killed the main breaker in the house and found that the noise abated, leading him on a search of the premises with a portable shortwave receiver. The culprit? Unsurprisingly, it was a cheap laptop power supply. [Emilio] found that the switch-mode brick was spewing RFI over a 200-meter radius; a dissection revealed that the “ferrite beads” intended to suppress RFI emissions were in fact just molded plastic fakes, and that the cord they supposedly protected was completely unshielded.
We applaud [Emilio]’s sleuthing for the inspiration it gives to hunt down our own noise-floor raising sources. It kind of reminds us of a similar effort by [Josh (KI6NAZ)] a while back.
Abduction and kidnapping has ever been a fixture of human violence. Be it done for purposes of ransom, as a psychological or emotional weapon or just to quench the sadism and bloodlust of the kidnapper, being the victim of such is certainly one of the most harrowing and most dangerous things that can possibly happen to you.
Victims of kidnapping are placed into extreme jeopardy, completely dependent upon their captors’ whim and will, unless they can escape.
If the kidnappers discover or already know that you are valuable to them you will be ransomed, and when the ransom is paid, you might be let go or you might be disposed of.
If the kidnappers find out that you don’t have any value or they grabbed the wrong person they might decide to take no chances and get rid of you anyway versus letting you go. This assumes, of course, that you are not simply the object of the kidnapper’s desire in the first place…
Everything about abduction is ugly, and it is imperative that you know both how to avoid being kidnapped, and how to escape if the unthinkable happens. In this article, I will provide you with advice and procedures for accomplishing both.
Kidnapped? Me?
Yes, you. No one is ever truly safe from the threat of kidnapping, no more than you are completely safe from any human violence.
No matter who you are, young or old, man or woman, there exists the possibility you could be kidnapped. Wherever you have other humans, you have the possibility of violence.
With that being said, some people are far more vulnerable to kidnapping than others, and this vulnerability is intensified in certain areas of the nation and the globe where kidnapping is more commonplace, especially as a means of income.
People can be kidnapped for a host of reasons. In some countries and continents, places like Mexico, South America, the Philippines and other parts of Southeast Asia, kidnapping is often conducted on a mass scale as an income-producing endeavor for organized crime.
You don’t have to be a visiting oil baron or tech company CEO to be targeted for kidnapping in these places; simply looking like what you are – a foreigner – is enough to get you rolled in hopes of getting a ransom paid.
On the other hand, if you are a person of some renown, even if it is just being an employee of a large and wealthy corporation operating in the area, this might be enough to see you specially targeted.
You need not think that serious criminal enterprises don’t have their own intelligence-gathering apparatus working in overdrive at all times…
And men, you might think that simply being male affords you some protection against being kidnapped, but you would be wrong; many professional kidnappers and the teams they are part of are entirely comfortable, and proficient at snatching men as easily as women.
You could be heading overseas on vacation, or simply traveling through a human trafficking hub in your own country on a work detail; it will affect your chances of getting yoinked, but no matter where you are you are never 100% safe from the threat of kidnapping.
For this reason, it is in your best interest to learn how to avoid being abducted and how to escape if that happens. In the next section we will look at some of the nuts and bolts of typical kidnapping operations as well as how to best thwart various types of kidnapping attempt.
Obvious displays of wealth and prosperity are likely to get you targeted for kidnapping anywhere that the practice is endemic.
There is no set-in-stone template for kidnapping; you might be abducted by a disorganized, unruly gang or a desperate small-time duo in one part of the world, or snatched by a professional, well-oiled team or lone henchman in another. Determining who has taken you might be an important part of your overall survival strategy.
Some kidnappings are shockingly brazen events that can take place in someone’s home or temporary lodging, or in the middle of the street. You are not necessarily safe just because you are not in the bad part of town.
Some kidnappers will enact a “live” capture, hustling you into a vehicle, or taking control of your own vehicle with you still conscious. Others will attempt to incapacitate you with the use of gas, drugs or other subterfuge.
Learn the kidnapping hotspots of the country or region you are in. Kidnappings will be far more common in some cities than others.
Kidnappings may be of a shorter duration, an extortionary affair where you are held in a location while the kidnappers drain your debit card and other accounts, or long-duration where you are held in ransom until your loved ones or your insurer if you have KRE (Kidnap, Ransom, Extortion insurance) pay the kidnappers off to let you go.
Your kidnappers may execute you if they think the situation has gotten beyond their control, has grown too risky, or there is no payoff forthcoming. This is also highly likely if you have been kidnapped for ideological reasons or by known terrorist groups.
It is imperative that you keep a few things in mind as soon as you perceive you are being targeted for kidnapping, or you detect the attempt. The following may make the difference between life and death:
A kidnapping can be initiated in any number of ways. One common method used south of the U.S. Southern border is to overwhelm somebody in their own vehicle, and use it to drive them to a secondary location. Hustling them into a waiting vehicle is also common. Other kidnappings are initiated by a seemingly innocent minor fender-bender that gets you to pull over or stop, or a crooked taxi driver or his accomplices hitting you with a knockout agent.
As with any crime, being taken away from the initial location where it occurs is bad news. Things will get steadily worse from there. But understand if you are targeted by a professional snatch team, you still might have virtually no opportunity to resist initially.
Experienced kidnappers will make it a point to frisk you in order to remove any weapons or tools that might aid escape attempts. The longer you are in their custody the more thorough and the more intrusive searches will become, to include removal of most or even all of your clothing.
Similarly, the quality and intricacy of your restraints and your holding cell will increase the longer you are held and moved from place to place. Once again, you will have an easier time escaping earlier in your captivity than later.
If you determine that you are dealing with professional kidnappers who are demanding a ransom or just trying to drain your bank account of money, there is a better-than-average chance you will be released once the ransom is paid. However, if things go badly or they are disappointed, your fate may be in jeopardy. Your chances of surviving a kidnapping by a deranged person if you do not affect self-rescue are virtually zero.
How to Survive Being Kidnapped!
The following steps and procedures should help you escape captivity and survive your kidnapping, if worse comes to worst.
1) Maintain Overall Awareness, Especially in Areas of High Kidnapping Activity
Situational awareness is usually the single best thing you can do for yourself in order to increase your chances of survival no matter the situation, but it is especially important to avoid or escape a kidnapping. This is doubly crucial in areas of known high kidnapping activity.
Generally, you should strive to be very familiar with the area you are living, working, or traveling in.
You want to know major man-made and natural landmarks in the surrounding region to better orient yourself in case you pop up somewhere not of your choosing after you manage to escape your captors’ clutches.
If this is in or around a large metropolitan area, being broadly familiar with the various districts and boroughs can help orient you in a similar fashion; terrain recognition works in and out of the city!
When you are abducted it is a virtual certainty that your kidnappers will blindfold you or otherwise obscure your vision, and possibly your other senses as well in order to confuse you.
If you pop out of captivity in an unfamiliar area it will help greatly to know which direction to head to go toward help.
You also want to be acquainted with organized criminal activity in the area, especially those groups that regularly employ kidnapping. Understanding your enemy is the first step toward beating them, and in your case beating them is simply a matter of staying out of their hands.
You want to know where they typically operate, what identifying marks, logos, colors or uniforms they employ, typical vehicle selection if any, and what methods they usually use during their kidnapping. All of these things will inform your decision making process.
2) Always Carry Tools (But They Must Be Well-Hidden!)
Most preppers already carry an EDC kit consisting of various tools and even weapons to help them survive the perils of the modern world.
If you are seriously worried about a kidnapping attempt, and escaping from one, you’ll need to add a few special purpose items to your accoutrement in the form of escape tools:
handcuff keys,
shims,
simple lock picks,
compact knives or razor blades,
and even specialized goodies like high-strength, thin fiber that can saw through restraints are all worthwhile additions.
While these types of items have proliferated in the prepping communities, there is one resulting blind spot that most people do not account for…
Thanks to an increasing number of programs and articles (like this) one on the internet warning and preparing people for kidnapping attempts, the people doing the kidnapping have upped their game in a sort of “arms race”; an arms race that pits measure against countermeasure over and over in an endless cycle.
Most seasoned or skilled kidnappers will now start frisking people they abduct immediately, or simply stripping them in order to deprive them of the tools they anticipate their victims carrying.
Your fancy paracord bracelet with a handcuff key buckle, the lock picks clipped on behind your belt and the razor blade in the tongue of your shoe or boot will all go missing very quickly, meaning they won’t be able to help you.
You must be prepared to hide these tools in ingenious ways that are still accessible even when restrained. Easier said than done, and this is largely dependent upon how you dress and your own flexibility.
As mentioned above, you can depend on the searching and stripping to grow ever more thorough and invasive the longer you are in the custody of the kidnappers. You must access your tools and use them to good effect the moment you have an opportunity; you may not get another one!
3) Submit or Fight: Countering the Abduction
When the moment of truth comes and the kidnapping attempt actually initiates, you’ll have to correctly assess the situation, and then decide what to do. Broadly speaking things will only get worse for you if you are taken away from the site of the initial contact.
For this reason, if you are dealing only with one or two kidnappers who do not appear to be particularly skilled or professional your best bet is probably to attempt to flee immediately especially if help is nearby. They will likely give up once the attempt goes bad.
But this also does not mean you won’t have to fight!
If you’re dealing with individuals who appear professional or very experienced, and they are employing lethal cover (which is an increasingly common practice, mind you), you must be prepared to fight and, perhaps, die if you want to avoid being taken somewhere else against your will.
On the other hand, your best chance of survival may come from initially submitting without a fight in order to take advantage of any opportunity forthcoming, no matter how brief, to either turn the tables on your captors or simply get away.
By not attempting any resistance, you may be able to set your captors up for failure using such methods as getting your hands bound or otherwise restrained in front of your body versus behind you, relaxing your body in order to gain mobility when restrained and generally lulling the bad guys into a false sense of security.
4) Practice Employing Unarmed and Improvised Weapon Combat
Since it is a virtual certainty that you’ll be deprived of any genuine weapon while in captivity, you must become fluent at doling out lethal or disabling damage using nothing but your hands and feet, as well as making use of and fashioning improvised weapons from any material available.
This is the only way you might gain a decisive edge quickly enough over armed captors.
Also keep in mind the weapon you are most readily able to source is the one being used by your captors. It is definitely worth your time to learn some simple, effective weapon takeaways that you can employ explosively the precise instant they let their guard down.
But even learning these techniques, be prepared for a life-or-death fight the moment you decide to touch things off.
Regarding improvised weapons, you might be surprised to see what kind of damage can be done with the most rudimentary materials, and furthermore what kind of weapons can be fashioned from them.
If prisoners all around the world are held in the strictest and most oppressive high security prisons and still create weapons seemingly out of nothing and keep them concealed on their person, you can do the same. All it takes is a little know-how and ingenuity.
Common objects can be used to deadly effect as-is; everything from loose ceramic tile to hefty books can pack a deadly punch.
Weapons can be crafted from nothing more than a short piece of wood, the plastic barrel of a disposable pen or a small stone rolled up in a piece of cloth or a bandana. These can be fashioned into spikes and flails respectively.
The chief weapon is the human will and your own ingenuity. No matter how austere the conditions you are being kept in are, you will be able to come up with something that you can fashion into a weapon.
5) Seize the First Opportunity to Escape that is Presented.
This is perhaps the most important lesson you can learn when it comes to surviving the kidnapping itself.
You absolutely must take the first viable opportunity to escape that is presented and capitalize on it with everything you can muster. You might not get another one! The longer your captivity drags on, the worse your overall situation will become.
First, you’ll be continually moved, searched and stripped, meaning you will lose more and more tools and material available to you. Second, as grim as it is to contemplate, you have to count on your captors abusing you or at the very least starving you and depriving you of water.
This means your physical and mental condition will be steadily deteriorating. It is true that they might let you go if they don’t get what they want, but they’re almost as likely to just kill you and dispose of your body as they are to do that.
Do you really want to give up your vote in the outcome of the situation and place it solely in the hands of the people who abducted you in the first place?
When you have the means and the opportunity to escape, go for it!
Conclusion
Kidnapping is an existential threat in many areas, and no matter who you are and where you live you will never be completely safe from the possibility.
Surviving from a kidnapping is a matter of correctly understanding your kidnap risk and a specific area, assessing the kidnappers and having the tools, training and tenacity necessary in order to affect escape.
It will be a harrowing, potentially deadly experience no matter what happens, but if you keep your head, it is possible to escape and survive.
Slingshots are weapons that have been around a long time, and they are still used today for recreation, small game hunting and, in some rare cases, even self-defense or other special-purpose tasks.
Compared to the simple slingshots crafted by mankind in eras past, modern slingshots might as well have been designed by NASA: Instead of a simple forked stick with some rubber tubing or strapping strung between them, modern slingshots are made of high-tech synthetics, alloys or composite materials with state-of-the-art elastics and optimized geometry for launch and all kinds of projectiles.
So, just what is a slingshots maximum range? The maximum range of a slingshot that is being employed in a hunting capacity is at most 20 to 25 yards on the extreme end. This will naturally be dictated by the shooter’s skill, the quality of the slingshot, its band, and the ammunition being fired. It’s possible to score hits farther, and indeed the slingshot may be plenty accurate beyond this range, but any projectile they fire will have lost too much energy to be effective.
The power, accuracy and range of modern slingshots is impressive but often overstated, with many tall tales floating around making bold claims of 75 or 100 yard shots that successfully brought down game.
If you are interested in extending your slingshot’s maximum range, you need to know what all the factors are that affect it. Read through the following sections to get a better understanding of what you might need to change if you are trying to go for a successful long range shot!
What’s Your Purpose?
Before you do anything else, consider your purpose. Are you just trying to nail a distant target, even a small one, just for giggles?
If that is the case, maybe you don’t need to worry so much about actual performance enhancements since the consequences of a miss or a marginal hit are minimal to nonexistent.
You can draw, hold high and start lobbing shots to your heart’s content. So long as you are confident of getting feedback to know you have hit, what is the harm?
But hunting or other special purposes, like knocking out cameras, street lights or other objects in a tactical situation means that your projectile must be capable of imparting sufficient energy when it makes impact.
If it strikes with pinpoint precision but with all the force of a thrown grape, you are kind of defeating your purpose!
At any rate, unless you are some highly specialized commando-type or are living through a long-term emergency, you are probably just using your slingshot for hunting if you are using it for any serious purpose.
In that context, assuming you are after small or medium-sized game animals, your maximum effective range is probably going to be between 10 and 25 yards, with that max effective range determined predominantly by your skill, the construction of the slingshot and the ammunition chosen.
This max effective range is the range at which you cannot reliably kill humanely the animal you are shooting.
It is entirely possible to shoot at and hit accurately an animal beyond these ranges, but the vast majority of slingshots shooting the vast majority of ammo types will no longer be powerful enough to guarantee a clean kill, though they can certainly stun.
Projectile
Slingshots are famous for being able to employ a wide variety of ammo, everything from various sizes of BB or ball to specialty projectiles like fully-fledged arrows, darts, and bolts.
The choice of ammunition more than most other factors will dictate your effective range, but even this particular factor is deceptively complex.
An aerodynamic projectile like an arrow, dart or pellet will be less affected by drag but one must also consider the weight of the projectile in this equation. A heavier projectile launched with a given force will have a lower initial speed but will be less affected by wind and drag.
The reverse is true for a lighter projectile; the lighter it is the higher the initial speed but the more affected it will be by drag.
Generally speaking, the typical ammunition used for hunting with a slingshot is a steel or lead ball, though sometimes glass marbles or even composite ammunition made of wax and other material can be used.
Determining the ideal diameter, size and weight of a given projectile is the only way to establish your effective maximum range with your chosen ammo type.
Slingshot Type
For as simple as slingshots are, there sure is a wide variety when it comes to type, style, building materials and features.
Though the functional mechanics of every slingshot are the same, the devil is always in the details with design as well as material choices, counting more than you think when it comes to effective range.
The quintessential slingshot consisting of little more than a forked branch with an elastic band strung between them might propel your chosen projectile as far as a more modern option, but chances are it will not do it with as much accuracy or as consistently.
Contrast this with the latest and greatest and modernized slingshots made from composite materials or high-tech alloys and you’ll see a world of difference when it comes to increasing your maximum range.
The current paradigm in long-range slingshots are called starships. These are slingshots that feature a long and sturdy forearm brace mated to a grip that projects the forks very far ahead of the firing hand.
This is a comparatively simple trick that serves to greatly increase the draw length of the attached band, maximizing potential energy and thus maximizing velocity upon loosing your shot.
Also, the band itself is critically important to maximizing power and thus effective range. A simple strip of vulcanized rubber can do the job, or even a bungee cord, but you’ll always get best performance and longest life out of a slingshot-specific band.
One should also keep in mind that these bands degrade with every single draw and release cycle, and the lifespan of a given band is dependent upon usage conditions as well as its inherent durability. A slingshot band that is nearing the end of its useful life will have noticeably degraded power.
Conclusion
A slingshot that is optimized for hunting with a correct band, correct ammunition and wielded by a shooter of adequate skill can place a shot decisively and accurately onto a small target that is 20 to 25 yards away.
It is entirely possible to strike a target much farther away than that, but terminal effectiveness will be greatly reduced.
I don’t think it is any sweeping assumption to say that everybody reading this article, right now, understands just how important water is to survival, and only a fool would not prioritize it as a resource in a survival situation.
A short-term emergency or a long-term catastrophe makes no difference: You can only go without water for a couple of days, tops, and drinking suspect water out of desperation is bound to lead to disaster sooner or later.
This means you need a source of water that you can rely on, one that is resistant to outside contamination, disasters, and going dry at the drop of a hat. I’m referring to, of course, a well to call your very own.
Humans have depended upon wells for millennia as the cornerstone of any permanent settlement that was removed from a natural body of drinkable water.
For all of our advancements in the skills of locating them and the technology for digging them, the principles of installing and maintaining a well are very much the same today as they were way back when.
In today’s article I will offer you an easy to understand beginner’s guide for locating and digging your own well.
The Importance of Well Water for Human Settlement
The importance of a reliable, bountiful well cannot be overstated. It is no exaggeration to assert that human settlements far away from naturally occurring bodies of freshwater would be greatly curtailed, or even made impossible without the advent of wells.
We aren’t so far removed from our ancestors as to be exempt from this lesson; just ask anyone you know who lives quite a ways outside the city limits. They won’t be able to connect the public water resources if they want to get clean, drinkable water when they throw open a tap.
Instead, a well must be dug on their property and a pump installed to bring the water trapped deep in the earth up to the surface and into the plumbing of their home.
Aside from the method of retrieval- an electric pump versus a rope and bucket- not so different, eh?
And beyond merely being a source of water wells may produce higher quality water than can typically be had from above ground sources, be they rivers, streams, ponds or something else.
This is because the typical well draws its water from underground aquifers, which are simply water-retaining fractures in the rock of the Earth or a conglomeration of some other matter that is water permeable.
Aquifers may occur near the surface or many tens of thousands of meters down in the bowels of the Earth. Chances are a well will not be going that deep, but they can go thousands of feet in questing toward water.
Most wells created via primitive or austere construction methods often only go as deep as a hundred feet or so at most.
No matter how deep the well goes and no matter how it was dug, the end result is the same: a consistent source of water that is generally resistant to outside contamination, and is unlikely to go dry.
The importance of a well goes far beyond keeping a human body hydrated, as its water can be used to provide for livestock, irrigate crops, cleaning, bathing and so much more.
How Low Will You Go? Shallow Wells and Deep Wells
To an outsider, any well will probably seem like a pretty deep hole in the ground. After all, a well that terminates 30 feet underground will probably look like a black hole or a bottomless pit from the surface!
All joking aside, the basic category of well you are dealing with is determined by how deep the well goes in quest of water. Wells are classified as either shallow or deep.
Most wells are deep wells, which is any well that goes beyond 50 ft. into the Earth’s surface, but modern ones might average several hundred or even thousand feet deep!
Wells of this type will usually go beyond the first layer of impervious soil strata into aquifers that are full of water that is pure and clean by “surface” standards, but is likely to be impregnated with a variety of minerals, leading to odd or bad taste, and considerable “hardness”.
Modern deep wells in advanced societies will often be connected to high-tech filtration and water softening systems to make this water more palatable and useful in domestic environments.
Contrast these far-reaching wells with shallow wells, which is the classifier given to any well that is 50 feet deep or less.
These wells draw from water that is well above the first impervious strata and the quality of the water in these aquifers is a trade-off, also; it is much less likely to contain significant amounts of heavy minerals, but it is more likely to be contaminated with bacteria or viruses.
It is also significantly more vulnerable to contamination from above ground and in-ground hazards.
Determining or selecting the required depth of the well is not just a matter of picking what water source you will have an easier time living with.
Other important factors must be considered, namely the fact that for all of their expenses and difficulty in accessing them, deep wells will rarely dry up during droughts or other hot weather while shallow wells, though much easier to install and operate, can be vulnerable to contamination as mentioned above, and even dry up completely in hot seasons, especially in arid regions.
Neither of these problems is any reason to fret; where there is a will, there is a way! When it comes to striking water so long as you have a little bit of time to plan and prepare you will easily find out which well is best for you.
Assuming, of course, that you have a choice! Sometimes the choice is made for you, a result of your regional terrain, soil conditions technology or workers on hand and many other variables.
A deep well might be the only choice where you live, whereas somewhere else it is shallow wells all the way. You might be fortunate enough to be afforded a choice so long as you have funds enough to roll the dice and see which you can pull off.
Taking all of this into consideration makes it easy to understand why a thorough working knowledge of all the variables involved in locating, planning and digging a well is so important to ensure success.
Well Types and Variations
There is more than one way to skin a cat, and there is too more than one way to dig a well. Far from only being privileged to employ a multitude of digging methods in our modern era, a variety of techniques have been used to dig wells going all the way back to antiquity.
Some rely on ingenuity, while others rely only on brute force contraptions or even humble, backbreaking labor with simple tools.
It is wise to not put all of your eggs in one basket with a single method, since not all methods are suitable for digging every type of well, and the calculus changes even more when you consider the great variety of soil and terrain you might have to dig for it.
Any good homesteader will have alternate and contingency plans for unexpected problems. Make it a problem to become passingly familiar at the very least with even a single alternate method of digging a well beyond your primary technique. See the list below for additional information.
Dug Well
The oldest and indeed the first type of proper well, dug wells are not just artifacts of the past, they are still employed today in third world countries, and even in first world countries where technology or resources are scarce but manpower is plentiful.
A dug well can be installed with nothing more than a strong back, shovels and buckets but more advanced and ingenious devices consisting of human-turned drills and a variety of augers are also entirely viable.
Probably the single biggest shortcoming to a dug well is that they will only be able to go so deep, almost as a rule being used for shallow wells and only occasionally through great effort, toil and a little bit of luck achieving deep well depth.
Also the very nature of a dug well makes them more vulnerable to the ingress of contaminants than other sealed or semi sealed types of wells.
Driven Well
Driven wells are a type that is commonly used today for the installation of private wells. A driven well is little more than a pipe driven into the ground (as you might expect) until it reaches the water source below.
The bottom of the pipe has a filter or screen on it in order to prevent large contaminants and other obstructions from entering the water source that is drawn through the interior diameter.
The physics of driving great lengths of pipe into soil grow pretty perilous very quickly, as the density of soil rapidly increases the deeper you go invariably leading to a bent, cracked or otherwise badly bungled pipe.
For this reason, driven wells are typically only used in relatively soft soils or sandy terrain and almost always only for establishing a shallow well. Shallow wells and in particular shallow driven wells are highly vulnerable to contamination.
Drilled Wells
The most popular method for the installation of any modern well, drilled wells are also a surprisingly ancient technique pioneered by advanced cultures with access to quality metal works.
Drilling is as you might expect an extremely efficient method of installing a well, and will help the well hole remain concentric and hopefully plumb.
Drilling is also highly adaptable, with only different drill heads or bits being required to defeat soft soil, hard soil, rock or any combination of the aforementioned. The hardest substrates can be defeated with a device known as a percussion drill head. Drilling is definitely the method of choice, and indeed the only choice, when you need to go really, really deep.
Structure of a Well
There are many variations on even the well designs we just covered, but no matter what kind of design and what kind of local or national variant it might be, it will have a few things in common with all wells.
The vast majority of wells operate using just a couple of simple principles and the same basic components. The list below will help to familiarize you with the most common and important parts of a well.
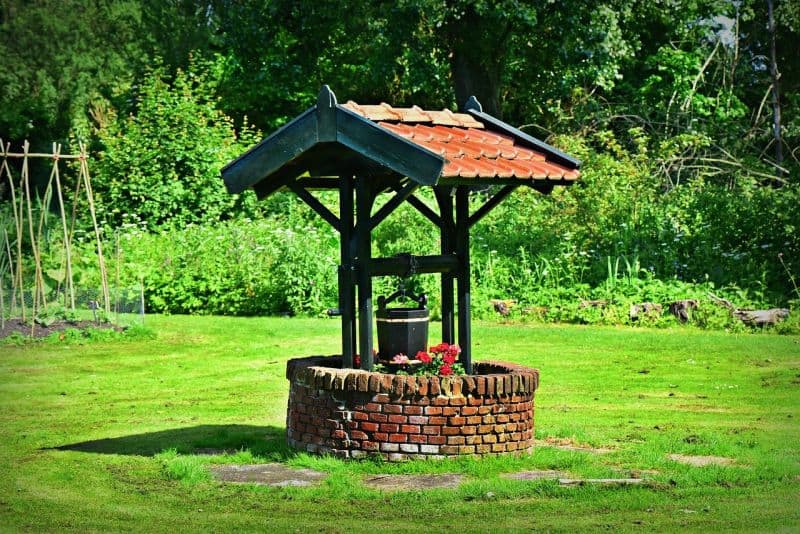
Well Hole: The well hole is the shaft of the well itself, be it dug, drilled or driven. It is through this passage that water will be brought to the surface.
Well Curb: This is a rim for raised structure around the opening of the well hole at the surface. This helps to protect the well from contamination, as well as prevent people and animals from inadvertently stumbling into and falling down the well. This also serves as a foundation for any superstructure that will be built above the well, such as the steining, the well cap and any mechanism for raising and lowering the vessel.
Well Casing: The well casing lines the well hole or indeed might be the well hole itself in case of a driven well or prefabricated casing. This gives the well hole structure, prevents cave-ins, and also helps prevent contamination seeping into the ground and contaminating the well water source. Today, typically made from metal or plastic. Primitive wells or ones built in austere conditions could be made from brick, wood or stone.
Steining: The steining is the solid structure or wall extending above the well hole and built atop the well curb. This could be a freely built construct or a prefabricated piece. The steining must be sturdy enough to support people leaning against it as well as any superstructure that allows the installation of the well cap and any mechanism for hauling the vessel.
Well Cap: A device or installation that is placed over the uppermost opening of the well in order to prevent people and animals from falling in as well as contamination from other sources. Essential for safety and for preserving water quality!
Well Screen: Another essential component to help ensure water quality, this is a part that attaches to the very bottom of the well casing in a modern well in order to prevent debris like rocks, sediment, insect corpses and other detritus for being drawn up with the water via the pump. Often made from metal or plastic and more advanced models that offer better filtration can be very complex.
Pump: A typical installation for modern wells, and even for some austere wells they can make use of plentiful natural or remote power sources. A pump is used to pull or push water up to the surface. Submersible pumps are often employed for deep wells where they are lowered all the way to the water source and submerged. Jet pumps are most commonly found in use with shallow wells and typically mounted above ground.
Container/Vessel: This is the part of a primitive well that actually retrieves the water. Classically, this is a bucket or leather sack on the end of a rope that is raised and lowered either by hand or by a simple winch. Far more laborious than using a pump, and also introduces a greater risk of contamination as the vessel should be kept scrupulously clean; not always easy to do when it is kept outside 24/7.
There are other components found in most wells and specialized components found in specialized wells, but these are the basics you should become familiar with. Soon, you’ll know your way around wells of all kinds.
Strike Water: Considerations for Digging Your Own Well
Digging any well, whether you do it yourself or not, is a serious undertaking and should only be approached when an understanding of all the many variables needed for success and safety is attained.
Even if you are digging on your own property in the middle of nowhere there will be much to consider, everything from permitting and surveying to locating the well hole and choosing what kind of whale is best for your needs.
You can double the effort and advanced work you’ll need to put in if you plan on doing it yourself. In some areas no licensing or permitting may be required, but in other areas you could be up for some fairly odious hoop jumping.
Some places even only allow specially licensed and trained contractors to dig or repair wells, and will punish violators with substantial fines or even jail time.
The following subsections will help you keep in mind everything you need to consider in order to successfully plan and install your well.
After we go through these considerations you will take a look at some DIY methods that have been around for a long time and are suitable for the installation of a primitive well or a more advanced one in an austere environment.
Before You Begin, Consider Hiring a Pro!
I know most folks reading this are all about self-sufficiency, self-reliance, and DIY extravaganzas for the ages. But consider that digging a well, though conceptually simple, has an awful lot going on and is a fairly dangerous undertaking.
Also, consider how much your time is worth. It is true that you might not have an option if you are living in the aftermath of a major SHTF event (well digging professionals don’t grow on trees!) and in that case if you were going to rebuild society brick by brick you might have to dig your own well first.
But assuming that isn’t the case and society is still humming along more or less recognizably then investing in the experience, skills and services of an expert is a wise move. Before you decide to go it alone, ask yourself the following questions:
So you know if your property can even support a well? If it can, where is the best place to sight it nominally? Is it far enough away from any potential source of contamination or other hazards?
Do you know what those hazards are? If you are uncertain do you know how to conduct a survey or read a survey that was done previously?
Do you know what the laws are in your burrow, city, county and state? Are you aware that if you botch the digging or drilling you might destroy or contaminate the aquifer itself?
These are all factors that must be considered before you embark on digging a well yourself.
Site Selection, or Locating
The single most crucial element of installing any well is locating the site of the well itself. This is a multi-faceted task but you have to get right for all your labor, effort and expense will be for nothing, a literal dry hole.
Now, in actuality that is only half true because in most places you can go deep enough where you will eventually reach water, but every foot you travel is a serious investment as we will learn later and also increases the chances that things can go terribly wrong.
The two key elements of site selection are making sure you are atop a proper aquifer that will serve as a go-to water source, both in quality and quantity, and reading the terrain and the soil substrate layers so you know you can actually penetrate the ground and reach that water in good order.
There is a certain calculus between the two.
Do you go for a water source that is closer to the surface, and perhaps more vulnerable to contamination but in exchange make the digging exponentially easier, perhaps easy enough that you can have your well installed in one or two days?
Or do you try to go deep, a more laborious process and perhaps along a path that means you encounter harder strata that will make for troublesome and difficult digging?
The reward in that case might be water that is extremely resistant to contamination but it might also require substantial softening to be used. Everything is a trade-off when it comes to locating a well!
You might have a location that is atop easily dug soil and not too awfully far down to an aquifer containing high-quality water but perhaps it is located just a little too close to a potential source of contamination for comfort. Dare you risk it?
These concerns and many more will confront you in the process of allocating your well, and you had better make sure you get it right.
Failing to do so could mean squandered resources, backbreaking labor with no return on investment and an awful lot of wasted time. In a worst-case scenario you might actually ruin or contaminate the water source you were trying to reach in the first place!
If you are determined to dig your well yourself, don’t let that sway you as humans have been digging wells for millennia. Just make sure you perform your due diligence!
Hazards, Contamination Vectors and Other Mishaps
Just as important as knowing where to dig to reach the best water for the least possible effort with the most certainty is knowing where not to dig and where not to locate your well in order to avoid every possible source or vector of contamination that you can.
Contamination is an issue for any well, and no water source, no matter how deep and how far under impermeable layers it resides is truly immune to contamination in one form or another. That being said, some wells are more vulnerable than others as we have discussed in detail above.
Shallow wells are highly vulnerable to in-ground contamination and any contaminants that leach through the soil above.
Deep wells, especially ones with a water source residing through several impermeable layers, don’t have much to fear from above ground contaminants unless they penetrate the well and seep down directly. Regardless, it is the summit of idiocy to cite your well in the path of probable contaminants or next to a source of them.
What are contaminants? Common ones include natural hazards like swamps and marshes full of water that is practically alive on its own it is so full of bacteria, viruses and other biological nastiness, while man-made hazards could be anything from a septic tank or refuse pit to an in ground oil tank, a dump site, or the location of a substantial chemical spill.
You must also take pains to locate your well out of the typical path of flowing water that invariably occurs during rain and flood events. Your well could be located far away from any direct source of contamination but square in the middle on the path of water that could sweep contaminants to your well’s location. That is just as bad!
The general rule for locating a well away from hazards and contamination vectors is to maintain a minimum (minimum!) standoff distance of 50 ft. and more is always better.
Serious potential sources of contamination like sewers and septic tanks should be treated like they are radioactive, and avoided as far as practicable.
Also, don’t forget to check for the presence of any buried utility or power lines and any other kind of an underground installation like fallout shelters, severe weather bunkers and others before you dig. Use your head and dig smart!
Testing
No matter how you choose to install your well, no matter where it is located and no matter what kind of well it is you must take the essential step of having your water laboratory tested for safety.
You might be getting your water out of an ancient and protected aquifer, quite literally some of the purest available water in nature, and it could still be questionable or totally unsuitable for human consumption depending on what kind of contaminants are in it.
Minerals, metals, viruses, bacteria and who knows what else could all be lurking in your water. Do not rely on the taste test, sniff test, or color test. Only a lab that is set up for the analysis and discernment of water quality is able to make that call reliably.
But we must also consider that you might be digging and drawing water from a well completely and totally on your own in the aftermath of some society-toppling disaster. In that case, it definitely pays to know how to test your water for the most common as well as the most dangerous contaminants.
You probably should not expect to be drinking artisanal spring water from a hand-dug well, but you might be jumping out of the frying pan and into the fire if you dig a well to defeat dehydration only to wind up poisoned from its water!
If at all possible, get your well water laboratory tested for certainty. If that is not possible, you must conduct such testing yourself and have the equipment and other resources necessary to make an informed call.
The Old Fashioned Way: Well Digging Techniques
The time has come: you have read the charts, poured over the data, assessed the various hazards around the site and finally arrived upon the point at which you will put tool to Earth and begin to dig your well. Humorously, the final question in many ways is how you will dig it.
The most laborious and back-breaking of these methods is to employ a selection of shovels, buckets, picks and ropes to start excavating your way down into the Earth.
More advanced methods rely on some simple but comparatively primitive apparatus that can greatly multiply the amount of effort that any worker puts into digging.
Each of the methods you will see below has been around a startlingly long time, and employed by cultures around the world. Many are still employed today in environments where heavy machinery and other modern tools are not available, or impractical.
You might be lucky enough to own a truck with a drill rig, and if you do that is quite the ace in the hole to have for your well digging survival plan, but if you don’t, it is in your best interest to brush up on one or more of these primitive methods since they can be made from common and simple materials using nothing more than a little ingenuity and know-how.
Read on to learn more about the pros and cons of each below.
By Shovel, Pick and Bucket
This is it, we are really going old school now! This is the method by which most wells have been dug most often for millennia. Human laborers using hand tools boring a hole into the Earth until they strike water, and after that constructing the well casing and all of the other components of the well to protect their newly revealed water source.
Any tool that is useful for moving Earth, breaking rock, and cutting through roots and other obstructions will be useful here, along with tools for moving the detritus up and out of the hole.
There is not much else to it; anybody who can operate these simple hand tools can contribute to the digging of this well though it is not work for the weak or puny.
Hand digging a well hole entails a few assumptions. The well must be wider than more modern arrangements in order to accommodate a worker or workers at the bottom who need room to swing their tools and load the soil for removal from the hole.
Additionally, these wells will only ever go as deep as the water source itself rarely deeper than 50 feet. They will go no further than the water since unassisted people cannot work hand tools and keep on digging while underwater! This wider well hole structure will typically produce more water than a narrow one, but they are more vulnerable to contamination overall.
Auguring
By using a long shaft attached to a turnstile and tipped with an auger head, a team of men can rapidly excavate softer soils and obstructions from the well hole and make it nice and concentric at the same time.
A typical manual auger head for the drilling of a well hole is shaped somewhat like a bucket with a serrated bottom that will hold the soil it breaks through. After it fills up, it is retrieved from the whole and emptied before being reattached to the shaft and lowered to continue boring.
Auguring is ideal if you are locating your well in an area with soft soil and minimal hard matter, but large rocks or dense, heavy soil will defeat you.
And even though these augers are efficient in ideal circumstances it will get harder and harder the deeper you go, eventually reaching a point where you will need more men to even turn it slowly and then risk breaking your shaft for every foot gained.
Percussion Drilling
Percussion drilling is an impressively effective technique that has been used around the world, and consists as one might imagine of a heavy, specialized drill head that is designed to cut once it makes impact at speed with soil or rock, and is typically employed by being attached to a rope or a solid shaft that has been raised and lowered by a team working in unison to actuate it.
This lifting and dropping might be accomplished by using a rope and pulley or more ingeniously a flexible rod that can impart even more energy to the drill head.
Out of all the primitive methods you might use, this is the one that gives you the best chance of getting through the hardest soil and obstructions.
Perhaps its only disadvantage is that it requires access to a suitably hard and tough drill head that can be used over and over. This is a high-impact technique that will make short work of a soft metal head.
Another advantage is that it can reliably create a clean and reasonably concentric well hole similar to auguring. One more thing: Practice makes perfect so make sure you get everyone on the team working off the same sheet of music before you begin or expect to become frustrated.
Drive Pointing
Drive pointing is a well-digging method whereby a sharpened metal head is affixed to a perforated pipe and hammered into the ground using a sledgehammer or similar device.
Think of a pile driver on a smaller scale and you have a good idea of how drive pointing works. The perforated pipe shaft serves as well casing and well screen all in one and once it is in place your well is basically ready to go!
You can think of drive pointing as a sort of feast-or-famine method of digging a well because it is truly easy for even a single person to install a well using this method. If soil conditions are ideal and a water source is assured in as little time as a few hours your well can be producing!
However, drive pointing only works for shallow wells as the deeper you go the more likely you are to bend or break the pipe, ruining both it and your day! Like all shallow wells it is more vulnerable to contamination than deeper ones.
Drive pointing is a method commonly employed in loose or sandy soil of the kind typically found near rivers and other large bodies of water. So long as you aren’t going deeper than 20 ft. or so you shouldn’t have any problems.
Sludging
Sludging is another odd and ancient method of well digging that relies on teamwork and physics to get the job done
Sludging is simple in principle if not in execution: An open-topped pipe is prepared and placed into the well hole while being connected to a lever on a fixture nearby that allows it to be raised and lowered using manpower.
The well hole, already full of water, then has the pipe lowered into it until it makes contact on the bottom, removing soil. This is where things get interesting. Using careful coordination, a crew member is standing by the pipe that covers the opening at the top with his hand before it is withdrawn to the surface.
The rest of the crew raise the pipe preparing to plunge it downward again but right before this happens the other crewmen uncovers the hole at the top allowing the cuttings and water picked up by the pipe to splash out of the top.
Sludging definitely requires a higher degree of coordination for success compared to the other primitive methods we have listed here, but it is handy because the chief component required for operation- a sturdy open pipe- can be found almost anywhere. It is also one of the few austere methods that can install a deep well reliably.
As you might be expecting, lacking any sort of serious cutting action it only works in softer soil substrates, with clay or partial clay being on the upper limit of what it can handle. Like all such methods it can be difficult to effectively seal a well that is installed via sludging.
Assessing Costs
Only the easiest and simplest of well installations will cost less than a small fortune, even if you do it yourself. The cost of any professional installation will naturally be much more expensive, but the chances of both striking water and maintaining a water source are higher.
Note that the deeper you go when digging a well the more expensive it gets to keep going further. It is a geometric progression of cost.
Consider just a few of the variables below that will be commonly encountered when installing a well, and then decide if professional or DIY installation is for you.
Also, just a reminder: None of the costs you see below are for extra labor, county or city fees, testing and any permits that might be required. This is just for basic equipment and services!
Professional Well installation Costs, United States, Averaged: $4,650.00 to $8,250, depending on location and complexity.
Professional Well installation Costs with Complications (terrain, difficulty, depth, etc.), United States, Averaged: $9,500.00 to $14,000.00+
Equipment and Component Expenses (Installation not included)
Casing Pipe: $600.00 to $3,000.00
Pump: $80.00 to $2,000.00+ depending on model and type (shallow or deep well)
Pressure Tank: $1,500.00 to $3,000.00 (for in-home plumbing)
Purification and Softening System: $1,000.00 to $3,500.00.
Wiring, Switching, Sensors, Etc.: $50.00 to $350.00
Professional Digging/Drilling Costs
Drilled: $8.00 to $32.00 per linear foot, cost increases as depth does!
Dug: $7.00 to $26.00 per cubic foot excavated. Excavation is only suitable for shallow wells!
As you can see this is not something that most people can stroke a check for painlessly. The costs associated with professional installation of a well might be reason enough to get most people on board with doing it themselves.
On the other hand, you should stop and look at the cost of the materials alone, and ask yourself how much worse off you will be if you botch the job and lose some or all of the materials and a likely ruin your well hole.
Sometimes it is better to bite the bullet and rely on professionals if you have the option.
Conclusion
Having a well is the only way to provide sustainable, reliable freshwater without a ton of extra labor and logistical strain when you are living far from an above ground water source.
Every culture around the world throughout history has relied on wells, and that means that at some point they had to dig them.
You can do the same thing with some grit, know-how and a thorough understanding of all the variables involved. It might be arduous, even grueling, but if you persist, you will strike water you can rely on for years to come.
Colorado is a state that is rapidly moving away from its culture of independence and self-determination, instead becoming infected by the same type of overbearing pro-intrusion bugthought that has laid low California and much of Cascadia.
This is evident in its increasingly restrictive laws on weapons and regrettably that includes the carry of common knives.
Colorado does not have too many restrictions on what knives you can own or the type of knife you can carry, but it does have a fairly odious regulation against blade length, with only short blades being legal for concealed carry with or without a concealed weapons permit.
In a Nutshell
What Kind of Knives Can I Own?: Any knife except a ballistic knife.
Can I Carry a Knife Concealed Without a Permit?: Yes, with restrictions; blade must be shorter than 3 ½”, no ballistic knives, no throwing stars.
Can I Carry a Knife Concealed With a Permit?: Yes, but no additional permissions granted.
Can I Carry a Knife Openly?: Yes, except ballistic knives.
General Ownership
We can be thankful at least that Colorado does not have too many sweeping prohibitions on what kind of knives you can own. The only knives that are outright illegal in the state are ballistic knives.
Switchblades, dirks, daggers, bowie knives, and other typically regulated classes of knife are all okay, though you cannot carry any of these knives concealed, typically, unless they are very short.
It was not always this way, and until recently, butterfly and switchblade knives were prohibited weapons right along with ballistic knives, so take some solace from that.
Additionally, Colorado has statewide preemption laws (laws that prevent local ordinances from superseding the state laws on the same issue), but they are not much force compared to the typical preemption laws in other states.
Colorado’s preemption law only covers citizens with a knife in their vehicle while traveling from place to place.
If you get out of your car, meaning you are not just traveling through a location, you must abide by any locality’s knife laws and that means staying abreast of the laws and all the places you typically work, play and travel is a part-time job unto itself.
Concealed Carry, No Permit
A person in the state of Colorado may legally carry on or about their person any otherwise legal category of knife so long as the blade is shorter than 3 ½ inches.
If you care to look at the state statutes quoted at the end of this article, you will see in one of the sections that it specifically says the concealed carry of a “knife” is a class 2 misdemeanor, and this might lead to some confusion.
If you read farther in the definitions you will see that “knife” is specifically defined as any implement with a blade of 3 ½ inches or longer, so technically a knife with a blade shorter than that is not a “knife” at all and hence legal to carry.
The only other typical exception to this law is if you are carrying at your home, your property, your place of business or in your vehicle, where one may have concealed on or about their person a knife of any length.
Concealed Carry, With Permit
There used to be a concealed carry exception for knives meeting the state’s definition of “knife” for those people who had a CO concealed weapons permit, but it has since been revised and no longer includes these otherwise restricted knives.
This means that even if you do have a state permit to carry a handgun it will grant you no additional leniency when it comes to knives!
Open Carry
Somewhat more happily, open carry of knives is an easier affair with the open, unconcealed carry of any knife, except the completely prohibited ballistic knife being allowed.
Oh, and also you cannot carry throwing stars in a public place; apparently these weapons are just too devastating to be allowed to mingle in the public.
You should not take this as carte blanche, however, since for sometime Colorado has been long divorcing itself of pro-carry and pro-defense culture.
That being said a larger, longer knife can be safely carried under the letter of the law so long as you do not conceal it. The larger hunting knives, fighting knives, and other utility blades that typically live on the belt can stay there so long as you make no attempt to cover its presence.
Prohibited Places
You cannot carry your knife, any knife onto the grounds of a government building, the grounds of any university or any school.
You can keep the knife in your vehicle so long as it is in a secured container, and this provision also extends to traveling across the grounds of a university so long as it remains in your car along with you.
There are no exceptions for civilians not operating in the official capacity of a state employee, member of a state agency or in a law enforcement capacity, including school resource officers.
Assessment
Colorado is far from the worst state when it comes to the carry of knives, as you can carry almost any kind of knife you want, so long as you carry it openly. But if you just want to pocket a common folding knife with a blade just a fraction longer than 3 ½ inches you’ll be in violation of the law.
This is especially troubling when you consider that the statewide preemption only covers people who remain in their vehicles with their knives while traveling.
It does not take much imagination to think of a scenario where you might be stopped passing through a larger city with a particularly restrictive knife laws and the humble pocket knife you have always carried suddenly becomes grounds for charges.
Important Colorado State Statutes
Below are some of the most important statutes in Colorado governing the ownership, and carry of knives of all kinds.
It makes for dense, dry reading, but you must become familiar with the laws that govern what kind of knife you can carry, under what conditions are allowed to carry it, and where you may carry it if you want to stay on the right side of the law.
Failing to do so is setting yourself up to have a legal encounter with a negative outcome.
(a.3) “Ballistic knife” means any knife that has a blade which is forcefully projected from the handle by means of a spring-loaded device or explosive charge.
(a.5) “Blackjack” includes any billy, sand club, sandbag, or other hand-operated striking weapon consisting, at the striking end, of an encased piece of lead or other heavy substance and, at the handle end, a strap or springy shaft which increases the force of impact.
…
(d) “Gas gun” means a device designed for projecting gas-filled projectiles which release their contents after having been projected from the device and includes projectiles designed for use in such a device.
(e) Repealed.
(e.5) “Handgun” means a pistol, revolver, or other firearm of any description, loaded or unloaded, from which any shot, bullet, or other missile can be discharged, the length of the barrel of which, not including any revolving, detachable, or magazine breech, does not exceed twelve inches.
(e.7) “Juvenile” means any person under the age of eighteen years.
(f) “Knife” means any dagger, dirk, knife, or stiletto with a blade over three and one-half inches in length, or any other dangerous instrument capable of inflicting cutting, stabbing, or tearing wounds, but does not include a hunting or fishing knife carried for sports use. The issue that a knife is a hunting or fishing knife must be raised as an affirmative defense.
…
18-12-102. Possessing a dangerous or illegal weapon – affirmative defense – definition
(1) As used in this section, the term “dangerous weapon” means a firearm silencer, machine gun, short shotgun, short rifle, or ballistic knife.
(2) As used in this section, the term “illegal weapon” means a blackjack, a gas gun, or metallic knuckles.
(3) A person who knowingly possesses a dangerous weapon commits a class 5 felony. Each subsequent violation of this subsection (3) by the same person shall be a class 4 felony.
(4) A person who knowingly possesses an illegal weapon commits a class 1 misdemeanor.
(5) It shall be an affirmative defense to the charge of possessing a dangerous weapon, or to the charge of possessing an illegal weapon, that the person so accused was a peace officer or member of the armed forces of the United States or Colorado National Guard acting in the lawful discharge of his duties, or that said person has a valid permit and license for possession of such weapon.
…
18-12-105. Unlawfully carrying a concealed weapon – unlawful possession of weapons
(1) A person commits a class 2 misdemeanor if such person knowingly and unlawfully:
(a) Carries a knife concealed on or about his or her person; or
(b) Carries a firearm concealed on or about his or her person; or
(c) Without legal authority, carries, brings, or has in such person’s possession a firearm or any explosive, incendiary, or other dangerous device on the property of or within any building in which the chambers, galleries, or offices of the general assembly, or either house thereof, are located, or in which a legislative hearing or meeting is being or is to be conducted, or in which the official office of any member, officer, or employee of the general assembly is located.
…
(2) It shall not be an offense if the defendant was:
(a) A person in his or her own dwelling or place of business or on property owned or under his or her control at the time of the act of carrying; or
(b) A person in a private automobile or other private means of conveyance who carries a weapon for lawful protection of such person’s or another’s person or property while traveling; or
(c) A person who, at the time of carrying a concealed weapon, held a valid written permit to carry a concealed weapon issued pursuant to section 18-12-105.1, as it existed prior to its repeal, or, if the weapon involved was a handgun, held a valid permit to carry a concealed handgun or a temporary emergency permit issued pursuant to part 2 of this article; except that it shall be an offense under this section if the person was carrying a concealed handgun in violation of the provisions of section 18-12-214; or
…
18-12-106. Prohibited use of weapons
…
(e) He knowingly aims, swings, or throws a throwing star or nunchaku as defined in this paragraph (e) at another person, or he knowingly possesses a throwing star or nunchaku in a public place except for the purpose of presenting an authorized public demonstration or exhibition or pursuant to instruction in conjunction with an organized school or class. When transporting throwing stars or nunchaku for a public demonstration or exhibition or for a school or class, they shall be transported in a closed, nonaccessible container. For purposes of this paragraph (e), “nunchaku” means an instrument consisting of two sticks, clubs, bars, or rods to be used as handles, connected by a rope, cord, wire, or chain, which is in the design of a weapon used in connection with the practice of a system of self-defense, and “throwing star” means a disk having sharp radiating points or any disk-shaped bladed object which is hand-held and thrown and which is in the design of a weapon used in connection with the practice of a system of self-defense.
…
18-12-105.5. Unlawfully carrying a weapon – unlawful possession of weapons – school, college, or university grounds
(1) A person commits a class 6 felony if such person knowingly and unlawfully and without legal authority carries, brings, or has in such person’s possession a deadly weapon as defined in section 18-1-901 (3)(e) in or on the real estate and all improvements erected thereon of any public or private elementary, middle, junior high, high, or vocational school or any public or private college, university, or seminary, except for the purpose of presenting an authorized public demonstration or exhibition pursuant to instruction in conjunction with an organized school or class, for the purpose of carrying out the necessary duties and functions of an employee of an educational institution that require the use of a deadly weapon, or for the purpose of participation in an authorized extracurricular activity or on an athletic team.
…
(3) It shall not be an offense under this section if:
(a) The weapon is unloaded and remains inside a motor vehicle while upon the real estate of any public or private college, university, or seminary; or
(b) The person is in that person’s own dwelling or place of business or on property owned or under that person’s control at the time of the act of carrying; or
(c) The person is in a private automobile or other private means of conveyance and is carrying a weapon for lawful protection of that person’s or another’s person or property while traveling; or
(d) The person, at the time of carrying a concealed weapon, held a valid written permit to carry a concealed weapon issued pursuant to section 18-12-105.1, as said section existed prior to its repeal; except that it shall be an offense under this section if the person was carrying a concealed handgun in violation of the provisions of section 18-12-214 (3); or
(d.5) The weapon involved was a handgun and the person held a valid permit to carry a concealed handgun or a temporary emergency permit issued pursuant to part 2 of this article; except that it shall be an offense under this section if the person was carrying a concealed handgun in violation of the provisions of section 18-12-214 (3); or
(e) The person is a school resource officer, as defined in section 22-32-109.1 (1)(g.5), C.R.S., or a peace officer, as described in section 16-2.5-101, C.R.S., when carrying a weapon in conformance with the policy of the employing agency as provided in section 16-2.5-101 (2), C.R.S.; or
…
(h) The person has possession of the weapon for use in an educational program approved by a school which program includes, but shall not be limited to, any course designed for the repair or maintenance of weapons.
Electronic devices can be surprisingly leaky, often spraying out information for anyone close by to receive. [Docter Cube] has found another such leak, this time with the speakers in iPhones. While repairing an old AM radio and listening to a podcast on his iPhone, he discovered that the radio was receiving audio the from his iPhone when tuned to 950-970kHz.
[Docter Cube] states that he was able to receive the audio signal up to 20 feet away. A number of people responded to the tweet with video and test results from different phones. It appears that iPhones 7 to 10 are affected, and there is at least one report for a Motorola Android phone. The amplifier circuit of the speaker appears to be the most likely culprit, with some reports saying that the volume setting had a big impact. With the short range the security risk should be minor, although we would be interested to see the results of testing with higher gain antennas. It is also likely that the emission levels still fall within FCC Part 15 limits.
I've confirmed this on an 8 non-pro AND discovered that when you're around 960 KHz you ALSO can detect the haptic clicks! I am suspecting that they are running a class D amp with the PWM at 960 KHz, which would be 20x 48khz-right on the mark for a class D amp. Video demo of both. pic.twitter.com/EbodZS11kB
The phenomenon of electronics leaking unintended information in magnetic waves has been knows since WW2, and it even has a codename, TEMPEST. If you want to learn more about it and do some experimentation, there are a number of open source software toolkits you can play with.
I used to dream journal and devote a lot of time to it and lucid dreaming. However, now I get up early in the morning, every minute of extra sleep counts, so I don't have time to do it. Has anyone succeeded in lucid dreaming without keeping a journal? How did you do it?
P.S. Please no hate, I am not new to this and I know the importance of it. However, I just don't have the chance to do it now.
via Lucid Dreaming - Dream Views - Attaining Lucidity https://ift.tt/3iEgdbq