Wednesday, February 5, 2020

So, Does Bear Spray Actually Work?

The deep woods and remote forests covering much of the U.S. and an enormous part of Canada are often seen as a sort of “go-to” BOL for preppers, and even in peaceful times are frequently traveled and visited for recreation or practice bug-outs.

These forests also contain bears, which can be a significant threat if you should happen to surprise one, especially a sow with cubs. Rangers, guides and other deep country professionals commonly recommend bear spray as the ideal defensive weapon against bear attacks. But does bear spray really work?

Overwhelmingly, yes. Bear spray is an effective and efficient defensive weapon for preventing bear attacks from brown or black bears. Bear spray provides a high success rate, standoff capability and a forgiving margin of error on deployment, all together making it an excellent choice. And happily, it does no permanent damage to the bear.

While plenty of people recommend firearms for bear defense (and they have a good point), bear spray is easier to use, easier and cheaper to obtain, and all around more effective with less skill investment.

Bear spray has little chance of seriously injuring yourself or bystanders. Its widespread availability and legality means you’ll never have to choose between bear insurance or going legally onto land where firearms might be restricted.

Research initiatives conducted by various state and local agencies discovered that bear spray was successful over 88% of the time in stopping a bear attack or pre-attack charge on a human being!

The remainder of the attacks were also studied and there the scientists found that the injuries sustained by the victim were drastically less severe than by those inflicted typically by a non-dosed bear.

While the reason for the difference is not entirely conclusive, it does not take much figuring to see that the onset of the spicy spray probably convinced the offending bear that the juice was just not worth the squeeze.

While it isn’t as macho, multi-purpose or as lethal as a firearm, for this one task bear spray excels!

How does bear spray work?

Bear spray is basically the buff, super-sized cousin of common, civilian and police grade pepper spray.

Containing an O.C. (oleoresin capsicum) solution in a blend that is often a little stronger than civilian sprays bear spray is used just like pepper spray; remove safety, aim and squeeze trigger or activator.

The larger can bear spray is typically found in supplies greater range, a denser stream and more agent than comparable, small cans of civilian O.C.

Most bear sprays will come with a pre-selected spray pattern from the factory, the two popular types being stream and fog, or mist. Stream units have less spread but greater accuracy and range as they do not aerosolize the contents as much as the fogger units.

The fogger variety has a shorter range, but has the perk of being able to lay down a wide cloud of agent that the bear is almost assured of running into, making accuracy less of priority though wind can quickly ruin this plan or see it backfire by drifting on to you.

The stream-style cans mean accuracy is more important, but they buck the wind a little better and deliver a much stronger “dose” of agent on a hit. You might need nerves of steel to aim well, though, if a bear is charging you!

Ultimately, both types work acceptably but stream gets the all-purpose nod from us.

Does bear spray work on people, too?

Yes it does! Though you should not do so unless it is an emergency development, as some bear sprays might be so strong their use on people could be a violation of law.

That being said, most mammals, humans included, will be affected by bear or pepper spray the same way. Because mammalian biology is generally receptive to the “heat” of the active ingredient in O.C. spray (capsaicin) you can expect it to take effect on people with rapidity.

Any mammal should experience the same excruciatingly unpleasant effects: burning or searing pain in all soft tissues, especially the eyes and mucous membranes, profuse tearing and mucous production, coughing, wheezing and sneezing, and difficulty breathing.

This is bad enough for humans who can at least rationalize the agony. To an animal that is almost certain to never, ever come across something so hot in nature it must be disconcerting in the extreme! That’s the idea.

In fact, you’ll be happy to hear bear spray has documented successes on people, dogs, hogs and cougars aside from bears, so you can carry it with confidence against all kinds of two- and four-legged threats.

Isn’t a gun the one-size fits all solution for defense?

Guns are a good option for bear defense, and the only option for hunting a wide variety of game, but for pure self-defense, bear spray is probably the better option.

Don’t misunderstand me: I don’t blame anyone who wants to go well-heeled in bear country, and it is nothing but prudent, but I would still rely on bear spray as my first line of defense since it is so much more reliably effective than a gun.

All you are trying to accomplish is preventing the bear from attacking you, or making him break off the attack that he started. That’s it. Bear spray directed at his snout and eyes will do it with excellent consistency and rapidity.

Another option is to plow bullets into the bear until you destroy the nervous system or let out enough blood that the bear dies. If you are very lucky, pain or shock might convince the bear to tuck tail before that happens.

Now, to hit the vitals of the bear, you’ll have to precisely aim and fire a bullet so it will strike the bears vitals in the head or chest, both of which are protected by the bulky body of the bear. In the case of the head, it is the strong frontal glacis of the skull. For the chest, slabs of muscle and potentially blubber and the ribs.

One shot may not be enough, necessitating accurate follow-up shots as fast as you can manage. Even with good hits, bears often shrug off gunfire that is not deeply penetrating.

Many guides only recommend shotguns loaded with slugs and potent rifles for bear work. Also keep in mind you will need to nail a moving target…

With bear spray, you need only to aim and spray! Its nature makes a good hit much more likely.

Conclusion

Bear spray is absolutely an effective defense against bears, and provides the range and high hit potential you need when the chips are down and Smokey is closing fast.

If you are planning on being anywhere near areas where bears are known inhabitants, you’d be a fool to forgo your bear spray. Make sure you pick some up before your next foray into the deep country.



via Modern Survival Online https://ift.tt/37XNBEy

The $50 Ham: Going Mobile

So far in this series, everything we’ve covered has been geared around the cheapest and easiest possible means of getting on the air: getting your Technician license, buying your first low-end portable transceiver, and checking in on the local repeater nets. That’s all good stuff, and chances are you can actually take all three of those steps and still have change left over from your $50 bill. Like I said, amateur radio doesn’t have to be expensive to be fun.

But at some point, every new ham is going to yearn for that first “real” rig, something with a little more oomph in terms of power, and perhaps with a few more features. For many Technicians, the obvious choice is a mobile rig, something that can be used to chat with fellow hams on the way to work, or to pass the time while on long road trips. Whatever your motivation is, once you buy a radio, you have to install it, and therein lie challenges galore, both electrical and mechanical.

I recently took the plunge on a mobile rig, and while the radio and antenna were an order of magnitude more expensive than $50, the process of installing it was pretty cheap. But it’s not the price of the thing that’s important in this series; rather, it’s to show that ham radio is all about doing it yourself, even when that means tearing your car apart from the inside out and rebuilding it around a radio.

Choosing a Rig

Whatever radio you end up buying is going to depend entirely on how you plan to use it. Technicians will probably want a dual-band radio that covers the 2-meter (VHF) and 70-cm (UHF) bands, which will give you access to local repeaters. Features and quality vary by brand, but if you stick with one of the “Big Three” – Yaesu, Kenwood, and ICOM – you’ll get good value for the money. Alinco probably belongs in there, too, and you can find decent mobile rigs that are higher-power versions of the much-derided “cheap Chinese handy talkies” that are available for not much more than $50.

My choice was a Yaesu FT-8900R, a now-discontinued quad-band radio. In addition to the usual UHF and VHF bands, the 8900 also has 6 meters, known as “The Magic Band” because it can be worked in so many different ways, and 10 meters, which offers some interesting options for simplex, repeater-less, communications. Technicians have access to all of the 6-meter band, but only a small slice of 10 meters, and then only using single-sideband voice. The FT-8900R is an FM-only transceiver, but since I have my General class license, I can use it on the 10-meter band. The radio can also be set up as a cross-band repeater, which holds some interesting possibilities for me.

Almost all FM mobile ham rigs these days are digital, and many of them support one or the other of the digital modulation schemes, like System Fusion and DMR. Many have support for the Automatic Packet Reporting System (APRS) built-in, which lets you report information like your GPS location automatically. The manufacturers have responded to the market in offering as many or as few bells and whistles as possible, so whatever you want, chances are good that someone makes it. Strangely, mobile rigs are the one area of ham radio where there’s not a lot of homebrewing, although there is an active community that repurposes old UHF and VHF business band radio for ham use. But most people just buy a well-engineered COTS radio and use the installation to express their homebrew creativity.

Planning the Install

Nearing peak disassembly. The radio will go just below the drop light.

And let me tell you, modern cars and trucks require a LOT of creativity and ingenuity to achieve a clean, professional installation. I started doing mobile installs many years ago, when cars had much more metal in them and far fewer electrical components and wiring harnesses. Back then, it was easy to find a reliable ground, and you never had to work around airbag computers, seatbelt pre-tensioners, and infotainment components. Modern cars are a lot more challenging to do installations in, but they’re a lot more fun too, since you get to marvel at the skills of engineers who design pieces that can be assembled quickly with minimal tooling, and then curse their names while you try to disassemble something with no visible fasteners.

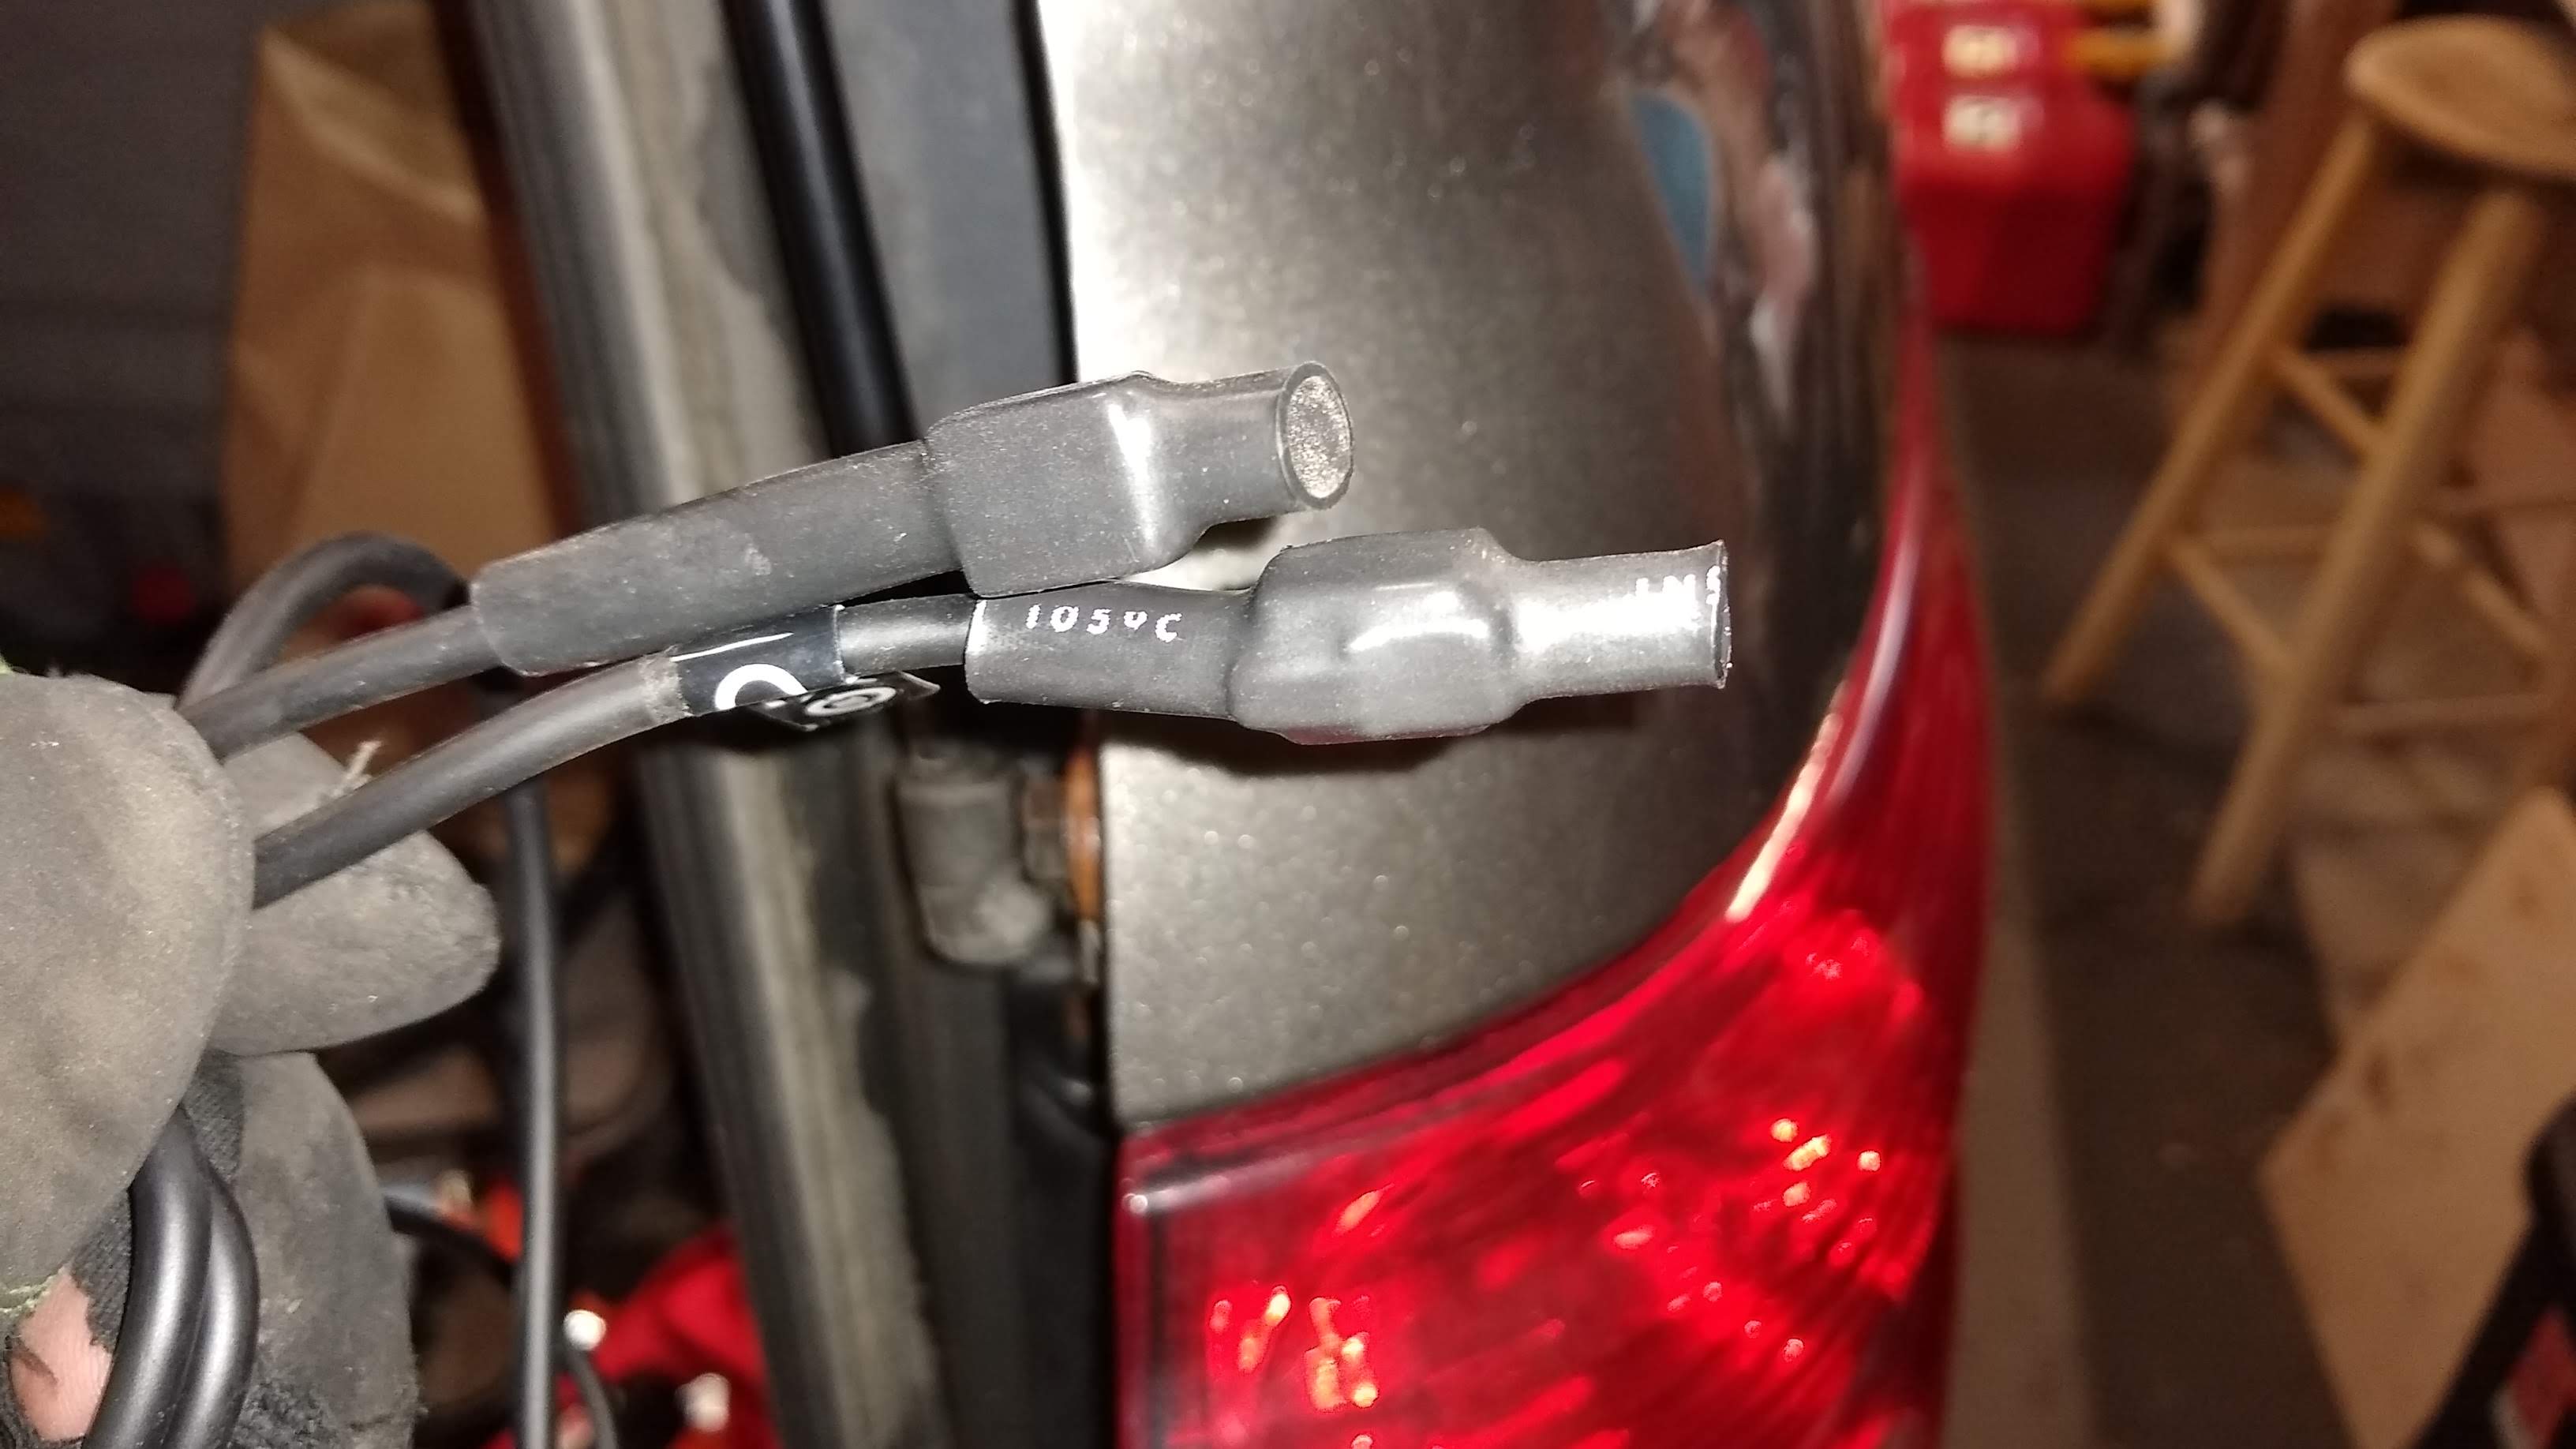
Protip: many control-head cables have RJ-style connectors. Protect the locking tab while running the cable with a little heat-shrink tubing.

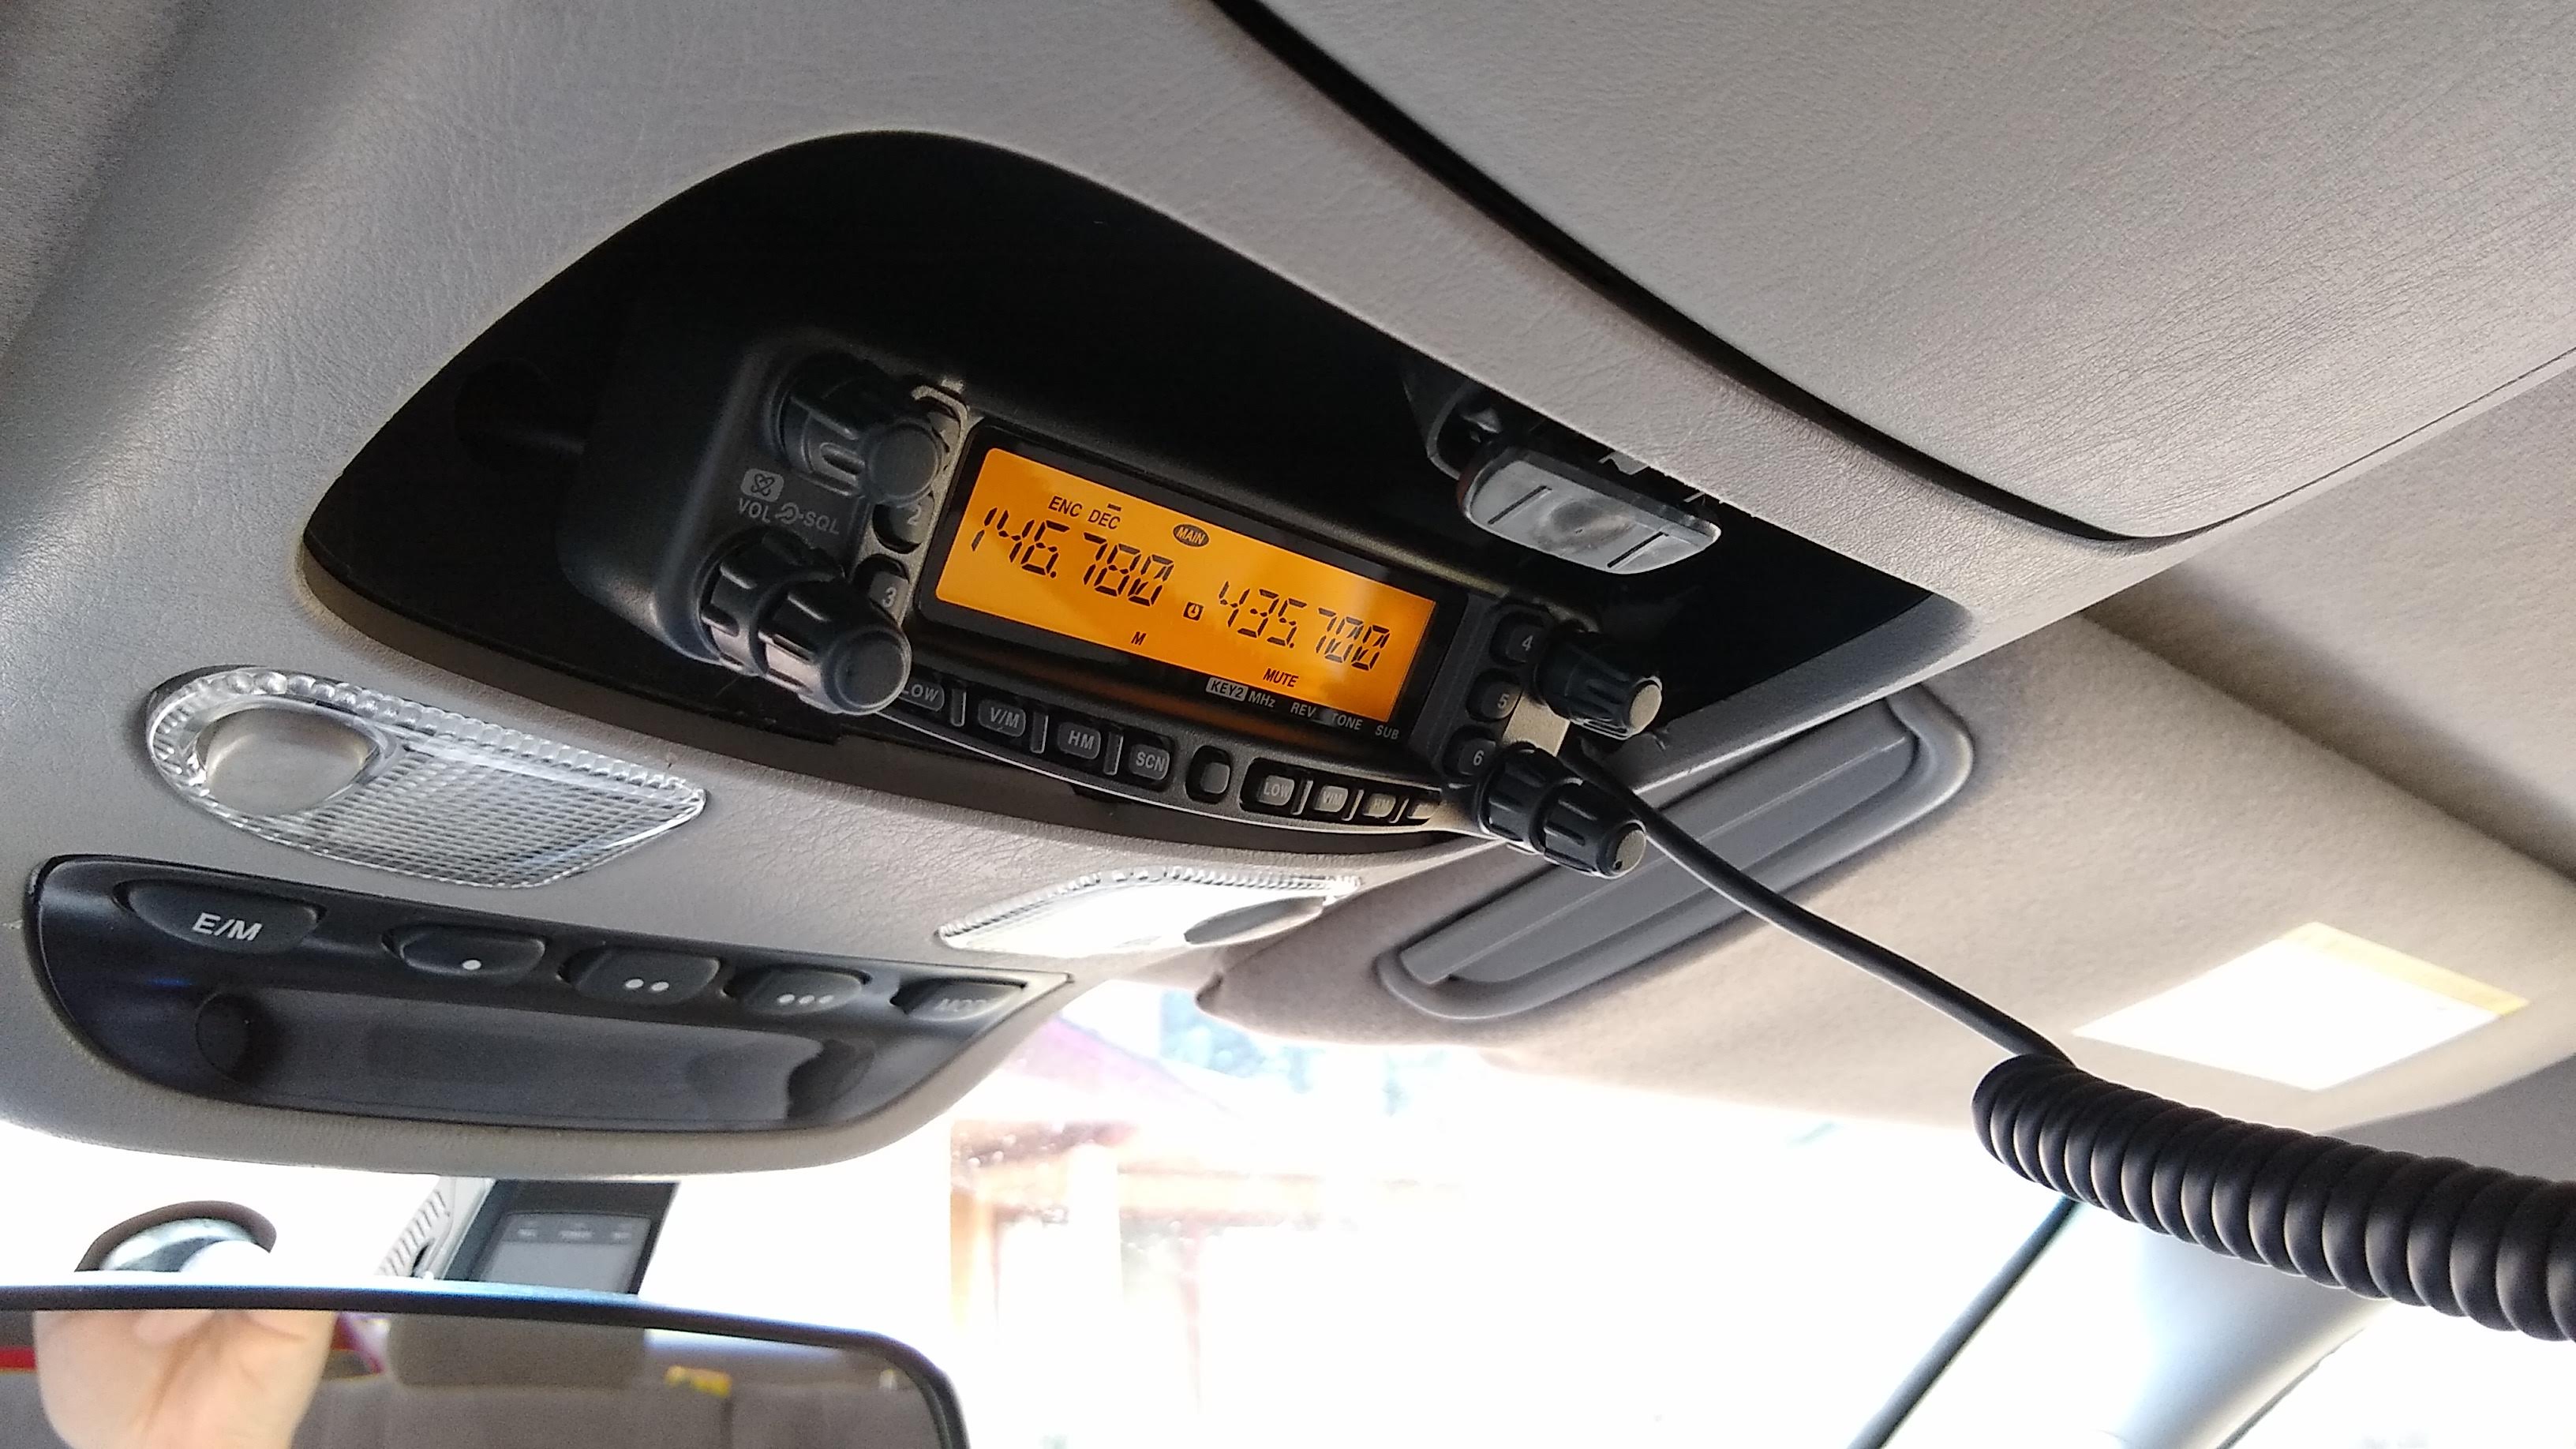
Planning your install is probably the most critical step. Many mobile rigs come with separable faceplates, so that the radio itself can be trunk-mounted or installed under a seat, while the control head with the display and microphone can be placed where it’s easily used. This is a huge bonus when installing in a modern car where options for placing a large one-piece radio are limited; the small control head is far easier to wedge someplace and still be usable. In my case, I decided to remove one of the overhead storage bins in my 2004 Toyota Sequoia and install the head in its place, while the radio itself would go in one of the side pockets in the “way back.”

After planning where the parts will go, you’ll need to figure out how and where to run wires. Ham rigs take a lot of current — 7 to 10 amps on transmit is common — and they require a direct run to the vehicle battery with heavy-gauge wire. Don’t scrimp on this and try to tap into something under the dash like we used to do for installing an after-market stereo. Find a plug or grommet in the firewall and do it right. Fuses are a must. You do not want a 12-gauge wire running through the car acting like a fuse when something shorts out. Ask me how I know.

Physically protecting the power wires – all wires, for that matter – is really important too. Spend a couple of bucks on some corrugated plastic split-loom and wrap the wires up, especially in places where people are likely to step on them or kick them.

Neatness Counts

The nice thing about modern cars is there are plenty of concealed places to run wires. The bad thing is getting access to them. Almost every plastic trim piece in a car is held in place with some kind of plastic fastener that’s as likely to break as it is to release cleanly. Invest in a set of trim removal tools; these will give you a better chance at releasing these fasteners without breaking them or marring the finish of other pieces. Still, count on a 50% failure rate at this phase.

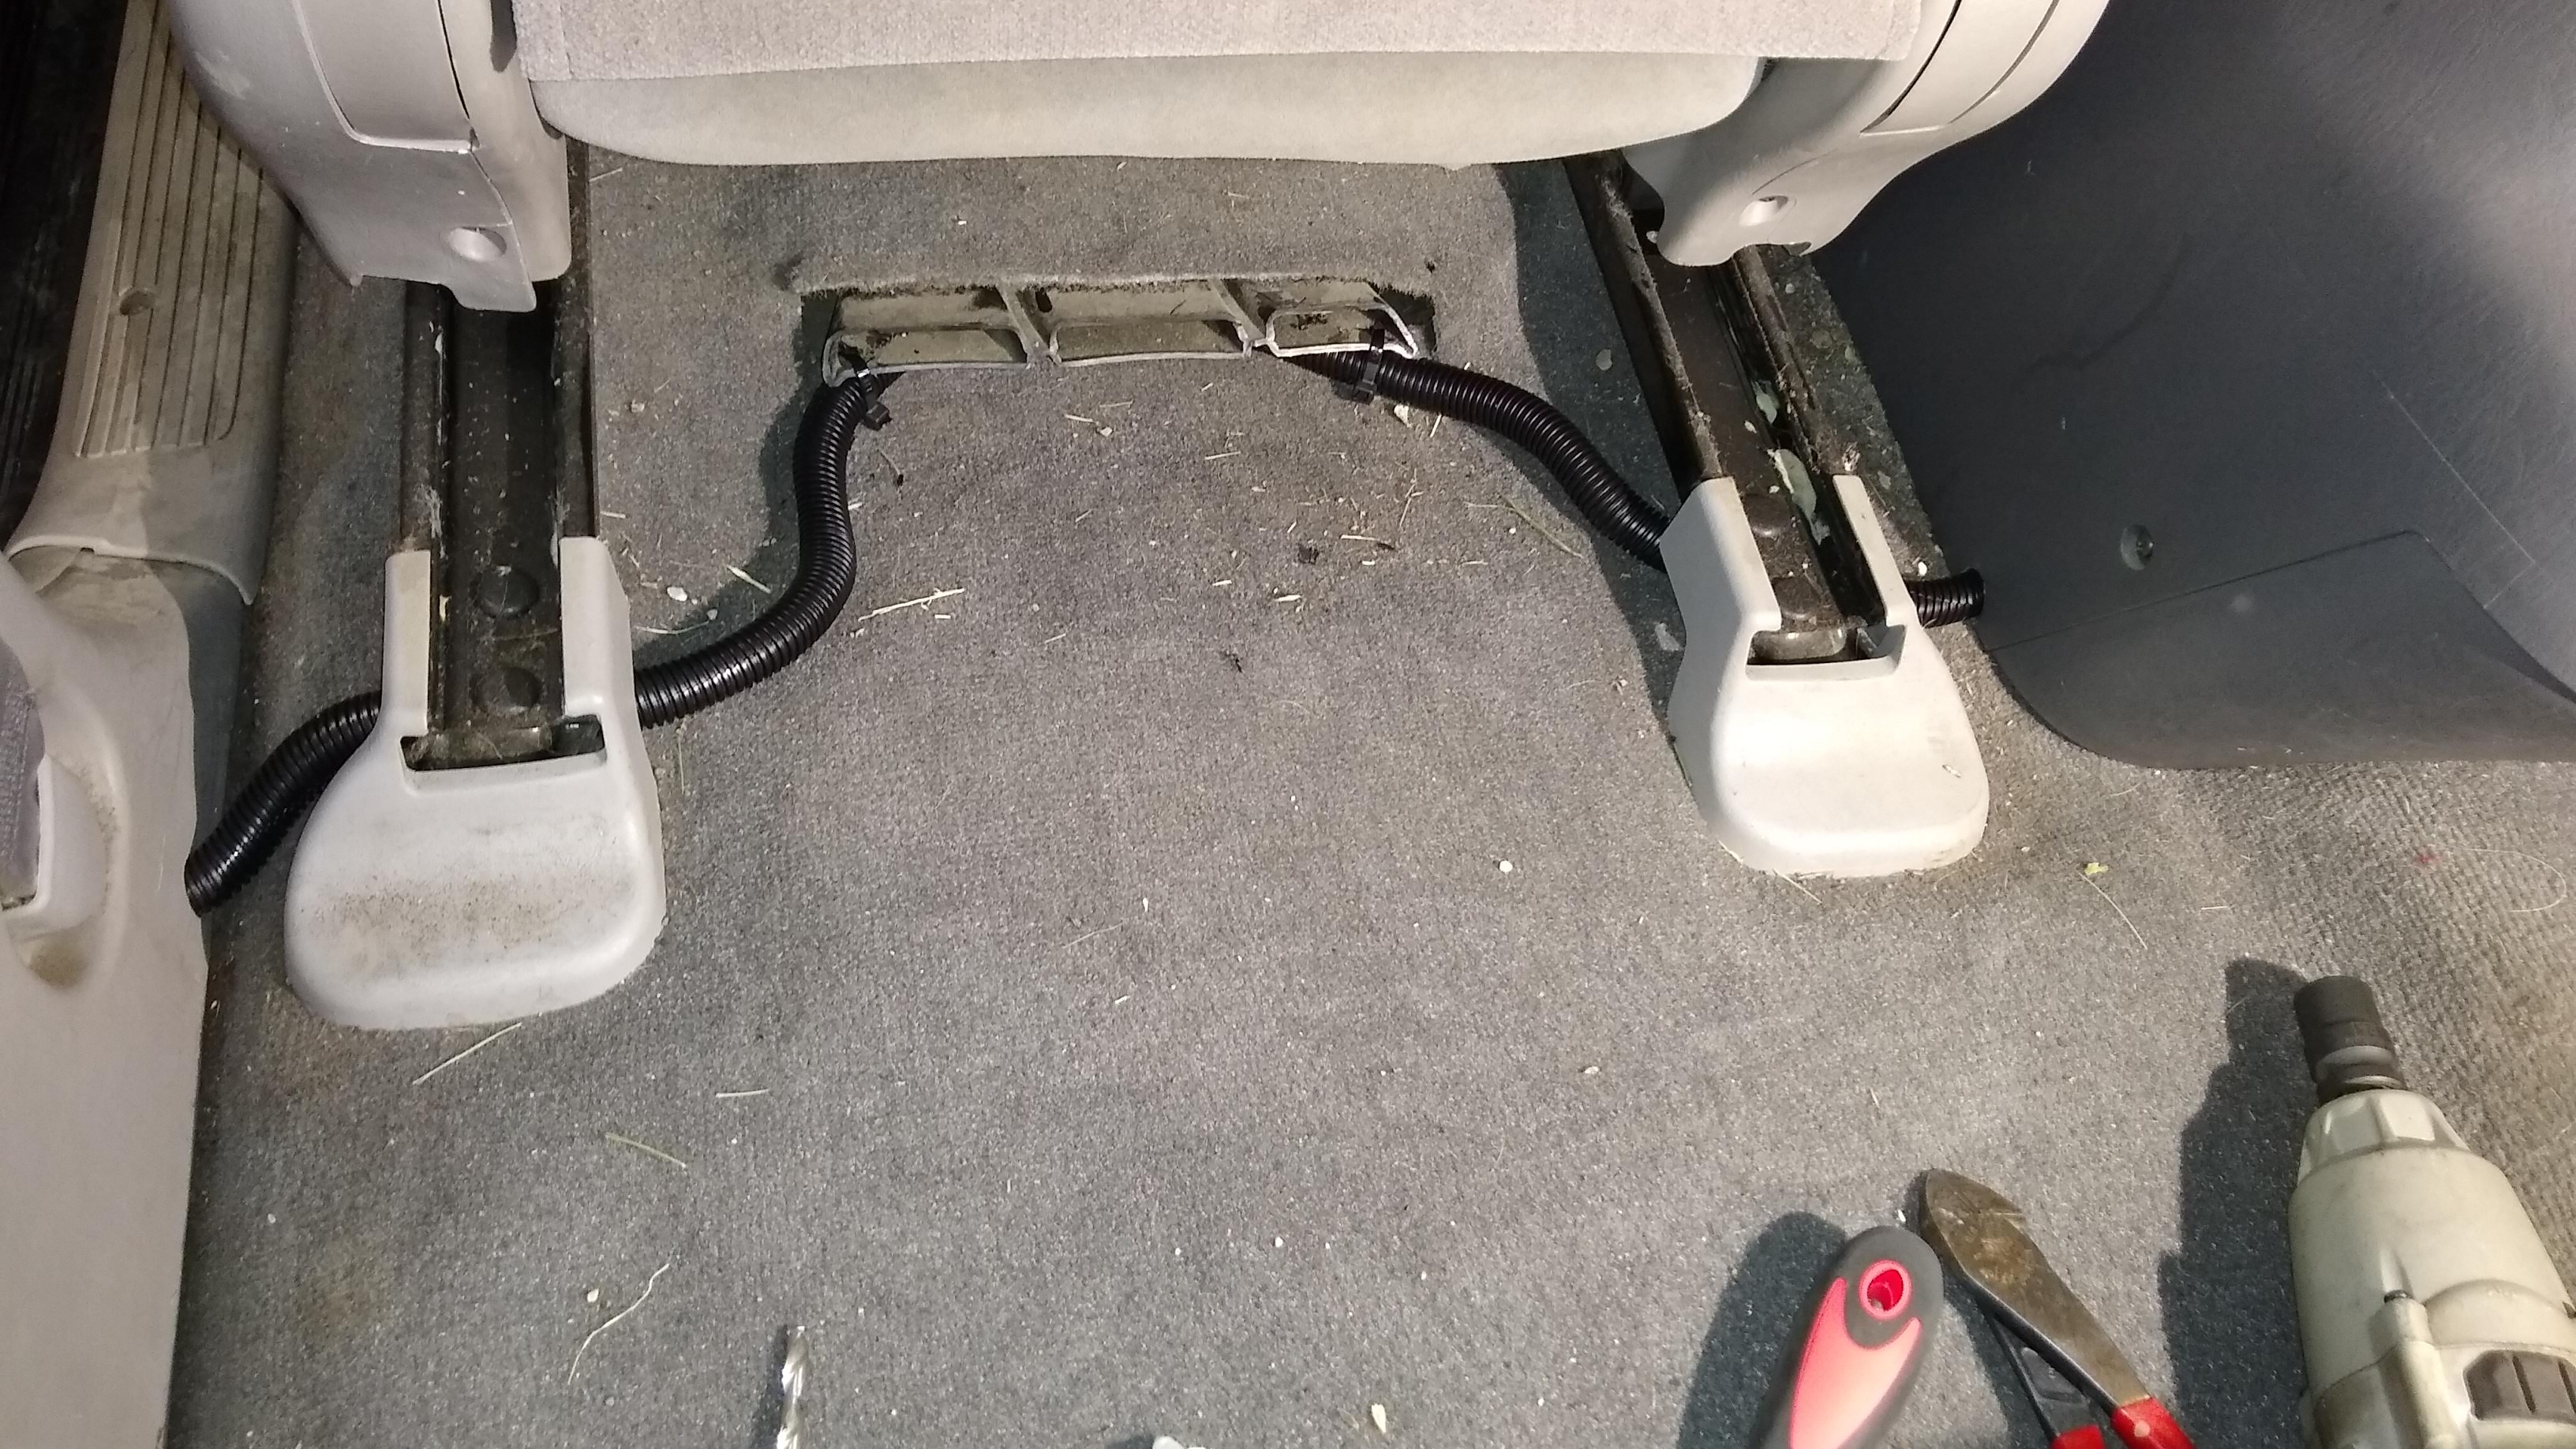
Nice and neat and safe from feet – make sure you loom your wires to protect them from damage.

I managed to run my wires fairly easily. The wire for the control head went through the headliner to the trim piece on the “C” pillar (the third roof pillar from the front); while the power and remote speaker wires went under the rear passenger door sills and under the driver’s seat to the center console. I lucked out in that I had previously installed an inverter in the console, and so had very large-gauge wires already in place. I did take care to properly loom the radio’s wiring harnesses, though, and to use good crimp connectors installed with a proper crimping tool. I also made sure the fuses were easily accessible for replacement.

Finished install. The front face could use a little more illumination for easier nighttime use, though.

Next Time

Probably the most critical task in any mobile ham installation is dealing with the antenna. Not only must you spec out a proper antenna for the job, you’ve also got to mount it. That can be as simple as plunking down a magnetic base and screwing the antenna on, or as pucker-inducing as taking a hole saw and drilling through your roof. And even after that, there are other jobs, like tuning the antenna, testing the install, and mitigating any noise being induced by the car itself. Those can all be challenging jobs, and we’ll cover them in the next installment.


via Radio Hacks – Hackaday https://ift.tt/2Utg6Gs

Tuesday, February 4, 2020

Ham Antennas From MIT

Dealing with an antenna is one of those topics we never feel like we know enough about. MIT had a live stream of [Dr. Kiersten Kerby-Patel] discussing antennas in a talk, sponsored by the ham radio club on campus. You can see the recording below.

The main assertion of the presentation is that everything is a dipole unless it is a loop. Although the professor probably deals with antennas at an extremely high theoretical level, she did a great job of keeping it aimed at ham radio operators.

The talk is about an hour long, so it isn’t optimized for the YouTube generation. There’s some introductory material that looks as though it would have been in one of our old physics classes. However, the talk gets more practical towards the end.

There’s the obligatory mention of Yagis and loops. There’s even a Smith chart. If you don’t know what the Chu limit is, you should definitely be watching this video. The end of the talk covers some very small antennas using active devices or even moving parts.

If you want more discussions on the why behind antennas, we really liked this video. This two-parter is worth your time, too.


via Radio Hacks – Hackaday https://ift.tt/2UmaBt3

Monday, February 3, 2020

Lucid Dreaming | Identifying with the dream

Hello Dreamviews,

I was reading up on the Chariot Tarot card. The author's religious views were not compatible with mine but he got me thinking. He described the card in 2 parts. First, a celebration of one's victory. Second, a warning against the danger of identifying as the Hero archetype after which he quoted Jung. Both Jung and the author warned against identifying with our unconscious, or aspects of our unconscious (such as the Hero archetype). Doing so, they say, leads to an inflated ego. I infer identifying with the Child or the Shadow leads to their own issues?

It was the first time I've been warned against identifying with my unconscious. I thought it was an interesting concept, since as lucid dreamers, part of our ritual is to dissipate the idea of a duality between oneself and the dream. "I am the dream, the dream is me" seems like an appropriate mantra to unlock the ability to be an active participant in the dream.

What I understood from Jung, though I wouldn't be surprised I was wrong, is to identify only with our consciousness and nurture a sense of duality with our unconscious as well as a sense of "connectedness"... (but not identity). This seems... more grounded in reality?

During a dream, if someone perceives the dream stimuli as coming from outside of oneself, they're likely to call the dream an astral projection.
Perceiving the dream stimuli as coming from within describes a dream and potentially a lucid one.
Is then, identifying with the dream, believing "I" am the dream, not an exaggerated claim? Or is it a lucid thought?

I was wondering about this dilemma. Is it just philosophy or is there advantages/disadvantages to accepting the dream comes from one's body, yet is not "me" vs identifying with the dream?


via Lucid Dreaming - Dream Views - Attaining Lucidity https://ift.tt/37RqcVg

Lucid Dreaming | I wake up from lucid dream - always on the left side

I noticed that when i wake up from lucid dreams i always find myself on the left side.

I never go to sleep this way.
My normal position is on my stomach.

The other night i went to sleep on my left side (before i even thought about the connection) and got a lucid dream in the first cycle.
(Fell asleep at 23:30-23:40 and woke up from a lucid at 1:10).

Some say that when you sleep on the left side, more blood goes to the left side of the brain, which is responsible for logic thinking. In lucid dreams logic is an important factor.

Just something i want to share...maybe it will benefit someone.


via Lucid Dreaming - Dream Views - Attaining Lucidity https://ift.tt/2GPDHZN

Sunday, February 2, 2020

Easy DIY Carpet Cleaner Recipe

Stockpiling the ingredients to make a DIY carpet cleaner should be worked into every prepper’s budget. Cleaning your carpets might not initially sound like a priority chore on your survival plan list – but it should.

The bacteria and germs lurking in carpets can spark or spread illness in a short amount of time. When calling 911 is not an option, remaining keenly focused on thoroughly cleaning and disinfecting your bugin location or prepper treat must be a top level concern.

DIY carpet cleaners can be used to regularly eliminate blood, livestock manure, dirt, bacteria, decomposing food, and other potentially harmful pathogens from your floors.

Using natural ingredients to make your DIY carpet cleaner not only may keep you healthier by decreasing your exposure to possibly toxic chemical ingredients, but allow you to use multi-purpose ingredients that may already be a part of your preps to make the DIY carpet cleaner.

When making an all natural carpet cleaner to remove dirt and debris from your floors, there will be no need to ensure the process is conducted in a well-ventilated room, nor will you have to worry about babies, young children, or pets being coming into contact with the carpet even immediately after the cleaning.

Easy DIY Carpet Cleaner Recipe Active Ingredients

Salt

Something as simple and cheap as standard table salt can help keep your carpets clean when used in conjunction with a DIY carpet cleaner recipe. If you are cleaning up an especially grimey, thick, or dirty patch of carpet I do recommend using sea salt instead.

This type of larger and more abrasive salt can help break up and pull up the dirt and scum better than standard table salt.

In addition to using salt as an ingredient in a cleaner recipe, it can also be used as a pre-treatment. To use as a pre-treatment, liberally sprinkle your chosen salt onto the carpet, and allow it to settle for roughly 15 to 25 minutes. Next, vacuum up the salt, then proceed with the carpet cleaning.

Distilled White Vinegar

The uses for vinegar are seemingly endless. Distilled white vinegar not only helps remove even tough protein stains and debris in carpets, but helps to eliminate odors, as well – even pesky pet odors.

Due to the highly acidic nature of distilled white vinegar, it is best to dilute it slightly with Lukewarm water. Typically, using a 2 to 1 ratio of vinegar to Lukewarm water is recommended. But, if you are dealing with a particularly big mess or especially thick carpet, consider diluting the vinegar slightly less.

Essential Oils

There is no absolute need to infuse essential oils into your DIY carpet cleaner, but doing so will add a fresh and lingering pleasant scent to the carpets. If children age 2 and younger or pets will be on the carpet make certain you are using only essential oils deemed to be safe for them to come into contact with – even after the carpet has dried.

Print

Easy DIY Carpet Cleaner Recipe

Ingredients

  • 2 cups lukewarm water
  • 1 cup distilled white vinegar
  • 2 cups salt
  • 15 drops your favorite essential oil pet and baby safe

Instructions

  • In a squirt bottle, pour the distilled white vinegar and the lukewarm water.
  • Next, pour the salt into the same squirt bottle.
  • Put the nozzle lid on the squirt bottle, and screw it in place firmly.
  • Shake the squirt bottle for 30 to 60 seconds vigorously.
  • Remove the nozzle lid again.
  • Drop in any essential oils being used – if any.
  • Replace the squirt bottle nozzle once again and shake vigorously.

How to Use The Carpet Cleaner

  • Before each use shake the squirt bottle for 30 to 60 seconds.
  • You can mix a larger batch of this DIY carpet cleaner recipe and use it to fill up a carpet shampoo machine or a carpet steamer. If
  • Usage Tips
  • Always shake the container for about 30 seconds before using.
  • Squirt the carpet cleaner onto the carpet section being cleaned or the entire room of carpet.
  • This DIY all-natural carpet cleaner can be squirted directly onto a stained or dirty carpet area. Some folks use this mixture in their carpet steamer or shampooer machine. Pour in 1 cup of carpet cleaner, and fill up the rest of the steam or shampooer reservoir with hot water.
  • Let the carpet dry for an hour before using the sweeper to vacuum up both the DIY carpet cleaner and the debris and bacteria it has lifted.
  • The amount of carpet cleaner created by this recipe should treat a 10 X 15 room of thin to mildly thick carpet.
  • This easy DIY carpet cleaner can be made ahead so it is always ready to use when the carpet is soiled while in the midst of rendering first aid, after food is spilled, or manure is tracked on it. Typically, the ingredient combination in this carpet cleaner recipe will retain their potency for about one month.
  • When treating soiled carpet that is also particularly odorous, I highly recommend pre-treating with not just salt, but baking sodas well, to better pull out and eliminate the smell.

This easy DIY carpet cleaner can also be used on upholstered furniture to remove stains, odors, debris, and bacteria. Use a thickly bristled cleaning brush or old toothbrush to scrub clean the upholstery.

Rinse the upholstered furniture with lukewarm was spritzed onto the area with a spray nozzle. Next, use the hose attachment on your vacuum to suction up the DIY carpet cleaner, debris, and water after your done cleaning and rinsing.


via Modern Survival Online https://ift.tt/2Scls5T

Saturday, February 1, 2020

A Mini SDR Receiver Using An Audio DSP

Software defined radio or SDR is the most exciting frontier in the field of radio, transferring as it does all signal functions from the analogue to the digital domain. Radios using SDR techniques can be surprisingly straightforward and easy to understand, and [Ray Ring]’s little SDR receiver manages to combine this with the novel use of an audio DSP rather than a computer to perform its SDR functions.

The front end is a conventional enough direct conversion design with an Si5531 clock generator providing I and Q phase-shifted local oscillator signals to a TS3A5017 analogue switch used as a mixer. An unexpected presence is an LTC6252 op-amp as an RF amplifier, but the special part comes after the I and Q baseband signals have been filtered. The SDR part of this receiver is an audio DSP, but it’s one that might not be an immediate choice. The Spin Semiconductor FV-1 is a dedicated digital reverb chip for musical effects boxes, but it comes with the feature that its internal DSP core can access custom code from an external ROM. [Ray] has written his own code for demodulation of AM, USB, and LSB signals rather than musical effects, and used the device’s left and right audio channels to process I and Q quadrature signals. The use of a single purpose chip to do something its designers never intended gives it the essence of a good hack, and we’re mightily impressed at his spotting the potential for an SDR in a musical effect. Hear it in action in the video below the break.

Meanwhile if the operation of a receiver such as this one is a mystery to you, we published a handy primer back in 2017.

Thanks [Ziew] for the tip.


via Radio Hacks – Hackaday https://ift.tt/36VvlKU