Thursday, November 6, 2025

Testing Your Bug Out Bag – Would Yours Survive the First 48 Hours?

So you have spent your hard earned money, and your valuable time getting prepared. You have read all the articles and made the perfect bug out bag. Now what? You can sit the bag in your vehicle, or home and just wait till SHTF so you can bug out. I asked my self-everyday with my BOB sitting in my backseat of my truck, “What am I missing?”

green molle backpack

I always see new items that I think I have to have and wonder if I should buy that item. I have spent hundreds and hundreds of dollars over the past many years buying stuff so I can be ready.

How do I know if I am ready?

I knew there had to be a valuable way of finding out if my bag could keep me alive for 3 days or longer if needed. I put my bag to the test. Here is what I have done and continue to do.

I do on a regular basis “Survival Campouts” or “Bug Out Bag Campout”. Basically, the premise behind these is to have different scenarios that will test my knowledge and bag.

I like to do this at different seasons throughout the year. It can’t always be sunny in the 70s. I just finished one a couple of weekends ago. Here it was cold and rainy; needless to say it was miserable.

I did this one with several family members that tagged along. Each of us had our own bags. I typically use land that my brother owns. There are 81 acres of land. I am currently talking with other friends who have large amounts of land. It doesn’t do me a lot of good to constantly use the same land since I know the layout of it.

Here is how I structure the testing weekend. I come up with what I consider possible real life events that would require us to bug out and that would cause us to abandon our vehicles and take to foot. I will use this past weekends experience as an example.

The first thing I did was ensured that the land was not being hunted on. This past weekend was opening rifle season in Missouri and the last thing I felt like doing was treating a gunshot wound.

There were a total of four of us that went. My girlfriend (27), one of my nephews (10), my mother (57) and I (34) all participated. I also brought along my dog.

When preparing for this test, I told my family to bring what they thought was needed for them to survive for three days in the wilderness. I didn’t put limitations on them since this was their first time.

For me I had only what was on my person, and my bag. My dog also has a vest that has molle packs on it where he carries his food, some water, fire starter kit, a small first aid kit, and a cable run so I can ensure he doesn’t run off. I didn’t add or change anything in my bag, and I wore normal clothing that I would wear for the current type of weather.

The key here is to not do any extra planning or packing. If SHTF in real life and you are forced to bug out, you mostly likely won’t have the chance or time to pack new items. I also keep my bag in my truck and at night I bring it into my house. If I keep it at home and I am out and about and SHTF I am without my bag till I get home.

The scenario started with SHTF. We were forced to bug out due to unsafe circumstances in the neighborhoods we live in. We all had a rally point were we meet up and then proceed to our bug out location.

On the way to the bug out location our vehicles were rendered useless. Now we had to transfer to foot. We packed up with the supplies we had brought and headed in the general direction of our bug out location.

At this point we were all relying on our knowledge and equipment we had on our backs. The weather was in the 40s with the sun up and was forecasted to be in the low 30s at night, plus it was lightly raining. The last time I updated the items in my bag was early summer. I was concerned that I might not have what I need to survive.
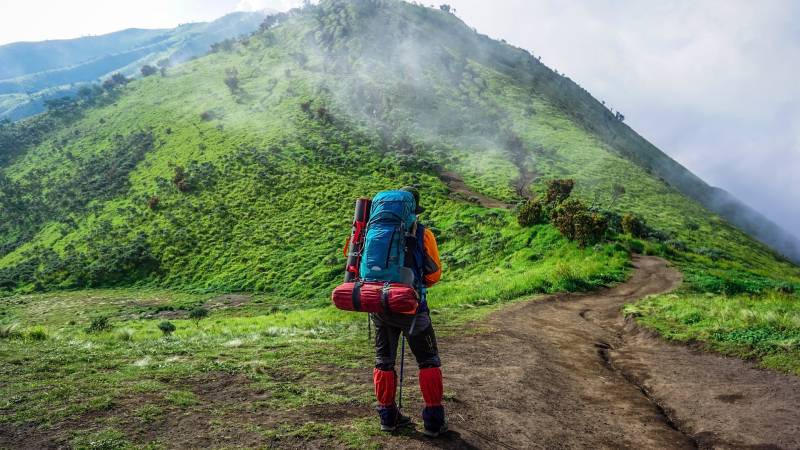
man going on a hike

As we set up camp and I opened my bag and started to inventory my items, I realized that this was going to be interesting. The first thing I did was setup a shelter and then started a fire. I had 2 quarts worth of water that I carry with so water wasn’t my first concern; it was the colder weather that was rapidly approaching as the sun went down.

This night was a chilly one. Remember I didn’t do extra planning or packing. I had on a long sleeved shirt with my medium coat. I had a brimmed hat in my bag which is designed to keep the sun off my neck, and that was it.

The next morning we decided to stay at this campsite while we figure out our plans moving forward.

We spent the next two days testing our skills and equipment. I had written several scenarios that I implemented at different times of the days to test skills, and knowledge. These are as examples the following, make up your own that will test your skills:

  • While away from camp an animal finds food in your camp and eats half of it. I took the entire camp food supply and took half of it and placed it out of service.
  • While away from camp a looter comes in and takes 5 items from your supplies. I took five random items from each persons bag and placed it out of service.
  • I had a couple of days before the camp out placed a tote and a backpack at random spots on the land. These were there to represent the possibility of scavenging items. They had random items that could be valuable to the camp if found. No instructions or even knowledge of these was presented to the camp. They found the tote, but didn’t find the bag. Of course I recovered this later.
  • I then added a scenario about a group of unknown people scouting the camp. The group had to decide how to react to them.
  • The next scenario was the group of unknown people advancing on the camp.
  • Then it went to a scenario of one of the unknown attackers was injured and another ran off. What steps do you take now? Do you use your few medical supplies to help them?

During “free” time I taught basic skills fire building, shelter building, water purification, foraging, and many others. I would then test their knowledge on how to make or do the simple tasks. On day 3 we did some more training and the packed up camp and headed back to our vehicles.

These are very important types of tests that make you better prepared. It is one thing to have all kinds of equipment and supplies, but another to know how to use it and what actually works.

An example; I carry ration bars, freeze-dried meals, and other long shelf life items. Well the ration bars and snack style items were great.

The freeze-dried meals were a disaster for me. I carry a small cooking pot that I can cook and boil water in. Well, these freeze dried meals produce 4 servings. My little pot wouldn’t cook a quarter of the bags. I tried portioning a small amount into my pot and cooked it like suggested.

The issue is the seasoning is impossible to portion that is loose in the bag. I had a horrible meal that my dog wouldn’t even eat. Plus each of these uses a whole quart of water to make. I now know that these are great for bugging in or even at you bug out location, but not in my bug out bag.

There are many other items I keep in my bag that are absolute worthless. I never even thought of using them in a bug out situation. These would be used in a long-term situation, but not bug out. Remember, 72 hours is what you are striving for.

One of the biggest things I realized was how I am not all weather prepared. I had one mylar emergency blanket. If it weren’t for my knowledge and my dog snuggling with me, I would be an ice cube. So very quickly in a short three days, I realized I had a few mistakes that could have cost me my life in a real SHTF situation.

In conclusion, if you have not yet tested your bug out bag, or if it has been a while then go out and test it. Unless you plan on repacking your bag every few months, I recommend packing stuff for the different weather you might come across.

Also don’t be afraid to pull items out of your bag you don’t use. Every pound counts when you are lugging your bag around for miles and days. There is no better way to know if you are ready than to put your skills, knowledge and equipment to the test.

bug out bag testing Pinterest

The post Testing Your Bug Out Bag – Would Yours Survive the First 48 Hours? appeared first on Modern Survival Online.


via Modern Survival Online https://ift.tt/d4MTzjh

Monday, October 6, 2025

How to Build a Bug-Out Bag the Right Way

So you decided to get more serious about prepping and want to put together a bug-out bag. That’s great! Still, you want to keep it light and you do not want to spend a lot of cash. There are a few strategies you can use to accomplish this, and some items that are an absolute must.

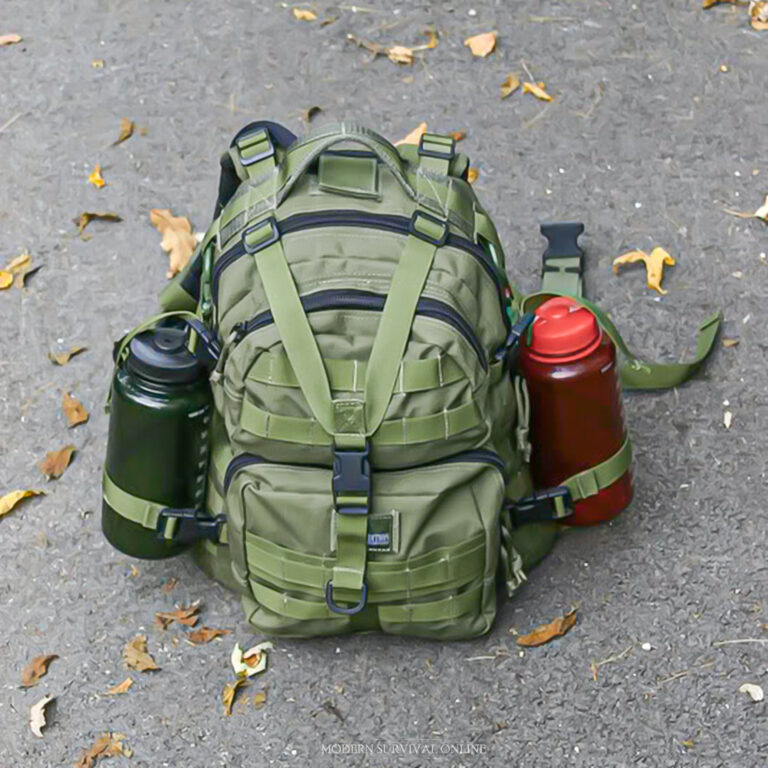
green backpack with two water bottles in side pockets

What is a Bug-out Bag?

First, let us define a bug-out bag. This is a pack preloaded with tools to help you survive if you are forced out of your home. Experts say that the average bug out situation lasts between two and three weeks, so you need enough supplies to at least get you through that time frame.

Many bug-out bags are labelled as “72 hour bags”. However, in theory the same supplies that help you survive three days would help you survive for a week or two. This is called the survival clock.

Let’s not confuse this bag with a get-home bag, which is intended to get you back home from the office or from your car. Your list of tools will vary quite a bit between these two scenarios.

Pre-packed Bags

I do want to take a moment to address pre-packed bags you can purchase online. First of all, these are very expensive. You could easily spend several hundred dollars on one of these packs.

More importantly, survivalists who buy pre-packed bags are less likely to break into the pack and become proficient with the tools inside. By forcing yourself to hand pick each item, it ensures that you will be more prepared if you have to use the bag in a survival situation.

Which Bag is Right for You?

We can start by discussing the bag itself. The size you choose will be determined by how much gear you pack, which is in turn determined by your skill level. The more experience I gain with survival techniques, the less gear I need to pack.

Also, try to avoid any packs that would make you stand out in a crowd. Other people may be desperate in this situation and may try to steal supplies from those that are more prepared. If you can keep your pack size down to a normal back pack, this is ideal.

If not, you definitely want it to have an internal frame. Packs with external frames scream “I have lots of gear, come and take it.”

Rules for Packing your Bag

As you start to look at items to pack, take a look at the four pillars of survival: food, water, fire, and shelter. In addition, you may consider first aid and signaling to be two secondary priorities. Some general rules to consider on every piece of gear are as follows:

  1. Ask yourself if you absolutely need it. This is especially true of large or heavy items. For example, there is no point in taking a cast iron skillet if you can take something lighter and smaller for cooking. I always try to keep my pack weight under 25 lbs.
  2. Always comparison shop. Every time I choose a piece of gear for my pack, I get online to see if I can find a more effective, lighter, smaller, or cheaper option. In just a matter of minutes you may save a few lbs or save a few dollars.
  3. Make sure you have a plan B. The one thing you can say about every survival situation is that something unexpected will go wrong. Instead of just taking waterproof matches, take a ferro rod as well. This way you can still light a fire if you run out of matches.
  4. Don’t just think of yourself. In many cases you will have family or friends with you, so consider their needs when you pack. Also, try to bring items for bartering if you have the space. Cigarettes are an item that takes up little space but would be in high demand. You can pretty well ask for whatever you want if you have smokes and nobody else does.

Cutting Tools

Now that we have some basic guidelines, let us discuss specific items. Cutting tools are at the very top of the list. A good full tang knife is essential in most survival situations. You do not have to break the bank, but get a knife with high carbon steel for the blade. This will allow you to use it with your ferro rod. You can get a perfectly functional knife for under $30.

Depending on the type of vegetation, a hatchet, machete, or folding saw may be smart as well. These items take up space, so only take one if you know you will need it. These bladed tools will help you to fashion other tools and also help with building a shelter.

Fire-starting Devices

Next on my list would be two methods for starting a fire. For me a ferro rod is mandatory. This item can allow you to start a fire even if you get it wet, and it will last a very long time.

A secondary option would be a good lighter. I like Zippos because they work when wet, they are wind proof, and you can refill the fuel with several different flammable liquids. They recently have come out with several electrical lighters that would probably work well, but you would need a way to charge one.

With fire allowing you to safely cook food, purify water, keep away predators, stay warm, and keep the bugs away, it should be a major priority. I would also consider taking one of the waterproof tinder options you can buy. Just a few small cubes could last for weeks and help you get a fire going in the pouring rain.

Water Purification

In most conditions you can only survive without water for three days. Having a secondary method with which to purify water is very important. You will not always be inclined to build a fire just to get a drink of water.

I like carrying some water with me, so I have a water bottle with a filter built into the lid. It takes up some space, but I can clip in on my belt. You can also get a steel bottle so you can use it for cooking as well. If you need to save more space, a straw style filter works great.

I also like to have iodine tablets just to be safe. I’ve had my filter clog up before and needed the tablets to get by.

Shelter Building Materials

There are a few items for shelter that I consider a must. A good emergency blanket is definitely one of them. For about $10 you can get a thick tarp-style blanket with a reflective surface on one side. This is great for a waterproof shelter or to wrap up and keep warm in a jam. If there are several people in your group, upgrading to a full sized tarp may be a good idea.

Paracord is another item which I always have in my pack. Sure, you can make your own cordage, but paracord is so much easier. You can cut it open and remove all the interior strands for projects ranging from setting snares to lashing poles together.

Defense

The biggest debate in my mind is whether to pack a weapon or not. Having something for self-defense and for hunting is great, but they are bulky and don’t pack well. A handgun is great because of the size, but it is a sure fire way to disclose your location. A crossbow is silent and deadly, but it is awkward to carry.

In my view, the decision comes down to the distance you need to travel. If you are staying close, it is probably worth toughing it out and taking one. If you have a long distance to travel, carve yourself a spear and do without the gun or bow.

Food and Water

Food and water are other items that are up for debate. What I mean is actually taking food with you in your pack instead of procuring it in the wild. Having any meaningful amount of food or water would take up significant space and would be quite heavy.

If you are going to take food with you, I would definitely suggest something lightweight that does not spoil. Beef jerky, pemmican, and MRE bars are examples that might work. Unless heading into the desert, I would not suggest carrying much water. I sometimes fill up my small water bottle before I hit the woods, but any more than that would be counterproductive.

Miscellaneous Items

Finally, there are a few small random items that I normally keep in my pack. Fish hooks are normally either in my pack or stuck in the bill of my hat. You can make fish hooks, but they take up almost no space. I like to have a sharpening stone. Again, you can find one in the wild but it is so small that I can keep it on my keychain.

A quick-read digital thermometer is a smart choice. Whether you are ill, dealing with extreme cold, or enduring extreme heat, knowing your body temperature is good. If it drops below 95 degrees or spikes above 103 degrees then you know you need to take action to improve your situation.

A reliable compass is also a good idea. In most cases I can find my cardinal direction without one, but a little reassurance is a good thing. Mine also has a magnifying glass for starting fires. A signaling whistle is another small item that can be very helpful if you need to signal for rescue. A good tactical flashlight is needed for emergencies, but eventually you will need batteries.

Also, don’t use your light as a crutch. Once the sun goes down, you really need to be settled in for the night. Walking around at night can be dangerous for several reasons.

Organizing and Testing your Gear

Once you think you have your bug-out bag put together, you are just getting started. Try taking it with you for some primitive camping. You will quickly realize that some items are not important while others are vital. When you get home, reevaluate the items in your bag and make changes as needed. Remember to shop around and you should be able to keep cost to a minimum.

All of the gear I have ever used in my bag cost me about $140. That being said, I have removed more than half of those items. At this moment my pack only has about $65 of gear inside.

One other point to mention is that you can carry small gear outside of your pack. With cargo pants I have six pockets in my pants and five pockets in my jacket. I can put my knife and hatchet on my belt, and use carabiners to attach other items to the outside of my pack. It does not help with the weight, but it does give you a little more space in your pack.

green molle backpack

Modular Bug-out Bags

Organizing your BOB is every bit as important as getting the right gear. A modular bug-out bag is a system that divides your pack into several categories. You can organize by the type of gear, or by the time frame you expect to be away from home.

Either way, pack several smaller bags, label what is in them, and put them all in your primary pack. With this system you can make last minute adjustments to your pack to keep the weight down. You can also ensure you are not forgetting anything.

In my opinion, there needs to be at least one general emergency kit in your bag. This is a small kit that you can carry in your pocket or latched to your belt if you leave your large pack behind. Inside your pack you may have a first aid kit, a fire-building kit, and a fishing kit, but you also need a kit that will cover all four pillars of survival for at least a few days.

For example, I will sometimes stuff my filtered water bottle with a folding knife, some fish hooks, a ferro rod, a few fire cubes, my emergency blanket, some iodine tablets, and some paracord.

It also has a paracord lanyard that allows me to hook it on my belt. This kit is compact and only weighs about a pound, but it has most of the important items from my pack.

As you tackle this project, take your time and do it right. Spend time shopping for the best value and try to avoid impulse buys. I suggest purchasing just a few items at a time so you can give each one a good amount of attention. If you purchase online, most items will have a weight and size listed.

Just remember that every once will count if you have to travel dozens of miles. Once you have your items, pretend that you are reviewing each item and put it to the test. If your tools are not ideal, you want to know that well before you end up in a survival situation.

building a bug out bag Pinterest

The post How to Build a Bug-Out Bag the Right Way appeared first on Modern Survival Online.


via Modern Survival Online https://ift.tt/5C2Vpc9

Wednesday, September 24, 2025

A Primer on Raising Sheep

Sheep would have to rank among the most common grazing animals in the world. They are extremely versatile and adaptable and are raised for wool, meat, skin and milk.

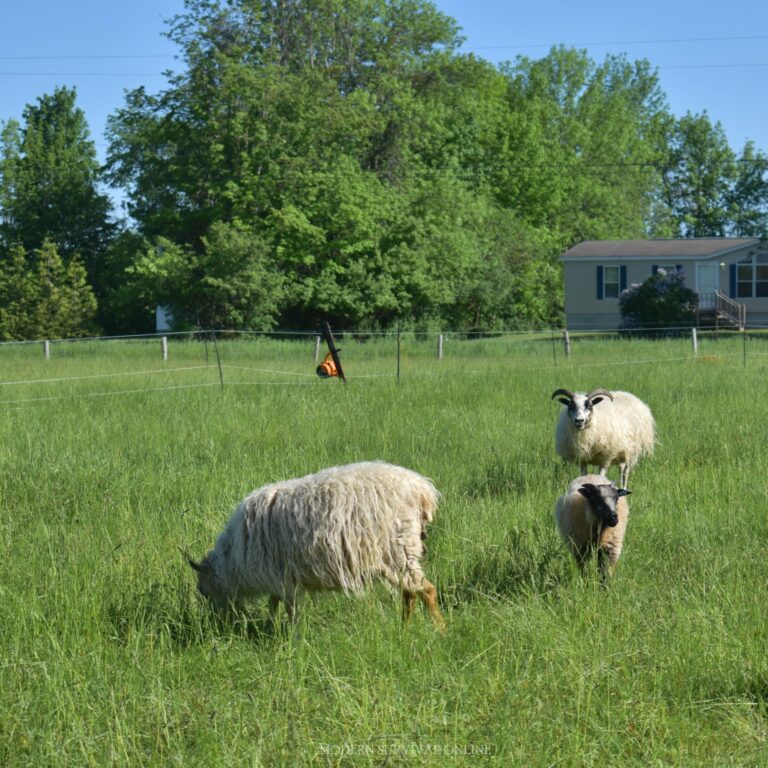
Icelandic sheep on green pasture

Raising your own sheep is an extremely enjoyable experience, as well as an excellent way to keep the grass down, turn your weeds into clothing and provide some really tasty meals.

The sheep industry isn’t a modern one. In fact, it dates back thousands of years to a time when a more primitive people relied on their personal flocks for food, clothing and trading. Actually, history tells us that wool was one of the first textiles to be processed and spun for use as cloth.

Let’s look at the benefits of raising your own sheep and see they will become invaluable when disaster strikes…

Lifestyle

For many, the enjoyment of an agricultural lifestyle and a ‘small taste of country’ is the reason for keeping a few sheep. If their property has extra land, it’s an excellent way to keep the grass down and provide some of their own organic meat. Folks sometimes use it as an opportunity to expose their young children to the idea of living off the land and teach them that meat and milk doesn’t grow on supermarket shelves already packaged.

For families with young children, sheep are an excellent choice because they are generally good tempered and easy to handle. We have found that lambs which have been bottle fed become extremely friendly and make excellent pets.

Relationships with animals such as these are really important, especially for children because when disaster strikes and your life is turned upside down, animals are one of the best sources of comfort quickest ways to restore a bit of normality back to your life.

They take up much less space than cattle and aren’t Houdini’s like goats. To give you a general idea, one cow and her calf needs about the same amount of grazing area as a flock of five ewes and lambs.

Sheep are happy to graze orchards, lawns, wooded areas and nearly anything else between. They eat a lot of plants that other more fussy grazers won’t touch and better still, they eat basically to ground level.

They are reasonably cheap to buy, have a comparatively short gestation period of 145 days and generally need little medical attention. So, without much upfront cost, you can have your own little flock in a short space of time.

Organic Food

For some people, it’s a way of ensuring that what they eat is completely natural free of additives and steroids. Knowing exactly how the animal has been kept, what it has eaten and how it has been processed is really important to these people.

Tax Benefits

There are several taxation advantages that go along with raising sheep, or other agricultural activities, which may be worth considering too. Laws vary by state, so you will need to familiarize yourself with your state’s definition of a farm for taxation purposes.

Wool, Meat or Milk: Which Breed is Best?

Considering there are a lot of breeds of sheep, it’s important that you identify exactly what you want to get out of your flock. As with any livestock, different breeds have been developed for different purposes, so you need to decide what your number one priority is: wool, meat or milk?

You also need to consider your climate and what kind of pasture you have to offer and make your choice accordingly.

Supposing your aim in raising sheep is purely for their wool, here are some things to consider:

Fine-wool breeds have been specifically developed for the genuine wool producer, for both commercial and hand spinning markets. These sheep have been selectively bred to produce quality fleeces and their comparatively fatty meat is not always considered prime eating quality.

Fine wool will bring better returns, but you may have difficulty breaking into an existing market in your area, especially if your quantity is small.

Fine-wool breeds include:

  • Merino
  • Rambouillet
  • Debouillet
  • Cormo
  • Jacob

Medium-wools cover most of the common breeds of sheep. Their fleece is generally sold on the market and their carcasses are often large and make good eating.

The ROI on this wool isn’t likely to be as good and if you can’t shear them yourself (i.e. you have to pay shearers to do the job), the cost of the shearing may be greater than the money the fleece brings.

The most popular medium-wool breeds include:

  • Dorset
  • Hampshire
  • Suffolk
  • Shropshire
  • Texel
  • Cheviot
  • Polypay

Meat sheep

If you are keeping sheep for their meat and can’t be bothered with the fuss of shearing, your obvious choice will be one of the hair sheep varieties.

As their name suggests, hair sheep are covered in rugged hair much more like that of their wild ancestors, which adapts to suit their environment and sheds in much the same way as a dog’s coat.

Hair sheep have become very popular because they are hardy, low-maintenance and resistant to many of the common parasites.

Carcasses are usually lean and make excellent eating.

Hair sheep breeds include:

  • Katahdin
  • California Red
  • Barbados Blackbelly
  • Croix
  • Wiltshire Horn
  • Royal White
  • American Blackbelly

Dairy sheep

Do you want to keep your flock for milk and cheese? These items will be invaluable for bartering after that catastrophe hits.

Sheep’s milk is extremely nutritious and has a very high solid content which means makes excellent cheese and butter. It is higher in several vitamins and minerals than cow’s milk and is easier on the digestive system.

They are easily milked by hand and depending on the variety, may produce between 400 and 1100 pounds of milk per season.

Lactating ewes of any sheep species are suitable for milking, however the renowned milking varieties include:

  • East Friesian
  • Lacaune
  • Hampshire
  • Suffolk

What facilities do I need to keep sheep?

Buildings/shelters

As with any livestock, the size and complexity of the facilities needed to keep sheep depend largely on the size of the flock, your local climate and the climate in lambing season.

Some sort of storage shed or barn is useful for fodder storage and climate protection and will be essential if lambing is going to take place during the winter.

Sheep are incredibly adaptable and hardy and if the ewes are lambing in spring or summer, a small flock owner may well get away with a basic shelter for storing supplies and housing ill or lambing animals.

Shelter for BOL

A temporary shelter is easily constructed with bales of hay for walls and a piece of weighted iron for the roof. This type of shelter can be easily erected at your BOL and is cheap. The hay will provide fodder once the shelter is no longer needed.

Shade and water

If your summer is dry and hot, you will need to ensure that your animals have adequate access to shade and water. Sheep, like other grazing animals, are exposed to the elements all year round and inadequate shade and water will likely be fatal.

You will need to make sure that your BOL is close to a natural water source – your flock will make short work of your stocked water so your location needs to have a dam, waterhole or river nearby.

a Cameroon sheep

Pasture/feed

Sheep are grazing animals, so the constancy and quality of pasture or feed is very important. They will happily graze a wide range of grasses, legumes and trees.

Most of a sheep’s nutritional needs can be satisfied with grasses, but if the pasture is poor or in short supply or the needs of your animals particularly high, you may need to supplement with a mix of whole grains.

Some people say that feeding sheep grain to fatten them up will make the meat greasy and fatty – this is of course, a matter of personal opinion. I have never tried it because we have more than enough pasture. Grain is, of course, a more expensive feed option and will be harder to find and more expensive post disaster.

Hay, which is high in vitamin A, is going to be necessary for feeding out if your area experiences harsh winters. Store your hay in a dark place (e.g. a barn) to preserve its nutritional value.

Mineral salt helps to prevent bloating and should be readily available to your sheep. Maybe you could use a licking block or provide it loose or granulated.

Health Issues

Sheep are incredibly hardy, adaptable and resistant to many kinds of common livestock diseases.

Of course it’s your responsibility to provide a clean and safe environment for your animals because most illnesses are the result of poor sanitation and dirty housing.

A few of the illnesses that may affect your flock are:

  • Footrot
  • Polyarthritis
  • Pneumonia
  • Mastitis
  • Pregnancy disease
  • Coccidiosis & scours (lambs)

Sheep are also prone to parasites, but this can be prevented to some extent by rotating pastures regularly.

It is really important that you maintain contact with a reliable veterinarian and vaccinate your flock appropriately.

Annual routine care should include vaccines, shearing, hoof trimming and deworming. Lambs require ear tagging and tail ringing. Ask your vet for more information on these topics.

Sheep manure should always be pelleted and solid and the animals generally stick together in a flock. Keep a lookout yourself for any animals that look sick or injured and isolate any animal that appears unwell.

General care

Sheep are generally easy to handle and easily trained. If your flock is small and you are a smart prepper, you can make the most of their gentle character and use it to your own advantage. They will follow almost anywhere for grain, apples or bread. Luring them with treats makes it easy to get them into pens for veterinary treatment or loading.

Handling facilities, no matter how small the flock, always make the job easier when it comes to loading, shearing or sorting. Of course they can be constructed in many different ways and your own needs will determine what you build or buy.

A few things to remember when designing your pens:

  • Sheep move along better if their course is slightly curved and they can’t see what is ahead
  • They instinctively move towards and follow other sheep
  • They move better uphill than down

Predators

Predators are a serious concern as thousands of sheep are lost every year to hunters such as wolves, coyotes, foxes, eagle and bears.

A few points that may help to prevent losses to predators:

  • Use guardian animals such as dogs, alpacas, llamas or donkeys
  • Use neck bells on your sheep
  • Quickly remove any dead sheep from your fields
  • Install high, predator-tight fencing

Other Points of Interest

Here are several other points about raising sheep and lambs that might be of interest to you:

  • Lambs can be weaned as early as 60 days old
  • Orphaned lambs are often unwanted by commercial farmers and they are only too happy to give them away. This really does make your flock a very economical investment.
  • Bottle-fed lambs make excellent pets, though they tend to be very demanding and over friendly as they grow up.
  • Lambs do very well on cow’s milk powder, which can be easily purchased from your local supermarket and is much cheaper than the genuine lamb milk powder.
  • Sheep are generally quiet, unlike goats.
  • Sheep will happily graze steep or rocky pasture that is unsuitable for cows.

Well, it really isn’t difficult to keep a few sheep of your own. In fact, it’s enjoyable and helps to keep the grass under control. With the added bonus of delicious, home-grown meat.

You never know what circumstances might crop up, when there is no longer anywhere to buy meat, or you simply don’t have the cash. I think, when times get ugly, you’d be jolly glad to have your own animals. After all, isn’t this just going back to basics and learning how to care for ourselves without relying on modern conveniences?

raising sheep Pinterest.jpg

The post A Primer on Raising Sheep appeared first on Modern Survival Online.


via Modern Survival Online https://ift.tt/2zWQgtD

Monday, July 28, 2025

How to Take Care of Goats on the Homestead

Goats are perfect animal to have on a survival homestead. Even if you live in suburbia, you should have enough space to keep a Pygmy or Nigerian Dwarf goat – they are not any larger than a typical family dog.

Tara’s pygmy goats

There are approximately 200 different breeds of goats. A goat will provide the family with both milk and meat. Some breeds of goats are considered meat, other dairy, and a few types are deemed “multi-purpose” breeds. But, all female goats will give milk and all goats will provide meat, some are just better producer of milk or offer a better quality of meat.

Keeping goats on your survival homestead will eliminate the need for weed eating or grass cutting. Not only does this save you valuable time for other chores – and wear and tear or your body, but offers the goat a more natural (healthier) and free diet, during the warm weather months.

Even during the winter when the goat herd will need supplements of hay, there is still enough underbrush and grass going for them to browse for a portion of their diet in most climates.

Goats are ruminants, just like cows, deer, elk, and several other types of livestock and wild animals. Cows do not have four stomachs, that is a common misconception. They, and all ruminants, actually have four chambers to their stomach.

When the ruminant chamber gets out of whack, painful and potentially deadly bloat can result.

– like cows. Contrary to common belief, cows do not have four stomachs but four chambers in their stomach – like goats, sheep, deer, and elk – among a handful of other animals but wild and domestic.

The ruminant is one of the stomach chambers and when it gets out of whack, bloat occur and must be treated quickly or a painful death could result.

Drenching small goats with a 1 to 1 ratio of a mineral oil and baking soda – with a few drops of peppermint essential oil thrown in, should break up the thick gas bubble rather quickly.

Standing the goat up on its hind legs and gently rubbing the sides of its stomach should help produce the needed belching or flatulence.

baby goats on feed tub
You think that fence will keep the two baby goats from jumping over? Maybe for now…

Fencing

There are many benefits of having goats on the homestead, but they do come with one major drawback as well..keeping them in the fence. Goats are notorious escape artists and incredible climbers. I opted to eliminate that common goat-keeping frustration and teach our herd how to free range.

Unlike keepers who tie their goats out at various locations to eat weeds and browse for foot, our free ranging goats basically have the run of the place and only go into a “pen” at night.

The goat pen is simply a barn stall that my husband added a piece of divider fencing to when our Nigerian Dwarf goat was getting ready to give birth. Because she is a small statute goat that was very pregnant at the time, she could not escape the confines, but a standard goat could scale the makeshift divider in mere seconds.

Fencing Tips

  1. A goat pen should be made of high-tensile woven wire or barbed wire affixed tightly and closely together around/through either wood panel fencing or wood pallets. The pallets must be turned so the deep pocket side is facing inward to deter goat climbing.
  2. Hog panels or similar sturdy wire fencing can also be used to frame out a goat pen when solid wood corner posts are used – do not use metal T-posts when setting up a goat pen, they will give too much over time and allow the fencing to sag enough to allow goats to climb out.
  3. Adding electrical fencing strands in between wood panel fencing, or even when wire fencing is used, is highly recommended, as well.
  4. A goat fence should be at least 47 inches tall to keep standard goats inside.
  5. To best protect goats from predators, use wire fencing with an opening no larger than four inches in width.
  6. A herd of two to 10 goats should be housed in a pen that is about 1-acre in dimension to allow humane freedom of movement and enough grass to eat on a regular basis.
  7. Goats love to climb and can get very fussy when they become bored. Use old tired mounted together, a wood platform, or similar structure to give the goats the opportunity to exercise their natural climbing tendencies.
  8. Goats are herd animals, they should be kept with at least one other goat. If you purchase your first goat and are still looking for more, allow the goat to commune with sheep or equine until its own little herd can be established.
  9. A small barn, shed, or similar structure must be provided for the goats to use for shade and to escape inclement weather. Even goat breeds that hail from warm climates will become overheated and dehydrated during the summer months if they do not have access to adequate shade and enough clean water to drink.
YouTube Video

Goats will find something to climb on just about anywhere. If you leave your truck door open on a goat farm, or an ATV parked briefly in “their” field, expect to find either the animals still standing there upon your return, or their muddy hoof prints on your seat cushions!

How Much Does It Cost To Keep A Goat?

Purchase Price

The price of a goat can vary greatly due to its breed, age, sex, time of the year (prices go up before the 4-H livestock tag in deadline) and your specific location. Just like with other types of barnyard livestock, the cheapest time of year to buy is during the late fall because no farmer, breeder, or homesteader wants to suffer the additional cost of wintering over an animal they no longer want.

Typically, you can expect to spend approximately $85 to $200 for common goats. Some breeders can fetch up to $500 per goat if registered or a rare breed.

Grain

A 50-pound bag of either all stock feed or goat feed usually runs about $9 to $11 per bag. If you want to buy organic grain feed or a type with a lot of added this and that which is supposed to be a great dietary supplement for your goats, expect to spend around $25 per bag. If your goats are either free ranging or allowed to browse for food while tied out, they really don’t need any supplements to their diet.

Bedding

All livestock need some type of bedding in their pen, stall, or lean-to sleeping area. Straw is the most commonly used bedding. A square bale of straw generally costs between $3 to $5 each.

When the living area is muck or scraped with a tractor, both the straw and the manure can go straight into the compost pile to eventually create top-quality soil for gardening plots.

Sawdust is also a commonly used bedding medium for livestock because it is both cheap and readily available. If you purchase a manufactured package of sawdust shavings from a farm supply store, it generally costs about $5. A bag at least containing at least twice that amount can often be purchased from a sawmill or farmer for half that amount.

Hay

Baling your own hay is the best and cheapest way to feed your livestock over the winter months. It is not only far less expensive if you have the necessary equipment and time, but you know exactly what goes into the material your animals (and eventually you in some cases) will be eating.

A square bale of quality hay (containing Timothy and alfalfa) typically costs about $5, unless you buy in bulk and then the cost goes down a dollar or two. Round bales can range in price from $25 to $40 depending upon the quality of the hay, how large the bale is, local demand, and the time of the year.

Goats typically eat about two to four pounds of hay per day, depending upon the breed and how much grass, weeds, etc. they can find on their own.

Medical and Health Care Costs

Goats should be wormed between four to six times per year. You can worm the goats yourself by purchasing medicated pellets from a farm supply store. The pellets are flavored and the goats seems to love them. A jug of pellets large enough to worm a herd of six goats at least two or three times, will cost less than $20, on average.

If a vet has to be called to deal with a goat injury, illness, or pregnancy complication, the bill could range from $50 to $300, depending upon the severity of the issue and time spent traveling to your survival homestead and tending to the animal.

I have always been able to treat the medical and general care (fly spray etc.) needs of our livestock myself using homemade remedies and herbal tinctures. We grow our own pharmacy on our retreat to care for the health needs of both the family and the barnyard inhabitants.

If a farrier has to come out to trim the hooves of the goats, he or she may charge up to $25 per animal for the service. Learning how to properly file and even possibly trim the hooves is not a complicated task and can help keep your livestock healthy while saving you money in the process.

Free-ranging animals tend to need far less trimming, especially goats, because their hooves are worn down naturally when the walk on rocks, climbs, and traverse other types of rugged terrain.

The development of hoof problems due to neglected care can lead to expensive and sometimes even deadly, health conditions.

Dairy Goat Facts

  • Seven quality dairy goat breeds exist: Nubian, Saanen, Nigerian Dwarf, Alpine, Toggenburg, Oberhasli, and LaMancha.
  • Both LaMancha and Nubian goats originated in warm climates and typically adapt well to summer heat.
  • Goat breeds that are known to be cold weather hardy due to their places of origin include the Oberhasli, Toggenburg, Alpine, and Saanen.
  • A Pygmy goat can produce up to 1 quart of milk per day.
  • A Nigerian Dwarf goat usually produced two quarts of milk per day.
  • A Nubian goat can produce about 4 quarts per day but may hit a half gallon of milk daily during her peak production period.
  • A quality standard dairy goat usually produces up to 900 quarts of milk annually.
  • Goat milk is a lot sweeter than cow milk because of its high butterfat content. It tastes a lot like buttermilk.
  • The quality of milk decreases over time. When it gets a salty taste, the nanny goat’s milk cycle is coming to an end. The salty taste stems from an increase in mineral production in the goat’s body. While the milk is still safe to drink or use to make dairy products, the taste is not pleasant.
  • People who suffer from a lactose intolerance problem can sometimes (perhaps, often) tolerate goat’s milk to drink and in recipes.
  • A goat’s milk production begins after kidding (having a baby) this is referred to as the “freshening” period. As long as the goat is being milked daily, the production could last up to a year without the nanny goat kidding again in between.
  • It is recommended to give the nanny a break and allow her some down time (about two months) from milking in between kids to ensure her overall health and to muster the necessary strength to have a healthy pregnancy and delivery. Simply stop milking the nanny goat on a daily basis (milk only every several days) and her milk will “dry up” in a relatively short amount of time.
  • Goats come into heat twice a year, typically during the spring and fall.
  • A goat’s gestation period lasts around 150 days.

Goat Milking 101

A milking stand, either homemade or store bought, is pretty much a necessity – even for the most compliant and docile goats. A new commercially manufactured goat milking stand typically costs about $150.

How To Milk Goats

  1. Put a lead strap on the goat and walk her onto the stand.
  2. Place the milk bucket in the appropriate spot on the stand under the goat’s teats.
  3. Tied the lead strap onto the stand. Using a treat or little cup of food will make leading and keeping the goat in place a far simpler endeavor.
  4. Wash the teat and the area around them to make sure they are as free of debris as possible.
  5. First, you need to pinch your thumb and index finger around the nanny’s teat in a gently yet firm motion. Never grab or tug the teat.
  6. Now, grasp the rest of the goat’s teat with the rest of your fingers on the same hand and apply gentle yet firm pressure while pulling it downward.
  7. After gently pulling on the teat a few times, milk should begin to flow into the bucket.
  8. Rub some coconut oil or other safe antiseptic and skin soothing substance onto the teats to prevent them from getting dry or cracked after milking.

Meat Goats 101

The Spanish, brush, boar, and Tennessee breeds of goats are often considered the best eat producers. A mature male standard meat goat typically weighs between 170 to 325 pounds. A mature female standard goat generally weighs between 150 to 220 pounds.

Top Meat Goats

  1. Spanish – These goats are hardy in warmer climates and a very popular meat breed choice in the South.
  2. Boar – This breed of meat grow tends to grow quickly and also boasts a high fertility rate. They are stocky and sturdy enough to have once often been used as pack animals.
  3. Tennessee Goats – This breed of goat is also often referred to as “Fainting Goats.” Although they are now often purchased as novelty farm pets, they also produce quality meat. Tennessee goats typically have a long breeding season and are also known to be a substantially fertile breed.
  4. Brush – This meat goat breed is highly adaptable to a variety of climates and can thrive in even rugged terrain.
  5. Pygmy – These goats were initially imported to the United States from Africa for use at petting zoos. These fertile little goats may not produce as much meat as a standard goat, but they need less room to roam and cost less to feed – making them a great choice for preppers who live in a small town, in the suburbs, or on a low acreage survival retreat.
  6. Kiko – These are among the largest of quality meat goat breeds. They hail came to America from New Zealand in the 1990s. They are known to thrive even when living in harsh terrain.
holding an alpine baby goat in arms

Goat Pregnancy

How To Tell If Your Doe Is In Heat

  • Her tail becomes swollen, is slightly red, and is usually wet from discharge.
  • She urinates far more frequently.
  • She is a lot more vocal than normal – she exhibits this same behavior when preparing to kid.
  • She appears to be mounting other goats, both male and female – this is known as “being bucky.”
  • She engages in “flagging” which means wagging her tail frequently.
  • The doe experiences a loss of appetite.
  • She may behave in an unusually aggressive manner with other members of the herd or humans.
  • Her volume of milk fluctuates.
  • She becomes giddy, a state some goat keepers refer to as “acting drunk.”

How To Tell If Your Goat Is Pregnant

  • Take her to the vet for a blood test – these usually range in price from about $25 to $100.
  • Lift up the tail of the doe and check but her anus and her vulva – this is commonly called the “pooch test.” If the anus is sagging away from the tail area and the vulva is elongated, the doe is probably pregnant.
  • About two weeks after a successful breeding session the belly of the doe begins to tighten. Press your fingers firmly but gently to the front of her udders. If the area feels soft, she is likely pregnant.
  • Approximately six weeks into the pregnancy the doe will begin to “settle in” to her condition. Her teats should become rounded and grow at least slightly larger.

Preparing For Kidding

A doe should not be milked during the final 60 days of her pregnancy. Some does stop producing milk on their own during the final stages of pregnancy. The goat needs time to rest and muster as much strength as possible before kidding.

She should be given a larger ration of food to help her garner as many nutrients as possible to help ensure a safe birth and healthy kids.

If you are new to keeping goat, resist the urge to buy an entire herd at once, even if they are offered to you free of charge. Start small and hone proper husbandry techniques and getter a better gauge on how much they will cost to raise and how helpful they are at clearing the land, before committing to caring for more than just a few.

raising goats Pinterest

The post How to Take Care of Goats on the Homestead appeared first on Modern Survival Online.


via Modern Survival Online https://ift.tt/gjnGPLN

Monday, June 23, 2025

15 Toilet Paper Alternatives to Stay Clean Post-Collapse

Have you ever considered what makes a necessity a necessity? By a strict definition it’s things you have to have to survive; air, food, water, shelter. That’s probably the best way to define it, but I also like to include things that you simply cannot imagine going on without. And no, I’m not talking about things like your favorite soft drink.

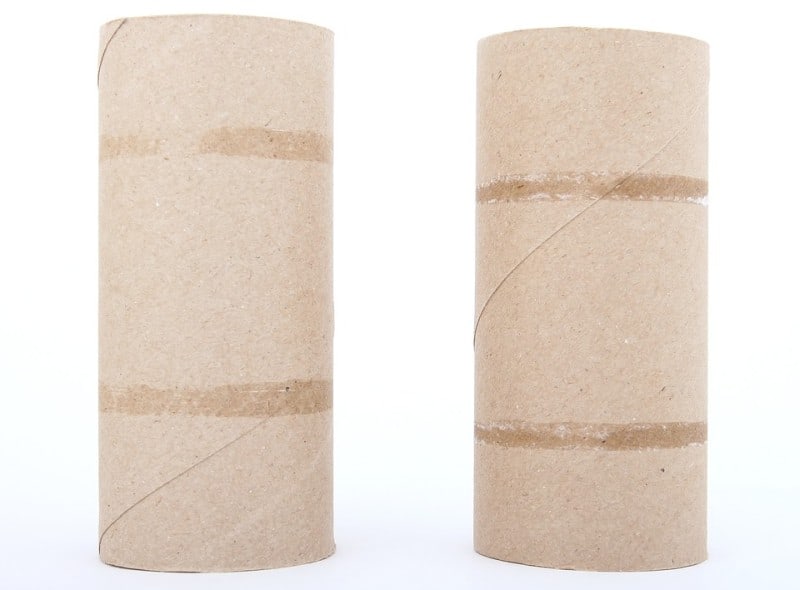
empty rolls of toilet paper

How about something like toilet paper? I mean, you don’t have to have it to live, do you? Not really, but going without it is the stuff of nightmares.

Instead of getting into a big philosophical debate about whether or not it is necessary, I believe it is practical to plan for the time when you run out of it. If a survival scenario goes on long enough, it will certainly happen!

To put your mind at ease, I’m bringing you a list of the 15 best post-collapse toilet paper alternatives. We’ll get straight into the list below.

Baby Wipes

The first, best and most obvious toilet paper alternative. In fact, it works better than toilet paper! It stands to reason that some people might forget these exist if there is another stampede on toilet paper supplies, and in any case you should remember you have them when nature calls and you don’t have a roll to spare.

Many preppers keep lots of baby wipes on hand specifically for hygiene purposes, namely bathing, in grid-down or off-grid scenarios. So if you need to get properly clean after doing your business, don’t hesitate to reach for these.

Tissues

This is another obvious TP alternative that most of us have had to use at least once before. In truth, tissues are basically TP: this stuff is so light, soft, fluffy and ephemeral that it basically dissolves on contact with water.

For cleaning up your backside or undercarriage, you’ll need to use several folded over so you don’t risk a blowout.

Gather up any spare boxes and portable packets from around your house and inside purses, cars and other locations to use as emergency TP when you run out.

Paper Towels

Paper towels, of all kinds, make for a good TP substitute. Even the cheapest paper towels are considerably stronger than toilet paper, and this can make them a good sanitary option since there’s less risk of accident when you are wiping.

However, there is a downside to them: even the softest paper towels are considerably rougher than the roughest, cheapest cutthroat office building toilet paper.

Continued use can cause chafing and irritation. A good solution: blue, automotive shop towels. Counterintuitively, they are much smoother and softer.

Feminine Pads

Hey, sometimes needs must and if you are a savvy prepper you’ll have plenty of these on hand whether you or someone in your family needs them or not. You’ll always run into people that do, and they make for great trade fodder or will just make you look like a hero to the lady who needs one.

Soft, sterile, sturdy and sanitary, they make a dependably good but awkward TP replacement. Consider cutting into halves or thirds for ease of use, and do yourself another favor by snipping off any plastic or velcro straps that might be present.

Water Rinse

Water alone can do a great job of cleaning up after you go number one or number two. There’s a reason, after all, that bidets are increasingly popular. Some folks recommend hopping into the shower if you can, to clean your backside and that’s certainly viable, though this adds the additional necessary chore of having to clean up the shower once you are done.

A more practical method is to use a pot, bottle or some other device to pour water over your bum. This, as you might imagine, is logistically challenging for most people and especially those who have reduced mobility or are overweight. Nonetheless, this can be one of the most sanitary and sustainable solutions. Practice makes perfect!

Coffee Filters

One of my favorite improvised TP alternatives and one that I have used with great success in the past. Coffee filters have a just-right combination of strength, sturdiness and form factor.

Grab one, fold it in half and you can get two or three good wipes out of it before you need to discard. Depending on the style and brand, you may only need to use one coffee filter at a time!

Newspaper

Sometimes it’s seen as the mark of the truly desperate, or an irrepressible cheapskate, but newspaper is still a pretty good alternative to your usual TP. But ask any urban scavenger and they will tell you: the trick to getting good results is in how you prep it.

Rules: avoid the glossy photographs and don’t fold the paper straight away. Instead, stick to black and white print only, scrunch it up repeatedly to soften it, then smooth it out and fold it into a convenient shape before you wipe.

Magazine Paper

This works similarly to newspaper, just not as well. The vast majority of print magazines have semi-gloss or glossy paper. It’s heavier and slippery compared to newspaper, and accordingly it can be tougher to get clean when wiping with it.

But it can work and it’s still a more sanitary option than using your hand. Use the same procedures that you would with newspaper: try to find a page that is mostly devoid of extra glossy, colorful ink and crumple the hell out of it before you smooth it out, fold it and then wipe.

Book Pages (Cheap Paperbacks)

Here’s a method from way back! When cheap mass-market paperbacks have been read by the whole family, you might demote them to “outhouse” duty: you can just tear off pages as you need them, convenient, easy and perfectly sized.

This paper tends to be rough but surprisingly absorbent and tough. Honestly, I like using this method better than newspaper, but I hate the idea of tearing up books, even terrible crappy ones – no pun intended! Okay, a little intended…

Rags

This is the main wiping method for eco-conscious homesteaders and preppers everywhere, and was a standard in the US for a long time. Rags can be used repeatedly, sanitized and washed so they can be used again and again.

The downside is that this makes for some stinky laundry duty that must be handled properly to avoid contaminating washing machines or other laundry equipment. The good news is that rags will last for a very long time if properly cared for. Obviously, softer, smoother fabrics are nicer.

Old Clothing

If you really get in a jam, don’t hesitate to cut up old clothing for use in the bathroom or the latrine. Great candidates are tightly knit, thin and smooth items like bandanas, t-shirts, socks and so forth, but you can get by with using thin denim and even corduroy.

If you have a good supply of clothing, just throw the individual swatches away or burn them when you are done. More on that a little later.

Cardboard

I can see some of you shaking your heads out there. Bear with me here: in dire times, cardboard can work, but like with newspaper and magazine paper, knowing how to prep and handle it makes all the difference.

For starters, you want to find thin, plain brown cardboard and remove any stickers or tape from it. Peel the cardboard apart so you have two layers and use the individual layers to wipe with, crumpling and smoothing it repeatedly to soften it.

Folded Grass

Don’t discount bushcraft methods for wiping, even if you are bugging in. Long grass, carefully plucked and folded into a sort of paddle shape, can be used effectively.

Obviously, there are some major considerations: never use any grass that has sharp or prickly edges, and you’d better make really sure that the grass isn’t irritating or that it hasn’t been treated with any herbicides or pesticides.

Corn Husks

A much better option than grass, and one that will be accessible for anyone living in farm country. Corn husks have a ridged texture that cleans really well and they are quite tough as long as they aren’t too old and dry that they crumble to the touch.

Take a few minutes to remove any lingering strings from the husks and you are ready to go. This is also a great option because it’s biodegradable.

Speaking of which, there are a ton of other plants you can use for the purpose, such as mullein, lamb’s ear, or thimbleberry. Full list here.

Flat Rocks

Flat, smooth stones make a pretty good wiping and cleaning tool, but they are let down by the fact that without some nearby running water you won’t be able to quickly clean them off to use them again without making a bigger mess of things.

Even so, a small supply collected for the purpose can get the job done on a short-term basis.

Don’t Flush Any of This Stuff!

Just in case you were under any delusions, you shouldn’t flush any of the TP alternatives I talked about on this list, except tissues. And no, baby wipes arent flushable, even the ones that say they are: it’s a huge industry scandal and it’s been proven over and over again that these things do not break down and will absolutely destroy septic tanks and sewer systems.

Consider that your fellow citizens, if you’re on a sewer system, will likely be flushing non-standard stuff down the toilet too; you don’t want to cause a different kind of apocalypse!

toilet paper alternatives Pinterest

The post 15 Toilet Paper Alternatives to Stay Clean Post-Collapse appeared first on Modern Survival Online.


via Modern Survival Online https://ift.tt/PNRhMv2

Friday, June 13, 2025

8 EDC Mistakes You to Never-Ever Make

You’d think there are no mistakes to be made when it comes to everyday carry. You get yourself a nice wallet, stuff it with essentials, put the rest in your pockets or in a bag and you’re done.

an EDC kit

Well, that’s not the case. Sure, unless you’re in a survival situation, these blunders probably won’t be a big deal, but that doesn’t mean you should make them. Plus, if you ignore emergency situations, you could end up beaten… or worse.

So let’s see what the biggest EDC mistakes that people make are, and talk about ways to fix them.

Mistake #1: Ignoring Self-Defense

Now, I’m not saying you should carry a fully loaded revolver plus a belt packed with extra ammo every single day… but don’t ignore this aspect altogether, either.

Depending on where you live, carrying a gun, a knife or even pepper spray may be against the law. Still, if they are not, I highly recommend you carry the thing that will do most damage.

Also, if you’re traveling, particularly by plane, you should be aware of what you can and cannot take with you. Airport security will stop and even flag you for something as banal as a credit-card shaped multitool.

Mistake #2: Abusing Their EDC Knife

If you want a knife (of any kind) to last you a lifetime, you should only use it for its intended purposes. Sure, some bushcraft knives are even suited for splitting wood, but misusing your knife is a definite no-no.

First, you might not be able to use that knife when you need it most. Second, it’ll cost you money.

A good EDC knife is around 50 bucks, with some being over $100. That’s not the kind of money I’m willing to spend twice just because I damaged the tip when I used it to open a beer. A knife’s tip should never be used for things like these.

I know you could, in theory, you could use it in a variety of survival situations (such as digging a Dakota hole to make fire), but that doesn’t mean you should.

Keep in mind EDC knives have smaller blades and are weaker than survival and bushcraft knives… so, please, treat them with care and respect.

Mistake #3: Carrying Too Much Stuff

If you’re willing to learn new skills and new ways of doing things, you shouldn’t have to carry too much stuff with you. It’ll not only weight you down, but people may start asking questions about why you carry so many things with you all the time.

So how do you know which items to remove from your EDC? Redundant items are a good place to start. I know redundancy is a very useful survival concept, but this is everyday carry we’re talking about. You can keep redundancies in your get home bag, not your pockets. For example, if you carry a lighter with you at all times, what’s the point in having a credit-card shaped Fresnel lens in your wallet?

Another way to do it is to look at the item and ask yourself two questions:

#1. When was the last time I used this?

and #2: Would this be useful to me in a survival situation?

See, just because you haven’t used something you carry, it doesn’t mean you never will.

Mistake #4: Ignoring Their Phone

Everybody has a smartphone these days. The amazing thing about it is that you can load it with apps and information and not add a single ounce to the weight of your EDC kit.

From articles and ebooks to survival apps, photos of things such as giving first aid and navigation apps, there are plenty of things you should download. Unless you’ll be dealing with an electromagnetic (EMP) pulse, your phone will probably be one of the most important survival items in your kit.

Tip: avoid putting your survival apps on your main screen. People may notice them at some point.

Mistake #4: Not Checking Their Gear

Are you sure your lighters work? Are you sure your flashlight’s batteries are functional? You should check every little thing that you carry and see.

And if you want to minimize the risk even further, how about you ditch your battery operated keychain flashlight for one that is hand-crank? That way, you won’t have to worry about batteries anymore.

Mistake #5: Carrying Items that are “tacticool”

This is important particularly in urban settings, where anything tactical sticks out. In a survival situation, you want to be “grey”, you want to stand out as little as possible. Avoid items in camo and bright colors and opt for things in black and dark colors.

Mistake #6: Bragging

There’s no point in bragging with your EDC unless you like the idea of being labeled a prepper or a survivalist by folks who have no idea what it really means. Keep your items concealed and, if they do happen to notice them, avoid getting into arguments. You probably won’t change their minds.

Mistake #7: Not Having Basic First Aid Items

I always carry a band-aid in my wallet. It’s small, lightweight and no one will find it. It won’t do much in most survival situations but if either I or someone else gets a cut, this can and will stop bleeding.

But don’t stop here. You can add even more first aid items. You can fit them into a Maxpedition organizer or even in an Altoids tin that will fit in your purse or laptop bag.

Mistake #8: Lack of Skill / Not Knowing How to Use Their Gear

This one is obvious. You need to know how to operate every edc item in your possession, enough said.

Question:

What are some of the mistakes that you have made with your everyday carry gear? let me know below, and be sure to pin this on Pinterest!

edc mistakes Pinterest

The post 8 EDC Mistakes You to Never-Ever Make appeared first on Modern Survival Online.


via Modern Survival Online https://ift.tt/OT9g0xK

Saturday, March 15, 2025

10 Quick Tips to Be a Minimalist Prepper

Prepping is more than a list of chores. Prepping, done right, is actually a lifestyle change. A lifestyle change that is welcomed by some, and resented by others.

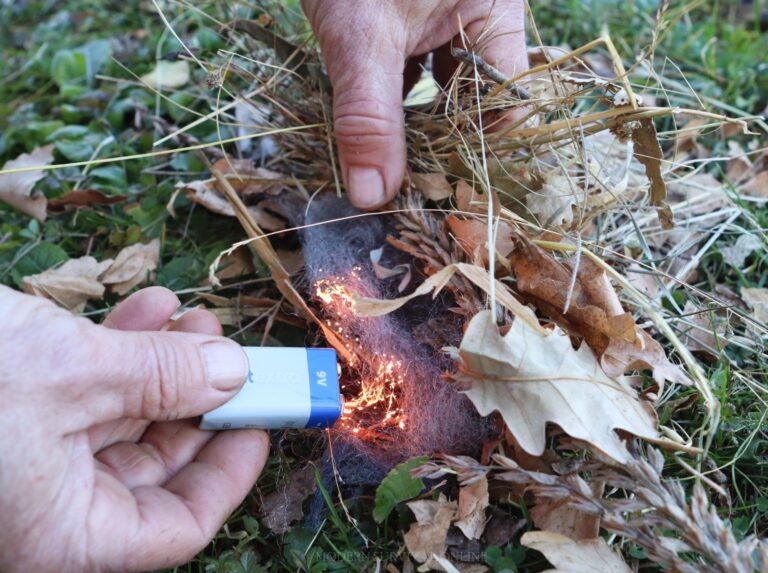
using a 9 volt battery and steel wool as tinder to start a fire

If you fall into the latter category, it is probably because you have believed a lie. A lie that is actively pushed, one that says you have to buy tons of gear, a property in the middle of nowhere, a warehouse full of food, an off-road RV and tons of other expensive stuff.

That’s complete hogwash. Prepping effectively can be done in a minimalist manner without turning your life completely upside down. That’s a fact, and in this article I’m going to tell you how with some quick tips that will help you become a minimalist prepper. We will dive right into it below.

Focus on Skills, Not Gear

If you learn nothing else from this list, learn this and take it to heart. Skills are what pay the bills when disaster strikes.

Knowledge, and better yet experience, doesn’t weigh anything and it’s something you’ll always have with you. All the gear in the world won’t save the day if you don’t know what you are doing.

If you are of a minimalist mindset already, this will be easy to understand: you probably shy away from buying hordes of stuff without a really good reason. Learn what to do and when, then buy the things you need to support your skills and you’ll be off on the right foot.

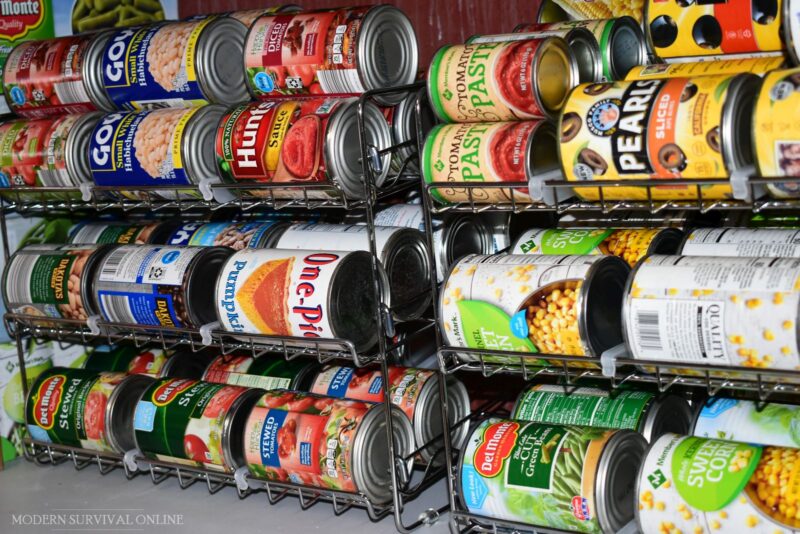
canned foods on can racks in pantry

Only Store Food You’ll Actually Eat

This is a mistake I see made over and over again, and truth be told it is a mistake that I made myself! When you start to assemble your survival food stash, it’s easy to get taken in by the idea that you should have this huge, varied menu. All kinds of food, all kinds of things, grains, veggies, fruit, meat and more.

It is true that you want some variety to prevent menu fatigue and to make sure you’ve got all your nutritional bases covered, but aside from that you should only store things that you actually want to eat.

If you hate lima beans, don’t get them! If you detest tuna, there’s no reason to have it no matter how good it is according to some guy on the internet like me.

Buy Supplies in Bulk When Possible

Whenever you are buying consumables, be it batteries, food, water, medicine or anything else for the purposes of stashing it, try to buy it in bulk if you can. This will save you money and make your life easier.

Now, depending on where you live and where you shop this may or may not be possible. If the vendor you are buying from only has smaller quantities or packages, you may be out of luck. That said, you can always talk to the manager and see if you can negotiate a better deal. And you should!

Thrift Shop for Expensive Gear

Make no mistake, despite my emphasis on skills rather than gear, having the right gear is still critically important. You might be a seasoned and savvy medic, but if you don’t have a trauma kit on hand when someone is grievously injured, the deck will be stacked against you and your patient.

If you’re shopping for something expensive, be it a nice tent, tools or anything else, you should go thrifting for it. Check flea markets, closeout retailers, estate sales, swap meets, classified ads, social media marketplaces and more. A little bit of time and due diligence can save you a small fortune.

Rotate Perishable Supplies

This is basics, but so much of prepping is doing the basics well. Food, water, meds, batteries and more will all go bad in storage over time. You don’t even have to open them or interact with them for this to happen!

Because of this phenomenon, you’ve got to rotate your supplies. That means you take out the oldest stock before it goes bad or becomes useless and, ideally, use it so it doesn’t go to waste.

When this happens, you replace the quantity you removed with new, fresh stock. First in, first out; that’s what you’ll hear the concept called in these circles. By rotating your supply diligently you ensure you’ll always have viable supplies on hand.

Keep Your BOB Packed – But Reasonable!

The keystone prep for pretty much every prepper is a BOB, or bug out bag. This is a large backpack or other piece of luggage packed with the survival supplies, equipment and other gear you need to self-sustain for at least a couple of days if you’re forced to evacuate or leave your home.

I can go on for thousands of words on the topic, and have, but for now suffice it to say that you should put one together as quickly as possible and have it ready to go in an easily accessible spot. If you are forced to run out the door with little warning, your BOB can be a lifesaver.

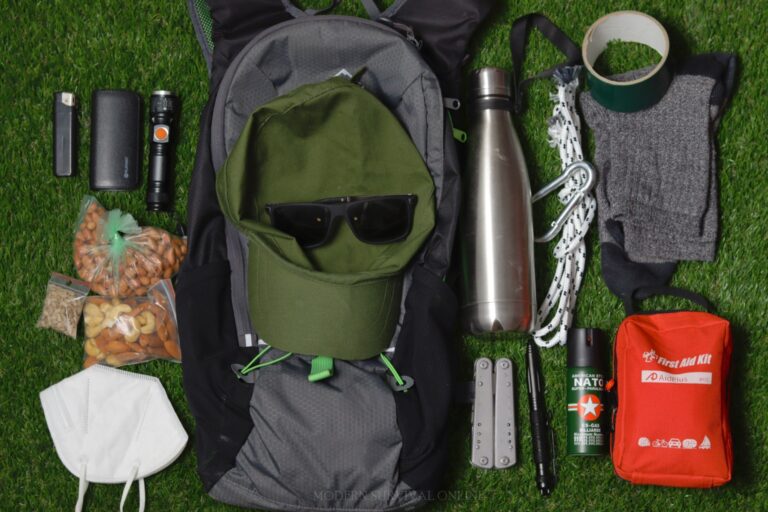
get home backpack with flashlight knife nuts multitool and first aid kit
get home backpack with flashlight, knife, bag of nuts, multitool, tactical pen, green hat, sunglasses, duct tape, and first aid kit

Plan and Prepare for the Most Likely Hazards in Your Life

Some preppers get sucked into a kind of paranoia worrying about and subsequently planning for, in microscopic detail, every conceivable hazard and disaster under the sun.

This is a mistake. Figure out what is most likely to occur in your life. Natural disasters that are most probable in your neck of the woods, and lesser emergencies that could befall you or your family. Plan for those.

Don’t Be Seduced By Apocalyptic Scenarios

Humans have a tendency, seemingly a natural one, to contemplate the end of the world or the end of days. A super volcano eruption, nuclear war, gamma ray burst, asteroid strike, magnetic pole reversal, killer AI uprising, zombie outbreak and all the rest.

Here’s a sad fact: it’s called The Apocalypse for a reason. The vast majority of people, if not all people, won’t be survivors of such an event but will instead be corpses in the background.

Spending time pondering and planning for such an event is fantasy, something that will rob you of attention, energy and willpower. Don’t give into it; keep your feet flat on the ground.

Get Fit, Stay Fit

If you aren’t fit, you’re going to die. It’s just that simple. Folks who have strength, stamina and resilience are far more likely to survive every conceivable kind of scenario. By the same token, people who are flabby, out of shape and infirm are far more likely to perish.

You owe it to yourself to get fit and stay fit. No excuses.

Leverage Family and Community Connections

Last but certainly not least, going it alone is a recipe for disaster, one you should avoid if at all possible. Smart preppers will cultivate connections and proper bonds with friends, family and neighbors.

These very real community links provide strength, redundancy and backup plans in times of trouble. Wolves that run with a pack survive and thrive; lone wolves perish in the winter.

minimalist prepper Pinterest

The post 10 Quick Tips to Be a Minimalist Prepper appeared first on Modern Survival Online.


via Modern Survival Online https://ift.tt/BTt9huo