Friday, November 9, 2018

The Best Pepper Sprays for Survival

by Derrick Krane

The use of force continuum ranges from Command presence, in which your very presence deters aggression, all the way up to lethal force. Between these two far ends of the spectrum are less-than-lethal self-defense tools, including a Taser, Stun Gun, or Pepper spray.

Pepper spray, more technically known as OC (Oleoresin Capsicum) spray, is a viable alternative for self-defense; it is classified as less-than –lethal, in that it is highly unlikely to cause death or serious injury.  OC spray can temporarily incapacitate an attacker, buying you time to escape.

Pointing a canister of OC at someone with your thumb on the button and a stern warning to back off may be enough to dissuade some individuals. OC is also useful it than it is far less regulated than firearms, and therefore more accessible, and it is an option for someone who has decided beforehand they could not use a gun to defend themselves. OC is one of many options for a self-defense spray.

Other types of self- defense sprays:

Wasabi

This is not yet available for civilian use as of the date of this article. (Summer 2018). It is based on wasabi horseradish instead of OC. It produces more or less the same effects as OC, but is very short acting; about 10 minutes vs. 45. Thinking of how much a small amount of wasabi paste burns, this has got to hurt.

Wasabi also produces a different kind of burn. I feel hot peppers mostly in my mouth, as a nice red hot glow that burns for a few minutes. Wasabi burns my nose and somehow, the back of my neck in a white hot glow that only lasts for seconds, but it is much more intense.

Tear gas or CS (chlorobenzylidene malononitrile).

CS is classified as a chemical irritant, and is commonly known as tear gas. It is a powder which when raised to its melting point releases a vapor which reacts with water to make an acid. CS is irritating to the skin and mucus membranes.

CS will cause a burning sensation, tearing of the eyes, coughing, excessive mucous production, e.g., strands going from your nose to the ground, and may cause vomiting and choking, and loss of bladder control.

Basically, whatever fluids are inside you will unpleasantly emerge through the nearest convenient orifice. It will be especially irritating if skin is wet or perspired, and will cause acute burning under wristwatches, other jewelry, or eyeglasses. People who have been exposed to it say it is quite incapacitating. It is short acting, and is minimally effective against dogs’ bears, or sasquatches, as they have no lacrimal glands, or tear ducts.

I just wanted to see if you were paying attention. I do not actually know whether or not sasquatches can cry.

Mace or CN (Chloroacetophenone)

CN is commonly referred to as Mace. CN is made of crystals in a pressurized liquid medium, typically propelled by nitrogen gas. It can have a delayed onset of action for up to 30 seconds, and causes the eyes to burn and water. This should not be confused with Mace brand OC spray. This is a brand name, but has fallen into generic use for any type of irritating chemical spray.

Bear Spray

This is OC at a lower concentration than what is used as a human self-defense spray (about 2% vs 10%).  Intuitively it would make more sense if a higher OC concentration was used on something so much bigger than a human, but apparently the lower concentration is more effective against bears. Bear spray comes in a much larger container (about 8 0z. vs. 3 oz. or less) than most canisters of OC, and is more of a fogger than a spray. It is designed to put up an OC shield between you and the bear.

Wasp/Hornet Spray

Wasp/hornet spray is a very good choice for self-defense if you are attacked by wasps.  If attacked by a person, it is a very poor choice. The active ingredients in most wasp/hornet sprays are a variety of chemical compounds called Pyrethroids or pyrethins.

Both compounds are minimally toxic to humans, and will produce stinging, burning, itching, tingling and numbness if they come in contact with exposed skin.  It will not be of a high enough intensity to deter most people intent on doing violence.  It is also a violation of federal law to use an insecticide “in a manner inconsistent with its labeling” For a self-defense spray, stick with OC.

PAVA (Pelargonic Acid Vanillylamide)

This is a synthetic form of OC used by law enforcement in the UK.

Criminal identifier

This is a joke. It is a non-irritating dye/paint which you spray on the bad guy. The idea is it will “disorient them and dissuade them from further aggression”. When they run away, the police will be able to identify them as your attacker as they will be painted. The only advantage this has is it can be carried in jurisdictions where OC cannot. Used by civilians in the UK.

MPK (pelargonic acid morpholide) is used in Russia, and is another synthetic analogue of OC.

PSI Poly Spray Imobilizante is a lachrymatory spray based on lemon and onion extracts and is used in Brazil.

ACDC adesivo para controle de distúrbios civis” (civilian disorder control adhesive) is also used in Brazil, and is basically a spider web, or “glue- net” sprayed on the bad guys.

OC (Oleoresin capsicum)

While the other self-defense sprays have their advantages and limitations, we will focus on OC as it is one of the most effective and commonly available.

Before buying pepper spray, know the law regarding purchase, possession, carry, and use in your jurisdiction.

Oleoresin capsicum is the extract from hot peppers. OC is an oily liquid, partly water soluble, with a maximum of 15% active ingredient and a rating of about one to three million Scoville units. The Scoville scale is a rating scale of the relative heat perception from capsicum. See the link below for a look at the Scoville scale.

The Scoville scale

OC is classified as a either a lachrymatory agent, or a neurotoxin. A lachrymatory agent causes tearing of the eyes. A Neurotoxin sounds very sinister, and is not a very accurate label. A neurotoxin typically effects the central nervous system, or the nerves of the brain and spinal cord, which are responsible for the command, control, and communication of the entire body. OC affects the peripheral nervous system or the sensory nerves outside of the brain and spinal cord, specifically the peripheral sensory nerves responsible for the perception of heat and pain.

The effects

OC will produce a burning sensation on any bare skin it contacts. It causes your mucous membranes in your nasal cavity to produce heavy amounts of mucous, and your eyes to tear, and reflexively clamp shut. The subject who is exposed will be incapacitated for 30 to 45 minutes and the effects can persist to a lesser degree for up to three or four hours, producing prolonged discomfort. OC will cause temporary inflammation, but it does not damage tissue.

Advantages & disadvantages of OC

The limitations

A canister of OC is not a magic charm that will repel evil. It is a tool, fraught with limitations.

  • OC expires
  • It may not function in extreme cold
  • It is PFU (Pretty Fucking Useless) if kept in the bottom of a purse or anywhere where you cannot access it within about two seconds. Get an OC canister with a belt/pocket clip.
  • It will blow back in your face in the wind.
  • It will contaminate a small enclosed area. The vaporized spray will diffuse and cause coughing and irritation to people in a building. A CO told me that if OC is used on the first floor of the Parole and Probation building, it wafts through the air vents and everyone in the building is coughing.
  • It may not stop someone with a very high pain tolerance, who is very intent on victimizing you
  • Someone with a firearm and a lot of crazy may just open up indiscriminately
  • It can take up to 15 seconds to take effect

Onset of Action.

The effects of OC may not be felt for up to 15 seconds. A violent individual can do a lot of damage in that time.

Efficacy

Most people will be stopped or deterred by OC, depending on their level of motivation to attack you, and their pain tolerance. There have been numerous documented cases and many more anecdotal ones of individuals sprayed or even saturated with OC who did not respond.

The OC stream may also be blocked by eyewear or from what I am told, a skateboard used as a makeshift shield.  Some lots of OC should have failed quality control, but made it to the shelf, and are too weak to have an incapacitating effect.

Ask anyone in law enforcement or corrections, or otherwise involved with the criminal justice system and they will have a story of someone they hosed down with OC and it had no effect. For that matter, Binge-watch COPS and you will see suspects exposed to pepper spray with no effect or a delayed effect.

Options for OC delivery systems

There are three main options for OC delivery systems, or the means by which the spray, foam, or gel gets on the bad guy.

  • Pyrotechnic: Use a small gunpowder charge to expel the OC at high velocity, to make evading it unlikely. An example of this type is Kimber Pepper Blaster II  A two shot pyrotechnically delivered burst of OC from a gray or red polymer pseudo-handgun frame.
  • Pepper ball: The OC is contained in gelatin balls which shatters on impact of the person or a nearby surface and releases the OC. Also highly unlikely to be evaded. An example is Salt Supply’s Pepper Spray gun
  • Pressurized: Nitrogen is used to propel the OC. The OC may emerge as a liquefied Spray, or sticky Foam, or a Gel. The spray, foam, or gel may contain a UV dye to mark the bad guy for identification later. Some models are triple action, meaning they contain CS in addition to OC and the UV dye. The pepper foam is OC which is blended with a substance that will foam up when sprayed, sticking to and coating the face of the bad guy. The gel will come out in a gooey string, minimizing cross contamination. It is better of indoor use than a spray. Examples include: Mace pepper Gun 2.0   A black polymer handgun frame with an orange break action barrel which holds a canister of pressurized OC.

Sabre pepper gel

Sabre pepper spray

Sabre pepper foam

Training and Demonstrations

Get live training. Reading and video is an introduction, or supplement to training. Here are links to videos to give you get you started and to provide some further information.

Conclusion

OC is a less than lethal option on the continuum of force. It always you to defend yourself at a distance, incapacitate your attacker so you can escape, and generally will not permanently harm your attacker.  There are a number of options available for both the type of OC and the delivery system.
pepper sprays pin


via Modern Survival Online https://ift.tt/2RGlb9E

All The Goodies You Need For Your RTL-SDR

When the RTL2832-based USB digital TV sticks were revealed to have hidden capabilities that made the  an exceptionally cheap software-defined radio receiver, it was nothing short of a game-changing moment for the home radio experimenter. The RTL might not be the best radio available, but remains a pretty good deak for only $10 from your favourite online supplier.

Having bought your RTL SDR, you will soon find yourself needing a few accessories. A decent antenna perhaps, an HF upconverter, and maybe an attenuator. To help you, [IgrikXD] has come up with a repository containing open-source implementations of all those projects and more. There’s an HF upconverter handily in both SMD and through-hole versions, as well as a wideband active antenna. A resonant antenna for a single band will always out-perfom a wideband device if your interest lies on only one frequency, but when your receiver has such a wide range as that of the RTL it’s irresistible to look further afield so the wideband antenna is a useful choice.

The RTL SDR is a device that just keeps on giving, and has featured innumerable times here since since its first appearance a few years ago. Whether you are into passive radar or using it to decode data from RF-equipped devices it’s the unit of choice, though we rather like it as a piece of inexpensive test equipment.

Via Hacker News.

Header image: Joeceads [CC BY-SA 4.0].


via Radio Hacks – Hackaday https://ift.tt/2Qvi9F3

Monday, November 5, 2018

Lucid Dreaming | What is the best method afterall?

Ive been trying to get lucid for a few years and i lost my motivation after some time all i want is to experience my dreams like Real life. I had some DILDs sometimes due to me doing RCs and question reality
But nowadays there are many methods to get lucid and i was wondering which one would be the easiest. I know different methods work for different people, but what is the most known to work to get lucid?


via Lucid Dreaming - Dream Views - Attaining Lucidity https://ift.tt/2SKYy5f

Sunday, November 4, 2018

Defensive Handgun Ammunition – the Crush Factor

by Eric

When it comes to personal defense, it’s very hard to argue with a handgun being the best choice. Often the mere sight of a handgun will send a potential assailant fleeing simply because the bad guy wants an easy victim, not someone who is going to fight back. I actually know this from personal experience.

Once upon a time

In Louisville, KY in the early 1990’s there was a series of assaults on lone white people perpetrated by black gang members.

The attacks, widely covered by local news and dubbed “wilding sprees”, were being committed by a gang of 4 black “men” aged approximately 19-25 yrs old. Their MO was to drive around until they found a white person alone in a desolate area, then they got out and beat them.

pair of Pt92s

author’s pair of PT92s

I was nearly a victim of this when I was accosted by a carload of 4 people fitting that description in a dark parking lot late one cold winter night while I was in a phone booth (in the early ’90s cell phones were for the rich). They pulled up to me and opened the doors of their 4 door car and so blocked me inside the booth. They were smiling as they got out of the car as if they were about to have some fun, (so they thought).

I’ve got something in my pocket for you

I smiled back as I went for my Star 30M 9mm pistol from inside my leather coat. The sight of a pistol coming from under my jacket was all it took to send them diving for their car and burning rubber as they drove off with much haste.

Only later did I learn just how lucky I/they were. The four matched perfectly pictures I saw on the news a couple of weeks later as being the perpetrators of senseless, violent, and apparently racially motivated attacks on lone, seemingly helpless white victims. As it turns out, this was apparently a gang initiation rite. They were all sent to prison for their crimes against their unarmed victims.

The hammer and the nail

While the mere sight of a handgun alone saved me from potential harm that night, it alone is not the tool of self defense. Just as a hammer cannot serve its purpose without nails, a handgun cannot serve its purpose without ammunition. And just like using the right nail for the job, you must use the right ammunition for the job. The job here is self defense, so use defense ammo.

FMJ (full metal jacket) ammunition while used by our military and other NATO militaries around the world is not the ideal ammunition for self-defense. This type of ammo is used by the military in order to be in compliance with the Hague Convention of 1899 which states in part:

(IV,3): Declaration concerning the Prohibition of the Use of Bullets which can Easily Expand or Change their Form inside the Human Body such as Bullets with a Hard Covering which does not Completely Cover the Core, or containing Indentations”.

The last part of that statement is referring to soft point and hollow point ammunition, which are both illegal to use in war under this document.

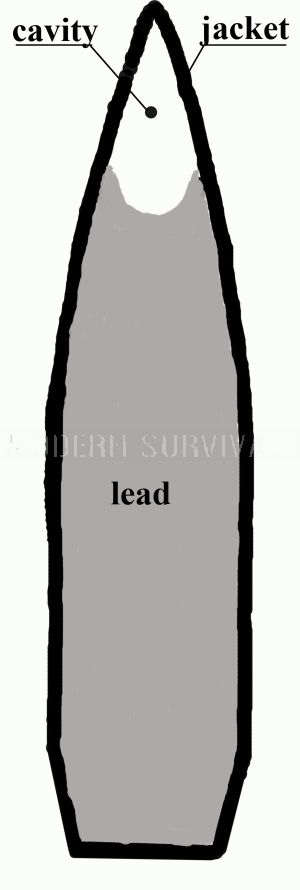
So in other words no hollow points, soft points, or ballistic tips are allowed to be used in war. Although one particularly sneaky military (I won’t say Russia…but it’s Russia) uses FMJ hollow TIP ammunition. This is a completely enclosed FMJ projectile but the nose of the projectile has no lead.

hollow tip bulletHollow tip bullet

Yaw

This allows the projectile in effect to bend when it hits the body and therefore yaw (yaw means to rotate or flip) inside the body and so cause a much larger wound cavity as it passes through the body sideways.

This video explains this:

Wound the enemy, not kill them?

The reason for this is that, believe it or not, the intention in wartime is to wound and maim the enemy, not kill them. The pretense behind this ludicrous ideology is that it takes 2 soldiers to care for one injured soldier and so if you hit one you disable three.

It costs more money to care for wounded soldiers than to stick them in a bag, so it slows or cripples a government that way as well. That may be well and good for signers of the treaty but I didn’t sign it, did you?

I didn’t sign your treaty

FMJ ammunition is just fine for the target range, it’s plentiful and cheap. But if you ever need to stop an assailant, a blue helmeted shmoe, or any other domestic or foreign threat, the way this is achieved is by inducing rapid loss of blood pressure.

The hollow point

The best method of effecting a rapid loss of blood pressure is to use an expanding projectile, most commonly known as the hollow point, and placing accurate shots into the vital organ area of your target.

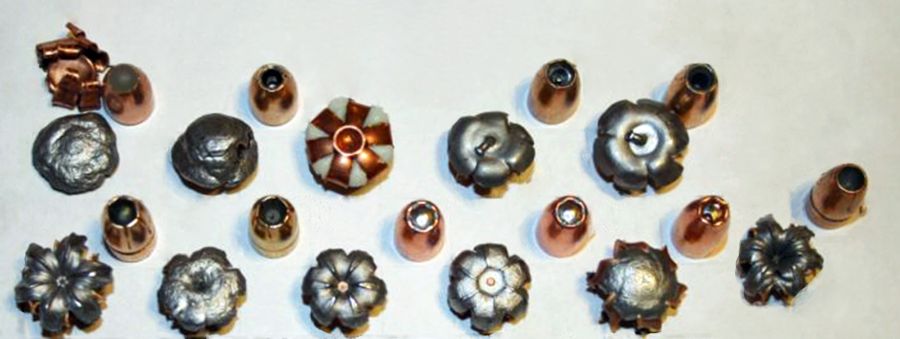
Examples of hollow point ammunition can be seen in the picture here:

hollow point ammunition

Notice the “mushroom” effect from the expansion of the projectile.

This expansion allows for more tissue damage, and the amount of tissue damage is what is known as the “crush factor”.

What is the crush factor?

When a projectile enters the human body, it strikes flesh and bone. A projectile of sufficient size and speed will shatter the bone, causing great damage. When the projectile passes through the soft flesh of muscles and organs, it creates a series of two wound cavities, the first is known as a temporary wound cavity, and the second is the permanent wound cavity. The permanent wound cavity is caused by the destruction of tissue. The amount of destroyed tissue is the crush factor of wound ballistics.

Don’t worry, it’s only temporary

The temporary wound cavity is the area of flesh that opens (a hole) that is created by the energy expended by the projectile. For the sake of simplicity, let’s say that mass X velocity = energy. Point being, a moving object will displace material, but the material will return to that space after the object passes. Just like when you run you push a hole through the air but the air returns behind you.

Temporary wound cavitation

Another, more visible example of this could be to think about if you punch into water. The water moves out of the way but comes back, that’s the temporary cavity. The temporary wound cavity from a handgun projectile may be 2 or 3 inches in diameter for a split second but then closes back for the most part after the bullet has passed.

For example, a 230gr (grain) bullet moving at 900 fps (feet per second) will create a larger temporary cavity than a 115gr bullet moving at 900 fps, but a 62gr bullet moving at 3200fps will create a larger temporary cavity than that 230gr bullet moving 900fps. See how that works? So the heavier and faster a bullet is the larger the temporary cavity.

Tissue damage

Part of tissue damage can be caused by the temporary cavity by the tearing of the tissue when it is stretched. This is unlikely to be caused by the amount of energy expended by handgun projectiles, but is a consideration with rifle projectiles. Although this torn tissue is damaged, it is still there and so is not relevant when considering crush factor.

Just for fun here’s a video of FMJ, SP, and, HP 7.62×39 ammo being tested:

Oops, that’s not going away

The permanent wound cavity is the hole that remains after the temporary cavity closes. This permanent wound cavity is left behind after the projectile passes through because the tissue is destroyed, or crushed. The amount of destroyed, or crushed tissue, is called the crush factor.

“Count” on it, or, don’t be afraid all I want is your blood…on the ground

The permanent cavity is the one that counts. I have performed my own ballistics testing, and I have read for uncounted hours on the subject, and there seems to be no lack of information on terminal wound ballistics.

Permanent wound cavity

The basics play out like this; when a projectile strikes flesh, the idea is to have as large of a hole left open as possible, that is the permanent wound cavity. This is necessary for the letting of blood, which then causes the loss of blood pressure that is needed to put down an aggressor.

Author’s Note: Most FMJ handgun projectiles don’t cause enough tissue damage to be effective defensive ammo as they tend to push the flesh aside, rather than destroy it as it passes through. This causes the permanent cavity to actually be smaller in diameter than the projectile, not the desired effect. On the other hand, projectiles that expand significantly can often create a wound cavity that is larger in diameter than the projectile was before expansion, this is the ideal scenario.

Expand your mind, well, expand your bullet

For instance, a 9mm projectile being .355 inch in diameter can expand to sizes of 17mm or .65 inch in diameter, well over ½ inch and nearly double the original diameter. Some quality .40 cal and many.45 auto projectiles can expand up to .75 or .8 inch in diameter, that’s a ¾ of an inch hole or better!

Crush factor on tissue

The term crush factor tells the amount of tissue destroyed, in grams, caused by a projectile. It also describes the minimum amount of tissue damage necessary for stopping the average aggressor.

When an expanding projectile passes through the tissue, rather than the tissue merely being pushed aside, the tissue is destroyed to the point of nonexistence, leaving a channel where the tissue had been. This destroyed, or crushed tissue, is what the desired effect is. And the more tissue crushed the better.

I used these three calibers as my basis but there are a few revolvers that are more than sufficient for stopping a man. .38 spcl +P hollow points and .357 magnum hollow points leave very little for discussion after an aggressor has been hit squarely in the chest.

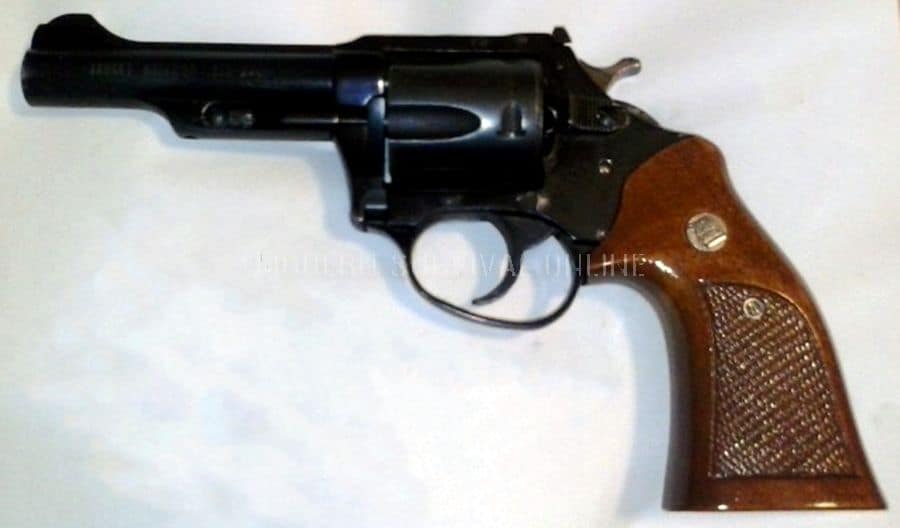
authors 85 dollar Charter Arms Bulldog 357

Author’s 85 dollar Charter Arms Bulldog 357

These six calibers, the 9mm, .40 S&W, .45 ACP, .38 spcl +P, the .357 magnum, and the .44 spcl are my personal favorite defense calibers, I feel, and ballistics show, that anything more is overkill, and anything less is not reliable.

Author’s note: A .380 or .32 cal pistol tucked away makes for a good backup gun and is better than a knife or a rock. It’s a given that one shot in the heart or brain stem, no matter the caliber, will kill, but I would not rely on the smaller caliber weapon as my primary defense weapon as they lack not only the penetration, but the mass and energy to cause an effective stopping wound with only one or two rounds.

Stopping power or no stopping power

I knew of a guy years ago that put a .380 in his mouth and pulled the trigger, the bullet lodged in his sinus cavity and gave him a really bad headache and a nastily bruised face for a couple of weeks. He had to have surgery to remove the bullet but he lived.

Yet another genius I worked with years ago shot himself point blank in his belly (says he was trying for his heart) with a .380 and all he got was a nasty scar to prove his love for the woman that drove him to this act of idiocy.

But thanks to these two guys I know firsthand that the .380 just lacks the stopping power. Don’t get me wrong, I don’t want to get shot with anything, but if an aggressor is high on crack or meth he is not going to be effected enough by these smaller rounds to stop him instantly. So if you have a .380 for your EDC gun I strongly suggest high quality expanding +P ammo (if your gun is rated for it) and shoot the aggressor until they stop or you run out of ammo.

Author’s note: Another thing to consider, and it’s an ugly truth but I always told my female instructees to keep it in mind, is if the potential victim is female and the bad guys intent isn’t robbery they may still begin what they planned even if they die before they finish, this is unacceptable. An aggressor ideally needs to be stopped in their tracks.

wood grip mini mag

Author’s wood grip mini mag

I have seen people carry a .22 cal for self defense and this is just way too small to trust with your life (still better than a rock), although I have been known over the years to keep an NAA .22 magnum 5 shot mini revolver in my front pocket for just such an emergency.

Small calibers and crush factor

These smaller calibers require too many rounds on target to gain the crush factor of only one or two of the larger caliber rounds and in the heat of the moment it may be difficult to get one or two rounds on target, much less the eight or ten from a smaller caliber needed to achieve the same effect as the larger caliber.

Very long story short, carry a weapon with as much capacity as you can, and with sufficient power to stop with minimal shots, that’s why I prefer the .45 ACP. Use a high quality defense round, a dollar or two per shot is nothing when it comes to saving your life, and most importantly, you need to learn to use your weapon. After all, you can’t drive a nail if you keep hitting your thumb.

Stopping power

There is a ton of discussion over whether the.45 ACP is a better man stopper than the 9mm, others swear by the .40 cal. but the fact is that with modern expanding hollow points the 9mm will make nearly as big a hole as the .45 ACP and has a little more penetration.

Consider mag capacity

Then consider most 9mm handguns have a much higher mag capacity, and in the heat of the moment seven or eight rounds comes out awfully fast, with a 1911 .45 guess what? You just emptied your gun. But with most 9mm handguns you will still have anywhere from four to twelve rounds left. But now factor in a high capacity .45 (mine holds 13 rounds but I only carry 12 in it), and favor leans back to the .45.

The more the merrier

The same argument can be said for the .38 SPCL or .357 MAG, both very good weapons, as a matter of fact I carried a .38 snubby for nearly 15 yrs before I switched to a high capacity 9mm, The 9mm lasted for 5 years then I switched again to a .45.

But while these revolvers have great stopping power, you have only five, six, seven, or eight rounds before you are out. Also to be considered the 9mm actually has a higher muzzle pressure than the .38. I feel better knowing that my EDC weapon has eleven rounds in the mag and one in the tube. It actually holds thirteen, but I’m not going to carry thirteen rounds in my gun, I guess I’m superstitious.

My argument against the .40 caliber is that the payoff for a slightly larger caliber is outweighed by the higher cost and lower availability of the ammo, it just isn’t worth it, and so I’ll stick with my 9mm’s and .45’s.

Crushing blow

I have mentioned crush factor a few times in this article, let’s try to see just what exactly these most commonly carried calibers do to flesh. In order to stop an aggressor, you must crush 0.22 grams of tissue per pound of body weight of said attacker, thus a 200 pound attacker would need 44 grams of tissue crushed to effectively be stopped.

9mm

A 147gr HP 9mm projectile moving at 990 fps will penetrate approximately 15 inches deep and crush 43 grams of tissue. With approximately two thirds of this tissue damage effective for stopping, this means that the projectiles crush factor is 28 grams. In other words it takes two 9mm projectiles to cause 56 grams of tissue crush for an effective stopping wound. Thus unless directly hit in the heart or brainstem a 9mm may not stop with one shot, so double tap.

.45 ACP

Now let’s look at the .45 ACP, a 230 gr .45 ACP moving 875 fps will penetrate approximately 14 inches and crush 65 grams of tissue, approximately two thirds of this tissue damage, about 43 grams, effective for stopping. In other words, the .45 ACP may stop an attacker with one shot, if you hit them with a well placed shot. So again, double tap for good measure.

Really the long and short (get it, long and short? Like ammo? Yeah, ok,,,you’re right) Anyway, the long and short of the story is that if you carry a firearm intended to be used in the event of a situation in which you need to defend yourself you need to know how to use it.

Know how to use your EDC effectively

Practice, and by practice I don’t mean got to a range and stand still in a perfect triangle stance and shoot paper targets. I mean train. Drill, run and gun, practice drawing and double tapping your target, (discussed in previous article). It doesn’t matter if you have the most expensive pistol in the world, if you don’t know how to use it and/or you use crap ammo it’s going to be a sad day when the time comes.

Learn to fire under pressure

When you are target shooting you are relaxed and that target is far away and not trying to hurt you, it’s a big difference over the real world scenario that will cause you to draw your weapon. Keep in mind that one shot and down he goes, that’s on television. The reality is it’s going to take a few shots to put them down. So you need to learn to fire under pressure.

Mozambique drill

Then when you do get good at it and the situation arises to stop a bad guy, there is always the Mozambique drill, 2 in the chest, one in the head. This method is pretty much guaranteed to put them down and keep them down.

Final thought

After all is said and done, no matter what caliber you carry, none are effective if you can’t hit the target.

Get out and shoot.

defensive handgun ammo pin


via Modern Survival Online https://ift.tt/2Ql52Gk

Saturday, November 3, 2018

Revive that old Analog Cell Phone with SDR

With the latest and greatest 5G cellular networks right around the corner, it can be difficult to believe that it wasn’t so long ago that cell phones relied on analog networks. They aren’t used anymore, but it might only take a visit to a swap meet or flea market to get your hands on some of this vintage hardware. Of course these phones of a bygone era aren’t just impractical due to their monstrous size compared to modern gear, but because analog cell networks have long since gone the way of the floppy disk.

But thanks to the efforts of [Andreas Eversberg] those antique cell phones may live again, even if it’s only within the radius of your local hackerspace. His software allows the user to create a functioning analog base station for several retro phone networks used in Europe and the United States, such as AMPS, TACS, NMT, Radiocom, and C450. You can go the old school route and do it with sound cards and physical radios, or you can fully embrace the 21st century and do it all through a Software Defined Radio (SDR); in either event, calls to the base station and even between multiple mobile devices is possible with relatively inexpensive hardware.

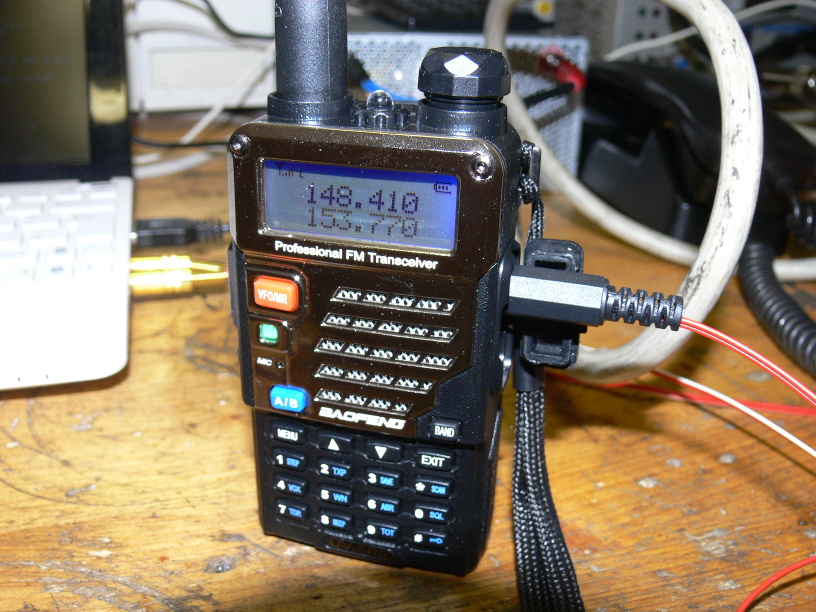
[Andreas] has put together exceptional documentation for this project, which starts with a walk through on how you can setup your DIY cell “tower” with traditional radios. He explains that amateur radios are a viable option for most of the frequencies used, and that he had early success with modifying second-hand taxi radios. He even mentions that the popular BaoFeng handheld radios can be used in a pinch, though not all the protocols will work due to distortion in the radio.

If you want to take the easy way out, [Andreas] also explains how to replace the radios with a single SDR device. This greatly simplifies the installation, and turns a whole bench full of radios and wires into something you can carry around in your pack if you were so inclined. His software has specific options to use the LimeSDR and LimeSDR-Mini, but you should be able to use other devices with a bit of experimentation.

We’ve previously reviewed the LimeSDR-Mini hardware, as well as covered its use in setting up DIY GSM networks.


via Radio Hacks – Hackaday https://ift.tt/2PGXpwI

Friday, November 2, 2018

FT8: Saving Ham Radio or Killing It?

It is popular to blame new technology for killing things. The Internet killed newspapers. Video killed the radio star. Is FT8, a new digital technology, poised to kill off ham radio? The community seems evenly divided. In an online poll, 52% of people responding says FT8 is damaging ham radio.  But ham operator [K5SDR] has an excellent blog post about how he thinks FT8 is going to save ham radio instead.

If you already have an opinion, you have probably already raced down to the comments to share your thoughts. I’ll be honest, I think what we are seeing is a transformation of ham radio and like most transformations, it is probably both killing parts of ham radio and saving others. But if you are still here, let’s talk a little bit about what’s going on in ham radio right now and how it relates to the FT8 question. Oddly enough, our story starts with the strange lack of sunspots that we’ve been experiencing lately.

Classic Ham Radio

I’ve been a ham radio operator since 1977. The hobby has changed a lot over the years. I can remember as a teenager making a phone call from my car and everyone was amazed. Ham radio covers a lot of ground, but “traditional” ham radio is operating a station on the HF bands — 3.5 MHz to 30 MHz — and talking to people all over the world. That kind of ham radio is suffering right now for a few reasons. First, HF propagation largely depends on sunspots and sunspots tend to ebb and peak on an 11-year cycle. Right now we are in a deep low part of the cycle and even the last few peaks have not been very good and no one knows why.

I’ve often thought that if Marconi and the others had started experimenting with radio during a sunspot low, they might have decided radio wasn’t very practical. With low sunspot activity, higher frequencies don’t propagate well at all. Lower frequencies might get through, but those require much larger antennas and that causes another problem.

At the height of classic ham radio, every ham wanted a beam antenna or a cubical quad or some other type of rotating directional antenna. Being able to swing an antenna at a particular direction brings more power to bear on the receiver and also helps you receive the other station. The problem is, the antenna elements are typically about a half wavelength in size. So at 20 meters, the elements are about 10 meters in size. You can shorten them a little using some tricks but you pay a price for that in performance. At 10 meters, though, the size is quite manageable. Many hams had directional antennas for the 20, 15, and 10 meter bands (all-in-one antennas called tribanders). A very few would have something for 40 meters — despite Mosley’s description of its 40-20-15 antenna as “vest pocket”, but that was pretty exotic. At 80 meters, mechanically rotating directional antennas are all but unheard of.

So when propagation is bad you should go to lower frequencies, but that means larger antennas. Worse still, the last few decades have seen an increasing hostility to ham radio antennas with city governments, home owner’s associations, and similar. People living in apartments or condos have the same kind of problem. So the number of hams who can even put up a tribander or any sort of visible antenna has dropped significantly.

So here you are with your radio. The bands are bad, and your small hidden antenna is not very good at any band that might work. What do you do?

Voice is Wasteful

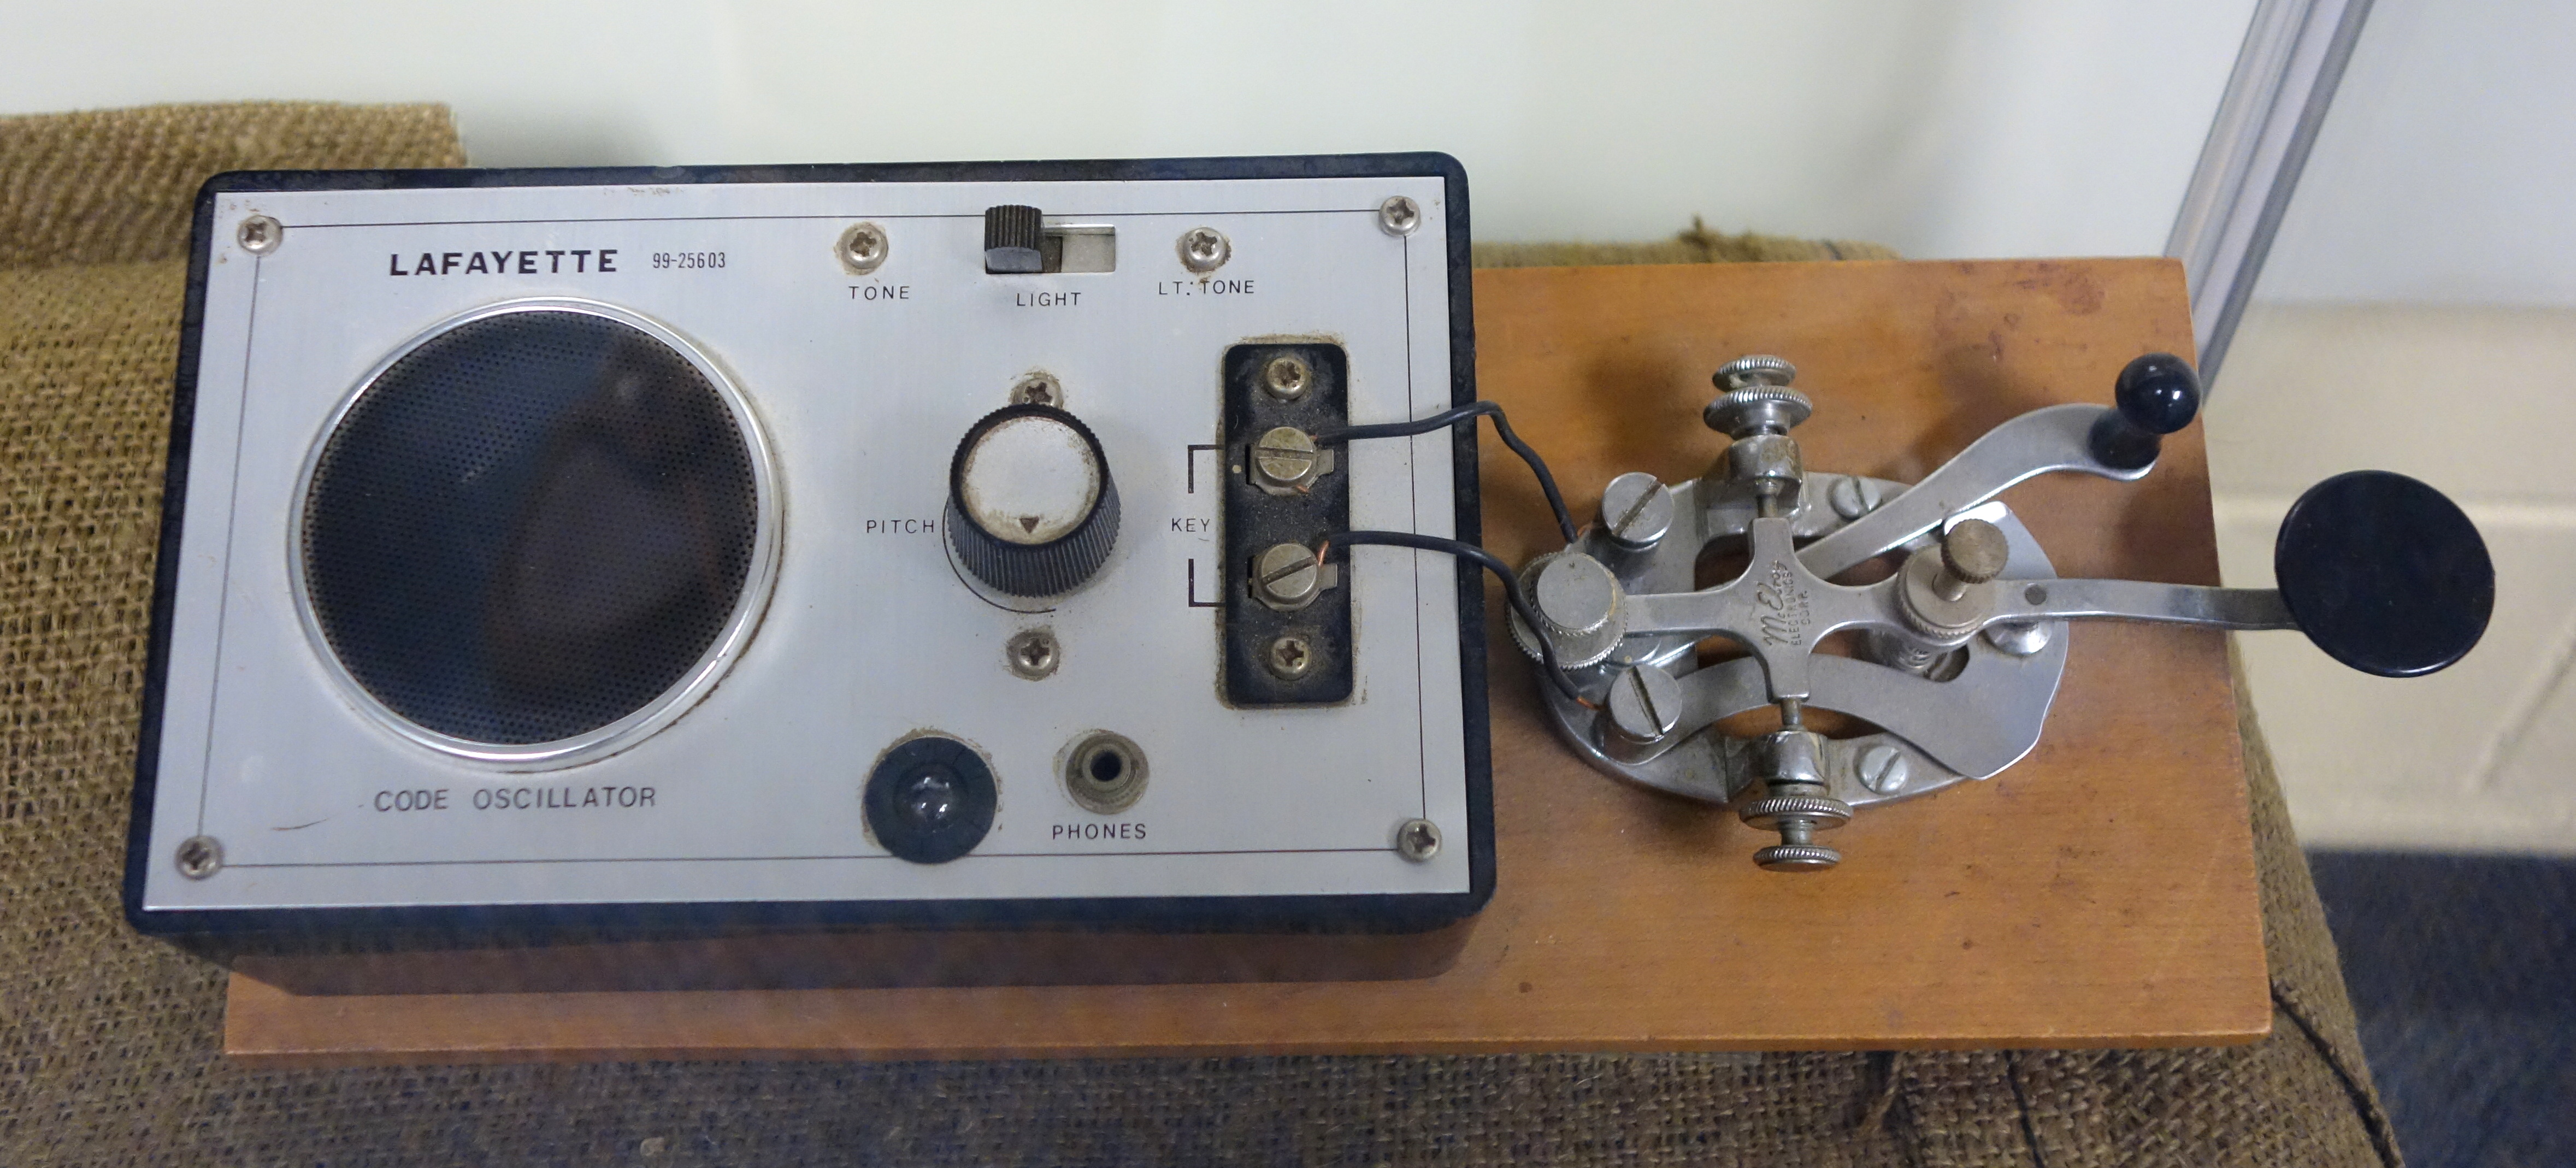
One historical answer to this problem was to quit talking and start using Morse code. For a variety of reasons, Morse code will get through when there isn’t enough power, antennas, or propagation to send voice communications. A skilled operator can pull a Morse code signal out of noise that you would swear is just noise. But what if you aren’t a skilled operator? Bring in a skilled computer.

Some hams have always experimented with digital operation, mostly with war-surplus teletype machines. Sending data digitally is almost as good as sending Morse code and it is easy to type and read a printout compared to manually sending and receiving code. Sure, computers can read code, but since a human is sending it, it is likely to not be perfect copy unless the software is very smart and can adjust to slight variations like a human operator can.

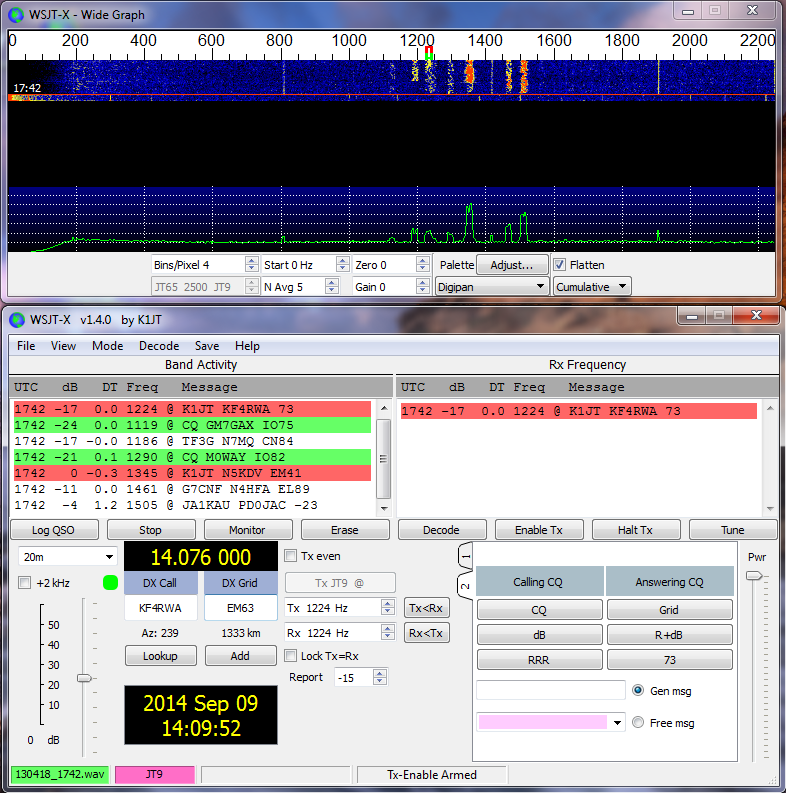
Then came a digital mode called PSK31. It was a low-bandwidth slow digital protocol that used a computer’s soundcard to both send and receive. The computer could pull data out of what you would swear was nothing. There was some error correcting and other technical features that made PSK31 possibly better than Morse code for disadvantaged operations even by very skilled operators.

There are other similar digital modes, but most of them have not really caught on in the way that PSK31 has. Until FT8.

So FT8?

FT8 is a digital mode, too. It was specifically created to work well in really bad situations like meteor scatter or moonbounce. To maximize the chances of success, each FT8 packet holds 13 characters and takes 13 seconds to send. The protocol depends on a highly synchronized clock and every minute is divided into 15-second slots. Because of this FT8 contacts are highly structured and short. It’s like Twitter on sleeping pills. You won’t use FT8 to talk about your new motorcycle with your friend in Spain.

However, because the information is digital and of limited format, a typical exchange is that one operation calls CQ. Another operator notices and clicks on the first station in their display. Now their computers exchange basic information like location and signal strength. And then the contact is done.

The Good, The Bad…

If your goal is to “work” a lot of countries, or states, or islands, or any of the other entities hams try to get awards for, then this is great. It favors getting the minimum data through under the worst conditions. If you want to use ham radio to learn about other people and cultures, this doesn’t help because you just can’t say all that much. The truth is, though, that having long casual conversations with people very far away doesn’t happen as much as you’d think anyway.

[K5SDR’s] point, though, is that right now HF ham radio is on the brink of disaster even without FT8. The bands are bad and with antennas restricted, there isn’t much to do for a lot of hams. FT8 lets them get on the air. Purists complain it doesn’t take skill. But honestly, we’ve heard that before. Automated Morse code gear didn’t ruin ham radio. Nor did the availability of store-bought equipment.

Besides, this is all classic ham radio. There’s plenty of other things to do: emergency preparedness, radio control, propagation experimentation, and TV or image transmissions, just to name a few. If those don’t excite you, there’s moonbounce and satellites (even one orbiting the moon), so there’s always something to get involved with. The frontier is moving, and ham radio is moving with it, or at least maybe it should be.

Your Turn

What do you think? Is FT8 going to kill ham radio? Save it? If you aren’t a ham, does that make you think about getting your license? Or is it just another boring thing old guys do with their radios that you don’t care about? Let us know in the comments.


via Radio Hacks – Hackaday https://ift.tt/2Rv7WbF

Thursday, November 1, 2018

Survival Candy – Make Sweet Treats from What You Grow or Forage

by Tara

Survival candy and sweet treats might not be at the top of your prepper shopping list, but they still should be worked into your SHTF budget somewhere. Stockpile morale boosters to pull out and enjoy during a long-term disaster. Something as simple as a piece of candy may vastly reduce stress level, and provide at least some semblance of normalcy for children.

There are two inexpensive and fun ways to stockpile edible morale boosters, like survival candy. You can make and preserve the candy now and/or learn how to use what your are growing in your garden (along with other stockpiled food stuffs) to make fresh and deliciously smelling sweet treats – just like pioneering Americans used to do.

Hard Tack Candy Recipe

Ingredients

• ⅔ of a cup of light corn syrup
• 2 and a half tablespoons of your favorite flavoring – cinnamon is highly recommended
• 2 cups of granulated sugar
• ¾ of a cup of water
• ¾ of a cup of powdered sugar
• Optional – up to ¾ of a cup of food coloring
• Optional – stirring in a pinch or two of cornstarch will make the sugar-laden candy less sticky and therefore less likely to clump together during long-term storage.

Supplies

• Cooking Spray
Pastry Brush
Candy Thermometer
• Large Pot
• Measuring Cups and Spoons
• Knife
• Siter
• Baking Sheet
• Aluminum Foil or Parchment Paper
• Wooden Spoon

Directions

1. Line the baking sheet with the aluminum foil or parchment paper.
2. Spray the sheet liner with the cooking spray
3. Combine the granulated sugar, powdered sugar, water, and corn syrup together in the large pot.
4. Cook the mixture over medium heat until the sugar crystals have dissolved.
5. Check the temperature with the candy thermometer – without touching the tip of the thermometer to the bottom of the hot pan, the heat will crack it and alter the temperature reading.
6. Bring the mixture to a boil – do not stir during this process.
7. Wet the pastry brush to gently push any sugar crystals that inch up the sides of the pot, back into the bottom of the pan.
8. Boil the survival candy mixture until the temperature reaches a consistent 250 to 260 degrees.
9. Stir in the food coloring now if you have chosen to use it. Do not stir the mixture after the food coloring is added.
10. When the temperature inside the pot reaches 300 degrees, remove it from the stove.
11. Stir in your chosen flavoring – carefully, the heat will cause the candy syrup to create flowing steam and popping of hot liquid.
12. Pour the mixture onto the baking sheet and allow it to settle for approximately 20 minutes.
13. Cut the survival candy into squares once it is cool enough to touch and solid enough to cut.
14. Allow the now cut survival candy to cool for 60 minutes.
15. Mix together equal parts of granulated sugar and cornstarch, and coat both sides of the survival candy with the mixture. The cornstarch is highly recommended but not required, you can choose to coat the candy with just sugar without ruining the recipe.
16. Store the survival candy in an airtight container until ready to eat. This recipe should yield about 1 pound of candy.

Dandelion Candy

There are two wonderful things about his survival candy recipe, it tastes great and the tasty treat can also be used as a cough drop!

Ingredients

• 1 squeezed lemon – strain the seeds
• 2 cups of sugar
• ½ teaspoon of turmeric
• 1 teaspoon of stevia or powdered sugar – approximately
• 2 cups of dandelion tea
• ½ teaspoon of ginger – powdered
• 1 cup of honey

Directions

1. Combine all of the ingredients in a large pot.

2. Put the pot on the stove over medium heat.

3. Do not stir the mixture but use the handles on the pot to “swish” them around to prevent scorching.

4. With a candy thermometer, make sure the heat reaches 300 degrees – the hard crack stage. If the mixture begins to scorch, resist the urge to stir and simply remove from the heat for a few minutes and adjust the burner temperature accordingly – but without going below 300 degrees. Don’t have a candy thermometer? Heat the dandelion candy mixture until all of it dissolves, this will take about 30 minutes.

When it begins to boil and separate, you most likely hit the 300 degrees mark. To test the temperature, drop a tiny bit of the survival candy mixture into a cup of cold water. If the candy mixture hardens rapidly, you were making it at 300 degrees and it is ready to be removed from the stove.

5. One the ingredients are thoroughly combined and have reached a liquid state, remove the pot from the heat. The mixture should resemble the color of honey when it is ready to remove from the stove.

6. Pour the mixture into molds or a glass baking sheet that has been buttered to prevent sticking.

7. Allow the dandelion candy to cool for about 10 minutes.

8. Flip over the molds or glass baking dish to remove the dandelion candy.

9. Sprinkle the powdered sugar or stevia on top of the candy to add extra sweetness and prevent them from sticking together – optional

10. Cut the dandelion candy into squares and eat immediately or store for later use in an airtight container in a cool dry place.

How To Make Dandelion Tea

1. Collect 3 cups of dandelions.
2. Cut off the greens and wash the blooms to use in the tea.
3. Put the blooms in a bowls and pour in about 4 cups of boiling water.
4. Allow the dandelion blooms to steep in the water for approximately five hours. The water will darker – the darker it gets the stronger the flavor will become.
5. Strain away the dandelions and use the tea in the survival candy (or cough drop) recipe.
6.
You can also make a sweet jelly from dandelions.

Herbal Taffy

This delicious little treat can also double as a cough drop.

Ingredients

• 1 and a half cups of honey
• 2 cups of water
• Up to 1 cup of foraged herbs or stockpiled herbs. Cinnamon, chamomile, coltsfoot, or elderberry are highly recommended – combining herbs is acceptable and may enhance flavor.

Directions

1. Boil the water.
2. Steep the herbs in the water: Pour the boiling water over herbs.Putting the herbs in a steeping ball, cheesecloth, or muslin bag will help keep large herb bits out of the water.
3. Allow the herbs to steep in the water for approximately 15 to 20 minutes.
4. Strain the herbs from the water.
5. Combine the herbal water (should be about 1 cup of water) and the honey in a medium pot.
6. Warm over medium heat – stir to prevent scorching.
7. The mixture needs to reach 300 degrees, check the temperature with a candy thermometer or do the cold water drop test detailed above. When the mixture in the pot reaches 300 degrees it should begin foaming at least slightly and then separate.
8. Remove the pot from the stove as soon as it hits 300 degrees.
9. Pour the herbal taffy onto a greased baking sheet or into molds.
10. Allow the survival candy to settle until it is cool to the touch.
11. Mold the candy into individual pieces or a long rope – or any other shape you desire as soon as you can touch it without burning your hands.
12. Sprinkle sugar or stevia onto the herbal taffy to prevent it from becoming too sticky when stored – especially is it is made on a day when the humidity is high.

You can also make lollipops with herbs and flowers.

Foraged Shortbread Cookies

This survival treat recipe should yield about 48 round cookies.

Ingredients

• ½ cup of sugar
• ½ cup of conifer needles or conifer tips from spruce, fir, pine, hemlock, Douglas fir – or substitute the conifer needles or tips with rosemary herbs.
• 1 pinch of salt
• 2 sticks of butter
• 2 cups of flour

Directions

1. Chop the conifer tips or needles finely – chop the rosemary the same way if harvesting fresh from your apothecary patch.
2. Mix together the needles, tips, or rosemary (or a combination of all three) with the sugar, softened butter, salt, and orange zest.
3. Stir until the mixture is creamy.
4. Divide the foraged shortbread cookie dough in half.
5. Place the halved dough on parchment paper.
6. Roll the dough into log shapes – about one and a half inches thick.
7. Wrap the cookie dough in a towel or plastic wrap and place it in the freezer for 15 minutes.
8. Preheat the oven to 350 degrees.
9. Remove the dough from the freezer and unwrap.
10. Cut into the log shapes into individual slices.
11. Remove any tree fibers sticking out of the dough – optional
12. Place the cut foraged shortbread cookie dough slices on a greased baking sheet – making sure they do not touch.
13. Bake for approximately 10 minutes until they are golden brown on top.
14. Remove from the oven and place on a cooling rack until they can be touched safely and devoured.

Thyme And Calendula Cookies

Ingredients

• ¾ cup of sugar
• 16 tablespoons of softened butter
• 1 and ⅓ cups of flour
• 1 pinch of salt
• 4 tablespoons of calendula petals – cut finely
• 1 egg yolk
• ½ cup of cornstarch
• 1 tablespoon of thyme – minced
• 1 tablespoon of lemon zest or up to 1 tablespoon of lemon juice – you may want to reduce the amount of butter slightly if using the lemon juice to avoid the dough becoming too liquidy.
• Optional – You can add in up to a pinch of other herbs to enhance the taste even more: sweet savory, lavender basil, sage, or oregano seem to work well in this recipe.Both violets and nasturtiums flower petals could be substituted for calendula – which boasts a multitude of medicinal benefits for both humans and livestock.

Directions

1. Combine the sugar and the butter until you achieve a creamy mixture.
2. Stir in the lemon zest and/or lemon juice, and the egg yolk.
3. Pour in the cornstarch and flour, and combine thoroughly until a dough forms.
4. Knead the salt, thyme, and calendula flower petals into the dough.
5. Remove the dough from the bowl and form it into a cinnamon roll or log shape.
6. Wrap the calendula and thyme cookie in a towel or parchment paper. Fold in the ends of the towel or twist the ends of the parchment paper so the dough looks like it is being house in a hard candy wrapper.
7. Place the wrapped dough into the freezer for a half and hour – or until firm.
8. Preheat the oven to 300 degrees.
9. Slice the calendula and thyme dough into individual cookie style slices – or cut with a cookie cutter.
10. Place the cookie shapes onto a greased baking sheet or a baking sheet lined with parchment paper. Space the cookie slices so they do not touch.
11. Bake for about 25 minutes. Check the survival cookies several times during the baking process the first time you try the recipe because they tend to brown rapidly. Remove the cookies from the oven when the edges start to turn a golden brown. Typically, these cookies will remain slightly soft in the center.
12. Allow the calendula and thyme cookies to cool for a few minutes before placing them on a wire rack to prevent breakage. The cookies should become significantly more firm as they cool.
13. This dough will usually keep for several days in the refrigerator and perhaps up to two weeks when stored in the freezer.

Pioneer Candy And Sweet Treats Recipes

During a long-term disaster, everyone will need to feel useful while adapting to the new post-SHTF routine. Keeping busy will help prevent folks from dwelling on the dire situation everyone is attempting to live through.

As noted above, maintaining some type of normalcy will be highly beneficial to the entire family, especially children, during a doomsday disaster. Baking together in the kitchen and then enjoying a sweet treat will not only bring about happy smiles, it will also give the children, elderly members of the family, and loved ones who are also physically or mentally disabled, a productive task to complete to help fill their day while occupying their minds.

Grow and forage for ingredients to use in the occasional sweet treat recipe, just like our ancestors once did long before grocery stores and donut shops were created.

Roasted Acorns Recipe

1. Shell the acorns
2. Crack the acorns – stockpile a couple of nutcrackers, they can break over time
3. Boil the whole acorn kernels in a pot with just enough water to cover them for approximately 15 minutes.
4. Strain away the water and boil again for about five minutes to make sure all of the tannins the acorns contain have been removed. Repeat this process if necessary until the water in the pan is clear and no longer has tinges of brown.
5. Soak the acorns in enough water to cover them for three to five days to remove bitterness.
6. Boil the acorns again, for about 10 minutes, and then strain away the water.
7. Preheat the oven to 350 degrees.
8. Rinse the acorns and place them on a towel to air dry.
9. Place the acorns onto a baking sheet – making sure they do not touch.
10. Sprinkle brown sugar and cinnamon on top of the acorns.
11. Roast the acorns for approximately 60 minutes.
12. Allow the acorns to cool enough to touch and eat.


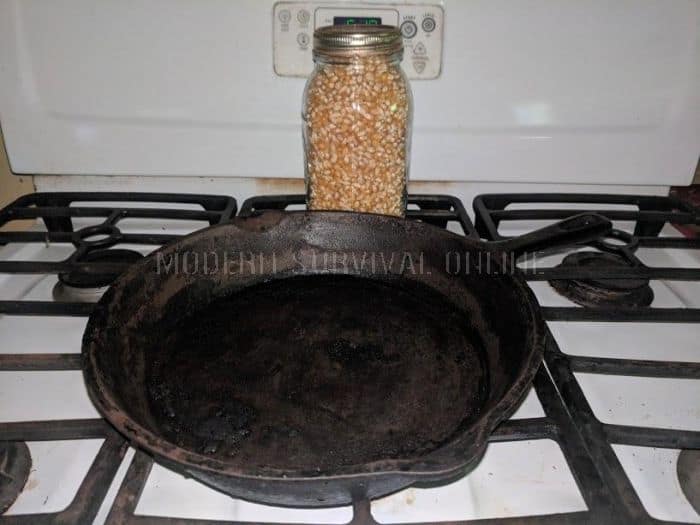
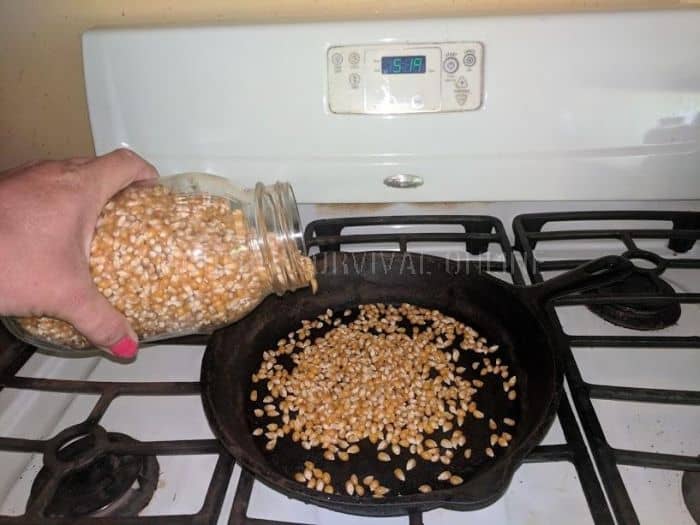
corn kernels in mason jar next to a cast iron skillet

Parched Corn

Anyone who grew up watching or reading Little House on the Prairie books might recall parched corn was one of Laura Ingalls’ favorite treats. It is incredibly simple to make and tastes absolutely delicious.

You can make parched corn from either shelled corn you have cut and dried from cobs you are growing or from frozen corn that you process in your dehydrator or in the oven. To dry frozen corn in a standard kitchen oven, preheat to 150 to 180 degrees. Put the corn on parchment paper on a baking sheet (do not let the kernels touch), and leave the oven door ajar a few inches and bake until it is thoroughly dry.

1. Lightly oil a skillet – vegetable oil, corn oil, coconut oil, olive oil, and almond oil all work equally well.

2. Turn the burner to low to medium heat to warm the oil.

3. When the skillet has gotten slightly hot (the skillet should not get hot enough to fry, just to scorch) carefully pour in a single layer of corn – just enough to cover the bottom of the skillet:

pouring corn kernels into pre-heated cast iron skillet

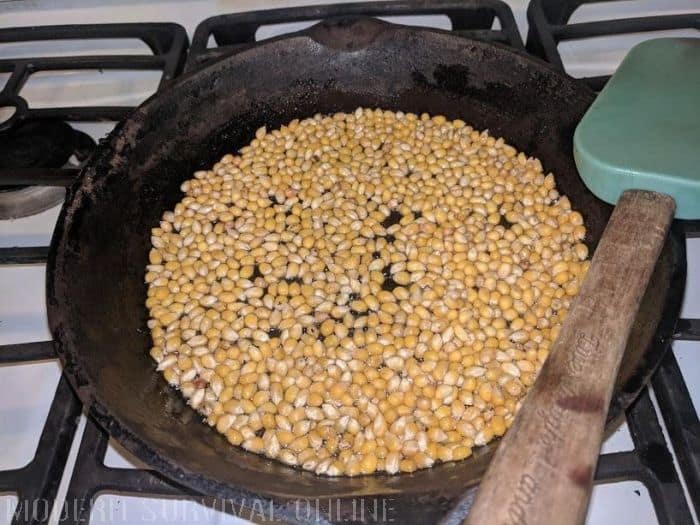
4. Stir the corn over the heat for approximately five minutes – it will start to change color – getting darker as it gets hotter. A few kernels might actually pop and resemble popcorn without all of the fluffy outer covering. The flavor of the corn intensifies as it gets darker in color, but keeping it over the heat too long will burn and ruin the taste:

kernels cooking in the cast iron

5. Pour the parched corn kernels onto a layer of paper towels to allow the grease to drain.

6. Sprinkle on sugar,salt, butter, or any other seasoning you like and have on hand.

7. This type of survival candy has an incredibly long shelf life and because it is so hardy and lightweight, makes great trail candy or portable snack for folks doing long perimeter patrols:

finished parched corn with seasoning on paper towel


Potato Candy

This pioneer candy recipe should not be reserved until a SHTF situation. Combining peanut butter with potatoes might not sound yummy, but it so is. Peanut butter has an incredibly long shelf life and potatoes are a staple in any garden, so amassing the necessary prime ingredients for this survival candy should not be too difficult or expensive.

Making potato candy is a bit time consuming to make, but once you taste it, I doubt anyone would argue it was not worth all of the effort. We convince my elderly mother to make huge batches of potato candy every year at Christmas, and it always disappears quicker than any of the other sweet treats placed upon the buffet table.

Ingredients

1. 2 tablespoons of milk
2. 1 pinch of salt
3. ¼ of a cup of mashed potatoes – leftover unseasoned mashed potatoes work great
4. 1 teaspoon of vanilla extract
5. ⅓ of a cup of peanut butter
6. 16 ounces of powdered sugar

Directions

1. Mix together the vanilla extract, salt, milk, and mashed potatoes in a bowl.
2. Stir in the powdered sugar.
3. Combine the mixture until a dough consistency is achieved.
4. Refrigerate dough for 60 minutes – or cover with a towel and place in a cool, dry place.
5. Sprinkle the powdered sugar on a piece of wax paper.
6. Roll the dough out onto a baking non-stick baking sheet or cast iron skillet.
7. Spread the peanut butter on top of the dough.
8. Roll the dough into a cinnamon roll shape – gently so the peanut butter does not mush out at the ends any more than absolutely possible.
9. Roll the candy roll in the powdered sugar – sprinkling a little bit extra on top.
10. Chill the dough for 60 minutes once again.
11. Slice the dough and serve cold or at room temperature.

Sponge Candy

Ingredients

• 1 cup of dark corn syrup
• 1 tablespoon of apple cider vinegar
• 1 cup of either brown sugar or granulated sugar – stevia works great also, but cut the amount used by half.
• 1 tablespoon of baking soda
• Chocolate chips, nuts, little candies for topping – optional

Directions

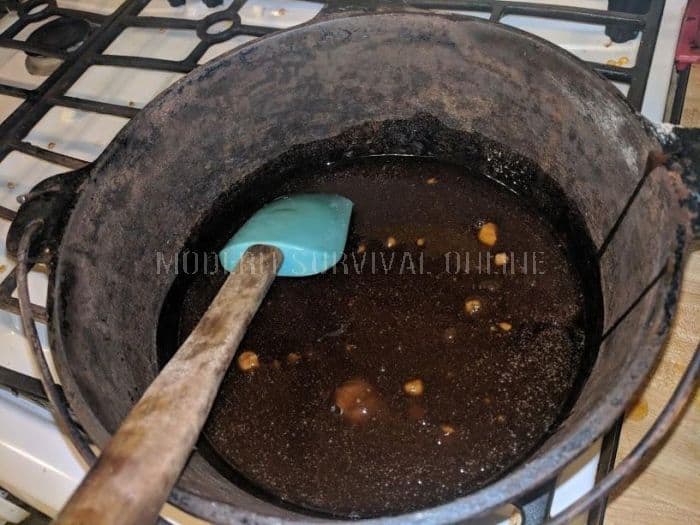
1. Combine the apple cider vinegar, dark corn syrup and the sugar in a pot:

acv brown sugar and corn syrup inside a pot

mixing acv brown sugar and corn syrup

2. Place the pot on the stove and warm over medium heat.

3. Stir continuously until the sugar dissolves to prevent scorching:

sugar has dissolved

4. Stop stirring and only jiggle the pot to prevent scorching while the mixture reaches 300 degrees – check with your candy thermometer.

pouring baking soda over the mixture

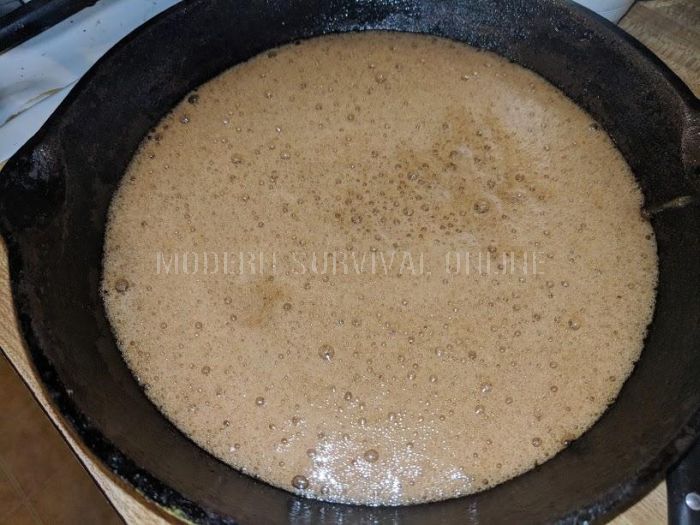
5. Remove the mixture from the stove and pour in the baking soda – it will foam up a lot during the process, it is best to pour in the soda quickly and begin stirring immediately.

6. Pour the mixture on a greased or buttered baking dish. Do not use a spoon to spread out the mixture; allow it to move and fill the dish on its own our the air in the sponge candy will escape and ruin the recipe.

7. Sprinkle sweet chips, nuts, or candies of your choice on the top of the sponge candy now, if you chose to use them. If you spread the sweet or salty bits, do so as lightly as possible.

8. The sponge candy will break into pieces on its own, there is no need to cut it.

You can sprinkle a topping on like I did here with chocolate chips, or melt the topping and pour it over the sponge candy as it cools but before it breaks apart:

sponge candy


Survival Candy Storage Tips

• Always store candy and and cough drops in airtight containers to prolong shelf life for up to 2 years. Cookies have a shelf life of only a week, but should also be stored in an airtight container. Storing the survival candy in Mason jars or bag that have been vacuum sealed should maximize shelf life.

• To preserve baking chocolate and other sweet or decorative touches to survival candy, cookies, and deserts, store them in vacuum sealed containers as well.

• Moisture is your enemy. Once an airtight container or vacuum sealed bag is opened, the contents inside will be exposed to air and begin the downward spiral to spoiling. Store survival treats in small amounts that will be consumed in a single setting to avoid opening and closing or jars or bags where food remains.

survival candy recipes pin


via Modern Survival Online https://ift.tt/2PuUreX