Thursday, February 6, 2025

How to Survive a Trip to a Developing Country

So you’ve decided to embark on an overseas trip, and this time it is not to Italy, France or the Bahamas, but instead to a developing nation, sometimes called a Third World nation. An estimated 50 million people from industrialized nations travel to the developing world every year.

boats in the port of Essaouira Morocco

The difference between industrialized and developing nations is the reduced availability, even total absence, of certain essential goods and services like medicine, food, security, housing and education. While these services and necessities may be present, the quality and consistency may be lacking, antiquated or erratic.

While years of travelling experience may have taught us First Worlders a thing or two about mishaps during a trip, travelling to a developing nation is a whole new adventure (or misadventure) entirely.

Below we have collected the tips and tricks you need to know to survive and prosper in developing countries, and placed them into this article.

As a bonus, and to aid you in developing the right mindset to survive in such faraway places, we have included a section called “What Would The President Do?” with tips and considerations from a veteran U.S. Secret Service agent. Your trip awaits, read on.

Medical and Health Preparation

Your body, and how it adjusts to unusual surroundings, is definitely on the agenda when it comes to preparation. As our most valuable asset, the body needs to be cared for and maintained. What is the best way to accomplish this?

Visit Your Doctor or a Travel Clinic

A travel clinic will prepare you with information that you need to be able to travel to another country, along with all the preventative immunizations and vaccinations that you may require. Ensure that you tell the clinic of the exact itinerary of all countries you are visiting. A common mistake, that may have severe consequences, is to confuse two similar sounding countries, like Guyana and Ghana.

Ensure You Have All Necessary Medication

Ensure you have sufficient medication, according to your prescriptions, for the time you are away plus no less than 3 additional days. Any medical conditions and allergies should be recorded on your person. Properly labeling medication and repacking it into waterproof, rugged containers is also crucial.

Doctors Letters, Authorizations and Translations

Ensure that you have a letter from your doctor authorizing you for your medication in the recommended doses. Another important factor often overlooked is the importance of translating all this information into the native language of your destination.

Imagine a situation where you are depending on a medical doctor, or explaining your bottle of pills to a customs agent. It’s bad enough that you have no patient history in that country, it could be worse if your prescription medication is mistaken for contraband illicit drugs.

Insurance

The Devil is in the details: make sure that your insurance policy covers any illness or incident while abroad is essential.

Normally, insurance companies will have partners in the countries you may be traveling to, or you may need to add a simple rider or additional coverage. If you need extra coverage, take out a specific travel policy and understand exactly its restrictions and limitations.

There are normally three important factors to remember about your travel insurance:

  • Notify the insurance company of any medical condition.
  • Restrict your activities to what’s covered in the policy.
  • Behave responsibly- injury or illness resulting from drunken or illicit behavior is not covered.

Do not forget to add the following to your Packing List:

Copy of your medical records and doctor’s letter (preferably translated).

Medicine, labeled and packed in plastic containers.

Insurance policy & emergency contact number.

  • World’s Thinnest DIY Survival Pack.

A traveler’s survival kit should be able to address some of the most common mishaps that might happen. The most common are:

Loss or stolen documents and valuables

Falling ill or being involved in an accident

  • Miscommunication incidents and language barrier issues

The biggest issue encountered with bug-out bags is storing or carrying without causing inconvenience or drawing attention, yet still remaining easily accessible.

Arriving in a new place tired and jet lagged can cause disorientation. It is easy to lose documents, equipment and your valuables. International visitors are easy prey for both petty and professional criminals in many developing countries.

Your shoes are a good hiding place for cash and smaller, flat items. If you are pick-pocketed, mugged or kidnapped, the last place your assailant will probably look is your shoes. In a tiny space barely a few millimeters thick, we will create the world’s most compact survival kit. Consider packing all these items below and add a few others if you have enough room while remaining comfortable.

Pre-paid SIM card- Most pre-paid SIM cards will work if you notify your carrier of your destination and the duration you will be staying. Ensure that you have call minutes and mobile data already pre-loaded on the card. Store important emergency numbers on it also.

Cash, American dollars and local currency– A reasonable amount should do. Think in practical terms. One thing you would want to do in an emergency is pay for transport and be able to buy a smart phone with internet access. The almighty U.S. greenback is accepted nearly anywhere.

Memory Card/Flash Drive– Store electronic copies of your passport, medical records, credit card details, airline tickets, vital emergency contact information and everything else you may need to know.

Paper Copy of Vital Info – Your name, nationality, emergency contact number, passport number, allergies, embassy location and phone number and any other information you consider important. On the other side of this piece of paper photocopy and certify your passport and probably a copy of your visa.

Band Aids– A few band aids on hand will help deal with nicks and scrapes, through which your body will be very vulnerable to the novel germs in the country you are visiting.

Medicine, powdered– Use tiny zip lock bags to crush and store your meds into powder. You may also choose the pre-made packets of travel medicines.

Credit Card– Preferably a less valuable card with a limit on it. Several prepaid cards allow you to have a few hundred dollars. Visa or Master Card backing will allow you to use ATM’s around the world. Remember to notify your bank of your travel itinerary prevent your card being locked down.

Ziploc Bag– This will store all the above contents. In a desperate situation, it can be used to hold potable water.

Take all the above and wrap it in a piece of paper, preferably the certified copy of your passport. Do not stack anything, and ensure that the contents are spread out. Take out the insoles of your shoes, set the bags inside, and replace the insoles. Try the shoe on for comfort and ensure you can walk without any pain or discomfort.

Remember: install this kit in your shoes after you arrive at your destination to avoid problems with airport security.

Another neat trick is to take electrical or duct tape and tape one end to the survival kit and the other on your socks right up the heel of your foot. If you are unconscious; when medical personnel try to take of your shoes, they see your kit. If it is labeled “please read me” in the local language they will find your pertinent medical info and adjust treatment accordingly.

a street in Cape Town
a street in Cape Town, South Africa

WWPD? -What Would The President Do?

When it comes to best practices in foreign countries, the Secret Service is the outfit to beat. Keeping the most powerful man in the world safe in any locale takes a tremendous amount of skill, preparation and good tradecraft.

Long time serving secret service agent Dan Emmet writes about his 21 years of service protecting four US presidents. His book is titled “Within Arm’s Length: The Extraordinary Life and Career of a Special Agent in the United States Secret Service“. Below I have summarized the most important points for you.

He equates preparing for a foreign trip to preparing for a domestic one, only a dozen times more complicated. Assignment to the presidential detail requires an agent to distinguish himself among others. You have to rise up the ranks starting with smaller, less prestigious assignments and responsibilities.

Several trips to less risky areas can work well for you as good preparation to the main show. Do not throw yourself into the deep-end immediately. Assessing your skills in areas like major domestic cities before going into the wild or foreign countries will help you prepare for your time abroad.

Advance Party preparation begins many weeks ahead of the President’s visit. Begin planning for your own trip many weeks in advance. Reliance on local resources, research and intel is vital to success. Try to find and join local expatriate groups and forums online.

Make acquaintances with someone who has firsthand experience of what is happening on the ground and review your plans with them. Checking their advice against other credible sources and authorities is also essential; not all sources are created equal.

Avoid known hostile destinations, regions and local areas as much as possible. No matter how prepared you are certain places are no-go zones for Westerners! Do not put yourself in unnecessary danger. Ensure that you do not leave a weak spot back home. While you are away, be sure that you have not created an opportunity for your property or home to be vandalized.

Effective and clear communication is vital. If travelling with others establish redundant rendezvous points and methods of communication. Double-check all your correspondence to ensure you have clearly understood the message and vice versa.

Seek clarification where not clear. Email your embassy in advance of your arrival and keep in contact with friends and family back home. Ensure they have a copy of your itinerary.

Having a secret distress signal that only you and companions know is important. Establish a distress signal and use it in case of an emergency. America, and Americans, are not as popular as you may think. While you may think we are the most loved nation in the world, a great many of Earth’s dwellers do not.

Don’t be obnoxious. Don’t play a stereotypical, swaggering American. You’ll be obvious no matter what you do, so just pay attention to local customs and culture. Be as respectful and as discreet as possible.

Cheap can be costly. While you may have a budget, ensure that in your quest for savings you do not compromise your trip by using unreliable or sketchy goods and services. Hotels for instance will normally use old photos of when facilities were still new.

What About Weapons?

It is engraved deeply in some survivalists’ brains that they need a little extra defense against unforeseen circumstances. By defense I mean a weapon.

Getting one in a developing country can be tricky and a somewhat grey legal area. Typically visitors will have extremely curtailed or no weapons rights or legal protection. Here are a few things you should consider.

Acquiring a firearm in a developing country will likely not be as simple as getting one in America. Firearms being sold by private sellers mandate you be very careful; you will not know that you are dealing with someone trustworthy.

Some countries will have cheap handguns and rifles, or even heavy weaponry. Don’t let the price fool you: Many of these countries have been through a war or some serious civil unrest in the recent past. Assume any firearms are contraband.

Consider purchasing a knife as opposed to a gun; a knife is not only an invaluable tool but very handy in self-defense, and far less likely to attract serious heat from law enforcement.

The written law can differ from the law in practice. Often times in developing country the law can easily change at the enforcer’s discretion. Check with your local guide what the attitude on weapons is like in the area you are visiting.

While the law may allow certain things, it does not mean it is socially accepted or necessary. Remember that even carrying a mere pocket knife could be illegal. The locals may do it but that does not mean foreigners are allowed to.

Fool’s Gold is Exactly That

Developing countries are also rife with scam artists and con men. Someone is normally trying to sell you something “amazing” or “top quality” for an unbelievably low price.

It is unfortunate that harsh living conditions make for such desperate “salesmen”. In extremely poverty stricken areas, some people live on less than a dollar a day. Imagine what they are prepared to say for 20, 50 or 100 American bucks.

Here are a few common tricks and scams that you should not fall prey to:

Wondrous Medicines or Natural Cures– Desperation and poverty leave people searching for solutions and remedies, even dangerous ones. Witch doctors, charlatans and faith healers are abundant and normally exploit a population’s desperation while they live in luxury. Avoid being drawn in.

Precious Metals- It is not rare to be offered gold, diamonds and other precious stones at suspiciously low prices. If you have heard of the blood diamond trade, or forced mining of gold, you might easily think this is your big break. It is possible it will be a big break, but it is probable you are going to be fleeced, and the only thing you will be breaking is your bank account.

Ensure all your agreements with people are written and signed- A simple handshake may not do the trick. Verify all information and document it.

Never pay for anything in advance- Even from seemingly credible places. Some international businesses will not know what is going on halfway around the world, even global brands.

If it seems too good to be true it normally is. Certain things are genuinely cheap but remember this as a rule, if you are not a native you are probably being charged double or quadruple for something in an informal market place or setting. Check with your local guide for what the actual price for something is before you pay.

A Last Word to the Wise

The medical, technical and travel advice given here is a guide for your own preparations. Emphasis on preparation in areas like health and documentation need to be taken seriously. Traveling can be an exciting experience, but you need to ensure that this potential once-in-a-lifetime expedition does not turn into a waking nightmare.

Preparation is what it all boils down to. A professional prepper should always think about having a primary, alternate and contingency solution to conceivable emergencies. A more aware and prepared person makes for a better trip, and a safer journey!

developing country survival pin

The post How to Survive a Trip to a Developing Country appeared first on Modern Survival Online.


via Modern Survival Online https://ift.tt/OhzD3qe

Friday, January 10, 2025

Here’s What Could Happen to Your Home Should the U.S. Dollar Crash

Today, housing prices are climbing ever higher even though many homes are currently staying on the market for months on end. Inflation is out of control, the economy is tanking generally, and the appraisal of the media and financial shills seems to be “clap your hands if you believe.”

Roll of american dollars tightened with red band

But let’s get real; even the ocean of money that the government is printing can’t keep this party going for much longer. Economic armageddon is on the horizon, and with it the inevitable collapse of the US dollar.

For homeowners, especially those still paying down a mortgage, this is a bleak forecast. But what really happens to your home if the US dollar crashes? Keep reading, and I’ll talk about the potential outcomes, most of them bad…

If the Dollar Goes Bust, Your Mortgage Obligations Remain

The first thing you need to know about what will happen to your home in the midst of a dollar crash is that your mortgags, whatever they are, will remain in force. If you still have payments, you’ll have to make them. Whatever the balance is, you still owe it.

It doesn’t matter if the economy is cratering and the country is imploding: your lender will have every intention of being paid back, and if not, they will take action to secure their interests.

It doesn’t matter what’s happened to you or anyone else. It doesn’t matter if you lost your job, and it doesn’t matter if the dollar is worth more as toilet paper or kindling than currency. Whatever you owe, you still owe.

1. Inflation Might Lead to an “On-Paper” Increase in Home Values

It’s worth mentioning that some folks believe a dollar collapse and other financial maladies are generally good news for homeowners. That’s because inflation often results in the prices of goods and commodities increasing, including home values.

Great news, right? At least, it is if you own your home. Rising home prices mean that your home is more valuable. You might indeed be able to sell for a profit.

But, in reality, the increased value of your home is only going to be reflected on paper and not in actual purchasing power when the deal is done…

The cost of your home will have gone up, but so will absolutely everything else in your life, from fuel to food, water, and electricity, and a whole lot more.

Inflation is a thief of sorts, robbing your dollars of purchasing power. That means you’ll need a whole lot more money to purchase the same things you did prior to the monetary collapse.

So, even though you sell your home for much more money, the gains you realize won’t translate into more purchasing power, most likely.

2. Significant Home Devaluation is Likely to Result

What’s most likely to happen, at least once the irrational market enthusiasm starts to fizzle out under the crushing weight of reality, is that the value of your home will plummet.

Your home will be worth a lot less, and if you plan on selling you’ll get a lot less for it. The market will become what is known as a buyer’s market, meaning those who have the cash and are willing to buy will have the most leverage in setting the terms of a deal.

If you plan on selling your home to relocate, upsize, downsize, or anything else, you’ll probably be at the mercy of buyers, what few remain. Most homeowners, private investors, and even many institutions will be struggling to remain solvent.

3. You Might End Up Owing More Than Your Home is Worth

One of the worst possible situations to find yourself in as a homeowner with a mortgage during a currency crisis is when you owe more on your home than it’s currently worth, or will be worth for the foreseeable future.

This is known as being underwater on your mortgage. Basically, you are continuing to pay money to the lender for an asset that is heavily devalued. This is not ideal for your future financial prospects, especially if you need or want to move in the future.

Ideally, your home value will go up over time, meaning it is truly an asset that can pay off in the future. But once the dollar bottoms out it is likely that you, and countless other homeowners, will suffer because of it.

And underwater or not, you’ll have to keep on making those mortgage payments, or else you could lose your home entirely.

4. If You Can’t Make Your Payments, the Bank Will Foreclose

If you can’t pay the bank what you agreed to pay monthly on your mortgage, they will take the house from you to secure the loan. This process is known as foreclosure.

Foreclosure is ugly, but unfortunately, it happens year in and year out in America, and foreclosure rates always skyrocket during times of turmoil, economic contraction, and of course, currency devaluation.

Back in 2008 and 2009, the huge real estate collapse saw record-shattering foreclosure rates, though in a darkly ironic twist, many of these were precipitated by the banks themselves engaging in predatory or ill-advised lending.

No matter what’s going on in the country and no matter what you personally are going through, you can miss one or, at most, three mortgage payments before your lender will move to foreclose on your home.

This isn’t a matter of them asking nicely for you to hand over the keys. In time, the sheriff will be sent to your home to escort you off the premises with or without what is left inside if you haven’t made arrangements to get it out and in storage yet.

It’s tragic, it’s ugly, but it always has and always will happen when you’re dealing with banks…

To them and those enforcing the law, the home where you raised your family and look to the future is just another line item on a spreadsheet. Just business.

I warn you now: you cannot, must not, count on any sort of mercy from your lending institution in regards to your mortgage, no matter who it is and no matter how close your relationship is with them or any of the managers in it.

Even in the most turbulent times throughout US history, banks have always moved to prop up the bottom line. Plan accordingly…

5. Understanding Every Line of Your Mortgage Agreement is Paramount

Part of improving your prepper financial IQ regarding your home is reading every single paragraph and line item in your mortgage contract.

Typically, when signing a mortgage it usually goes something like this…

You head into the office of a representative at your bank, they give you a brief synopsis of what a page or 10 says, then you sign, date and initial where indicated, along with your spouse if you have one.

Invariably, some critical details are left murky or otherwise unclear. For the financially illiterate, they might only be focused on whether or not they can afford the down payment and the average installment payment every month.

This is a great way to get absolutely slaughtered when the dollar bottoms out. Without reading the fine print entirely, you might be unaware of exactly what could happen with your monthly payment, your interest rate, and whether or not your bank can accelerate the loan.

6. “Gotchas” in Your Mortgage Agreement Might Make Payment Impossible

Adjustable rate mortgages might look attractive upfront because of small down payments and flashy advertising, but if the dollar drops your interest rate will skyrocket so the bank can recoup more assets.

Likewise, banks can, and have, accelerated or called due loans, and the agreed-upon “nominal” term be damned.

Said another way, if you’ve been paying off a $300,000 mortgage and have about $160,000 left to go in principal and interest, if the terms of your mortgage state that the lender can accelerate it you might be on the hook for the entire balance within a certain period of time, anywhere from 30 to 90 days typically.

Can’t come up with that 160,000 in that time frame? Guess what, you’re now in foreclosure. Does it sound ugly? Does it sound like a dirty trick? Again, it’s just banking and just business, but you would know about it if you had read the entirety of your mortgage contract yourself.

My advice? No matter how excited you are to get the keys to your home, take a copy of the mortgage agreement and read it on your own time thoroughly, dispassionately, and making notes of questions you have.

Then consult with your personal financial advisor or your attorney for guidance and clarification.

Bottom Line: Pay Off Your Mortgage as Quickly as You Can

The best thing you can do to prepare yourself for a dollar devaluation is simply not to be in debt, including on your own home. Get it paid down and paid off as quickly as possible. Hustling now might make a bad situation salvageable later.

If you currently have an adjustable-rate mortgage, talk to your lender about refinancing into a fixed rate and ensure the fine print won’t allow them to wriggle out of it if the economy should tank.

You can be absolutely sure that they will not be in a deal-making mood when they are losing money hand over fist should the dollar plummet.

The post Here’s What Could Happen to Your Home Should the U.S. Dollar Crash appeared first on Modern Survival Online.


via Modern Survival Online https://ift.tt/ckO8bMo

Wednesday, December 11, 2024

Top 10 EMP-Proof Vehicles You Can Actually Buy

Do you think you are ready for tough times? Disasters, riots, maybe even the collapse of society. Good preppers pride themselves on being ready for every situation, but even for the most dedicated among us, there are some things that will literally turn our whole world upside down.

bug-out vehicles collage

One of those events is an EMP. Caused by cosmic activity, a nuclear warhead detonation, or some sort of specialty generator weapon, an EMP could permanently destroy anything using a circuit board, or anything connected to the power grid itself.

With all electronics out of action, your survival plan is going to change dramatically, and change even more when you find out that your vehicle doesn’t work anymore.

If your daily driver goes down hard, you’ll have to hoof it, but some older vehicles are inherently EMP-resistant or EMP-proof. These are great to have as part of your EMP preparations, so keep reading and I’ll tell you about 10 of them.

Suzuki Samurai / SJ410

One of the best competitors to the Jeep Wrangler that has ever been made, these tiny SUVs weren’t in the American market for very long but are excellent off-road, extremely simple, and surprisingly reliable. The minimal use of electronics throughout is a definite advantage for overall EMP readiness.

The earlier models have a 63 horsepower 4-cylinder engine and don’t handle particularly well on the highway. Later models introduced in the late ’80s feature better gearing for improved on-road speed and an improved dashboard.

I would definitely stick with any of the models made in the ’80s, even though the Samurai stuck around until the mid-90s.

Cargo room and passenger capacity are a major shortcoming for this tiny two-seater, but the use of external storage and cross-country routes should allow you to bug out even in the aftermath of an EMP.

jeep CJ

Jeep CJ

You knew, you just knew, that Jeep was going to make an appearance on this list somewhere. I think when it comes to discussions of prepper vehicles, there is a law that Jeep has to be featured at some point.

Jokes aside, and current woes of the brand discounted, the venerable Jeep CJ is essentially a slightly upgraded civilian version of the military crawler that helped GIs win World War II.

With incredible off-road capability and surprising simplicity, a well-maintained Jeep is highly reliable and quite EMP-resistant.

But like all two-door 4x4s, you’ve got precious little room for cargo inside the body, and even less room for people. Your front-seat passenger won’t have it too bad aside from the kidney-rupturing ride, but you’ll have room for just a few packs and little else besides.

As you might have expected, chances are good this will be one of the more expensive options on our list owing to the enduring popularity of Jeeps generally, and the sheer rabidity of the fan base.

Toyota Land Cruiser FJ40.jpg

Toyota Land Cruiser FJ40

A genuine icon among hardcore off-roading disciples, Toyota’s FJ40 Land Cruiser is almost peerless off-road and more durable and reliable than any other similar vehicle we’ve looked at.

It’s also incredibly popular and ubiquitous, with countless numbers being exported to countries around the world.

Incredibly, supplies of the classic early 1980s and pre-’80s FJ40s are drying up rapidly in America, and surviving examples, even in rough non-running shape, command a steep price.

Even so, it could certainly be worth it, especially if you want an EMP-resistant daily driver that you can be enjoying right now.

I’ve seen so many of these 4x4s with hundreds and hundreds of thousands of miles still running smoothly and reliably, so you know you can count on one of these to go the distance.

Ford Bronco

Older Ford Broncos are artifacts from another time, back when American automobiles weren’t synonymous with garbage build quality. Workmanlike, reliable, highly capable off-road, and still surprisingly civilized on-road, first-generation Broncos make a fine ride for preppers concerned about EMPs.

Frankly, there isn’t much to go wrong concerning essential components in the motor, fuel system, and drivetrain. Again, it’s not out of the question that lights and the radio might give up the ghost, but that is a relatively minor concern.

The great thing about older Broncos, if you’re willing to search for one, is that they came in many configurations, including a short-bed pickup truck, open-top convertible, or even a wagon.

Also, bound to please some preppers, are the massive power plants available to these trucks: V6 and V8 engines came factory standard depending on the trim!

There’s lots to like about the Bronco in this capacity, but you probably won’t like the price if you find one in running condition.

Chevy Blazer K5

Compared to the mythically capable and highly regarded SUVs and 4x4s we talked about, Chevy’s Blazer seems bland, almost uninspired. Despite its middling success and recognition, it is nonetheless excellent for our purposes as long as you take the time to track down an early model.

Mercedes Unimog

These hulking articulated frame trucks lack the grace and panache that the Mercedes brand is usually associated with, but they are deservedly worshiped by off-roaders because of their durability and unstoppable capability.

There have been countless Unimog variants made over the decades, and there’s no shortage of them out there if you’re willing to find one and, potentially, have it imported.

Models made before 1980 are the choice for EMP readiness because that is about the time they started to get loaded down with advanced electronics – electronics that are highly prone to being burned out when the big one pops off!

If you plan on going cross-country or taking an off-road route to your bug-out location, the Unimog might be the very best choice there is: uniquely, these trucks have articulated frames and high ground clearance that lets them crawl right over even the most rugged terrain and obstacles that would stop other 4x4s cold.

But, if you’re going to commit to the Unimog it is going to be as a specialist vehicle: they are too huge and too fuel-inefficient to be used as a daily driver by most folks.

Volkswagen Beetle

Now that I’ve upset every “war rig” advocate reading this article, let me make a case for why the Volkswagen Beetle is actually an inspired choice for an EMP-readiness vehicle.

Aside from being absolutely ubiquitous, reliable, and efficient, 1970s and earlier Beetles have a complete lack of electronics that will knock the car out of action in the aftermath of an EMP.

Sure, the radio might be out, but you can live without that, especially if you have your own that was kept in a Faraday cage. You are keeping a radio in a Faraday cage, aren’t you?

You can get parts for vintage Beetles absolutely everywhere, literally all around the globe, and the small size and agility of these cars mean they are perfect for squeezing between other knocked-out vehicles on the road.

If you want to up your prepper cred a little bit, you might consider converting one into a dune buggy for excellent off-road capability.

Ford F-100

If there was ever a pickup truck that screamed American, it has to be the Classic Ford F-100.

Simple, extremely easy to maintain, and using minimal electronics across all generations prior to the early 1980s, the F-100 can be a perfect EMP readiness vehicle if you’re going to be moving cargo around.

F-100s come in many different configurations, some with longer beds and some with shorter, and plenty of other options besides depending on the year of production.

There are tons of these trucks still out there, many of them ready to run and many that can be made to run if you have a little bit of automotive skill and elbow grease.

Chevy C and K Series Trucks

Another great pickup truck option for EMP preparedness, the Chevy C and K class trucks are two-wheel drive and four-wheel drive respectively, and were first introduced in the 1960s…

My choice, of course, for a dedicated bug-out vehicle or EMP-ready daily driver would be four-wheel drive. There’ll be plenty of obstacles to hop over and opportunities to go off-road, trust me.

But no matter whether you get the two-wheel or four-wheel drive version, these trucks are brutally simple, reliable, and capable.

Parts are still available pretty much everywhere, and by the standards of later 20th-century automobiles, the pre-1972 models are basically devoid of advanced electronics that could prove vulnerable to an EMP.

Nissan 720

The Nissan 720 is a small, efficient, and practical pickup truck that looks like a clown car compared to the modern road monsters produced by the company and other truck manufacturers today.

Nonetheless, it can serve ably as a bug-out or general-purpose vehicle post-EMP…

Like the Ford and Chevy trucks we discussed earlier, these are amazingly simple vehicles. They are very easy to service and there are few components that are notably EMP-vulnerable.

But like some of the smaller options elsewhere on our list, passenger space is at a decided premium and even the bed can fill up quickly if you are hauling gear for your group or family.

Nonetheless, this is one of my favorite options but it comes with a catch: presently, they are enjoying resurgence among collectors and enthusiasts, meaning the ones you do find for sale will likely be expensive compared to similar model year trucks.

They are capable off-road, generally reliable, and have plenty of power thanks to a standard 6-cylinder and optional 8-cylinder engine. Unlike the jittery Suzuki and the borderline primitive Jeep CJ, the Blazer handles just fine on the highway, even at speed.

Best of all, passenger comfort is a step above most competitors and you’ll enjoy ample cargo room in the back. A great choice for an EMP-resistant vehicle, even if it is a boring one by other metrics!

emp-proof vehicles pinterest

The post Top 10 EMP-Proof Vehicles You Can Actually Buy appeared first on Modern Survival Online.


via Modern Survival Online https://ift.tt/cDhsLtU

Tuesday, November 12, 2024

15 Canning Mistakes to Avoid Making… No Matter What!

The sight of jars stacked in neat rows redolent with the taste of summer bounty will be inspiring for those who want to start canning their produce for their survival stockpile. Before your start, though, there are a few mistakes to avoid if you want flavorsome, tip-top quality canned goods through the winter.

shelves with canned food

1) Using sub-standard produce

When the recipe says choose ripe fruit or vegetables ensure they are crisp and firm.

Carrots that still look good but have lost that crack when you break them are not going to make good pickles. Similarly fruit that is just that bit past ripe is going to result in a poor jam.

The secret is getting the pectin right so the jam will set – slightly underripe and perfectly ripe fruit are better than overripe, which have a lower pectin content.

So, what is pectin and why do you need it?

Pectin is a starch (a heteropolysaccharide) that occurs naturally in the cell walls of fruit and veggies and in combination with the sugar and acid in lemon juice when making jams will cause the mixture to gel.

Quince and apples are particularly high in it, as are the skins of citrus fruit.

If you need pectin, you can get it in dry or liquid form but many traditional homesteading recipes use apple or quince to up the pectin content when making strawberry jam for instance – strawberries being soft and fairly low in pectin.

As soft fruits are lower in pectin, generally they will benefit from added pectin.

2) Using a boiling water bath instead of a pressure canner

For those new to canning one would think that a boiling water bath would do the same job as a pressure canner – but it doesn’t – the heat in the bath will reach 212 while the pressure canner will reach up to 425 Fahrenheit.

The boiling water bath is fine for food that has a high acid content, as botulism will find it difficult to survive the pH level of around 4.5 to 4.6.

Foods that can safely be processed in water bath are pickles, tomatoes – to which vinegar has been added, sweet preserves like berry jams as berries have a high acid content and other fruit.

You’ll notice lemon juice is often introduced in the recipe raising the acid level.

Food that is not acidic like vegetables (not pickled), soup, and meat must be done in a pressure canner to kill all traces of organisms that could spoil the food.

This explains the dangers of botulism which is fortunately fairly rare – but will only remain so if proper hygiene and sterilization is carried out in home canning situations.

The high temperature of the pressure canner will kill off the organisms that can cause food to spoil.

3) Not putting enough water into the boiling water bath

Once in the boiling water bath, the jars should be covered– that includes the lids – so make sure the water is deep enough so there is an inch or more of it covering the lids at all times during the processing.

This is important as all the produce needs to be heated equally during the process – you can’t have the bottom half of the produce heated to kill organisms while the part near the top is not sufficiently heated, allowing organisms to proliferate once the product is stored on a shelf.

4) Doubling the recipe for jam making

Especially when you’re making batches of jam or canning produce, it is tempting to simply double the recipe. After all you have the produce to use up, a large pot, the space in the pressure canner so there shouldn’t be a problem – should there?

Yes, it can be a problem. Once you double a recipe, you spend longer getting the ingredients to the right temperature – that can destroy the pectin, which is what you need to make the jam or jelly set.

When making jam you are usually advised to use a pot with a large surface area. The reason is it leads to evaporating the water in the fruit faster.

When the recipe is doubled, fruit will take longer to process and can become mushy under the weight of the rest of the fruit in the process. Cooking the jam quickly leads to fruit retaining its texture and shape – think lovely strawberry jam where you can identify the individual chunks of strawberry.

If you have a lot of produce what you can do is take two pots and make two batches at the same time, making sure to tend to them carefully so the jam doesn’t catch on the bottom and burn, then use that extra space in the pressure canner or boiling water bath.

If you’re using commercial pectin then you can double recipes as there is enough pectin to make the product set without having to lengthen the cooking time – but be careful of adding too much otherwise you end up with jam that is more like rubber.

5) Not testing for set in jams and preserves

If you follow the instructions, prepare the fruit, add the sugar and do not test whether it is forming a gel you my end up with fruit syrup instead of jam or a liquid that is too thick meaning the fruit you pack in the jars will tend to want to float to the top.

This is because fruit will vary in pectin levels depending on the time it was picked, the climate conditions, and between various cultivars, among other factors.

The way to get the set right is to keep testing – keep 4 to 5 tablespoons chilled in the freezer and put a teaspoon of the jam or syrup onto the chilled spoon, wait a few seconds and see if it sets.

If it doesn’t, keep cooking a little longer and test again with another chilled spoon until you are happy that the consistency is right.

Because you cooked the jam for 20 minutes the last time and it turned out perfect does not necessarily mean you can simply repeat – always test to avoid a disappointing batch.

If the result does turn out too runny watch this video to learn how to reprocess your product:

YouTube Video

6) Not using a canning rack

It happens – kids get hold of the canning rack and use it for something else and when you get out your pressure canner there’s no rack. You may be tempted to simply put the jars in without a rack.

This isn’t advisable – the direct heat from the metal base and the bubbling and boiling heated water can cause the jars to bump against the base and crack in the high temperatures of up to 425 Fahrenheit in a pressure canner, and of 212 Fahrenheit in the boiling water bath.

If the rack has been misplaced, you can take a clean dishcloth twist it into a sausage and coil it to fit inside the canner. This will provide a buffer between the glass and the metal.

7) Using a reactive pot

Specifically you should use stainless steel or an enameled cast iron pot. Do not use untreated cast iron or an untreated aluminum pot – the acids in the preserves will react with the pot imparting a metallic taste to the produce – also aluminum pots, particularly, will discolor due to the acid in the batch.

If the pot is made from anodized aluminum, it will probably be fine – many people cook in these and claim there is no metallic taste.

The acid content keeps the food in the jars preserved by not allowing yeasts and molds to grow in the low – pH levels of around 4.6. Personally though, I prefer not to use aluminum pots for any cooking at all.

You will often see people preparing their batches in copper pots. Although copper is a reactive metal is does not give a metallic taste to the batch cooked in it.

8) Forgetting to check for imperfections in the canning jars and lids

Once the shiny new jars and lids are delivered check each jar and lid carefully for imperfections – there may be a slight nick on the rim, a hairline crack that occurred during transportation, a part of the lid where the sealing material is thinner or non-existent, a buckled lid.

These should not be used. You run the risk of seals not forming properly and in the case of cracked jars, them bursting in the canner.

9) Not sterilizing jars and lids properly

The jars and lids are all new and clean when they arrive in their boxes, so one may be tempted to skip the sterilizing step.

The problem is that if you do this, figuring the hot water bath or pressure-canning process will get rid of all the organisms that can cause spoilage you are putting whoever eats your produce at risk. Rather be 100% safe and sterilize those jars and lids.

Once the hot food is placed into the jars, organisms may have snuck in from being exposed to the air, hence the boiling water bath or pressure canning step to ensure the last of the baddies is killed off.

After all, who wants to be featured in the news as the person whose produce caused death or paralysis due to botulism?

The trouble with botulism is you can’t see, smell or taste it in comparison with molds that announce their presence with a whitish, green or sometimes orange growth on the surface of preserved goods. This video shows how to do it:

YouTube Video

10) Not leaving the correct amount of headspace

Trusted recipes will tell you how much headspace to leave – this will vary depending on what you are canning as some produce may swell.

Leaving the right amount of headspace allows a proper vacuum seal to form in the pressure canner or boiling water bath.

If you have a little extra product that won’t quite fill the next jar, don’t be tempted to distribute it among the other jars and overfill them. You need the headspace for a proper seal to form with no product touching the seal area.

Rather take the extra produce and put into a container you can keep in the fridge for use over the next two to three days.

11) Forgetting to wipe the rims of jars where the lid and canning ring will fit

Omitting this step could mean small particles of product stop the formation of a good seal – the result being wasted food. Always keep a clean sterilized cloth at hand.

You can pop it into boiling water after you’ve wiped a couple of jars to prevent air borne organisms settling on it while you are working with large batches.

12) Forgetting to remove the rings

Once all the jars are all processed and filled with the bounty of summer it’s tempting to leave the rings on the jars. Don’t! They mask what is happening on the surface of the product so you won’t see mold growing in the headspace.

They keep the lid in place if a seal hasn’t formed properly, so you are unaware of the problem until months later when you fetch a jar from the storeroom to find it has spoiled.

The canning rings need to be removed, cleaned and stored for use with another batch.

13) Reusing old lids

The seal has a red rubbery type substance on it that ensures no air can get in. Once it has been used and opened the seal can be damaged and the will have started degrading over time.

Be safe and order new lids – you can reuse the jars and the canning rings provided they are in good condition. It is cheaper to spend on the new lids than to have to throw away produce, which has taken time, effort and money to process.

14) Fiddling with jars while they’re cooling

When jars are being removed from the boiling water bath or the pressure canner use canning tongs to avoid burns and place the jars in the spot where they are to be cooled.

Keep jars upright as you remove them. Once the cooling process has started avoid moving them around – tilting the jar allows the hot produce to come into contact with the seal and may result in a seal not forming properly.

15) Stacking jars directly on top of each other

This is a big no-no. The weight of the jars on top of each other can cause the seals to pop as this video explains:

YouTube Video

Instead, design shelves for storage that will accommodate the height of the jars or use a thin piece of plywood over the first row of jars to distribute the weight.

canning mistakes Pinterest

The post 15 Canning Mistakes to Avoid Making… No Matter What! appeared first on Modern Survival Online.


via Modern Survival Online https://ift.tt/Gh19Xti

Monday, October 21, 2024

Raising Chickens vs. Ducks – I Look at Every Aspect

When most homesteaders think of getting poultry for any purpose, the very first birds that spring to mind are chickens, naturally. And that’s with good reason! Chickens are cheap, highly productive, generally easy to care for, and a cinch to keep even if you have a small backyard.

chickens vs. ducks featured

But ducks are also quite popular, historically and today, and they are really gaining steam in terms of popularity lately. They can, after all, offer you the same things that your chickens do in the form of meat and eggs.

For this reason, some people think they are broadly interchangeable when it comes to care and keeping, but there are major differences that you need to know about before you bring home a flock.

I’ll be comparing every aspect that these two species share in this article so you can make a well-informed decision.


Chickens Ducks
Size Generally smaller, 5.25-6 lbs on average Generally larger, 6.25-8 lbs on average
Space Requirements 8-10 sq ft run, 4 sq ft coop per bird 10-15 sq ft run, 5-6 sq ft house per bird
Shelter Elevated coop, roosting bars, nesting boxes Ground-level, no roosts, open shelter
Water Requirements Drinking water only Drinking, eating, cleaning, swimming
Dietary Requirements Omnivores, lower protein and niacin needs Omnivores, higher protein and niacin needs
Cleanliness Messy Extremely messy, especially with water
Climate Tolerance Good cold tolerance, better heat tolerance Excellent cold tolerance, less heat tolerant
Vulnerability to Predation More vulnerable overall, better chances of escape Less vulnerable generally if on water, easier prey on land
Noise Factor Noisy during day, quiet at night Quieter overall, but active at night
Friendliness Can be friendly, some breeds standoffish Generally friendlier, more likely to bond with humans
Egg Differences Smaller, 2 oz, oval shape Larger, 3 oz, more elongated
Egg Output Many breeds lay 300+ eggs/year Generally fewer, some breeds match chickens
Lifespan Up to 6 to 10 years on average 8 to12 years on average

Size

On average, chickens are smaller than ducks and weigh less, usually between 5 1/4 and 6 lb on average. Your average domestic duck, in contrast, usually weighs between 6 1/4 and 8 lb.

But, there are exceptions on both ends of the spectrum for both breeds. Bantams might weigh only a pound or a little more, while tiny ducks like the diminutive and noisy Call breed might weigh no more than a couple of pounds.

Large breed chickens like the Jersey Giant or Malay can easily clear 10 lb, while big ducks like German Pekins or Muscovies will weigh about the same or even heavier.

Space Requirements

As a rule of thumb, always plan on ducks needing more room than chickens inside their shelter, in the run, and on your property when allowed to free-range.

As a general guideline, your average chicken will need around 8 to 10 square feet of space in the run, per adult bird, and four square feet of coop space.

Ducks need significantly more space in their coop, anywhere from 10 to 15 square feet per adult bird in a run, and five or six square feet per adult in their house (the common term for a duck shelter).

And as always, more is better for preventing stress, lowering cleaning requirements, and improving overall well-being. For both species, larger individuals or breeds will need even more room, whereas you can get by with less room for smaller breeds.

Shelter

The first major difference we encounter when comparing the two poultry birds is their shelter requirements.

Chickens generally need a slightly elevated shelter that has elevated roosting bars for sleeping on the inside. That’s because chickens instinctively seek out higher ground when they go to bed at sundown.

Chickens, given any other choice, are not active at night. A good chicken coop will also feature nesting boxes so that hens can have a safe and consistent place to lay their eggs.

Ducks, on the other hand, are happy to sleep at ground level and can make do with a simple structure that doesn’t need roost bars and usually won’t need nesting boxes either.

Domestic ducks tend to lay eggs in out-of-the-way places or anywhere else that gets the hen’s attention.

However, ducks are typically active at night because they take periodic naps throughout the day. You shouldn’t shut ducks up inside a shelter at nightfall if you can avoid it because this can make them anxious and antsy.

An open three-sided shelter with overhead protection or a four-sided shelter with an easily accessible duck door is perfect for them, but this has other consequences we’ll have to deal with later.

Water Needs

Chickens and ducks both need water to live, of course. Both species must have access to an unlimited supply of drinking water in order to stay hydrated.

But as expected, ducks have even greater water requirements than chickens do because they need water in order to eat properly, clean themselves, and swim.

This doesn’t mean you need a lake or even a pond on your property, though the latter is great to have. You’ll need a small water feature or pool, or at the very least an in-ground water trough, that your ducks have unlimited access to.

You’ll notice ducks taking and dipping their food in the water to help them swallow it and routinely dunking their heads and bodies to help them stay clean and take care of their feathers.

Chickens don’t take conventional baths but instead take dust baths. They greatly prefer to avoid being immersed in water if they can avoid it.

Dietary Requirements

Both species are omnivores and eat a similar diet that consists of insects, grains, seeds, and plant matter. Ducks will also eat a wide variety of aquatic organisms, snails, slugs, and so on.

Nutritionally optimized feed is, as always, a great choice for both birds. Chickens can eat duck feed, and ducks can eat chicken feed with no ill effects as long as it’s not medicated, but neither is ideal for the other.

Specifically, ducks need more protein and a lot more niacin, or vitamin B3, compared to chickens.

It’s possible for ducks to subsist on non-medicated chicken feed as long as you give them supplemental protein and niacin to help make up the difference, though this practice is generally discouraged by seasoned duck keepers.

Cleanliness

I’ve got bad news for you here: both species are pretty messy as they poop often left and right. Left to their own devices without your intervention, both will turn their shelter and their run, and any other places they frequent, into a stinking, mucky mess.

But if you thought chickens were bad, you haven’t seen anything yet: ducks are incredibly messy. They splash water everywhere when they are eating and grooming, and when they take a dip in the pond or pool and get out, they will track water everywhere.

Mud and mold are two constant problems you’ll have to stay on top of if you’ve got ducks.

Climate Tolerance

Both of these birds are famously tolerant of cold weather, but ducks have the edge. They have a thicker layer of fat for insulation, generally, and their feathers are supremely waterproof.

This means that most ducks are more than comfortable well below freezing, and as long as they have a dry shelter to retreat to, you won’t have much to worry about…

You’ll need to pay more attention to chickens when the temperature dips towards freezing, but they are more tolerant of high temperatures compared to ducks.

Most chickens do okay at 80°F / 26°C or a little warmer, but keep an eye on ducks that are outside in the sun at the same temperature and ensure they have access to water for swimming so they can cool down.

Providing shade is a must for both species.

Vulnerability to Predation

More bad news: both chickens and ducks are highly vulnerable to ground-bound and flying predators, but chickens tend to stay on the menu more often.

All sorts of critters like foxes, coyotes, raccoons, possums, domestic dogs, snakes, birds of prey, mountain lions, bears, and more will love nothing more than to make a meal of either bird, though smaller predators like raccoons and snakes typically prey on chicks, ducklings, and eggs.

The larger size of ducks may prove a deterrent to some of the smaller birds of prey, and if they have access to a substantial water feature, they will readily take to the water to escape terrestrial predators.

However, they are clumsier and slower on land compared to chickens, and so are an easier target if they aren’t on the water.

Noise Factor

Both of these birds are noisy, though you’ll have to pick your poison depending on your preferences.

Chickens, particularly roosters, tend to be very chatty during the day, though this varies from breed to breed and flock to flock. Ducks tend to be quieter overall, but because they are active at night, you’ll have to listen to them quack and hiss even during hours of darkness.

Somewhat surprisingly, it is female ducks that tend to be a lot noisier than males. This is because females are more social and spend more time communicating with their flockmates and also with their humans.

Friendliness

Chickens and ducks can be quite friendly with people, given proper upbringing and interaction.

Once again, breed differences play a big part here: some chicken breeds are famous for friendliness, like the Buff Orpington and Faverolles. Ducks, though, tend to be friendlier and closer with their people than chickens are, all things being equal.

If you spend a lot of time with and baby your ducks, don’t be surprised when they follow you around whenever they can see you. In contrast, chickens are more likely to be standoffish or keep to themselves even if they do like you.

This is just a rough guideline, though, and you’ll find that individual birds and flocks have their own personalities and preferences in this regard.

Egg Differences

For so many keepers of ducks or chickens, eggs are the number one reason why they got into poultry in the first place.

Both can be great choices if you want a steady supply of the freshest and best-tasting eggs you’ve ever tried, but there are still considerable differences you’ll need to know about.

Egg Characteristics, Shape, and Size

Chicken eggs, as a rule, are smaller than duck eggs and are usually a little lighter, averaging around 2 oz. They have a tapering, oval shape with gently domed ends.

Duck eggs are bigger, though, they weigh around 3 oz or a little more, and are noticeably more elongated with a prominently rounded narrow end. Duck eggs are also more commonly colorful or speckled compared to chicken eggs.

Duck eggs have a markedly richer taste compared to those from their chicken cousins, and this is due to higher amounts of fat and protein.

Output

Chickens and ducks vary a little bit when it comes to output, and most chicken breeds are more prolific layers than your average duck.

Leghorns, Australorps, and Orpingtons can lay upwards of 300 eggs yearly for the first few years of their life as long as they are in good health. Still, some birds might stop laying in the wintertime when days get shorter.

Most duck breeds are not that prolific, though some, like the Khaki Campbell, can clear 300 eggs a year. Most ducks are also more likely to lay eggs year-round; something to consider if you’re worried about a winter stoppage.

Lifespan

The lifespan of these two bird species is similar, on average, but ducks tend to live a little longer. Most chickens will top out at around 10 years old, though those living older than that and in relatively good health are hardly uncommon.

Your average domestic duck breed will live between 8 and 12 years, or even older, in ideal conditions. However, some duck breeds, like the American Pekin, are known for a relatively short lifespan, around 6 years on average.

Raising Chickens and Ducks Together

All in all, it is possible to raise adult ducks and chickens together as long as you take care of the shelter and space requirements for each.

Trying to keep them in the same shelter, unless it is an oversized coop or a small barn, is probably not worth it considering how messy ducks are. They’ll make the bedding inside wet, and that will cause problems for your chickens, and fast.

Something else to worry about are pecking order issues between the two breeds, specifically if your chickens have one or more roosters in the flock.

Under no circumstances should you allow hens from either species to raise young in a mixed flock; ducks are likely to trample chicks due to their greater size, and aggression between protective parents is common.

chickens vs. ducks Pinterest

The post Raising Chickens vs. Ducks – I Look at Every Aspect appeared first on Modern Survival Online.


via Modern Survival Online https://ift.tt/q5RHDnM

Saturday, October 12, 2024

Preppers Are Not Safe from SHTF and Tragedy

All of us know that disasters great and small are dangerous. You don’t really prepare for things on this scale if they aren’t truly so… Natural or man-made makes no difference; any given event will carry with it dozens of ways to die.

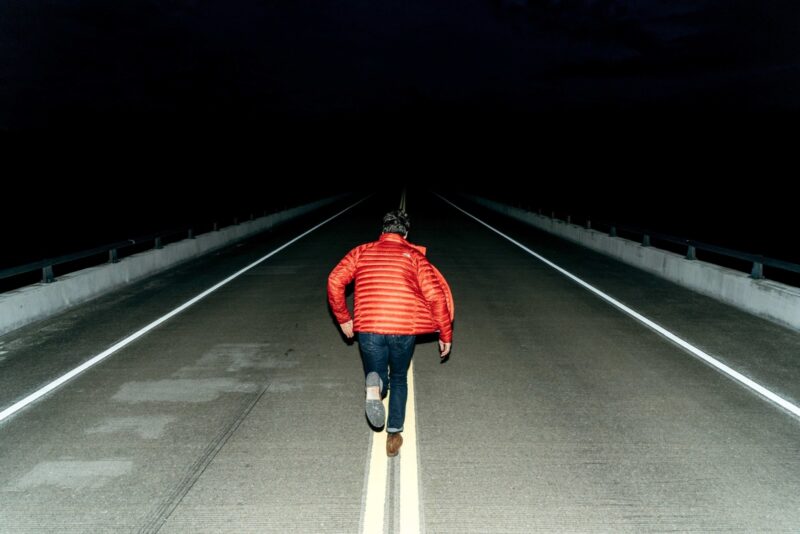
man running away on street

And so we prepare. We train. We plan. We stockpile. All in the hopes that when the reaper comes around we can say “not today” and slam the door in his face. That’s the way these things go. Right? Right…

Or is it? Is anything ever guaranteed in life? Is our survival assured at any cost? How about the lives of our loved ones?

For even the most skilled and confident will have doubts. Small ones, grim ones, in the dark recesses of their mind. “What if I don’t make it? What if it isn’t enough? What if I am unlucky? Too slow? Too late?”

Fair questions, all. Hard to ponder. Terrible to consider. But understanding risk and facing fear head on is something all preppers must be able to do.

In this article, I’ll take a break from my usual instructive and skill building content to discuss the darker side of disaster. The side where, perhaps, your number comes up…

What Are The Odds?

If only I could answer that question, I would not only be a wealthy, wealthy man but would also surely forestall my own death.

The variables present in any disaster, especially a severe one, are so numerous, so mutable and produce so many cascading second and third order effects there is no way to calculate them.

Consider also how much influence you have over the event, and your response. Your training, plan and material preparations could certainly influence the outcome.

Broadly speaking, we know that unless something comes along and kills you outright, if you are prepared with the right knowledge, skills and equipment your chances of surviving most disasters are pretty good.

Consider your average tornado; a storm of such power it can wipe entire towns right off the map, leaving tattered remnants of civilization in its wake…

Even in very severe instances, deaths from tornadoes are rare. Surprising considering the sheer violence of the event. It goes to show a little preparation (shelter), early warning and acting before things get bad will see most people survive its passage with nary a scratch.

Deaths typically result from those caught in the open, exposed to airborne missiles or have no choice but to shelter in flimsy structures.

Your chances of survival in other events may not be so good. Plagues and pestilence are two classical disasters that can sow death far and wide before you have a chance to react and medical countermeasures can catch up.

How can you protect yourself against something before you know it has arrived?

The bottom line certain types of disasters will have a greater chance of killing you outright versus others. These usually inflict casualties in a “burst” of carnage. Some are slower acting, but no less lethal, and will kill the unwary, lazy or foolhardy should they remain in the area of affect.

Any regional or national-scale disaster may damage the infrastructure of society badly enough that death from follow-on effects or living in the aftermath is a real possibility.

I’ll talk about a few scenarios below that fall in either category as well as mishaps, misadventures or plain old bad luck that could lead to your untimely fate.

And Just Like That…

Some threats will arrive with little or no warning, and be so dangerous that anything short of immediate action may see you killed.

Events like these are likely to place you into the “wrong place, wrong time” category of death. Think high lethality, little or no time to react and rapid onset. Potentially these events may have a wide area of effect.

Disasters in this category are things like a nuclear detonation, large asteroid or meteor impact, quickly forming severe weather (blizzard, tornado, strong thunderstorm), car wrecks, flash flooding, landslides, major earthquakes, plane crashes and so forth.

Quieter but no less lethal instances could be certain chemical and biological agents released over a wide area discreetly affecting a large number of people and leaving no time to react before symptoms set in.

The basis is, if you are unlucky enough to be in “ground zero” when one of these events occurs, you’ll need serious luck on your side to survive. That’s the brakes. It happens to people every day, hapless bystander and hardened prepper alike.

  1. Slower, But Still Deadly

Some disasters are either predictable, to a certain degree, building or moving slowly enough they afford you the time to formulate a response or implement you escape and survival plan.

Make no mistake, many disasters of this kind are still highly lethal, and not to be trifled with. One insidious element they sometimes manifest is instilling a “wait and see” mentality in some.

“Maybe it will stop. Maybe it will go around. Maybe…”

Disasters in this category include hurricanes, wildfires, conventional flooding and simmering social unrest prior to it erupting into full-blown rioting and Hell-raising.

Note that all of them give ample warning as to their approach. None of them erupt onto the scene out of nowhere. The wise will go while the going is good… if they have a choice. The brave or foolish will linger hoping to ride out the worst of it.

These events are typically survivable, no matter how severe they are, because you have time and opportunity to react and get away from danger!

Nonetheless, you will always see reports of deaths resulting from these and other similar events because someone who could have gotten out of the way chose to stay.

Perhaps it was simply a bad judgment call. Perhaps it was pride. It won’t matter when you are dead. Fires shift. Hurricanes intensify. Mass demonstrations turn violent and badly. Don’t be lulled into a false sense of safety because it hasn’t “turned” yet.

Mishaps, Misadventure, and Accident

Death may find you through far less exciting channels. Life expectancy in the modern world is so long only due to the prevalence and abundance of so much we take for granted:

Regular and emergency medical care, plentiful food and clean water, efficient and expert emergency services and miraculous technological solutions to problems our ancestors spent their lifetimes attempting to master.

When reacting to a disaster, you might find yourself in a situation that any other time would be an inconvenience or merely scary when you can summon aid with the press of a button.

In a time of uncertainty, fear, and chaos, even once minor problems may take on life-threatening, even deadly significance.

Consider what you would do if you were bugging out on foot through a remote area. Just you and your BOB. You pushed yourself a little hard and, with day turning to dusk, slip, stumble and badly break an ankle. If this were a pleasure hike, someone may eventually find you, or come looking for you.

Considering you are fleeing a situation on unbridled chaos, with power out and cell phone networks down, you will certainly not be able to count on that, and will be unable to call for help.

Stranded, basically immobilized and exposed to the elements, sheltering yourself will take on agonizing, life-and-death importance. Your food and water supply are both limited, and gathering more may be impossible. What will you do now? There have been tougher, better men die in lesser circumstances.

Alternately, lethal misfortune may arrive in the form of simple accident: a cut or gash becomes badly infected. Some of your food went bad and you contract botulism or dysentery.

You wind up catching a bullet in the brain from a gunfight occurring 5 blocks away. Falling debris impales or flattens you. You are struck and killed by a panicked motorist. What a way to go; you survive The Big One only to meet your end from so small a thing.

No prepper worth their salt imagines it will happen to them, but history has furnished us with plenty of examples t the contrary.

Old Age and Infirmity

It is a cruel truism and nature that the very old or infirm suffer the most when disaster strikes. Survival situations exact a terrible toll on brain and body, a toll that the elderly may not be able to bear in any case, but will probably not be able to bear at all on their own.

Injury, illness and exposure hit the very old far harder than the rest of us. A common bug that would only hamper or sicken a healthy adult in their prime or middle age will decimate a senior citizen, perhaps even kill them.

The same goes true for wounds; an aging, failing body will not sustain as much damage as a younger one.

No matter how motivated you might be, or how well prepared, if you are a prepper at or past your Golden Years you may be confronted with a situation you cannot hope to negotiate without aid. No force of will can overcome a failing body.

  1. Taking Your Chances

Ultimately, a certain amount of risk and uncertainty will always remain when you are coping with a disaster.

Anything you do may get you killed, including doing nothing. Hindsight is, well, you know. The best you can do is manage what risks you can, and take steps to guard yourself against preventable death and threats.

If you have been prepping any length of time, you have likely already accomplished that. So much loss of life can be avoided with just a little preparation.

If you are truly well prepared with a stash of food, water, shelter items, tools and the grit and know-how to make use of all of it in a rough spot, you’ll have done much to mitigate risk to life, and hopefully, barring plain bad luck, you won’t wind up like those staring and lost souls clinging to the ragged edge of life wondering how all this happened.

Even so you’ll take risks. Some will be big. Others will be small. If you have prepared accordingly you don’t need to worry about the small ones very much. The big risks will be worth careful consideration, as no amount of preparation may prevent tragedy should you roll snake-eyes.

The decision to shelter in place or bug-out. Fight or flee. Help a stranger or take no chances. Who to trust. Things like that.

Some will be so big, your one-in-a-million chances, that there is not much you can truly do to defend against them at all.

Long-Term Concerns

After the smoke has cleared and the rubble has settled in the aftermath of a serious catastrophe, society may be fundamentally changed, along with all the things we depend on and take for granted in everyday life. Food, medicine, clean water, power, and more may be disrupted, intermittent or absent entirely.

Depending on the severity of the situation, your long term plan and assets, you may be living only as long as your supplies last. Lack of food, water or fuel may doom you.

Without the wheels of commerce to supply what we need, you’ll be relying on what you can scavenge, barter, grow, hunt, gather, harvest or make. Sustainment living, homesteading, whatever you want to call it, is doable but very hard work, and requires considerable skill.

Without the skill and the land, you’ll be alive as long as your supplies hold, and not much longer thereafter.

Fear and Faith

Dealing with fear and accepting the things you cannot change or influence will require a certain amount of faith. Believers will draw strength and confidence from God. Anyone can draw confidence from the amount of work, blood, sweat and tears they put in to prepare for this fateful day.

Believe in your own strength and skill. Have faith in yourself: you are skilled enough, smart enough and strong enough to not only survive but thrive in such terrible circumstances.

Visualize a positive outcome, with you and yours safe and sound. Race car drivers will tell you that you steer where you are looking, so you don’t look at what you don’t want to crash into. You can do the same thing mentally.

Don’t focus down on the things you don’t want to see happen. This will only serve to cloud your thinking and magnify fear and dread. Only focus on the things you can do to improve your situation now. If there is, very literally, nothing you can do, don’t spare it a molecule of worry.

Conclusion

Death will lurk around every corner when the SHTF, waiting for the slightest lapse in concentration, judgment, or focus. While there is much your work and preparation to this point will do to ward off risk to life and limb, you simply won’t be able to eliminate risk completely.

Understand this and get over it so your mind is not clouded by uncertainty and doubt when you need to be sharp and task-oriented when under stress.

preppers not safe Pinterest

The post Preppers Are Not Safe from SHTF and Tragedy appeared first on Modern Survival Online.


via Modern Survival Online https://ift.tt/kP35hxp

Tuesday, October 1, 2024

How to Care for Your Ducks in the Winter

Ducks are very resilient to cold. They can tolerate snow quite well because they have natural insulation in their bodies that help them keep warm. They have a thick layer of fat underneath their waterproof down feathers that helps them ward off the cold wet snow and rain.

ducks enjoying sliced radishes

Is this a guarantee that your ducks will do fine in winter with the same living environment you have provided for them all summer long?

No, definitely not!

For one thing, they can freeze to death if they do not have a warm shelter from the wind and the elements. They should have a fully enclosed coop with windows or ventilation openings to ensure the air they are breathing is clean and healthy.

Second, their feet do not have fat to protect them from the cold ground or snow. They can get frostbite if the ground is too cold, and they do not have a protected area with warm bedding or insulated ground on which to walk and lie down.

If they develop frostbite on their feet, they will not be able to walk to a safer spot to rest, their legs will not be able to hold them up to walk to safety, and they will literally freeze.

Domestic ducks tend to do better in the cold than wild ducks, who migrate every winter. The reason is simple: human intervention!

You, as a homesteader, are able to provide a standard of care that they become accustomed to, building trust towards you. They know that with you, they will have shelter, food, water, and comfort. They will therefore be comfortable enough to stay rather than fly off.

There are many things you can do to help keep your ducks comfortable in winter. Sometimes the easiest answer to a problem can be solved by looking to the wild animals to see what drives them south and then navigating through those issues to care for your own flock.

Can Ducks Stay Outside in Winter?

Domestic ducks will happily go out in the snow on warmer days, provided they can still get into their coop if they want to, and provided they have a windbreak to protect them from the wind.

You can make a windbreak by hanging a tarp or groundsheet, or by making a wooden wall to block the wind.

Many people block only the side that the wind comes from the most, I prefer blocking the wind from the exit on the coop on both sides. Give them corners where they can get out of the wind but still enjoy the sun’s heat.

You should also consider growing hardy shrub bushes along the inside of your windbreak. Trees and shrubs are great windbreaks, but if you live in a particularly windy area, nothing beats a constructed windbreak.

Growing the shrubs on the inside of the wall will add an extra layer against the wind, and if it is an evergreen shrub, it will give your ducks the opportunity to forage while they are out on the town.

Ducks will do fine outside up to a low temperature of 20 degrees Fahrenheit. If the temperature is below that, it is better to keep them locked up in the coop where they can stay warm.

Signs Showing That Your Duck is Cold

If you are going to keep your ducks safe and healthy through the cold winter months you should understand a few things about a duck’s version of hypothermia.

Be alert for these symptoms that will show you that your ducks are at risk because they are too cold:

  • If the temperature is below 20 degrees Fahrenheit (-6 Celsius), your ducks will stumble or hobble on their feet. Remember the ground temperature will be colder than the air temperature, and those feet get cold easily.
  • If they start developing black spots on their feet, they are in grave danger. The black spots are frostbite and require immediate attention. Frostbite can lead to amputations, or even death. Get the duck’s feet in a warm bath of water – not hot water – and give the feet some time to thaw out properly. Put the duck back in the coop with lots of hay or straw bedding to protect its feet.
  • If your ducks look uncomfortable, constantly standing and then plopping back down over and over, if they are shivering, or if they are motionless it is important to get them indoors as soon as possible. Check the feet of each duck for frostbite before you put them in the coop and treat if necessary.
  • If you see that your duck’s feathers are wet, dry them off immediately and get them into the warm coop.
  • Finally, ducks are like humans in a surprising way: when they are cold, they eat! This is nature’s way of building up a layer of fat to protect their organs from the cold. If you see that your ducks are going through a lot of food, do not panic. They are building up their fat reserves. But do note that this is a sign that they are getting cold. Remove all wet bedding in the coop and add more clean dry bedding; make sure the ground is well insulated with a thick layer of hay or straw and that each nesting area has sufficient bedding in it.

Remember that your ducks will be doing what comes naturally in the coop which will leave the bedding wet and vulnerable to the cold. It will also cause a buildup of ammonia in the coop. Both of these could put your ducks at risk.

Clean the coop regularly, and replace the bedding or add fresh dry bedding on top of the old bedding. You should properly clean the coop at least once a month in winter. Watch for wet bedding or moldy bedding. If you see this, clean up immediately.

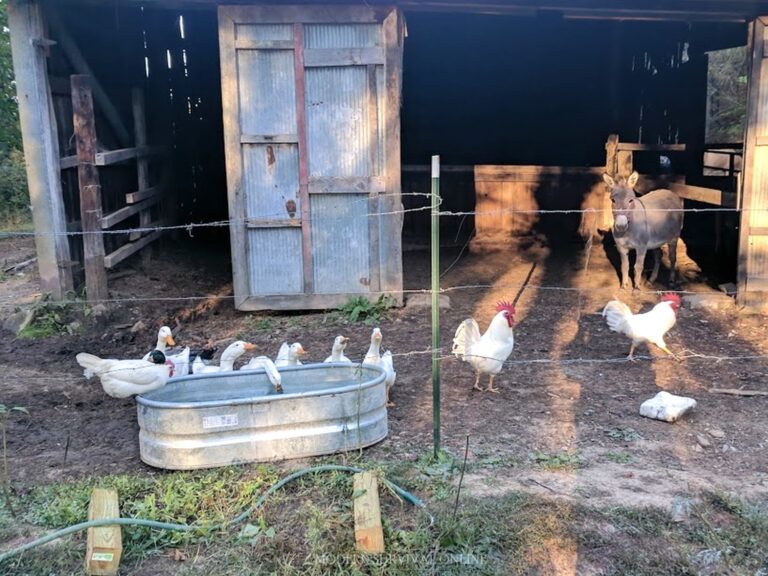
two roosters ducks and a donkey on the homestead

Tips for Keeping your Birds Warm and Comfortable in Winter

  • Lay straw or hay on the ground in the pen and the coop. You can put straw or hay on top of the snow daily – on warm days when you open the coop – to protect your duck’s feet.
  • Use wooden boards in the pen that you can lift when your ducks go to bed so that they are not covered in snow. This will help insulate their feet a little.
  • Insulate the floor in the coop with treated boards on the floor under the straw or hay.
  • Make sure they have access to clean water all day. The water should never be cold. Fill water dishes and ponds with lukewarm water every day. Check the temperature regularly and make sure it does not freeze. If they have a pond that is cold or frozen, use plastic, children’s shells as swimming ponds that you can fill with lukewarm water.
  • Make sure you give them lots of food every day. In winter, ducks need twice as much food as they would eat in summer. They need the extra food because foraging is non-existent, and they need all the calories they can get to build up good fat reserves.
  • Ducks need a lot of greens in their diet. Lettuce, cucumber, broccoli, spinach, kale, cabbage, and chard are essential to their diet.
  • They also need plenty of fresh fruit and corn.
  • You can add pellets to their diet to help build calories for energy and to boost their fat reserves.
  • Provide a good-sized coop to shelter them from the elements – especially at night. The coop will also provide the ducks with shade in summer, so this is a very worthwhile investment. When building your coop, consider adding insulation in the walls, roof, and floor – but still add the hay or straw on the floor to keep the feet warm and to give the ducks a comfortable living environment.
  • Your coop and pen should allow two square feet per duck.
  • Build an outdoor shelter so that they can sit outside of the coop but away from the cold and damp.
  • There is some controversy over this next one… Some folks say heat the shelter; others say the duck’s collective body temperature is all that is needed to keep your coop warm. If you live in an extremely cold area, I suggest you heat your coop with safe heating lights. This will just keep your ducks warmer. If you do use warming lamps, I suggest you have an electrician install them properly to reduce the risk of fire. Still, nothing is more important than that thick layer of dry straw or hay.
  • If your coop has been properly designed with a proper power source to use safe heating lamps, ensure that they are high enough to be out of the reach of the ducks and that they are legal and properly maintained. The last thing you want is the coop to go up in flames while you are fast asleep or away from home. You can use a standard 250-watt lamp in your coop. Do not use floor heaters as these can be very dangerous – especially with the bedding.
  • Duckling’s will definitely need to be under a 250-watt lamp as they are completely vulnerable to the cold.
  • If you want your ducks to lay eggs or breed during winter, heating is also very important.
  • You only need to turn the lights on for half an hour at the beginning and end of each day. You can set up a timer that turns the light on and off for half an hour before dawn and again half an hour after the sun sets.
  • Unless you want your ducks to lay eggs and hatch them, artificial lighting is not 100% necessary. But it should be considered for the comfort of your cold ducks.
  • Feeding your ducks with food that is high in protein is a must! The protein content should be 16% to 18%.
  • Make sure the ducks have plenty of fresh drinking water, keeping it in the coop will protect it from freezing – but always remember to check it several times a day to make sure it does not freeze. Adding a few ping pong balls to the drinking water helps prevent the water from freezing by moving around in the water preventing an ice layer from forming.
  • If they have a small pond to swim in, take empty gallon bottles and fill them halfway with ordinary kitchen salt. Put the lids on and let the bottles float around in the pond. This will also prevent the pond from freezing.
  • Provide protection from the wind. Place straw or hay on the ground where the windbreaks are.
  • Make sure your coop has windows or air vents. Keep these open a crack to let the moisture from their breathing outside. Make sure the vents are high up so that predators cannot get into the coop.
  • Provide warm to cool water in wide pools on warm sunny days for the ducks to swim and play in. Empty the pools every night to avoid waking up to a frozen pond.
  • Provide a windbreak for their pen.
  • Provide outdoor shelter.
  • Your coop should be constructed with treated wood to keep it warm and easy to clean.
  • You can use a barn as a coop and a pen, this will help protect against the elements and predators. Remember the straw or hay. You can even use wood shavings as bedding. A barn is a large space to keep warm, it will take a lot of bedding to keep the ducks comfortable. But a barn is ideal as their feet will be safe and warm and they will have more space to move around. There is also less chance of desperate predators getting in to kill and eat them.
  • Make absolutely sure your pen and coop are not accessible to starving predators.
  • Double their food rations. You can add peanuts, oatmeal, shredded cabbage, and cracked corn to their food for a tasty treat. You should add these to their nighttime feed every night. Always give them water at every feed as they need the water to swallow and digest the food. You can even warm these items or partially cook them to give the ducks a warm meal.
  • Remove the water sources every night. Water freezes affecting the temperature of the coop. it will also get slopped around causing the bedding to become wet and uncomfortably cold.
  • Continue using the same food in winter as in summer. They need nutritious pellets, greens, and grains. Mealworms are a favorite delight to ducks, so add some of those.
  • Place some floating snacks in the pond or pool, this has two advantages. One it helps prevent the water from freezing, and two it will give the ducks something fun to do.

Conclusion

Many years ago, I was called because a neighbor had a swimming pool. It had been hijacked by a flock of 30 to 40 wild ducks who were confused by a particularly long hot summer into thinking winter was still far off.

The ducks were too late setting off on their migratory path and found themselves in freezing conditions. They found the closest thing to a source of water they could find and settled in.

They would have starved or frozen to death if the homeowner had not taken such rapid action to help the ducks by calling a few of us local duck owners for help.

We each took as many ducks as we had space for until every duck had a roof over its head. We took them home, dried them off, treated their feet, and stuck them in the coop with the other ducks. We kept a close eye on the new ducks to make sure there was no fighting.

Well, there was no fighting. In fact, when summer came the wild ducks stayed put. They quickly became domesticated and when they should have taken off to migrate before the next winter set in, not one left.

I believe they felt safe enough to stay. We had built up trust with them and provided for their every need.

In much of nature, human intervention is not a good thing. We hand raise lion cubs and blame the lion when it attacks, kills, and eats a person. We keep boa constrictors and are shocked when they crush the owner’s child to death.

But there are many ways in which humans give mother nature a helping hand for the good of the animals. The ducks that were found in the swimming pool are an obvious illustration of humans doing a good thing to benefit the ducks who would have died.

Your ducks deserve nothing less than your undivided care and attention.

Successfully keeping ducks in winter is as simple as this:

  • Make sure they have a warm dry place to sleep.
  • Give them plenty of extra food.
  • Protect them from hungry, desperate predators.
  • Watch out for frostbite.
  • Monitor their health and take action immediately if you see any signs of them being cold.

Do your regular check-ups.

I hope this article will help you understand caring for ducks in winter, how to recognize that your ducks are in distress, and how to help them.

winter duck care Pinterest

The post How to Care for Your Ducks in the Winter appeared first on Modern Survival Online.


via Modern Survival Online https://ift.tt/hcVaSoB