Saturday, December 15, 2018

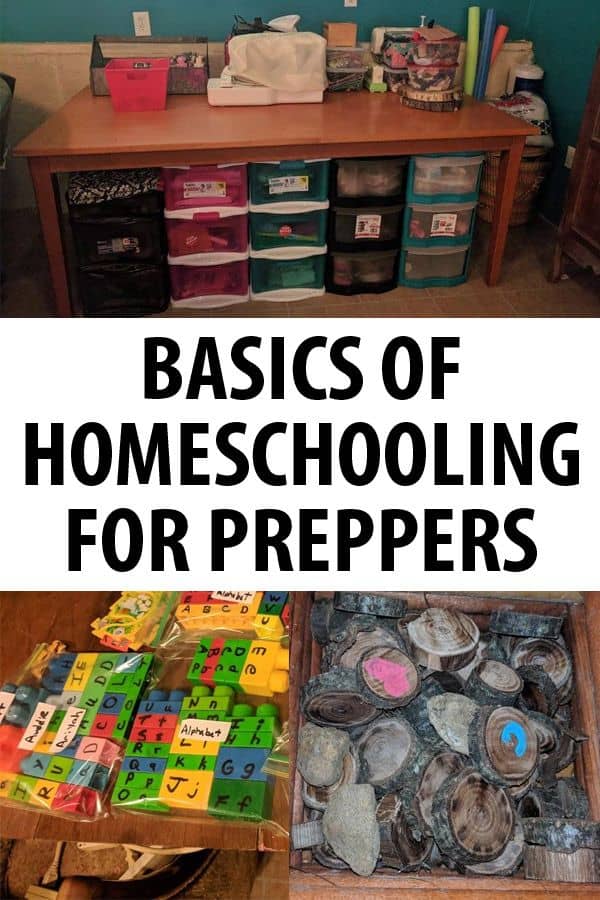
Basics of Homeschooling for Preppers

by Tara

The vast majority of preppers homeschool their children instead of sending them off each day to government school. In fact, there are now more American families (preppers or not) educating their children at home than any other time in the history of the republic.

Homeschooling is now legal in all 50 states, but the rules governing home education can vary somewhat widely by state. The first step in the homeschooling journey is to make sure you are following all state laws and completing the required local public school district forms and filing deadlines.

A Brief Overview of State Homeschooling Laws

• States with the most lenient homeschooling laws do not require any official notification with the local school district about a lack of intent to enroll a child when they become school age – but few states are this flexible. If a child who has been attending a public school district is removed to become educated at home, the school must be notified to prevent delinquency or potentially even child abuse, charges from being filed.

• The majority of states require notification of both an intend to not enroll or to remove a child from the government school system. Academic assessment and annual reporting policies still vary widely by state after the initial intent to homeschool is reported.

• Nearly all states have requirements regarding how many hours a child must be engaged in homeschooling activities each year. Exactly what constitutes home education hours is often left largely up to the parents, in some states.

• States with “Assessment with Exceptions” regulations are legally bound to present their child for annual academic assessments that are shared with the local school district. Some exceptions for children with disabilities are offered by some states.

• States with “Moderate Assessment” regulations still require academic achievement reviews during during the kindergarten through grade 12 years, but have varying policies about the ability to continue homeschooling if a child fails an assessment.

• States with “Stringent Assessment” regulations also require annual academic assessments but have the power to force parents to engage a specific type of curriculum and in educational intervention programs, as well.

• In many states, homeschool students can take advantage of programs that permit students in grades 7 through 12 to participate in a free dual credit K-12 and college course program (books and course fees are included in most states) either on campus or online, providing they meet the minimum academic scores that government school students are required to achieve.

• Homeschool students are permitted to participate in extracurricular activities and even take a specific number of classes at a government school, in many states.

How To Set Up A Homeschool ‘Classroom’

children playing with chickens

Prepper homeschooling parents have the awesome opportunity to infuse self-reliance skills into their child’s educational experience. Teaching children how to raise, butcher, preserve, and prepare livestock can be a math, science, history, health, and reading lesson all rolled into one.

You do not need a dedicated room to educate your children at home. Learning does not need to take place in a classroom setting, or even in a seat at a table. Homeschooling your children means you have the freedom to make learning the great adventure it should be – let nature, the barn, the garden, the garage, the kitchen, be your classroom.

That being said, a table and chairs can be handy for some types of work – even though sitting outside under a tree or curled up in a blanket by the fireplace, is also a great place to read and write in a journal. You can use a kitchen table to be the seat work area for your homeschool, or a patio table or picnic table during warm weather times of the year.

I firmly believe you can purchase, download, or make all the homeschooling educational resources you need cheaper than buying school clothes and filling the very detailed school supplies list handed out to parents of government school students before the beginning of each school year.

DIY Learning Resources For The Prepper Homeschool

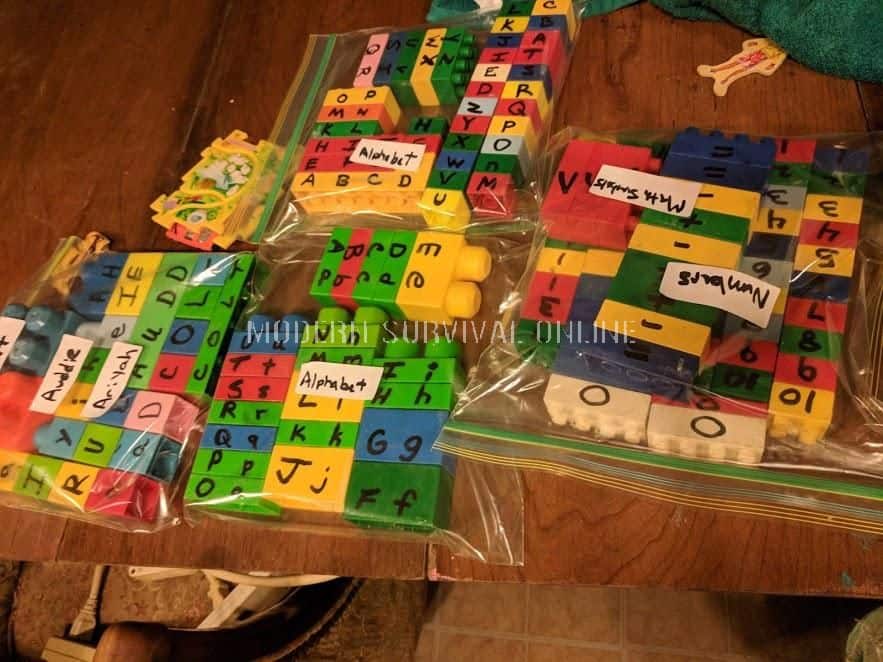
Children can learn to read, write, and spell without using pencils and paper for ever lesson. Chalk for outside use or on a chalkboard wall area created in the homeschool “classroom”, a wipe off board, and plastic building blocks with letters (and numbers for math) written on them can be used to teach spelling and vocabulary.

Plastic (or homemade wood blocks) are excellent learning manipulatives for teaching young children how to spell their names and to learn the alphabet.

leaning plastic blocks

You can also use natural materials to help teach math to your students. During a nature identification hike, have the children pick up sticks and/or stones that can be used as counting aids. The children can paint them as an art project, or as part of a learning how to identify and spell colors activity.

You can also use stones as letter and shapes learning aids by drawing the letters and shapes on them. You can also make story stones or wood slices. Draw or stamp symbols on them that relate to a story you are reading with the the children. Have each child reach in a sack and pull out the stone and retell the part of the story that relates to the image on the stone or wood slice as a comprehension activity.

wooden blocks

Using Nature As Part of The Prepper Homeschool Curriculum

Nature learning experiences can easily be taught to a multi-age group of homeschooled children by adapting what each child is engaged in during the activity that is centered around a singular or tri-fold academic concept. Designing a multi-age homeschooling curriculum is particularly helpful if you are homeschooling together with fellow preppers in your extended family or mutual assistance group.

Gardening may be one of the most valuable academic lessons you can incorporate into a prepper homeschool curriculum. The children can learn to grow seeds, transplant them, cultivate the plants, protect them from insects and predators, as well as how to harvest and preserve them.

Teach the children how to find their way in the woods, identify foraging material in each season, how to estimate distance, travel time, to read a map, and how to use what nature provides to find their way in the wilderness as part of their self-reliance focused academic studies.

Use a creek, lake, pond, or river on or near your survival homesteading retreat to teach children about native plants and wildlife, water safety skills, fishing, finding your own bait, flooding impact and safety, and hydraulic power as part of their science, language arts, and history curriculum.

Using Hunting And Firearms Training As Part of The Prepper Homeschool Curriculum

Teach the children how to handle weapons safely, how to make their own weapons, and how to shoot the weapons as part of their science, language arts, history, and even math, lessons. Older children who are mature enough could even learn how to help reload ammunition and to make a simple forge.

Using Woodworking And Construction Skills As Part of The Curriculum

Teach the children how to use both power and manual tools and how to build and repair solid, square, and level structures as part of the home education curriculum. You can (and should) also incorporate basic mechanics into the self-reliance curriculum.

All of these activities can be tailored to meet the required state academic standards for science, vocational, math, and language arts curriculum – as all of the suggested learning units above can as well.

In addition to creating your own learning unit, you can also find copious amounts of free and low cost academic units, worksheets, and lesson plans available online.

A simple Google or Pinterest search will lead you to many more great free and cheap resources that are not necessarily self-reliance and hands-on learning centered. The use of lapbooks, folder games, child-created flip notebooks, and dioramas are also highly engaging and fun ways to teach your child at home.

If you have any questions about setting up your prepper homeschool, please feel free to post them in the comments section below and I will do my best to offer help and guidance. Good luck on your home education journey and congratulations on making what will likely be one of the best parenting and prepping decisions you have ever made.

basics of homeschooling pin


via Modern Survival Online https://ift.tt/2Gv2Yv9

Friday, December 7, 2018

The Top 10 Handguns under 500 Bucks

by Charles

Handgunners today enjoy a market crowded with excellent options. Some writers and experts have dubbed the current era of firearms a second golden age at least so far as refinement, if not innovation is concerned. You cannot walk into a gun shop anywhere without tripping over stacks of handguns that are so good in so many ways we flat would not have believed it possible even 30 years ago.

Thanks to the increasing synthesis of social media for entertainment as well as advertising and other commercial purposes, it is easy to get caught up with the notion that highly customized, expensive or exotic foreign pistols are the only options for the discerning shooter. Seeing a stock gun adorn the feeds of anyone on social media is rarer and rarer.

But is that true? Are you hopelessly outmoded and outmatched if you do not spring and shell out a mortgage payment for a tricked-out handgun? Happily, absolutely not! In fact, there are more excellent, high-performance stock handguns to choose form than ever before, and what’s more, there are a slew of options under $500 that will serve you dependably and not bust your piggy bank.

A reliable handgun and plenty of practice turns out results that never go out of style. In this article we’ll be showcasing a brace of 10 great handguns that you can trust without spending a ton of cash. So grab your notepad and let’s get to the list!

Foreword

All of the handguns on this list are good, dependable handguns suitable for a variety of tasks with one hard requirement: they must all be solid enough to be relied on for self-defense, in keeping with the purpose of this site, which is to help you be prepared for whatever life throws at you.

So while they may have other attributes that make them better or worse for competitive shooting,  target shooting or some other activity, you can be assured that any gun on this list is reliable enough to bet your hide on when the chips are down, first and foremost. So no matter how good some other handguns are purported to be in the “budget” or entry level category, if you don’t see them on this list, you do not want to take your chances with them!

Below you’ll find fullsize pistols and compacts, revolvers and semi-autos, but the one thing they have in common is that they are an excellent bang for your buck. They are also all available new production, and were chosen for a consistent street price of $500 or less. You can get some truly excellent handguns used for less than $500, especially if you are willing to track down certain out of production models, but that is not keeping in the spirit of our list.

That’s all the preamble out of the way. Let’s get to the list!


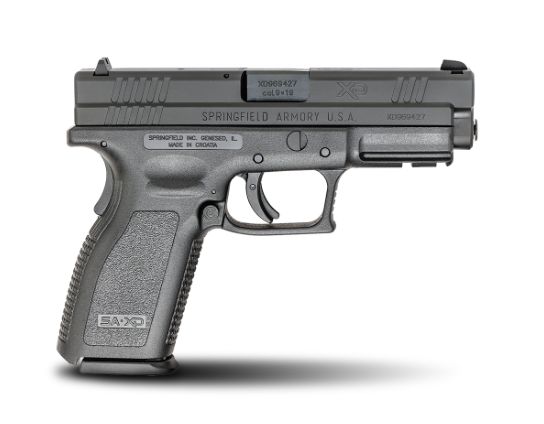
Springfield Armory XD 9 fullsize

Springfield Armory XD 9 Fullsize, 9mm Luger

The 3rd sister in the Great Striker-Fired Pistol Race of the early 2000’s, the XD has stuck around and developed a loyal following despite the best efforts of the Glock and M&P to completely supplant it. Springfield Armory’s premier polymer handgun is well known for its nice control layout, general reliability and good trigger.

Its standard loaded chamber and striker status indicators, trigger safety, and grip safety ala the 1911 have endeared the XD to fans of redundant passive safety systems. While the grip safety in particular is a love-or-leave-it feature, as long as shooters take care to maintain a full grip on the gun it is a non-issue.

The XD is a nice shooting pistol, and though not quite at the same level of quality as the Glock and M&P, the vast majority of prospective purchases will find it a dependable pistol, easy to shoot and very worthy of your hard-earned dollars.


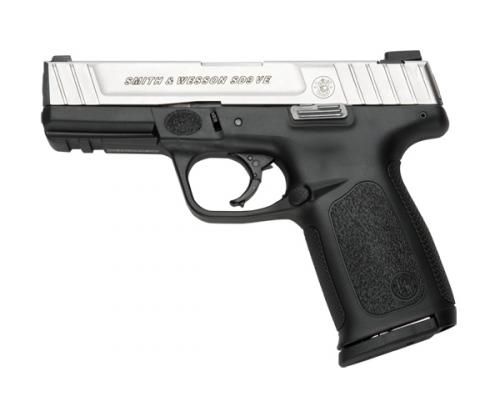
Smith and Wesson SD9VE

Smith & Wesson SD9VE, 9mm Luger

A direct descendant of S&W’s Glock rip-off, the Sigma, the SD9VE series guns have come into their own after that contentious copycatting incident eventually bore sweet fruit in the form of the M&P. Comparing the cruddy Sigma to the SD9VE will show the latter’s considerable refinement over that earlier polymer gun, refinement it has in spades.

The SD9VE is a no-frills striker-fired gun, but one that is reliable, durable and packed with plenty of smart features. The frame is aggressively textured on all sides, and also has matching texture “finger locators above the trigger guard on both sides to help the user remember, and keep, their finger outside the trigger guard when the pistol is in hand.

The standard 3-dot steel sights will present a familiar sight picture to new and beginning shooters alike, while the stainless slide is adorned with wide, but ample, serrations fore and aft, both furnishing shooters a sure grip no matter how they prefer to charge the slide, and also while conducting press checks.

Most importantly, the trigger is far, far improved over its clunky ancestor the Sigma, and the SD9VE is another surprisingly good shooting pistol made better for its (typically) under $400 price tag.


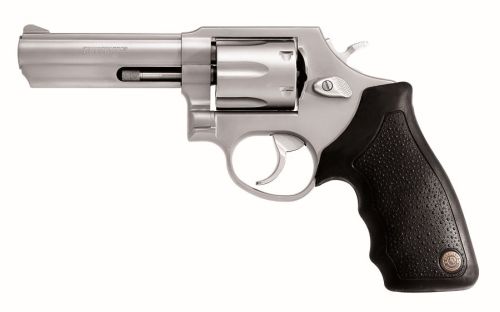
Taurus Model 65

Taurus Model 65, .357 Magnum

Sometimes you just need to get back to basics. If what you are hankering for is a potent, well-balanced, fullsize revolver, the Taurus Model 65 is just the ticket. Packing 6 rounds of the legendary .357 Magnum in a svelte medium frame, this revolver will satisfy your wheelgun jonesing.

This classic configuration is no throwback; it has all the features discerning revolver fans expect on the best of modern actions. A transfer bar safety, integral locking system and ergonomic rubber grip and a nice trigger, though not quite at the level of their inspired and legendary competitor Smith & Wesson.

This revolver can be loaded with barn-burning .357 Magnums for serious effectiveness, or loaded down with the more sedate .38 Special for those who like a little less blast and recoil. All around a great entry-level revolver: fine balance, packs a punch and a good trigger.


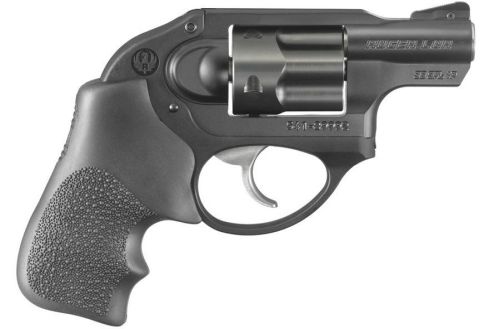
Ruger LCR, .38 Special

Ruger LCR, .38 Special

The second revolver on our list, only where the Taurus Model 65 is a fullsize powerhouse, the Ruger LCR is a flyweight concealment piece. But don’t be fooled; it is no pipsqueak! Firing +P .38 Special, this little five shot is snub nose is more than capable as a defensive piece.

Ruger has long made darned tough revolvers in all sizes and calibers. But before the advent of the LCR they all shared one character flaw: they are all heavy! Even the small SP101 was a tiny tank of a handgun, but the LCR has bucked that trademark for the better with its use of polymer and lightweight alloys. Weighing in at just 13 ½ ounces, you’d be forgiven for forgetting you were even carrying this airy revolver!

But the LCR is far more than just a lightweight last-ditch blaster. It has one of the best stock triggers on any production revolver from any manufacturer; smooth, virtually hitch-free and with a clean break. Combined with the better than average sights in its class the LCR is a pocket rocket, a snubbie that can be shot nearly as well as a fullsize revolver.

For concealed carry or backup purposes, the LCR .38 Special is tough to beat at any price.


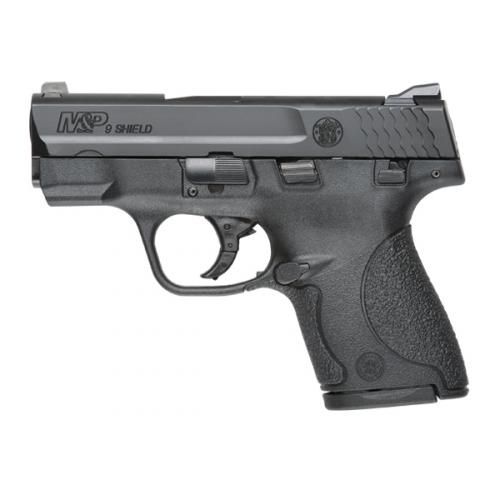
Smith & Wesson M&P9 Shield

Smith & Wesson M&P9 Shield, 9mm Luger

The baby brother in the M&P family, the Shield only gives up size to its larger siblings, not performance. Slimming down to a 7 or 8 shot single stack frame did nothing to dispossess the Shield of any of  the strong characteristics of the M&P line- good trigger, good control placement, rugged reliability- and adding also a manual thumb safety to the bargain.

Ideal for deep concealment or backup use, the Shield fits nearly in the palm of your hand, but handles and shoots like its fullsize brethren. Included are two magazines, one that fits flush in the frame to maximize concealment and another, extended magazine that allows one additional round and extends the grip a smidge. Besides giving you one backup magazine to carry off the bat, this setup also allows you to tailor the gun slightly to your carry position.

Dead tough, durable and a superb shooter, the Shield is a strong contender for the best shooting handgun on this list.


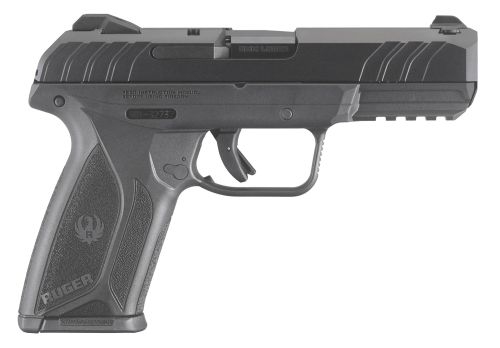
Ruger Security-9

Ruger Security-9, 9mm Luger

Ruger’s latest autoloader offering is a revival of their legendary Security livery last seen on the classic and beloved Security Six revolver. The Security-9 is about as far away from that pistol as it gets, though: a thoroughly modern polymer handgun packing 15 rounds of 9mm in a magazine, this new self-protection piece packs in lots of features at a jaw-dropping price.

The action is somewhat rare among semi-autos today. You’d be forgiven for thinking that the Security-9 is a striker fired gun, but it isn’t. Instead it is a single-action pistol with an internal hammer, ala its smaller cousin the LCP and F.N. Five-Seven. This provides a couple of perks: first, the trigger is a fair bit nicer than most competing striker-fired handguns. Second, it is much easier to charge the slide compared to a striker fired gun. This makes the Security-9 especially nice for those with less strength who may struggle with other semi-autos.

All of this is rounded out by nice sights with interchangeable colored inserts, full-length guide rails and an accessory rail that will fit nearly all lights or lasers. Even better, the Security-9 is available with an integrated Viridian laser sight and is still under $500. A tough pistol to beat by feature set, and all backed up by Ruger’s legendary customer care.

Beretta Tomcat Inox, .32 ACP

Sometimes it just has to fit in your pocket. If you need a truly tiny gun to ride where others can’t, and you don’t want to sacrifice quality, look no further than the mini but mighty Beretta Tomcat. This iconic .32 features the distinctive tip-up barrel of most Beretta small frame pistols that allows simple loading and verification of the chamber and a   corrosion resistant stainless finish that is classy and practical.

The Tomcat is a petite DA/SA gun that features a manual safety. Besides blocking the fire control, the safety also locks the slide for the ultimate assurance that even fully loaded this little pocket gun will behave itself and you can carry with total confidence, free from worry of any accidental discharge (so long as you don’t screw up).

Guns this size are never easy to shoot well, and the .32 ACP is not on anyone’s list of man-stoppers, but when one really needs tiny pistol for whatever reason the Tomcat is one ferocious feline.

Smith & Wesson Model 642 Airweight, .38 Special

Long the standard in double-action revolvers, with a proud history stretching back to before the 20th century, Smith & Wesson know wheelguns. Their 642 Airweight is no exception. This slim, slick .38 is a perfect example of a snubbie.

The 642 carries 5 rounds of .38 Special in a form factor that is just about as slender as you can make a revolver this size. Impeccably finished and fitted, the 642 is heir apparent to the legendary excellence that has see S&W endure well into the 21st century. The trigger is smooth, but a little heavy with some pronounced stacking near the end of travel, but it is very manageable, especially when shooting at typical distances where a handgun of this nature is likely to be employed.

Reliable to a fault and a joy to carry, the 642 is a perfect companion for those who want to carry a classic defensive gun on their travels.

Sig Sauer SP2022, 9mm Luger

Long viewed as the stepchild of the Sig Sauer pistol line, the SP2022 is actually an excellent DA/SA handgun in all aspects, one more than worthy of being venerated right alongside its classic P-Series peers. Way back in the late 1990’s, Sig, was one of the first major manufacturers to go “all-in” on turning out a modern take on a combat handgun rendered in polymer, this was the SP2009 and SP2340, in 9mm and .40 respectively.

The controls were instantly familiar to anyone who had user one of Sig’s P226’s or P220’s. The internals were different, but this new gun was light, and it could shoot. It also featured a (proprietary) light rail on the dustcover and interchangeable grip shells for fitting different shooters. Fast forward a decade and change and the SP2009 has evolved slightly into the SP2022: same great concept, only with a modern accessory rail.

The SP2022 is a dynamite traditional double action pistol: ultra-reliable, a super trigger on any DA/SA, shockingly accurate and very easy to carry thanks to its light weight. This has been a sleeper for Sig for a long, long time, and only in the past several years have they started to catch on in America. Europe, for once, was on board with these guns for some time since.

If you want A-tier reliability and durability at a budget price, this is your pistol.

Ruger 22/45 Tactical, .22 LR

Ruger’s 3rd entry on our list, and a special purpose handgun without peer. Most shooter’s see Big Red’s classic rimfires as training, plinking and target shooting guns, but for those who have difficulty running larger, service caliber pistols or those who need to stay really, realllly, quiet, they can work wonders.

Couple reasons why this is so. First, for anyone, the 22/45’s handle and shoot much like a similarly sized “full power” pistol. Form factor, handling and control layout is very much like it would be on another handgun its size. Second, for those who may struggle with another semi-auto, loading the thin magazines with an integrated follower peg and charging the bolt is far simpler than other pistols. Third, for Sneaky Pete-types, the threaded muzzle, under barrel and receiver top rail allow mounting of silencers, optics and lasers or flashlights, same as any “real” pistol.

What’s more and most important, the 22/45’s are renowned for their unflinching reliability with almost any kind of .22 ammo. That is no mean feat, as owners of little rimfires will attest. Combine this dependability and feature set with high-quality .22 LR loads and you have a rimfire that can serve as a primary defensive gun for certain applications.

Underestimate this one at your own peril; this .22 has the genes of bigger, meaner guns.

Conclusion

You don’t have to spend a thousand bucks or more to get a quality defensive handgun in this day and time. You don’t even have to go perusing the bargain bin or pre-owned case at the local gun shop. Plenty of manufacturers are turning out great guns at fair and modest prices, ones that are suitable for defense and a whole lot more.

If you are on a tight budget, or just don’t like the notion of dropping $800 large on a pistol, give this list a look and you are sure to find a pistol to fit your preferences and purpose.

top handguns under 500 bucks


via Modern Survival Online https://ift.tt/2BWHL96

Thursday, December 6, 2018

Your USB Serial Adapter Just Became a SDR

To say that the RTL-SDR project was revolutionary might be something of an understatement. Taking a cheap little USB gadget and exploring the radio spectrum from the tens of megahertz up to into gigahertz frequencies with the addition of nothing more than some open source tools may go down as one of the greatest hacks of the decade. But even in the era of RTL-SDR, what [Ted Yapo] has manged to pull off is still pretty incredible.

With a Python script, a length of wire attached to the TX pin, and a mastery of the electron that we mere mortals can only hope to achieve, [Ted] has demonstrated using a common USB to serial adapter as a SDR transmitter. That’s right, using the cheap little UART adapter you’ve almost certainly got sitting in your parts bin right now and his software, you can transmit in the low megahertz frequencies and even up into VHF with some trickery. The project is still very much experimental, and though this may be the first time, we’re willing to bet this isn’t the last time you’ll be hearing about it.

The basic idea is that when sending certain characters over the UART serial line, they can combine with the start and stop bits to produce a square wave burst at half the baud rate. [Ted] found that sending a string of 0x55 at 19200 baud would generate a continuous square wave at 9600 Hz, and if he turned the baud rate all the way up to 2,000,000 where these USB adapters top out, that signal was transmitted at 1 MHz, right in the middle of the AM dial.

A neat trick to be sure, but alone not terribly useful. The next step was to modulate that signal by sending different characters over UART. [Ted] explains at great length his experiments with multi-level quantization and delta-sigma schemes, and each step of the way shows the improvement of the transmitted audio signal. Ultimately he comes up with a modulation scheme that produces a impressively clean signal, all things considered.

This alone is impressive, but [Ted] isn’t done yet. He realized that this method of transmission was generating some strong frequency harmonics which extended far beyond the theoretical maximum 1 MHz frequency of his UART SDR. In his experimentation he found he was able to pick up a signal from all the way out to 151 MHz, though it was too poor to be of any practical use. Dialing back the expectations a bit, he was able to successfully control a cheap 27 MHz RC toy using the 43rd harmonic of a 631 kHz signal at a range of about 10 feet with a FT232RL adapter, which he notes produces the cleanest signals in his testing.

[Ted] is still working on making transmissions cleaner and stronger by adding filters and amplifiers, but these early accomplishments are already very promising. His work reminds us of a low frequency version of the USB to VGA adapter turned GHz SDR transmitter, and we’re very eager to see where it goes from here.


via Radio Hacks – Hackaday https://ift.tt/2E1lKHk

Monday, December 3, 2018

Putting That Airplane On The Map – Live And With Python

Mankind’s fascination with airplanes is unbroken. Whether you’re outside with your camera, getting an actual glimpse of the aircraft, or sitting at home with your RTL-SDR dongle and have a look at them from a distance, tracking them is a fun pastime activity. Provided, of course, that you are living close by an airport or in an area with high enough air traffic. If not, well there’s always real-time tracking online to fall back to, and as [geomatics] will show you, you can build your own live flight tracking system with a few lines of Python.

As it’s usually the case with Python, a lot of functionality is implemented and readily available from external modules, which lets you focus on the actual application without having to worry too much about the details. Similarly, plenty of data can be requested from all sorts of publicly accessible APIs nowadays. If you are looking for a simple-enough example to get into both subjects with a real-world application, [geomatics]’ flight tracker uses cartopy to create a map using Open Street Map data, and retrieves the flight information from ADS-B Exchange‘s public API.

We have seen ADS-B Exchange mentioned a few times before, for example with this ESP8266 based plane spotter and its successor. And if you’re more curious about the air traffic in your direct surroundings, it’s probably time for a DVB USB dongle.


via Radio Hacks – Hackaday https://ift.tt/2Pi5unl

Top 7 EDC Mistakes to Avoid

by Charles

EDC is more than just an acronym for a collection of stuff you choose to carry around; EDC is now shorthand for a lifestyle choice, one in which a selection of carefully chosen equipment is called on to solve anticipated problems in your day-to-day reality.

EDC loadouts can range from bare-bones minimalist tools, to a full complement of equipment carried covertly, like a pistol, extra ammo, medical supplies, escape tools and more. There is no hard and fast “correct” or “true” EDC solution for all people, in all places, and all times. This uniqueness is likely what plays a part in the enjoyment of sharing and reviewing “pocket dumps.” Viewing someone’s chosen EDC loadout gives you a glimpse into their personality, problems and rationale for solving those problems.

But conversely to the “no one true way” caveat above there are definitely things you should not do or make a part of your EDC. These pitfalls are not always obvious to the uninitiated, and furthermore sometimes even a seasoned practitioner may overlook it or just plain be ignorant of its importance. After all, we are all victims of our own biases.

The List

Below you will find a list of EDC mistakes that you should be on guard against. If you are making one of these mistakes, fix it. If you aren’t, take care that you do not make them in the future. Complacency is overwhelmingly responsible for lulling people into a completely false sense of security. Don’t let it creep up on you.

Of course, some of you readers might find yourselves in a position where one of these “mistakes” may actually be detrimental or even harmful in your locale or according to your specific situation. I have written these guidelines with your average Joe Public civilian suburbia-dweller in mind who carries and lives in a more or less permissive environment. Your environment may be different, or your daily job and tasking may see you need to fly in the face of some of these recommendations.

If that describes you, don’t get wrapped around the axle; I’m not calling you out personally. Use your head, as always, and review this list with a grain of salt. That’s enough chattering, let’s get to the good part.

men walking

Mistake #1: Not Always Carrying Your EDC Equipment

This is overwhelmingly the biggest crime committed by people proclaiming they want to be “ready.” They simply don’t always, always carry their tools with them! And I am not just talking about a pistol or other weapon (though that is a mistake in and of itself), I am talking about any other tools and life support equipment that is normally a part of your EDC.

Think it through: you have carefully curated and selected items that you have deemed valuable enough to always keep on your person, then you simply choose to not carry them. Baffling! From pocket knives and multi-tools to cordage and escape tools, these items should be carried constantly, only omitted from your personage if entering an area where their detection or discovery could land you in some seriously hot legal broth.

One of the biggest classes of offenders in this category is pistol packers and people who carry basic medical or trauma supplies on them. Often you’ll hear them admit that they carry their pistol “when they think they need it” or leave their first-aid behind because they “aren’t going out far/long.” Inconceivable!

If you knew you’d need the gun when running to Wal-Mart you really shouldn’t go in the first place. Same thing with your med supplies. You are carrying in the first place because you may need them, and “may” implies a certain amount of uncertainty. Come on, folks! Carry your tools, no exceptions!

You may add or subtract from your loadout for any number of reasons, but you had better make sure they are good reasons.

soldiers

Mistake #2: Too Many Tells / Not Blending In

I’m not here to give you a class on taste, fashion or anything else. I am here to admonish you to clean up your image for the cause. I don’t mean get a haircut and wash your face, I’m not your dad (though you should take care of your appearance!), I mean to say you should eliminate any outstanding tip-offs or “tells”  that could inform an observer that you are either armed (gun or knife) or are of the “self-sufficient” persuasion.

Things like obviously pro-2nd Amendment apparel, morale patches, footwear or attire that is military in appearance (5.11, Vertx, BDU’s etc.) should be avoided. If your EDC bag, should you carry one, is overtly tactified in appearance or covered with PALS webbing, etc. consider changing it.

It is easy to think it is no big deal, or people either don’t care or don’t pay attention, but I can assure you that the wrong people are paying attention, and you don’t want them marking you as a potential source of free weapon and other goodies. Even if you are not carrying any weapons, the idea that you are can cause you serious problems. Remember: perception is reality.

At the other end of the scale, detection by good guys like cops or fellow citizens, especially when carrying a weapon can lead to embarrassment at best or arrest at worst. Don’t forget that may apply even for knives and even less-lethal options like pepper spray also!

Save the pride and fandom for training days and casual wear among friends and like minded people. Out in the world, you don’t want to look like Timmy Too-Tactical. Low profile and unremarkable is always best. Low profile does not mean “gray man.” Where most people go wrong with this now overused concept is people simply dress plain and drab with no attention paid to the environment around them.

Look at the typical dress of the people around you: how are they dressed? Conservative? Flashy? Colors? Jerseys, logos, branding, etc. Go for that to blend in. Dressing in gray, tan and black does not guarantee a low profile, nor does avoiding bright colored packs or other luggage. The idea is to mimic those around you.

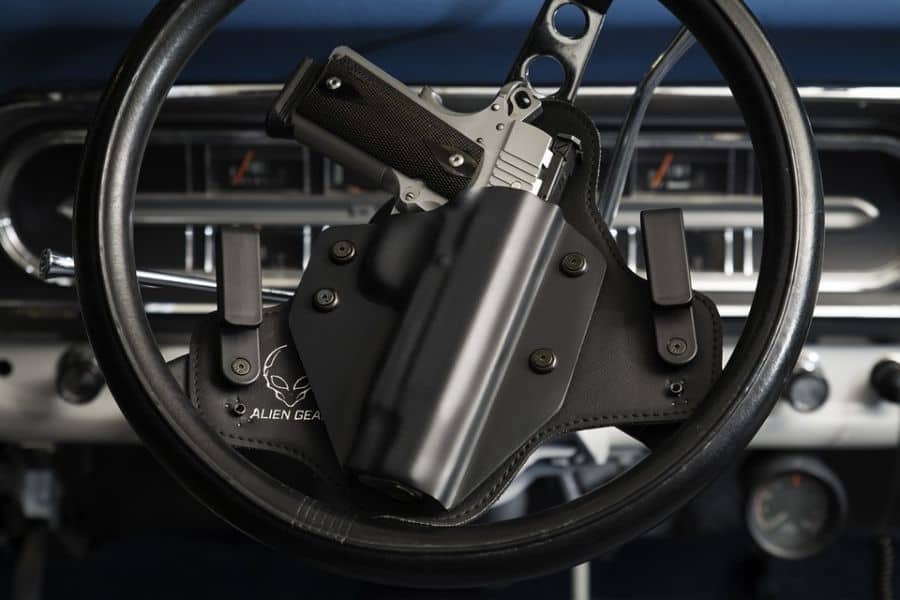
holster

Mistake #3: Allowing Weapons to Print or Remain Visible

Like #2 above, you never, ever want to tip you hand that you are armed. It is good procedure, and may also be a legal requirement. Covering a gun with a piece of clothing while allowing a bulge or obvious outline of the gun to remain visible is beyond suboptimal. You might as well open-carry. You aren’t fooling anyone with what you have under there, and if all you are worried about is doing the bare minimum then why are you carrying in the first place?

Pocket knives are huge offenders in this category. Who out there carries a pocket knife with a clip on it? Yeah, that clip is often an obvious tell that you have a big, folding crew-served knife in your pocket. You know what kind of person typically carries a knife like that? You got it. Stop advertising. Hide the clip or select a different mode of carry.

Beyond what is often a legal requirement in some states and locales (concealed means concealed, not just covered) it is very, very poor procedure as a civilian to tip your hand as to what you are armed with to any potential adversary. Don’t fool yourself into thinking it is a deterrent. It isn’t and if it was cops would not get attacked.

Letting a bad guy know you are armed tells him two things: I can get a weapon there and I should keep an eye on this guy. Don’t kid yourself, your attacker may be much more comfortable and proficient with violence than you are. They may well not be the least bit afraid of your gun or knife, and may decide to prove it to you by taking yours as their opening move in an attack.

The element of surprise is an enormous advantage when you have been targeted by an attacker. Don’t throw it away over lazily dressing yourself, a Devil-may-care attitude about the visibility of weapons or a misguided belief they are a deterrent somehow. Hide your tools, and if you are worried that you won’t be able to draw in time then you need a better carry location, a better holster setup, more practice or all three.

There is also a certain ethical consideration here if you are moving around in public. When it came to guns and weapons, growing up I was always taught, “don’t scare the horses.” Meaning I should endeavor not to startle or frighten anyone on account of my gun, even if I have a right to have it on me and in the open where anyone can see it. Plenty of people will react adversely to the presence of a gun or large knife on the hip of someone not in uniform. Consider that before you open carry or carelessly disregard printing.

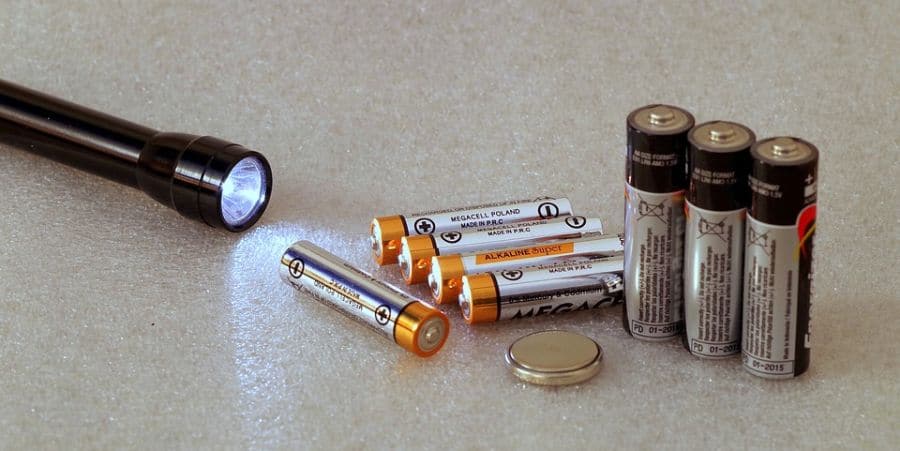
batteries

Mistake #4: Not Maintaining Your Tools

News flash: nothing lasts forever. Even with care, things will still wear out, but you can be assured that anything will wear out faster when ignored and neglected. Items you carry on you regularly will be subjected to quite a bit of wear and tear, certainly more than you are probably thinking.

Knives of course must be sharpened, lest they dull to near uselessness. Any metal items must be lubricated or refinished to assure smooth function and corrosion resistance. Wood will benefit from occasional treatment, leather will need regular nourishment with special oil or lotion to maintain its suppleness or form and fabrics need cleaning to help prevent abrasion and fraying.

It is easy to do when you EDC the same things constantly. You’ll come home and immediately de-ass your pockets and pouches of all your accoutrement, in the same place, in the same way (if you are at all like me):pocket knife, wallet, keys, phone, lighter, flashlight, spare mag pouch, pistol, medkit and finally, ahh, belt. Then it will all just sit there until the next time you need it. Wash, rinse, repeat ad nauseum and pretty soon 6 months have gone by and not a bit of maintenance on any of your gear. For shame!

It is remarkable how little care folks will give life-saving tools like knives and even firearms. What is even more remarkable is that most good gear will continue to perform under such neglect. But even your lesser gear needs care also to ensure it will both perform and last you a while. Heck, even your belt needs a little care.

The tools you carry will be subjected to dings, dents, rubbing, grit abrasion, heat, cold, moisture and salts (from your sweaty, sweaty body) that all serve to accelerate wear, which leads to a failure point. Even simple wipe-downs, lubrication (or other treatment, if required and depending on materials) and inspection can vastly prolong the life of your equipment and keep it operating at 100% effectiveness.

Guns should be oiled and free of dust bunnies. They can and will malfunction without care.  Knives should be kept shaving sharp, or carry a support blade to handle mundane chores. You may need to cut a seatbelt off in a hurry, or open up a mugger.

Plus, and perhaps it is just my imagination, but I can tell the difference when my tools have been maintained versus when they have been neglected. Everything works a little better. Don’t stake your life or limb on ill-maintained equipment. Create a schedule for routine maintenance based on your environment, what you put your gear through regularly and how much care it needs to begin with. Keep it clean, keep it oiled, keep it close!

Mistake #5: Not Practicing With Your EDC Gear

To be fair, some things don’t require much practice. Your fancy bottle opener on your keychain or your lighter for instance. But other things you carry daily, like your pistol, medical supplies and escape tools are only worthwhile in conjunction with some very finely practiced skillsets. If you don’t have the skills or are badly out of practice, they could be little more than good luck charms.

Having the tool does not necessarily mean you have the capability. Make sure you can utilize your goods to best effect by practicing with them in variety of scenarios. This is not just to refine your use of them, but also an opportunity to see how far a tool can go before it fails.

Will that paracord really hold 500 lbs a strand? How far can I make an accurate shot with my little carry gun? How cold can my lighter get before it won’t spark reliably? How rapidly can I access my med gear, and do it with either hand? And so on and so forth.

A real crisis is not the time to test yourself or your gear in extremis. And before you trust to the rabbit’s foot, remember that it did not help the rabbit! No one else is coming. No one else will save you. It is up to you. No exceptions. Be prepared!

boxes

Mistake #6: Carrying Too Much

This is a fine line, and follows closely with #2 above. We carry what we do to be better prepared for curveballs and tasks we expect to encounter. It is easy to run away with that train of thought and pretty soon you are cramming pockets full of stuff, adding pouches  to you belt and, soon, you’ll be wearing cargo pants or shorts (gasp!) bulging with gear.

I’m not saying this is not valid or that it is not a necessity for you, only that for most they are likely trying to replace skill with gear, or are definitely beyond prudence on equipment selection. Your on-body EDC gear should enhance your capability and be there in case of serious emergency, not cover every imaginable contingency.

Remember, you should have your go-bag or BOB in your vehicle in case things really go pear-shaped; you needn’t try to fit the contents of your sustainment system on your body and in your pockets most of the time. Proponents of “gypsy carry” will say they have taken the admonishment of “be prepared” to its logical zenith and are simply keeping the most vital gear ready to use at a moment’s notice.

I would say that attracting the wrong kind of attention is a bigger risk than being caught out by not carrying an entire toolbox and half your BOB in your pockets when you go grocery shopping or head to the movies.

iphone

Mistake #7: Not Making the Most of Your Smartphone

It is currently popular among some sectors of the preparedness and self-sufficiency “community” to deride the smart phone as a time-wasting distraction at best or a crutch that erodes and weakens other skills by way of its near-omnipotent suite of functionality. I think both opinions miss the mark,

Consider the smartphone for what it is: essentially a miracle machine akin to the tricorder from Star Trek! It can handle communications of all kinds, take photos, act as a compass, level and map suite, store a library’s worth of useful texts and other information, control drones, has a built in flashlight and so much more. So long as it has power…

To not take advantage of all this is simply being anachronistic. The smart phone is a miraculous device, and offers so much while asking so little. Keep it charged, keep a backup battery handy, and make use of it! To proclaim its reliance on power as a deal-breaker is short-sighted. To claim that its reliance on a incredibly complex network in order to provide many of its functions is somehow a disqualifier for a proper readiness tool is baffling.

Of course it relies on a very high technological base to function at full capacity, and many disasters may disrupt, degrade or destroy that base, but not all, certainly not even most. Like any other tool, you maximize its perks while minimizing its flaws. I say you’d be a fool to not take full advantage of the smart phone. Load that thing up with useful guides, cram files of your own marked up maps and notes in there. Make use of its ability to discreetly and remotely control various other parts of your life. Don’t forget its light function.

They are too good to put in the corner as a crutch.

Conclusion

There you have it. The most common, egregious and avoidable mistakes people make with their EDC kit. EDC is a lifestyle choice, but falling into these common pitfalls is your choice. Keep your head on straight, step your game up and strive for consistency and excellence. Nothing else is worth it. Until next time!

edc mistakes pin


via Modern Survival Online https://ift.tt/2DZyeiE

Saturday, December 1, 2018

Try These Shotgun Drills on Your Next Range Day

by Charles

My readers know that I am a proponent of shotguns, so long as one understands their limitations and trains to mitigate them. One of the biggest general limitations compared to other types of firearm used for self defense is the simple fact that your average shotgun demands more thought and engagement from the shooter.

Simply put, you have a lot more to consider, practice and do to run an average shotgun well! Do you use shot, slugs or both? Can you transition speedily from one shell type to another if the situation calls on for it, or do you stoke the gun with only one type exclusively and leave it alone? If using shot, how does a particular brand pattern in your gun? Does it shoot to the sights? Have you zeroed your sights for slugs if you are using them? Have you practiced topping off the gun quickly when completely empty, and with a few shells left?

Lots to do and practice if you want to begin your journey along the path to mastery with a scattergun. Sure, you can emphasize lowest common denominator techniques and still emerge victorious in a confrontation, but that rarely an acceptable moral choice when proficiency is what you should strive to attain.

In today’s article, we’ll give you a few pointers and drills to help you do exactly that. With a lot of sweat and a little blood, you’ll be running your shotgun better than you ever have.

Foreword

You are not here because you are a lowest common denominator shooter: you are here because you have made the choice to take ultimate responsibility for yourself and for others under your charge, and want to constantly grow and improve your skills. If you have chosen a shotgun as your defensive or SHTF readiness gun, you will need to flex your muscles and learn to run it to the best of your ability.

Concerning the manual of arms, you give up a fair bit of simplicity to take advantage of a shotgun’s principal strengths, namely extraordinary effectiveness against flesh and blood targets and a high degree of versatility when using different shells.

This guide will cover primarily tube fed shotguns, both semi-auto and pump action guns. If you use a detachable magazine fed gun, or break action gun, you’ll need to adapt your loading and unloading procedures a little bit to make some drills and techniques work. Any shooting drills will obviously be the same.

Also keep in mind that some more advanced procedures may vary in their exact steps due to differences in action among shotguns. For instance, Some Ithaca shotguns eject through the bottom of the receiver through the same opening you feed the magazine tube. Thusly you will not be loading the chamber directly through there with the bolt to the rear! You’d need to simply load the magazine tube as normal, quickly chamber a round, then resume loading the tube to fill the gun up.

I will address the differences for the most common actions where applicable, but I am not trying to cover all makes and models of shotgun. Luckily many of them are quite similar.

In the next section, I will cover a few tips, tricks and expert bits of wisdom you should make use of to step up your scattergun skills. After that we’ll dive right into the drills.

Maverick Model 88

Tips, Tricks and Advice

  • Most shotguns are not drop safe. I do not advise you keep a defensive shotgun in place with the chamber loaded unless the gun is kept flat on the floor; the risk of an accidental discharge should the gun be knocked over is too great. Instead, keep the chamber empty and magazine tube filled; you can chamber a round as soon as you lay hands on the gun with little to no loss in speed. (See the section on “cruiser ready” and “cruiser safe” below.)
  • Take pains to keep on hand for defense only ammunition you have patterned/zeroed in your Even shotguns among the same batch of the same make and model are individuals, and will almost always show preference or differing results with one brand and type of load over another. This is vitally important with shotguns featuring only bead sights, as you must adjust your holds.
  • One of the biggest weaknesses of any shotgun is capacity, with only very long or box fed models holding more than 7 or 8 at most, fully loaded. Make sure you have extra ammo close at hand by utilizing an onboard shotshell carrier. This could be a receiver or stock mounted unit, and some can carry a single or pair of additional rounds on the forend of a semi-auto. This means you can grab the gun even in your underwear and have at least a couple of reloads at your disposal.
    • Note: While most any gunfight or shooting you’ll get into as a civilian will be over and decided in 2 to 3 rounds, statistically, you should not count on that for your fight. If you wanted to, you statistically do not need the gun at all.
  • Pump shotguns are vulnerable to user-induced malfunctions, meaning the shooter fails to run the pump briskly all the way to the rear then all the way forward with some force behind it. This will result in one of several kinds of malfunction. Make sure you always run a pump briskly!
  • Semi-auto shotguns will be more or less ammo finicky depending on the manufacturer and type. Some will only run with full-power loads, or high-brass hulls. Others can run most loads but require gas-system adjustment. Consult your manual for more details before buying a bunch of ammo to try.

Cruiser Ready and Cruiser Safe

As mentioned above, just about the only time you will want your shotgun to have a round in the chamber is when it is in your hands and ready for work. The reason is that shotguns as a rule are not drop safe. Turns out there is plenty of wisdom in the old hunter’s adage that you unload the chamber before setting the gun down to climb a fence, tree or whatever.

If you have your shotgun lying flat on the floor, or ensconced in a rack or something similar where you know it will not be knocked over, that might be an exception. Otherwise, keep that chamber empty! The best way to maintain this status while also keeping the shottie ready to use almost instantly is by keeping the magazine tube full (or nearly full) and the action closed. Your choice comes in whether or not you want the action locked if you are using a pump action, or the bolt ready to receive a shell on a semi.

If you keep the action unlocked, meaning you would simply grip the forend and run it to chamber a round, this is known as “cruiser ready”: loaded magazine, empty chamber, action unlocked. If you keep the action locked, meaning you need to press the forend release/action release (on a pump or semi respectively) and simultaneously run the pump/charging handle to chamber a round, this is known as “cruiser safe”.

Which is best, and what’s with the names? Simply the terms were coined from police work, and the once iconic police shotgun. Being typically mounted in vertical racks or left bouncing around in trunks, it was a bad, bad idea to keep a round chambered in a patrol shotgun for all the reasons mentioned. So instead savvy patrolmen (or hand-wringing liability committee-types) decreed that the guns should remain loaded for ready use, but without rounds in the chamber.

Cruiser ready became the default mode of carry, while cruiser safe was reserved for guns that would be jolting around in the trunks of the patrol car with all the other cop gear. A pump gun in cruiser ready status was vulnerable to having the forend partially cycled to the rear, leading to a shotshell being released on to the elevator and just sort of hanging out in the receiver; not the best status for a sure and reliable load, and so cruiser safe, action locked, was the norm for shotguns kept in cases, trunks and other situations where the gun may be manipulated incidentally by outside forces.

Drills and Skills

This next section will give you plenty to do the next time you are heading to the range, and some of these drills can be performed when doing dry-fire practice, where indicated.

Pattern Shot / Zero Slugs

Not so much a drill as a pre-requisite for skillful and sure employment of your shotgun. The process is simple:

Patterning Shot: Starting at very close range, about 5 yards or so, you’ll set up an approximately man-size silhouette target with a clearly defined aiming point on the center-of-mass.  Bench the gun to assure a consistent hold and fire one round. Then retrieve your target, outlining the outermost holes from the pellets with marker. Make a small note by this ring of the range it was fired at.

Now move back another 3 to 5 yards and repeat the process, outlining the perimeter of the new pattern until you notice pellets starting to strike off the silhouette. This will indicate the outer edge of your “safe” engagement range with your chosen load, meaning what distance you can expect pellets to start missing a target in the open even with a perfect shot. Keep pushing the distance back to 25 yards (the “traditional” max effective range of standard buckshot) or even beyond to 35 yards or so (well within the capabilities of flight-control buckshot, tight chokes or improved barrels).

Zeroing Slugs: If you are reasonably sure of your sights, start with the target at 25 yards. Closer if you are unsure. Bench the gun (use a rolled towel or similar between you and the butt; this is going to give you a pounding) and fire at least 2 well-aimed shots. Examine your target and adjust your sights (if possible) accordingly to reconcile your POA/POI. Then fire again and re-check.

Once you look good at 25 yards, move the target back to 35 yards or jump straight back to 50 yards if you are feeling confident and repeat the process until you are zeroed. Now you have a choice: some folks with good sights or optics prefer to zero for slugs at 100 yards, while others prefer a 50 yard zero. The choice is yours, but may boil down to the adjustability of your sighting solution and anticipated use of the gun. Dedicated sluggers will probably prefer a 100 yard zero.

At any rate, once zeroed, start shooting for groups with the same POA at various ranges, near to far, at least out to 100 yards. Note the drop of your chosen slugs, and pay close attention to its accuracy potential. This is important information if you must call on your scattergun to make a low-percentage shot.

Huzzah! Now you are zeroed and have confirmed your patterns!

Shoot and Load Drill

Very simply, the adage among scattergun virtuosos is “if you ain’t shooting it, you’d better be loading it.” This advice stems from one of the shotgun’s universal weaknesses: low capacity. Low capacity plus slow, cumbersome loading of single rounds equals a primary weapon with low endurance in a firefight. To mitigate this, pro shotgunners of all disciplines make it a habit to top off their shotguns immediately after firing as soon as there is an opportunity to do so.

This drill can be performed dry so long as you use dummy rounds, preferably weighted metal snap-caps or exact weight and feel “action proving” dummies. DO NOT PRACTICE LOAD LIVE SHOTSHELLS ANYWHERE BUT AN APPROVED FIRING RANGE.

The drill is performed as follows: As soon as you fire on a target, follow-through and decide your engagement was successful, start reloading the magazine tube, drawing shells from whatever source of ammo you have set up, e.g. belt, side-saddle, stock caddy, vest pouches or loops, etc. Stay in “fight mode” for the duration, load with speed and deliberation. Don’t treat this as down time. The sooner the gun is refilled the sooner you are able to dole out heavy medicine.

A good variation on the drill looks like this:

  1. Either decide or have a training partner/coach call out a number. This is the number of shells you will fire on a target, and the fire command in this simple drill.
  2. Fire when the command is heard.
  3. As soon as you have engaged and assessed your effect on target reload the gun as per above.
  4. The objective is to keep the gun topped off.

Increase the difficulty by the following means:

  • Have your coach decrease the time interval between fire commands.
  • Have your coach call out a varying number of shots with each fire command. Try to keep the gun from going empty.
  • Attempt the drill on multiple targets, with your coach calling out a target after the number of shots, i.e. “2, Blue” or “3, Yellow.”

Now, that statement above “as soon as there is an opportunity to do so” is an opportunity itself to “what if” scenarios to Hell and back. So we won’t. Be smart: if you don’t shoot the gun dry, don’t immediately come off a baddie you just filled up with shot and start stuffing shells into the tube- he may need seconds. If the gun goes dry, i.e. a “click” instead of a “boom” then either transition to your pistol or immediately conduct an emergency reload. Which brings us to…

Emergency Reload Drill

Shotguns, especially shotguns with very limited capacity of 4 or 5 rounds will be shot dry pretty regularly. Even guns with long tubes will run out when least desirable. To counteract their constant hunger for fresh shells, we practice emergency reloads.

An emergency reload, sometimes called a speed reload, is performed when the gun goes empty, usually indicated by an attempt to fire on an empty chamber. This is often accompanied by a “click” of a hammer falling on an empty chamber in manually operated shotguns and a “dead” or mushy trigger on a semi-auto when the bolt locks to the rear on an empty gun.

Either way, the solution is the same: immediately stoke the chamber with a new shell and then re-engage or continue loading the magazine as appropriate.

This drill at its simplest can be performed with an empty gun, but you’ll get the most value doing it when actually firing live rounds then executing an emergency reload. By default, I like to start with one round in the chamber, then perform the emergency reload. Steps and variation below:

  1. Upon decision to fire or hearing fire command from coach, engage target.
  2. Important: Cycle gun if necessary, then attempt to fire again. (We are ingraining this as a reaction, not cutting the corner on the “empty” trigger pull because we know the gun is empty.
  3. Upon perceiving gun is empty, drop shell into action through ejection port:
    1. Pump action – Cycle forend all the way to rear, retrieve shell with support hand, drop shell into action, cycle forend forward.
    2. Semi-auto – Drop shell into action, actuate bolt release.
  4. Once chamber is reloaded, either:
    1. Re-engage target with immediate follow-on shot, or…
    2. Immediately transition to loading magazine tube to fully reload gun.

Some ways to make this drill more challenging:

  • Have your coach load your shotgun with an unknown number of rounds. Emergency reload when the gun runs dry.
  • Have your coach call out an immediate “threat” command for re-engagement when topping off the gun. This will necessitate you hurry up and load then fire, or drop what you are doing if loading the tube to engage a new target. This will put you under pressure, test your reflexes, gunhandling and ammo management in addition.

Your positioning of the shotgun matters when loading through the ejection port. Some guys like to roll the gun slightly so the ejection port faces up, and then they drop the shell in from above before righting the gun and running the action to chamber the shell. Others like the “under and in” method by which the shotgun is kept in the shoulder and the support hand brings the shell under the receiver, curling up to drop it in through the ejection port. The later technique is sometimes preferred by AK users due to its similarity with one technique for charging that rifle.

Ultimately, the choice is yours. Practice your preferred method until you can do it in the dark. Some advocates of the under-and-in method prefer it because it allows you to keep the gun pointed more or less at a target (at least downrange) while loading the chamber. It is definitely not as sure or fast as the other method, and I will say this: there is no merit in pointing an empty gun at a threat. If you do take the time to keep pointing your empty shotgun at a threat while you reload you may watch the threat shoot you in the meantime.

I strenuously recommend reloading the gun as quickly as possible by any means when it is empty. All other considerations are secondary until the shotgun is ready to fire again.

Select Slug Drill

This is the part where wheels start to pop off. Your shotgun is a multipurpose tool, but is only loaded with a shell for one very specific purpose at a time. Should you be in a situation where the problem calls for the other solution, what shall you do? If you have 00 loaded, but need a slug, is your solution to say “shucks” and take cover? Wait for a guy with a rifle? What? It does not need to be if you have slugs handy.

Obviously, if you have slugs handy, you are ready to ruin someone’s day with a giant lead pumpkin hurtling downrange, but that is not what this drill is for. Before we get into the specific steps, we must first have a word on the philosophy of ammo management for shotguns, which is a treatise and perennial topic of argumentation among shotgunners.

The objective is to get at least one slug, preferably two in case a follow up shot is needed, into the gun. The way you’ll achieve this depends on how you have the gun loaded, and your attitude toward the ammunition already in the gun. A big part of the challenge is keeping slugs handy on your gun, gear or body and segregating them so they do not get mixed in with buck or vice-versa when you need them. Having your slugs’ hulls be a distinct color from your buckshot helps greatly in this matter.

In the case of a fully loaded gun, some shooters may opt to cycle the gun (ejecting the chambered buck and rechambering a second load of buck), load a slug in the tube, chamber it, then load a second slug in the tube ready to fire. In the process, two live buckshot shells are discarded onto the ground to make room for the slugs.

Some shooters opt to keep the magazine tube downloaded by one round in order to have the necessary room for the incoming slug available immediately. Thus you would load the slug into the tube, chamber it, then load one more into the tube. Done, and you only discard one round of buckshot, but your gun is starting one round down.

Other shooters would instead choose to keep the gun fully loaded and employ a compromise between the two techniques to chamber a single round without stripping a shell from the magazine: you begin by cycling the action slightly, just enough to unlock it. Then you reach up through the loading port with the shooting hand to thumb the next shell in the tube forward off the shell stops as you finish cycling the action to the rear. This will eject the chambered round while preserving the rounds in the tube, and is easier or harder than this text suggests depending on your specific action. With the action open to the rear, you drop a slug into the ejection port as with an emergency reload, then close the bolt and fire as normal. Note you will not be able to load an additional slug into the mag tube unless you were already down one shell or more.

Whew. With practice and intricate familiarity with your gun, this takes far less time than you might be anticipating, but it takes a lot of practice to do this fumble free on the clock. For less dedicated or coordinated users, either of the first two methods may be best.

Considering that most of our problems will be handily solved with the ammo on the gun, I place more value on maintain a little flexibility than going whole hog on capacity, so In choose to download my shotguns holding six or more rounds to allow room for the slugs should I need them. So if my shotgun holds seven, I only load six. If it holds eight, I only load seven, etc.

The steps for completing this drill using the “Short-1” method are as follows:

  1. When deciding or receiving the command to fire on distant target, shooter loads slug into mag tube.
  2. Unlock action and chamber slug.
  3. Shooter loads second slug into mag tube.
  4. Engage distant target with one or two rounds of slug.

As you can see, the process for selecting a slug if your tube is downloaded by one is really simple. I will not worry about the discarded shell of buck at first: if I need a slug, I need a slug! I must solve my problems as they are dealt to me. If I solve my slug-centric problem, I can recollect my dropped round of buck, and I have additional stores of it on the gun anyway.

You can make this drill more challenging a couple of ways:

  • Have a strict par time from the signal to “select slug” to the actual command to fire. Ideally you want to engage the target with a pair of slugs, and so this drill will reward you if you react and load smoothly and quickly enough to get two into the shotgun before the command to fire is given. A great drill for building speed and confidence.
  • Incorporate this drill into other close range drills with single target at range. Upon receiving the command to select slug, exchange loads and engage the distant target as quickly as you can.
  • Make the distant target small to force yourself to confirm all elements of a good shot are in place before firing the slugs; the idea is not to get them in and out as fast as possible- the idea is to get them into the gun then deliver good hits as quickly as possible.

Precision Shot Drill

Remember how I earlier emphasized you needed to know precisely how big your patterns were when using shot? Or knowing exactly where your slugs would shoot to your sights? Believe it or not, you won’t always have a wide open shot on a target in the open. You might have to shoot past an intervening person or obstacle. You might even need to make a very close shot past another human being. This is no time for guess work.

To practice this skill, you can use slugs or buck depending on your objective and setup targets that are small or partially exposed behind a hostage. Then simply engage the targets from a given distance applying hold-off as needed to make the shot or make it without dinging the no-shoot target (note that shotshell wads often leave gaping holes in paper targets, but are not to be treated as hits for purposes of the drill as they inflict minor injury at best by themselves). Shotguns are not thought of as precision instruments, but with the right loads most are more than capable of adequate precision at closer ranges. The weak link in the system is usually the shooter.

This drill is at its most valuable when either executed with a strict par time or when shot on demand in the middle of another course of fire or drill. The need to suddenly zero in, slow down and focus with a shotgun, which is sometimes a more forgiving weapon as far as accuracy is concerned, is tough but very valuable in a real world context where you are utterly liable for every single pellet or slug that leaves the muzzle.

You can put yourself to a real test by making this drill more challenging in one of the following ways.

  • Have a coach call out one of several “precision shot targets” each with a different firing solution.
  • Decrease the par time for the drill.

With practice, you will develop an innate sense of what shots you can make with confidence, which ones you can “get away with,” and which ones you must not attempt.

Conclusion

Shotguns objectively take require more investment of energy and sweat than other firearms to make the most of their considerable potential. Without practicing the right skills, a shotgun will only ever be a special purpose weapon or a B-list primary arm. But should you choose to put in the work, you will find that, warts and all, a shotgun is a highly capable and formidable primary weapon for home defense or surviving a major societal shakeup event.

Use the tips, advice and drills in this article to reinvigorate your own shotgun practice. Challenge yourself, don’t be afraid to fail or fumble in pursuit of the skills you need to pay the butcher’s bill.


shotgun shooting pin


via Modern Survival Online https://ift.tt/2U489ov