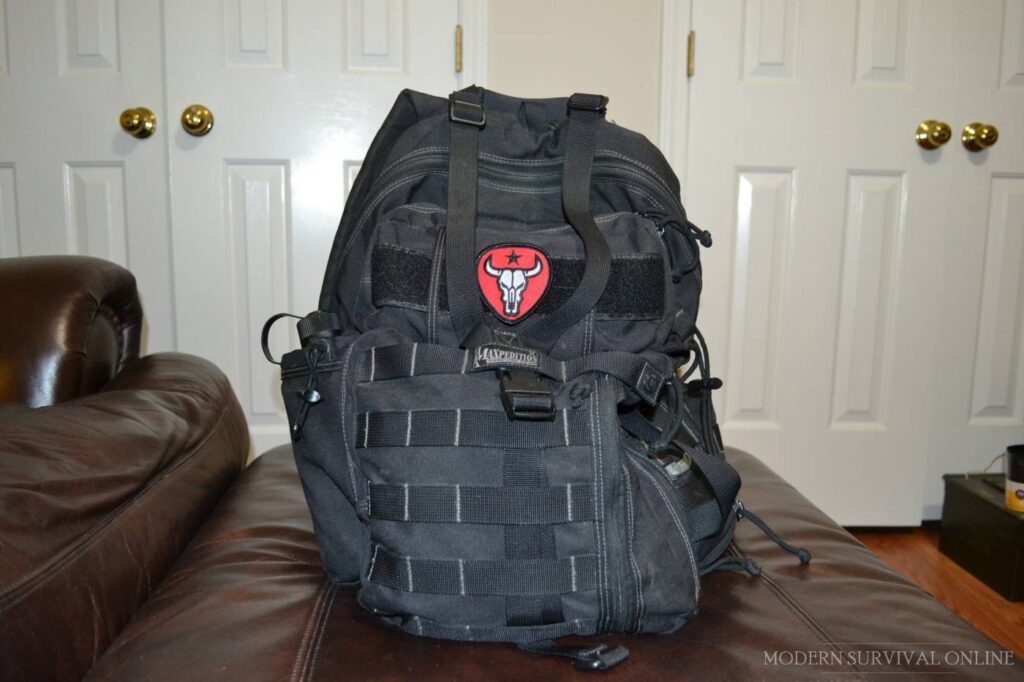
If you are a prepper, there’s a very good chance you have a bug out bag (BOB). If not, you at least know what one is. This is your lifeline if you have to bail and leave you home behind. It has all the tools you need to survive away from home.
Many scrutinize over the items in their pack. They often take pride in finding the best gadgets to pack their bag. However, one of the biggest weaknesses of survivalists is not testing their gear or their bug out bag.
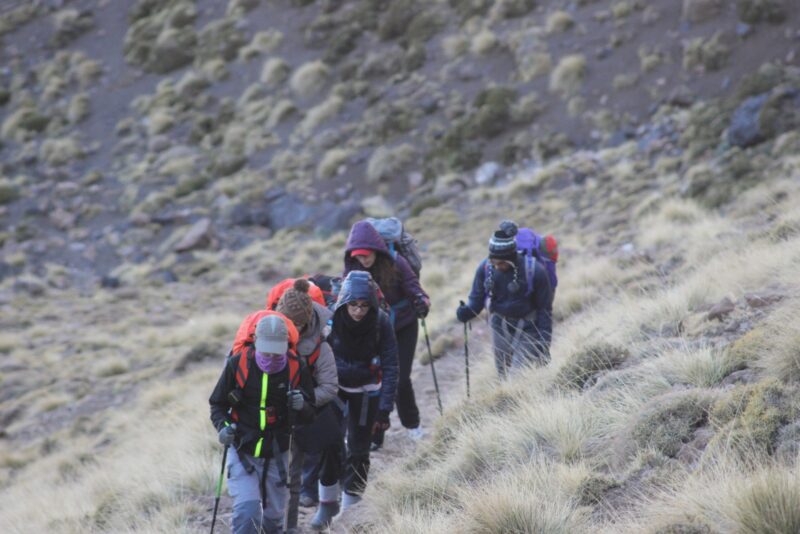
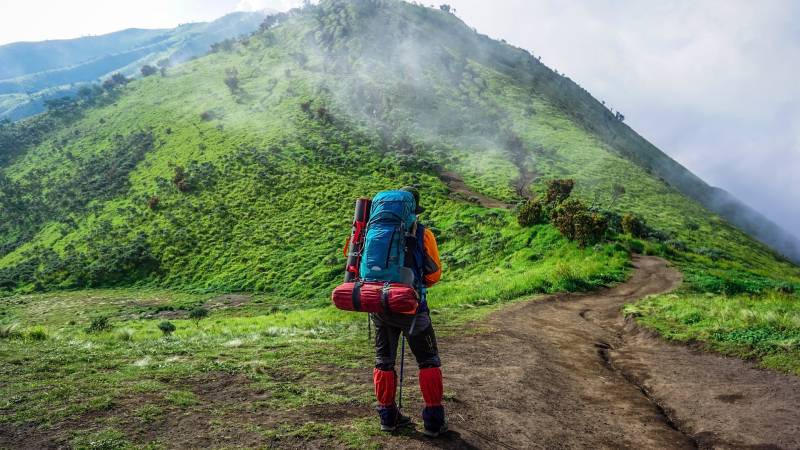
One of the best ways to accomplish this testing process is to try out your pack on a hiking trip. Hiking is essentially immersing yourself in the wilderness for an extended period of time. This is a great time to try out your gear.
If you take away the luxuries of a conventional hiking or a camping trip, you are left with survival items. Overnight hiking trips are by far your best chance to test out your pack. In this article I will cover some ways to try out your gear in a controlled and safe environment.
Safety
There are a few ways you can try out your bug out bag and still keep yourself safe. Stick to these rules to ensure you do not get in over your head.
Take a friend. Never venture out to try your bug out bag alone. It is important that you have somebody with you to get help if things go wrong.
Let everybody know where you are going. If people have a detailed itinerary of where you will be, it gives you the best chance of rescue in case of emergency.
Pick a reasonable route. It is best that you are in the wild, but not pushing yourself to the max. You can traverse hilly terrain, but you should not be climbing mountains on this trip.
Always have a way to call for help. Keep extra batteries for your phone. Stick to areas with cell phone reception. s a last resort, have other ways to signal for help.
Always have a backup plan. You may want to test out your primitive fire starting skills, but you should still have a lighter. You may want to test your shelter building, but you should still have a tent or tarp. Have an easy way to get food, water, fire, and shelter in case of emergency. On these trips, my pack is 50% bug out bag and 50% backup plan.
Testing the Weight
One of the toughest aspects of compiling a bug out bag is finding a balance between thoroughness and weight. If you bring too much gear, the weight will wear you out. If you bring too little gear, survival will be difficult.
For most, roughly 30 pounds is about right. On a long hike, you will quickly find out if the weight of your pack is ideal or not.
Food
While it’s not the most important aspect of survival, food can be very important. Always take a backup supply of food with you, but plan to save it in case you cannot find other food sources.
You can try out your fishing skills with a pocket fishing kit or a pocket fisherman rod. You can try out trapping with some snares. You can try hunting with a firearm, bow, or crossbow. However, you want to have some jerky, MREs, or hardtack ready in case you need it.
One of the best ways to test your gathering skills is to collect wild edibles. You can pick up and eat various edible plants as you hike.
Do some research on the area in advance so you know which edibles are around. Then try a few out so you know what you like and what you do not like, and be really careful with poisonous plants, particularly look-alikes!
Water
Water purification is one of the most important aspects of survival. It’s vital that you take a small supply of water with you when you hike, but you also want to test your water purification tools.
Take a filter bottle, a straw style filter, and some iodine tablets with you. Place your camp near water and practice different ways to purify water. Prefilter it, filter it, boil it, or cleanse it to ensure you can create clean water when you absolutely need it. If you have to rely on your canteen, be sure to ration the water so it does not run out.
Fire-Starting
Testing out your fire gear is always fun on a hiking trip, but never assume that fire is a given. There are plenty of times when cold or damp conditions could make it really hard for you to start one.
Always keep a lighter and matches with you as backups. Still, it’s a good idea to test other redundant fire-starting methods such as ferro rods, fire lenses, and even try your hand at the bow drill!
It is also important to practice fire safety on these trips. Clear all debris out of the area, and dig a pit for the fire. Surround it with large rocks to enclose the embers, and keep a good amount of water on hand.
Ensure there is no dead or dry material nearby that could flare up with a few sparks. When you are done with a fire pit, dump water over it and mix until the steam stops rising up. You must make sure there is no chance of the fire flaring up again.
Shelter
Building a shelter is one of the best ways to test out your bug out bag. You should have a few different ways to make a shelter with the tools in your bag. While you should have a backup like a tent or a tarp, there are plenty of other ways to build a shelter.
Emergency blankets are excellent for providing a waterproof canopy. Cordage can help you use natural materials to build other types of shelters. You can even use a poncho for an easy shelter.
This process is going to force you to use several tools in your pack. Saws or hatchets will need to be used to cut poles from the timber that is available. Your knife will be needed for finer work such as carving out notches or points and cutting cordage. You will also be testing out your knot tying skills as you assemble the shelter.
Signaling for Help
A long hike can be a good time to try out supplies you have for signaling. Send one person ahead on the trail, and have them use a signal mirror to try and get your attention. Have them use an emergency whistle to see if you can hear it.
When you set up camp, send somebody down the trail and try to signal them with smoke or with hand-made flags. These are all ways that you can make a game out of honing your signaling skills.
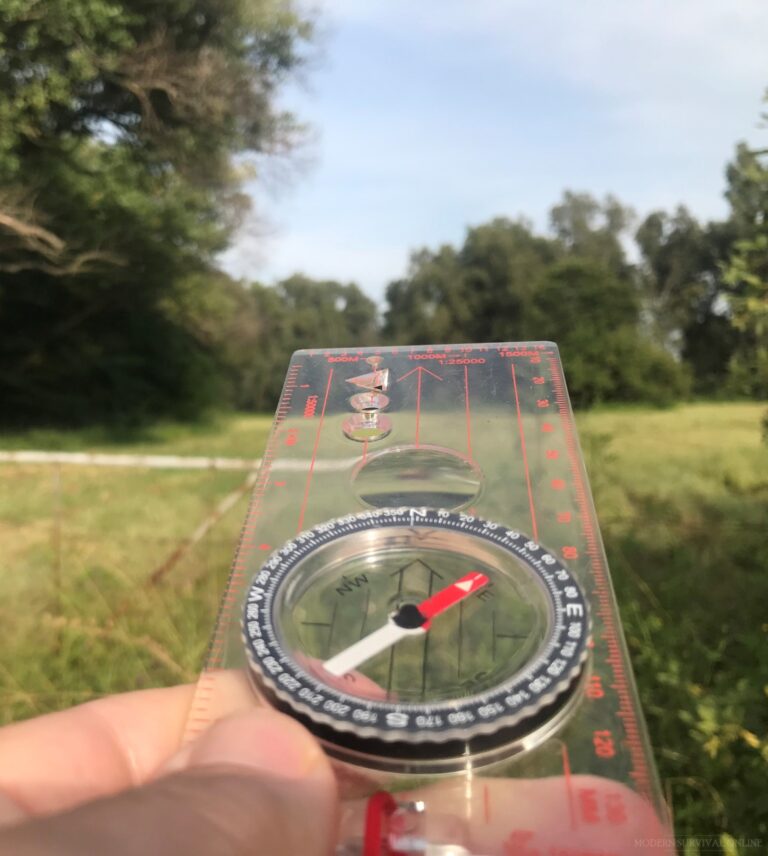
bezel orientation on a baseplate compass
Land Navigation
While you will likely be following a trail on your hike, there are still ways to try out your navigation skills. You should have a compass with you, so this is a great time to use it.
At the start of your hike, see which direction is north. Then periodically try to determine true north without the use of your compass, and then check to see if you are correct.
You can also find a place where the trail makes a hairpin turn and try to cut across off trail. You’ll have to use your compass to be sure you maintain the correct direction or you may miss the trail entirely.
First Aid
If you hike like I hike, you’re bound to get a few cuts, scrapes, and blisters. While I normally don’t treat these until I get home, you can use the gear in your pack to treat them as they happen. This allows you to test out the first aid supplies you have in your bug out bag.
Disinfect any cuts or scrapes and apply a bandage. Treat blisters and hot spots so they do not get any worse.
In Conclusion
A challenging hike can be one of the best ways to test out your bug out bag. If you think about it, bugging out on foot is nothing more than a long hike with a purpose. If forces you to use your resources to stay as safe and comfortable as possible.
By trying out the gear in your bug out bag, you become more comfortable with each item and ensure that you have the right items with you. Often you will have some changes to make once you finish your hike. Take the time to make these changes and you will be sure to have the right gear when you really need it.
Deception is one of humanity’s oldest traits, and unfortunately, or perhaps fortunately – depending on your endeavors – persists all the way up to today. Various interests throughout the ages have endeavored to stamp out lying, fibbing, and pulling the wool over someone else’s eyes, but no matter if they are religious institutions or courts of law liars and the lies they tell have endured.
Instead of turning this article into just another polemic about lies, liars and the damage that they can inflict, we’re going to make this a practical exercise in dealing with both. After all, a big part of prepping is just accepting things for what they are and dealing with them, not whining about what we wish they were. Why not do the same thing for the liars, deceivers and cheats that populate this Big Blue Marble we are all stuck on?
In today’s article I’ll be presenting some tips and guidance on determining if someone is lying to you. I cannot promise you’ll be a Human Lie Detector by the end of it, but you will be better equipped to spot and hopefully avoid deception in the future.
The Why of the Lie
People lie for all kinds of reasons. Whatever their objectives are, whatever they hope to gain the principles of lying are quite simple. People lie to alter the perception of others and to influence their judgment. That’s it. We don’t have to delve too deeply into the fascinating and complicated matrices of human decision making, but let it suffice to say that a lie, skillfully crafted and artfully told, can completely change the outcome of an interaction in favor of the liar.
Apply this to prepping. Why might someone lie to you in a survival situation? They could do it for all kinds of reasons. They might lie and say they are worse off than they really are, or they have someone in their group or that they are taking care of that is in a bad way, in order to play on your sentiment and get vital supplies from you. They might lie about an emergency or something they need help with in order to lure you into an ambush or some other trap. They certainly may lie to deflect suspicion or blame from them if they have been up to no good, or planning on getting up to no good.
Some do it somewhat more passively, just as a way to obfuscate and keep their cards, and therefore their status, close to the chest. Information is always ammunition, and you don’t want that ammunition to be loaded and aimed at you. Therefore it follows that some people live lives that sort of have a permanent campaign of disinformation swirling around them. It is not that they have anything to gain from all this lying or that they are just pathological liars, but that is not always the case.
What matters most is that you don’t get taken by a liar, and especially not on something that could be of paramount importance. Decisions you make in a survival situation that are founded on lies may result in a negative outcome, even your death. Believing someone who is begging for help or otherwise in need may see you lured into a trap that you will not escape or deprived of vital supplies that would have been better used for your survival and that of your group or family.
That means you need to learn how to spot liars and react accordingly.
But There’s a Catch…
Let’s get this out of the way right up front: no matter what some expert tells you, no matter what they promise, no matter what they claim there is simply no way to be sure if someone is telling you a lie unless you have evidence to the contrary. There is no single behavior, not even sets of behavior that are a certain tip-off that someone is being deceptive.
Detecting lies is not a science. Is a comprehensive skill that must be developed, honed and cultured. You’ll have to observe and analyze multiple behaviors, and seemingly conflicting ones at that, and then compare them against the baseline personality traits that you have established prior to trying to snare somebody in the lies they have told you.
The person in question that you are interviewing or assessing may display one or they may display all of the traits below and be 100% truthful with you. On the flip side, someone may appear to be the genuine article when it comes to sincerity and lies may be pouring out of their mouth at the full cyclical rate.
Some honest, trustworthy people may appear at times as if they are lying. Some born liars and charlatans may appear for all the world to be honest and trustworthy. Never let your guard down and never be too certain of yourself.
I Had My Fingers Crossed…
On the other hand there are times it’s useful to be able to lie and lie effectively. Now, listen to me reader: I am not advocating that you make lying a go-to response in your dealings with people inside your circle of trust, the people you love and the people depending on you. Honesty is a good policy for a reason, and a foundational level of trust is the only thing that makes the wheels of society go round and round.
That being said, aside from any religious and legal prohibitions to the contrary, employing a lie at the right time, in the right way may be necessary to complete an objective. A good lie convincingly told will keep the lid on a surprise party. It will certainly keep your children believing in Santa Claus, and it might help you hang on to more of your stuff if you get held up and shaken down for its location. It may even help you comfort the bereaved when they ask you, sobbing, if their loved ones suffered before they died.
Again, I’m not saying this to go against the grain of anyone’s religious tenets or anything else, but aside from those concerns a lie is neutral. Neither good nor evil. It is characterized by what it is used for! If you do need to lie about something it pays to know how to spot a lie from the other side of the table so you can minimize those signature tells that other people can detect. If are going to lie, lie responsibly!
Your Guide to Spotting Liars
Spotting a lie depends on two major components: establishing a reliable baseline for their character and behavior when they’re in a non-stress position and then being alert for changes in that baseline that may indicate they are lying.
The first part is relatively simple. When someone is calm, relaxed and not feeling threatened or railroaded by a line of inquiry that may threaten them, that is when you need to start paying attention to how they behave. What is normal for them? Are they placid or expressive? Are they very animated when they talk or very reserved? Is their tone and cadence short and clipped or do they sound mirthful and talk at length?
Note that even some of the markers indicating honesty and deception below may just be an essential part of someone’s personality. They do not on their own indicate that someone is being deceptive. They have to be taken in context and furthermore filtered through the lens of that person’s baseline. Remember, you’re looking for deviations; you’re looking for things that are out of the ordinary.
Next, consider any tells or indicators that they are presenting. This is the second part of spotting a liar. These tales will usually fall into one of two categories: self-comforting or so-called soothing behaviors and nervous movements/reactions.
The first category, soothing behaviors, are things that people do to decrease their own personal stress level. Chances are you’ve already seen these many times presented by people around you or even yourself when you’re uncomfortable or just stressed out.
Things like touching or grooming the face, grinding teeth, pursing lips, playing with hair, shielding their eyes or rubbing their neck and scalp are all things designed to help someone calm down and relax. Every person has their own “deck” of pacifying behaviors that they made drawn in a stress position, either singly or as a group.
The second group, nervous reactions, or things that may happen subconsciously or autonomously at the physical level when someone feels threatened or scared. Things like sweaty palms, shortness of breath, dry mouth, stuttering or stammering, “freezing”, winding legs around a chair, tapping or bouncing feet, chewing nails, jerky head or eye movements, and so on.
It’s essential that you are on the lookout for these self-soothing behaviors from the outset when you were talking to someone for reasons that will become clear in the next sections. In the mean time, below is a list of “tells”’ you should be on the lookout for.
The Big List of Soothing Behaviors and Nervous Reactions
Soothing Behaviors
Playing with Hair – Especially prevalent among women and those with longer hair. Do keep in mind this is often an idle tic but if you notice this surface when someone is nervous, there’s a high likelihood it will appear when they are lying also.
Protecting Throat/Heart – One somewhat curious soothing behavior is the shielding of the throat or the heart with a hand or a carried object. This is not so hard to figure out; if someone thinks they are in danger (e.g. being found in a lie) they’re more liable to subconsciously protect the vulnerable areas of the body.
Facial “Grooming” – People who stroke, rub, pick or tug at their face will do so in an effort to calm down. The human preoccupation with the face is primordial and very hard to stop. The average person touches their face over 25 times an hour subconsciously, and this will increase when they are upset.
Rubbing Scalp or Neck – This is an especially common soothing behavior in men and may present as part of the fight-or-flight complex. Again, when the brain interprets a person’s situation as perilous or dangerous stress levels will rise and behaviors like this will present. The rubbing or stroking of the scalp or back of the neck is a sure indicator that someone’s stress level is rising.
“Rolling” the Thighs – A curious soothing behavior where someone seems to be rolling out an invisible log of dough on their thighs with their outstretched palms. This appears akin to buffing a flat surface. This might be done in an attempt to dry the palms if someone perspires when they are nervous.
Vining – Vining is a common soothing behavior when someone is seated, especially on a chair or stool with thin legs or arms. Seen someone sort of snake their leg around one of the legs of the chair they are sitting on? That is vining. Note that this behavior is especially common in people who are more introverted or socially awkward.
Covering Eyes – The covering or shielding of the eyes is a common soothing behavior, one that appears in more ways than you might think. This can take the form of dipping in the head and shading one or both eyes with a hand or something more overt like covering and I and a sort of eye patch fashion or even both eyes in a “see no evil” style. People do this to literally block out a distressing reality they are facing.
Nervous Reactions
Wringing Hands – People who knead or wring their hands may do so out of anxiety or an overall sense of nervousness. Also included in this category is cracking knuckles. That is one that might easily be an idle tic that is likely to start presenting in abundance as the stress level of the person in question rises.
Balled Fists – A balled fist is not the default posture of the human hand. People make a fist when they are angry, or scared. If you notice someone’s hands resting on the arms of their chair on the table in front of them a balled fist posture the stress level is definitely climbing. If they are stressed, they might be lying.
Hidden Hands – Some people will hide their hands when they are nervous or guilty in an effort to shelter them or appear harmless. If you notice someone’s hands disappear in the pockets, up their sleeves or under their arms when questioning them you might be over the target.
Sweating – It is an old trope but a good one. People start perspiring when they get nervous, and some people can really turn on the waterworks. Assuming you aren’t in a hot environment where everyone is sweating if you notice someone on the hot seat leaking a little bit under the arms and around the collar, this is a clue that they might be lying, since the line of inquiry is making them nervous.
Freezing – People are always moving when they talk, and even when they aren’t talking their bodies are moving; subtly communicating how they are feeling. If you’ve noticed someone standing or sitting very rigidly, not moving, like a statue something is very wrong with their internal equilibrium.
Bouncing/Tapping Feet – When someone is ready to get out of a situation, you can look for their feet to start bouncing, tapping or otherwise I’m moving with nervous energy. This reflects the anxious individual’s desire to get out of Dodge and away from what is making them feel this way.
Large Arm Movements – Unless someone has an extremely animated and theatrical personality, large above the waistline movements of the arms, especially with the palms presented toward the listener are typically indicative of deception and anxiety.
Trouble Talking – Quite a few speech problems can present when someone is nervous. A sympathetic reaction causing the salivary ducts to shut down leads to dry mouth, and dry mouth can lead to a cracking voice, a hitch in the throat and other verbal malfunctions. Simple nervousness can lead people to stutter, stammer or repeat words in order to get their sentence going or buy time for them to finish a lie in their head.
Darting Glance – Rapid, jerky movements of the eyes or head say the same thing in every language and no matter what species is in question: someone is getting caught in a trap or backed into a corner and they don’t like it. Be on the lookout for this one when you’re getting close to the target.
Major Deceptive Tells
The following tells are major indicators of deception in progress. As I said above they are still not a sure thing but the ones on this list are disproportionately likely to indicate deception.
Many people, all ages and of all cultures, may display these particular tells and that makes them extremely valuable in determining whether or not someone is lying to you. But beware, since seasoned con men and gifted liars are disproportionately more likely to nip these in the bud before they present.
Run-On Answers – Any time you get more than an answer to a question, and I mean entirely too much information, entirely too much set dressing and backstory and “oh, yeah!” there is a good chance that someone is lying to you. It seems that liars will lay the information on thick in an effort to seem open, helpful and trustworthy with their goal being that the listener will believe them. A motor mouth or chatty Cathy is one thing; these people are another. If your subject is shellacking you with way, way too much info with every answer, be wary.
Pointing – One time-honored misdirection technique is turning the accusations back on the accuser. This is almost always accompanied by a jabbing, pointing finger to go along with the rebuttals. if the person you were talking to gets upset and then tries to upset you by accusing you of doing this, that or the other thing and jabbing a finger at your chest or face you are probably closing in on the truth. The truth being that they are ly-ing!
Unblinking Stare – This is an unsettling and obvious tell when you know to look for it. People blink often, and people that are stressed out or uncertain will blink regularly or even rapidly, but an unblinking, statue-like gaze is a typical hallmark of the sociopath and habitual liar.
If you notice any of these tells pop up in someone’s behavior, and especially if they pop up when they’re in a stress position after you establish the baseline, be alert! You may be dealing with a serious liar.
Time to Get a Reading
Before you can get to the business of sussing out a lie, you’ll need to establish a behavioral baseline reading on the person you are talking to.
Remember when I mentioned above that all of those anxious movements and nervous tells may just be part of someone’s basic personality or behavior? This is the reason why you’ll need to establish the baseline, so you can sort out the normal movements from the abnormal ones, the ones that will typically present when someone is lying and are worried about being caught. That is how you’ll catch them.
But consider this, especially if you are talking to someone that does not know you well or is otherwise not very familiar and comfortable with you; most people are mildly to very nervous talking to new people depending on their level of social anxiety.
That means it is entirely possible to get false positives in the opening parts of a conversation. If you can’t tell the “lie” tells from the normal tics, how will you discern when they are being deceptive?
The answer is simple: start paying close attention to what tells present when you know they are nervous, for instance at the beginning of the conversation or when they’re already stressed out. Those same tells will likely present when you are trying to catch them in a lie.
“Settle” Before Serious Questioning
Trying to catch someone in a lie should not look like a stereotypical good-cop, bad-cop police interrogation on a daytime TV drama. Anybody would be stressed out of their gourd going through something like that. You’re after mere confirmation of lie told, not after a confession; it is an important distinction. In order to find out what’s true and what’s not, you need to calm the person down or at least get them to relax and talk to you normally before you start are owing in on the hard questions that may get them shook up.
Part of this is building trust and rapport. Part of it is small talk. It might be engaging in an activity you know they enjoy. No pressure, then; don’t corral or cajole them. The goal is to get them to relax and do so sincerely otherwise these techniques will not work. When someone starts to relax you can see signs of that, also.
All of those nervous and soothing behaviors up there should go away so long as they are not part of someone’s default physical tics. The subject should visibly relax, lean in or move in closer and generally display open instead of closed body language.
Now is the time, once you have achieved this, to run a fresh assessment on them. What behaviors from the list above are still present? Which ones disappeared? The ones that are still present are either physical tics or habits or indicative of a slightly elevated stress level. The ones that disappeared more than likely indicate significant stress, the kind of stress that may very well show itself when you are asking them uncomfortable questions…
Approach the Subject Gently
When questioning someone to see if they are lying, don’t arrow in for the topic at hand right away. Just like boiling a frog, you want to turn the temperature up gently, slowly, not all at once. This is a conversational skill that takes time and practice to refine just like anything else, but most of the time you want to start hitting around the topic then asking “safe” questions that are proximal to the topic and then finally start asking the hard questions where you suspect lies to start popping up.
Remember: you are one of the most important parts of this lie detector system! You must be finely calibrated and paying attention to detect and identify your subject’s emotional responses and pick up the tells we have spent this entire article discussing. During this entire avenue of approach you must be paying attention to the shifting, reacting responses of the person you are talking to and weighing your opinion against them.
Only by observing and gauging their responses can you help to make an informed judgment on whether or not they are lying.
Be Specific
During your conversation and any questioning it is vital that, when you are calibrating the person you are talking to or when you are observing for any tells, that you ask specific questions with specific, defined answers. These are known as interrogatives: a question with a discrete answer, not an opinion and not some free form story. It is only by asking these questions that you can gather enough data about the person you are talking to in order to come up with a judgment call on their truthfulness or deceptiveness.
Even during these questions, be amicable, be friendly and don’t come on too aggressively. Someone who seems too keen on getting answers even two innocent questions is liable to induce a stress state in someone where none previously existed. This can compromise the subject and make it impossible to get a good read on them.
Be specific, be direct but be friendly and sociable. Save the hardcore take-no-prisoners cop attitude for the movies.
Be on the Lookout for Special Tells
There is one more piece of the lie-detecting puzzle you should be aware of during your question and answer session. These are again intrinsic, specific behaviors that sometimes manifest when people are lying in the course of a conversation. Either of these specific elements may be the turning point in your determination, so keep a sharp eye out for them.
Glance/Peek Direction – When someone has to remember something, is thinking of something, or is visualizing a concept or is just flat-out lying, science suggests that the way they aim their eyes may be an indicator as to their truthfulness or deceptiveness. It sounds fantastical, but it is true, or at least the theory has science behind it.
The tell looks like this: When someone is recalling something that actually happened, meaning something that is true, their eyes will look upward and to the right (their right) while they are recalling the memory. However, if they are thinking of something that is invented, that is something created in their mind, their eyes will do the opposite and look up and to the left (their left).
The reason for this has something to do with the logical versus the creative parts of the brain and is a fascinating if dry and lengthy read so I’m not going to go into the details here, but if you are interested in learning more about this particular quirk of human physiology and psychology I suggest you look into it.
All you need to know for practical purposes is if the person you are talking to has to think about something for a moment during the conversation and their eyes go up and to their right they are likely telling the truth. If they go up and to their left they could be lying.
Attitude Incongruence – Someone’s attitude should match the topic at hand. If someone has been accused of something and didn’t really do it, their outrage should be obvious. It should incense them, it should upset them. If it doesn’t, if they seem calm, aloof or uncaring you might be dealing with a liar; plainly stated their reaction and body language is not matching what is going on in the present.
Similarly when someone is driving a point home, or emphatically trying to convince someone of something that is true, their body language will mirror their cognition; their body weight will shift, they will be gesturing with their hands, the expression of their eyes will shift rapidly in accordance with what they are saying. Someone displaying attitude incongruence will likely be too still, too closed or otherwise too composed, at least out of all proportion with the intensity and severity of the topic at hand. This is, not always but usually, a surefire sign of a liar.
Conclusion
Learning to read and understand the behavioral cues and irregularities in attitude that indicate a person may be lying is more art than science, and will take significant dedication, practice and application to master. But mastering the skill can be a vital tool in everyday life and in emergencies.
No matter who you are and no matter where you live there will be no shortage of liars waiting to fool and take advantage of the unwary. With these skills you can spot them ahead of time and cut them off or catch them before they can do any harm to you and yours.
Preppers and survivalists are obsessed with bags, a bag for bugging out, a bag for bugging in, a 72 hour bag an INCH bag and a possible pouch, all well prepared and ready for impending disaster or emergency.
get home bag backpack
Realistically though, there is one bag that is going to be used more than any other, and it will be used far more often than all your other preps, that is a get home bag.
Forget bugging out and never coming home for a minute, what if disaster strikes while you are at work or away from home for any other reason and you need to get home to your family before taking any other action what do you have on you right now to make that possible?
It doesn’t even need to be a major national emergency or natural disaster that threatens your commute home, although it might be. Public transport strikes, flooded roads, fuel shortages and severe seasonal weather such as heavy snow might all prevent you from getting home.
So what are you going to do about it? What do you have in place to make sure you can make it home to your family and take charge in the event of an emergency or even just in case of more mundane obstacles?
Your get home bag should help in this regard and just as with any other survival kit it will need to be customised to your specific requirements, distance from home, intended mode of transport, local laws and many other factors. To start off I’ll relate some of my own experiences where I had to ‘get home’ and the lessons I learned from those experiences.
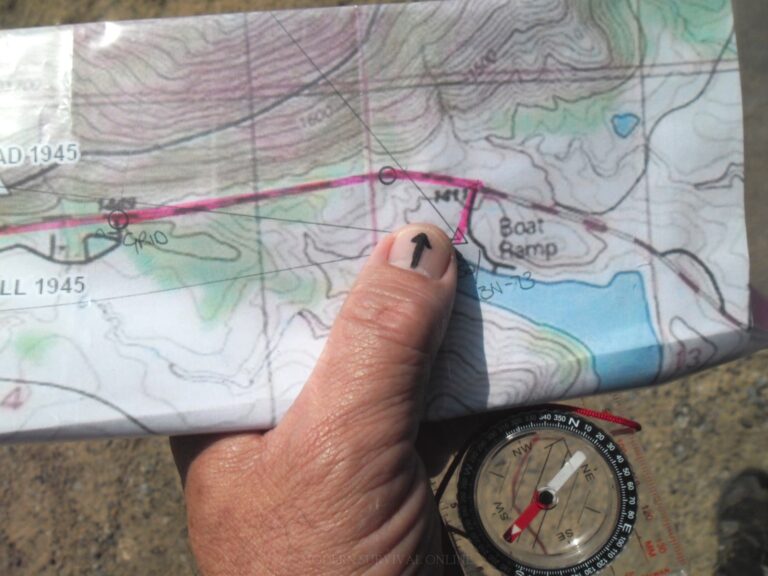
holding a paper map next to compass
1st Lesson; Never Rely On Technology
A long time ago I undertook a 291 mile expedition along the Cambrian Way in Wales to raise money for a children’s charity. The terrain on the trail is quite severe in places and much of the route is very remote and far from any help.
I had arranged with my wife that I would contact her regularly along the trail and was carrying several backup batteries for my mobile phone which I would switch on at pre-arranged times each day to get in touch and let her know what progress I had made.
If at any point I couldn’t contact her she wouldn’t have immediately worried as I may not have had reception but if I had gone for much more than 48 hours without being in touch she would know to send out a search party. Not all went to plan on this expedition though, I made excellent progress to begin with and actually walked day and night on the first day of the expedition to get ahead of schedule and take advantage of the beautiful moonlit night.
I carried on making good progress the second day and then the bad weather hit, it wasn’t completely unexpected but it was more severe than forecasts had indicated and rivers rose significantly preventing me from making some of my planned river crossings and delaying me significantly.
To make matters worse, my phone got soaked when I fell in a marsh and stopped working. This left me in a predicament, unable to contact my wife who was my designated safety person who would send rescue in the event of me being uncontactable or suffering an accident.
With the weather continuing to deteriorate there was every chance that I would have to make further detours and with every inch the rivers rose the risk of suffering an accident rose with them.
I was at that point that I decided the expedition would come to an end and I would depart from my route and head towards the nearest settlement where I could phone my wife and start my journey home.
My technology had let me down, the waterproof case of my phone had not protected it, the spare batteries were useless and I had to get home, partly for my own safety due to the bad weather and partly to ensure that no one was accidentally summoned to ‘rescue’ me when rescue wasn’t necessary.
In a ‘get home’ scenario this lesson applies in the sense that you may not be able to rely on your usual technology to aid you, don’t expect sat nav’s to work to help your find your way around diversions, or your phone to work to arrange a rendezvous with your family or to warn them of a delay or your normal mode of transport to be functional when you really need it.
For this reason I always carry paper road maps in my car and never rely solely in GPS when I am out on hiking expeditions, in fact this importance on not relying on technology was highlighted to me many years before my experience on the Cambrian Way when I was training to fly gliders and was bound by aviation rules to always carry a paper chart even if the glider was equipped with GPS.
2nd Lesson; Always carry cash
Following on immediately from the first lesson if it wasn’t for the cash I was carrying I wouldn’t have been able to use a pay phone when I did make it to civilisation to let my wife know I was OK and what my plan was, nor would I have been able to purchase a train ticket back home.
Another experience which drove this lesson home was when I flew to Italy to teach a class of children how to use knives for bushcraft at an education conference.
I was planning to combine my attendance at the conference with a few days camping and hiking in the Trentino Valley and Brenta Dolomites and had packed my light weight camping kit and was planning to camp the few nights between arriving and the start of the conference.
But when I alighted in Bolzano it was clear that my luggage hadn’t made it, my bags had been left behind in Rome when I changed plane and I was now without my accommodation.
At this point I learned that airlines will not pay expenses for accommodation at the destination as they work on the assumption that everyone has somewhere to go whether that’s home or to a hotel, they would have paid me the equivalent of about $25 to buy a toothbrush and toiletries but not for my accommodation so I was left with my carry-on luggage and the choice of sleeping under a hedge or paying for a hotel. As it happens I always carry enough cash for emergencies and I was able to find a backpackers hostel to stay at for about $20.
This lesson is important to remember for a ‘getting home’ scenario as much as a lost luggage situation. Getting home safely is the key rather than getting home at all costs.
Sometimes, perhaps in the event of the disruption of travel infrastructure such as road and rail due to strike action or severe bad weather the primary purpose of your get home bag should be to keep you as comfortable as possible until you can get home rather than get you home strait away. This might mean having enough cash on you to pay for a hotel or recovery for your vehicle if a breakdown is what threatens your journey home.
an EDC kit
3rd Lesson; Customization
Your get home kit must suit your individual situation. My primary means of transport to and from my day job is my bicycle and my get home kit reflects that, in the top of my bag I carry a puncture repair kit, spare inner tubes, spare batteries for my bike lights, a pump for my tires, tire levers and a spanner. These tools have been essential a number of times as punctures are frequent on the small country roads I ride along.
When I used to work in Scotland and drove to work, it was important to have some tools and spares relevant to the repair of my car:
a miniature fire extinguisher,
roadside beacon,
high vis jacket, spare wheel,
tyre pump,
spare washer fluid for the windscreen,
pare water for the radiator,
and a small emergency kit in case bad weather stranded me and I had to stay at work or in the car.
When I lived in Sweden and largely relied on public transport my most important piece of ‘get home’ kit was a street map in case the busses and trains I usually relied on were cancelled and I had to walk home.
What I take away from these lessons is that I need to allow my situation to dictate what I carry in my get home bag, it should for you too, there isn’t any one answer for everyone and you do need to take circumstances into account when you prepare your get home bag, local laws, your mode of transport, a get home bag which includes a knife and firearm isn’t going to work on a commercial flight if you are traveling for business for example.
Lesson 4; The Principle of diminishing returns
A get home kit is not a full bug out bag, the more you try and lug around on a daily basis the smaller the return you will see for the weight and bulk you carry. You can’t carry a full emergency kit with you at all times, it is true that you could permanently keep a large survival kit or bug out bag in your vehicle but that might not cover all your ‘get home’ requirements.
Remember that a bug out bag is designed for more or less self-contained survival, in a bug out situation money, street maps and spare light bulbs for your car might not be essential but those might be the very things you need to get home. Instead you might carry several pounds of snare wire and fishing kit that will never help when you need to get home.
There are people who seem sincerely convinced that the more kit they have the better they are prepared when in actual fact the return for carrying extra equipment because it is ‘in fashion’ or for buying expensive equipment when their skill level doesn’t really warrant it is minimal at best.
This same principle applies with your get home kit; trying to cram too many fancy survival aids into your commuter bag or car is going to make your bag frustratingly heavy, limit your ability to perform your day to day tasks and potentially get you into trouble at work or on public transport especially if you are trying to carry equipment for self-defence or a large knife.
The items that goes in get home bags which is most susceptible to the law of diminishing returns are knives. I know a lot of people advocate carrying several knives as part of an ‘edc’ system; a large or tactical style folding knife, a Swiss army style knife, a multitool and maybe a fixed blade as well. The combined expense of all those tools does not yield a corresponding benefit.
Those three or four pieces of equipment may cost several hundred dollars but all perform the same basic function. Make do with fewer tools if you can, I normally carry just a multitool on my person on a daily basis and a small fixed blade knife in my bag if I can justify it in case I need something more robust.
So what should you definitely carry regardless of any specific kit related to your mode of transport;
THE LIST
Spare battery and charging cable for cell phone, even if you shouldn’t count on your phone and other technology in an emergency you should do what you can to keep your phone functioning.
Emergency contact details; now that people tend to rely on their cell phones to remember numbers for them make sure you write down essential contact details and keep them in your get home bag, even if you do remember all the important numbers you need write them down anyway as stressful situations can make you forget things. You will want to have family members numbers and maybe the numbers of your kids school at hand in case of emergencies. Maybe your get home ‘emergency’ is that you are going to be late to pick your children up because your car has broken down or you have been held up because of roadworks or an accident or a family emergency, having the school’s number to hand will be important.
Local map.
Cash (at least enough for a night’s accommodation, a train ticket or to pay for a tow truck) some should be in change.
Vital documents (you may well carry these in your wallet or purse but copies in your get home bag are important too, in case of national emergency you may need to identify yourself to authorities or prove your identification).
First aid kit (minimum contents);
Plasters (Band-Aids)
Antiseptic wipes
Latex gloves
Pain killers
Scissors/shears
Triangular bandage
Absorbent wound dressing
Tourniquet
Multitool, something multi-purpose remember you aren’t necessarily surviving in the wilderness you are getting home. A multitool with pliers is the most versatile of the pocket tools you can have and is unlikely to get you in trouble even under the strictest of local laws.
Shelter; remember that your get home bag has to fit amongst your normal every day kit, you can’t carry a whole backpack with you at the expense of what you actually need on a daily basis. The shelter you carry might be something that keeps you warm if you get snowed in at work and have to sleep at your desk, or something more robust and weather proof of you need to hike home in a real emergency, I would suggest a poncho liner style blanket and a blizzard bag which is a type of double skinned mylar bag that is very robust and comes vacuum packed and no bigger than a water bottle. These two will pack down very small and means you wont have to carry a massive extra bag, drawing attention to yourself and slowing you down. If you travel in a car, you can carry a sleeping bag and some blankets as well to supplement your light weight get home bag.
Fire-starting tool; in conjunction with your shelter being able to make fire is a must, even if you carry a lighter or something for fire lighting in your edc you should carry a backup in your get home bag, preferably as fire lighting kit is so light weight a few options would be better a lighter or matches and a firesteel would be ideal. You should also carry a few items of volatile tinder such as wet fire tinder to guarantee you a fire if you need it.
Knife; a knife is a vital part of any preppers equipment, and just as much a part of a get home bag as any other ‘bag’ you put together in preparation for emergency. Just as with the lighter even if you carry a knife in your edc make sure you have an extra one in your get home bag. This doesn’t need to be a large survival knife necessarily, although if you can justify carrying one then do so, it’s better to have it and not need it than need it and not have it.
Illumination; a flashlight is probably already part of your edc but you’d be unwise not to include something in your get home bag too, a head torch is most versatile as it allows you hands free movement if you have to hike home in the dark, carry out a repair on your vehicle in the dark or move around safely in buildings or on the subway if there is a power cut.
Weatherproof; a light weight waterproof poncho is most efficient in terms of space and weight, if you carry waterproofs anyway as I do because I spend a lot of time outdoors on a daily basis then use these in an emergency but adding a full set of waterproofs to your get home bag will make it bigger and heavier than it needs to be.
Self defence; this depends more on your local laws than anything else, if you are allowed to carry do so but if you carry on your person anyway you may not need extra self-defence items on your get home bag. Remember that you don’t want to be carrying huge amounts of kit in your get home bag so you won’t want to be squeezing full size battle rifles into your kit, go instead for something compact and consider less lethal options such as tazers and pepper spray if you can’t carry firearms or knives.
Something to carry it in; a waterproof roll bag with compression straps keeps all this kit watertight and compact and it really shouldn’t take up much space. If you carry your daily kit to work in a backpack then you already have what you need to carry your go bag in as it should fit inside it along with all the things you carry on a daily basis. If you normally use a shoulder bag or brief case than add a fold down backpack to your kit, these are light and take up no extra space but that can be easily unfolded and the contents of your go bag can be decanted into it to make it easier to carry if you have to hike anywhere.
My Own Get Home Bag
On an every day basis my personal get home bag is contained in a Hazard 4 plan B sling bag inside the bag I normally take to work with me on my bike. If I am staying away from home for work or any other reason I will adapt it to the circumstances and if I am traveling by car there will be other items in the car. The contents of my normal get home bag are as follows;
Salewa folding rucksac
Spare battery and USB charging cable for cell phone
Waterproof notebook with essential contact details
Best of luck preparing your own get home bags, remember to consider your personal requirements don’t just pack what I carry and I hope you never have to use them.
An INCH bag is far different than a BOB bag. Possessing such a bag could be essential to your very survival – and should always be kept within reach.
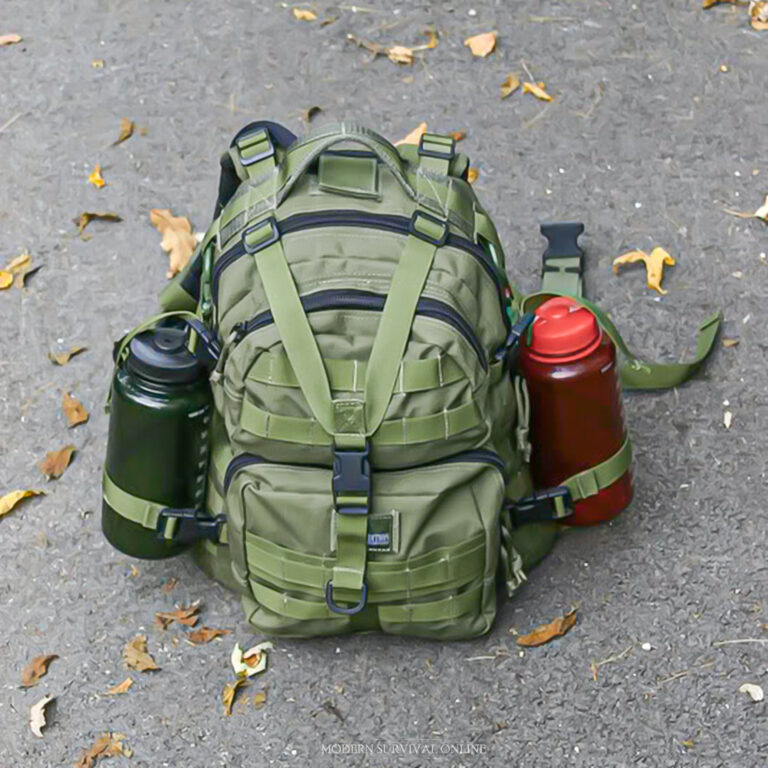
green backpack with two water bottles in side pockets
INCH stands for I’m Never Coming Home. It is a large survival bag that is packed full of all the essentials tools and gear you will need to survive while you find a new place to call home. A BOB – or bugout bag, holds enough gear to keep you alive UNTIL you get home, or up to 72 hours.
While you will some of the same items in each bag, there are vast differences in both the gear packed and the rucksack used to carry them. Think of an INCH bag as a bugout bag on steroids! In this article we’ll talk about the items you need to consider when you put it together.
Differences Between an INCH bag and a Bugout Bag
Bugout bags a typically smaller than INCH bag, and carry just enough supplies and gear to help you survive a SHTF trip from work or school to your home or nearby prepper retreat where stockpiles of long-term storage food, water, gear, etc. are waiting for you upon arrival.
A bugout bag is packed with a specific trek and time-frame in mind. An INCH bag is packed to last you basically forever. Of course you won’t be packing all the food and water you will ever need on your back, but you will be carrying to tools necessary to provide yourself with the basics of survival.
INCH bags are packed with a potentially unending time-frame and destination in mind. Nomadic living, especially in the wilderness, should be the primary focus during INCH bag packing. You may not be staying in one place for very long and likely will not have the option of guaranteed resupply unless you have buried survival caches you can get to during the SHTF disaster you are trying to live through.
The typical bugout bag weighs about 25 to 30 pounds when stuffed full with gear. An INCH bag commonly weighs between 40 to 50 pounds when loaded with survival supplies.
The best type of I’m Never Coming Home bags will also come equipped with a hydration bladder with a straw that reached from its storage spot in the bag to the wearer’s mouth…
Hands-free watering on the go will not only keep you moving along the trail, especially when being chased, but will prevent the need to remove the bag, causing you to keep both your hands and eyes busy and not looking out for danger that could be lurking behind the next bush.
Carrying either bag for any distance drives home exactly how important it is for all preppers to work physical fitness into their SHTF practicing your preps routine.
At least twice a month I walk three miles with my INCH bag and hike about the same distance over rugged terrain with my bugout bag.
Even though my beloveds and I live in a fully-functional, sustainable, and secluded homestead, I refuse to become a complacent and overly confident prepper and ignore the real possibility that we could one day be driven from our survival retreat by the marauding hordes, fire, or nuclear attack.
Choosing the Right INCH Bag
If you bag wears out before you do, the chances of living to see another sunset are greatly diminished. An INCH bag must be durable, first and foremost. Such a bag INCH bag should fit the upper body properly to distribute its weight evenly between the shoulders and hips – and have adjustable straps.
A rucksack with a sturdy yet light-weight external frame, the type designed for backcountry hiking, are the best option for INCH bags – especially the ones with padded pressure points to provide extra comfort. The bag’s fabric should be waterproof, durable, and have copious amounts of pockets and zipper compartments.
The bag, when filled, should not weight more than 25 percent of your total body weight. Only purchase a bag that is in a dark, earth-tone, or camouflaged color to help conceal your movements and location.
List Of INCH Bag Survival Items
Water
Water is a top priority, especially when you are planning to never return home again. When you are always moving about in order to survive, fining it is definitely going to be an ongoing struggle. Even if you are fortunate enough to make camp for an extended period of time near an ample water supply, the essential liquid must be both filtered and purified properly to avoid illness or death.
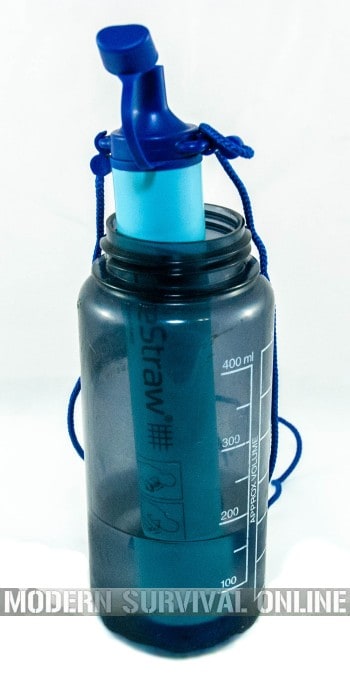
If you were merely packing a bugout bag, throwing in a few LifeStraw filters would do the trick. But, when packing an INCH bag, the straws and packets of water purification tablets would be used up in a matter of weeks – months if you got lucky.
Go ahead and toss several water purification tablets and LifeStraws into your INCH bag, but save them for only the most dire of circumstances. Pack a stainless steel water bottle in the I’m Never Coming Home bag for long-term use as well.
A stainless steel water bottle can be placed over an open flame so the potentially contaminated liquid inside can be safely boiled and impurities removed. You can boil water over and over, and yet over again, in the stainless steel bottle without damaging it – and it doubles as a portable water container.
Dual-use items are key when packing any survival bag – they serve multiple functions and avoid the need to add extra weight or take up essential space in the bag.
When planning to live off the land for long periods of time you need the right tools to do so. You need every advantage you can get and you need to use them all.
Food
You will need plenty of protein to remain strong and healthy while surviving in the woods or other temporarily safe area after the SHTF. Snaring small game like snakes, squirrels, rabbits, and raccoons, will become a part of your daily routine and challenge to survive.
Fishing in every waterway you are fortunate enough to come across offers another opportunity to secure protein and to garner the amount of calories you need to maintain your strength.
Snares and Traps – Either pack the wire in various small to medium weight gauges you will need to capture small game, or buy one of the survival snares kits that are readily available online for a nominal price.
The snare kits typically come with diagrams and detailed directions on how to place and set the snares to aid trapping novices. The kits or wire needed to make your own snares, will take up very little space and are really lightweight – but will worth far more than their weight in gold after the SHTF.
Compact Fishing Pole – A pocket fishing rod is lightweight and takes up little space in your bag. One is none and two is one, so squeezing two of these fishing poles into your INCH bag will enhance your chances of survival in one of them breaks and can offer you a quality bartering item if absolutely necessary.
Yo-Yo Reels – The reels are also a must have for the INCH bag. The handy reels increase your chances of catching a fish while you are sleeping or performing another survival task – like chopping wood for a fire. You simply set the Yo-Yo Automatic Reel and then walk away until you get a bit and then reel in your catch once you have awoken or finished gathering the wood you need to cook your bounty.
Tackle – A compact fishing tackle kit should include ample swivels, eights, hooks, extra line and other typical supplies an angler would need to catch his lunch and dinner.
Slingshot – A high-velocity slingshot will help you to not only kill small game, but can be used as a silent self-defense weapon as well. A slingshot will never run out of ammo! Put the survival slingshot in an exterior pouch of the INCH bag to keep it handy when you spot game….or trouble.
Bows – There are multiple types of bows, and each one of them can be deadly in the right hands and have extreme value during a survival situation. The takedown recurve bow it the best option for an INCH bag. It quickly breaks down into smaller parts without tools and can easily fit into a zippered pouch of your I’m Never Coming Home bag.
Compound bows won’t break down into smaller pieces to be stored inside the INCH bag, but are lightweight enough to be tied to the outside frame of the bag for easy toting. This type of bow is great at long range and will allow you the capability of stalking and shooting large game, like deer, from a significant distance.
A crossbow will likely need to be connected to a strap and carried over your shoulder or slung across the top of the INCH bag. It can be carried cocked so you are ready for either a threat or any game that happens to cross your path, at all times.
Knives – Multiple different type of knives should be included in the INCH bag. A pocket knife, multi-tool or Leatherman-style knife, a butcher knife, a fish scaling knife, and a Bowie knife. This is both a tool and a weapon and must be kept sharp and ready to use at any moment – your life will very likely depend on it!
an open multi-tool
Tools
You’ll need to build at least temporary shelters, cut your way through dense and prickly thicket, and chop woods, while surviving by only your wits, skills, and what is contained in your INCH bag.
Shovel – A lightweight and foldable survival shovel folds up into a hard case that can be placed inside of, or clipped onto, the INCH bag. Most shovels of this type have a serrated edge, making it another dual-purpose survival tool.
Hatchet – The hatchet will double as a wood and limb cutter for fire and shelter making, and can also be used as a weapon. If you also pack the necessary items to keep the hatchet (and the knives you will also be packing) sharp – and you should, the hatchet should be sharp enough to cut through animal bones for tool and weapon making purposes.
Machete – The lightweight brush-cutting tool will help clear your path in the dense woods and can also be used as a weapon. Learn how to make your own rope and use the machete to cut vines to garner supplies for natural rope making and basket weaving – to storing and gathering food and trapping purposes.
Hand Tools – A screwdriver, hammer, folding hacksaw or camping finger saw, plyers, wire cutter, and if you can find one that is not too heavy and cumbersome, a bolt cutter.
Fire Starters – Pack multiple lighters and waterproof matches, a flint stone, and homemade fire starters – like dryer lint, petroleum jelly mix with turpentine at a 2 to 1 ratio – this is also doubles as a healing salve for wounds and burns.
Compass and Maps – Pack a compass and paper maps that cover at least the tri-county region. Covering the paper maps with clear contact paper will help protect them from the elements while still allowing them to fold. A compass/emergency whistle combo can be tied onto the INCH bag and serve as an orienteering backup device.
Binoculars – If you rifle does not have a scope, or as back-up even if it does, invest in a decent pair of lightweight binoculars.
Clothing
Preventing frostbite and hypothermia will be essential to your survival. Even if the SHTF in the peak of summertime, do not leave home without a durable warm coat and rain gear.
Shirts – Lightweight long sleeve shirts should also be packed to avoid being plagued with bug bites and sun burn. Pack two lightweight long sleeve shirts, two sweatshirts, a thermal shirt, and two short sleeve shirts in your INCH bag.
Health issues which are nothing more than mild or mundane now could become deadly when left untreated during a doomsday disaster. An intense sunburn and exposure to the heat could cripple your energy and reaction time just enough to get you killed while trying to survive in the wilderness.
Gloves – Pack at least one pair of cold weather gloves and two pairs of work gloves in your INCH bag. Yes, three pairs of gloves will take up valuable space, but trying to survive without them will eventually be almost impossible. Gloves will wear out quickly during heavy usage – the typical farmer or rancher will go through four pairs of leather work gloves per year under routine circumstances.
Socks – Keeping your feet dry will prevent foot rot and other potentially serious infections and debilitating conditions that could keep you languishing in one spot, unable to do the necessary food gathering/hunting, and water gathering you need to survive. Pack seven pairs of socks and a dry bag to store any clothing you can’t immediately allow to dry thoroughly when it becomes wet or damp.
Pants – Two pairs of durable work pants, like Carhart pants of bibs, or heavy jeans should also be pack, along with a couple pairs of lightweight shorts. If you feel that underwear and bras are worth taking up space, by all means roll them as tightly as possible and put several of those into your INCH bag as well.
Bandanas – Pack three bandanas in your bugout bag. They can be dipped into water and tied around your neck or forehead to help keep you cool, or tie up your hair and keep it off your back to achieve the same goal. The bandanas can double as a bandage and a rag to clean your cookware with as well.
Hats – Pack two warm hats suited for winter wear – preferably the type that include ear flaps. A ball cap or other lightweight hat to protect the head and face from intense heat is also worthy of a spot in the INCH bag.
Cleaning and Repair
Sewing Kit – The supplies and ability to mend not just your clothing but the INCH bag if it tears – which it likely will over time, is extremely important.
A winter coat with just a few small tears will allow cold and rain to reduce your natural body heat. The needles in the sewing kit can be sterilized and used to stitch torn flesh as well. Sure, that is a very unpleasant thought, but being able to stitch your own body after an accident, might just save your life.
The kit should include small or foldable scissors, a dozen needles, a needle-threading tool, and ample mini spools of thread. White thread should be packed because it is free of dyes, making it less likely to spark infection if used to stitch up a wound.
Gun Cleaning Kit – A cleaning kit which fits into a tube or folding carrier will help keep all of the important pieces safely tucked away until they are needed. Purchase extra parts for your firearms and store them in a zipper pouch of some type to keep them secure. A repair kit and extra string for bows and fishing rods should also be included.
Sewing kits, weapon cleaning kits, repair kits, and small unique tool kits if room allows it (such as screwdrivers, pocket knives, and utility tools.) Extra clips, buckles, and straps should also be included in order to repair your I.N.C.H. bag in case of rips, tears, or damage while out trying to relocate to safe shelter.
Eating and Drinking
Cooking – A camping cookware set is both compact and lightweight and will cover all of your essential needs. The self-contained kits have a skillet and an “plate” that doubles as a lid for the skillet – the skillet is just deep enough to be used as a shallow pot to make stew. Eating utensils slide into a secure spot on top of the plate/lid for compact storage.
Canteen – A canteen with a carabiner can hang from the outside of the bag – saving valuable space inside. Even if you have a hydration bladder, packing a canteen is still recommended. You may be forced to move from your campsite near a waterway at any moment – having as much water as you can carry should always be a priority.
Survival Food – Pack enough MREs or survival food packets to last for three days. The food should be saved for only a dire emergency when you absolutely cannot catch, kill, or forage for a meal for the day.
Shelter
Tarp – Pack at least one tarp, preferably two, to use to make a tent when building a temporary shelter. Choose tarps in a camo motif or at least in a dark color to avoid attracting unwanted attention.
Rope and Tape – Pack two rolls of duct tape and plenty of rope and paracord to use to tie together branches when making a temporary shelter and to hold down tarps being used on the shelter. There are countless uses for duct tape and rope – do not skimp on these items when stuffing the I’m Never Coming Home bag.
Sleeping Bag – Packing a sleeping bag is common when making a bugout bag, but might be too heavy to add to an INCH bag. Instead pack several neatly folded into squares, plastic trash bags.
Laying on the trash bags will keep you off the cold ground and help you maintain a steady body heat. Stuffing the trash bags with leaves and brush will further insulate the body from the cold and damp ground. The bags can also be used to help protect the contents of the INCH bag during heavy rains or when being forced to cross deep waterways.
Blankets – Pack a small blanket to use as a bedroll – most rucksacks have straps at the bottom that can hold a rolled up blanket.
Mylar blankets are common items in a bugout bag, but they will do you little good in the long term – one use and they become trash. The blankets are extremely lightweight and take up a very small amount of space, so packing several in the INCH bag for medical emergencies or during times of intense cold is not a bad idea.
After being used, the blankets could be used as bedding or under a tarp roof on a temporary shelter to better protect the inside of the makeshift structure from rain, snow, or cold.
Pillow – A rolled up piece of the packed cold weather clothing can serve as your pillow – or use one of the trash bags filled with leaves to suit this purpose. Small inflatable pillows could be packed without taking up a lot of space, if deemed necessary.
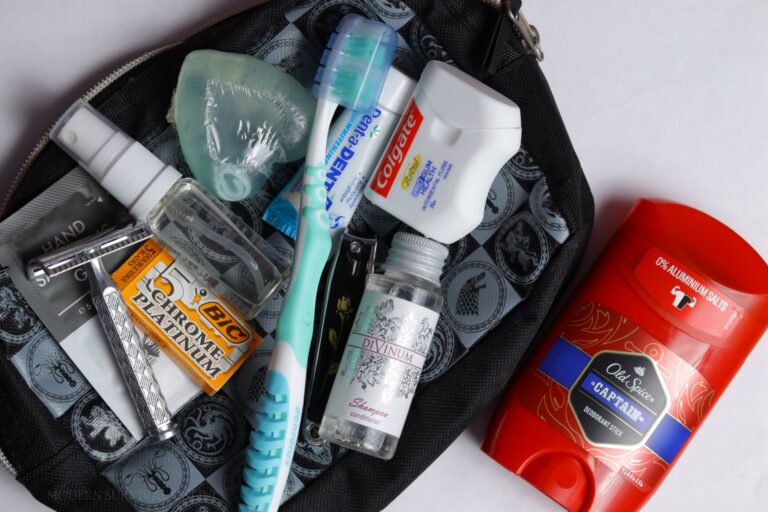
hygiene kit with toothbrush floss deodorant razor shampoo inside a pouch
Hygiene
Hand Cleaners – Wet napkins, soap, and waterless hand sanitizer will help keep you clean and destroy germs you WILL come in contact with while butchering animals and cleaning fish.
Teeth – Pack a two travel size toothbrushes and a travel size mouthwash and toothpaste holder, The mouthwash and toothpaste will run out quickly, so learn how to make your own natural substitutes from the bounty offered in the woods to prevent potentially life-threatening tooth and gum disease and infections.
Dental Kit -A small dental care kit with tooth extractors is also necessary. An infected tooth can bring you to your knees quickly, and allow the infection to spread throughout the body. The kit should also include a temporary filling kit and an oral anesthetic
Feminine Hygiene – It would be impossible to pack enough tampons and pads to take care of a lady’s monthly needs in any INCH bag. Purchase two disposable feminine cups to take care of the monthly issues. The cups are not designed to last forever, but if they are washed out and cleaned, it should be possible to make one cup last up to a year before it tears and leaks.
Misc. – A towel and wash cloth, a mirror, comb/hairbrush, are useful comfort items that will not add much weight to the INCH bag. Learn how to make your own shampoo from natural items to keep your hair clean – or cut it as short as possible before leaving home and pack a pair of scissors to repeat the short cut as necessary.
Birth Control – Romance might not be the first, or even the 100th thing on your mind when packing an INCH bag, but if you are bugging out with your spouse or significant other, one day it will be. Packing condoms will help prevent an ill-timed pregnancy from happening during a dire disaster scenario.
Lighting and Communications
Lighting – Flashlights and batteries to keep them going are definitely necessary. Batteries take up space and have some weight to them, so plan to use the flashlights sparingly after strapping on your bag and fleeing home. Mini flashlights that have a keychain end should be attached to the INCH bag in multiple places. A LED headlamp and glow sticks will also be handy to have and take up little space in the bag.
HAM Radio – Purchase a handheld HAM radio so you can monitor traffic, even if you never plan on saying a word to a single outsider. Being aware of the movements of marauding hordes, the location of an emerging pandemic, and a brewing wildfire – and what the government is doing, could save your life!
A hand-crank or solar powered radio could accomplish this same goal, if the purchase of a HAM radio does not fit your budget and you are worried about battery weight. Buy a small portable solar charger with a USB port to help keep your handheld radio charged at all times.
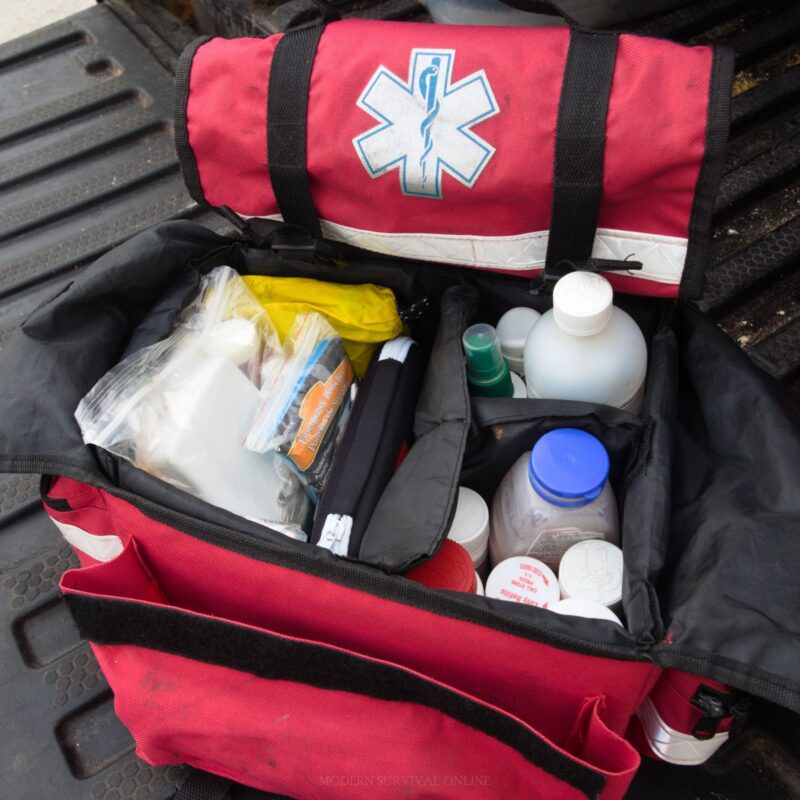
large first aid kit open with gauze, bandages, tensor bandage, Naloxone, Ibuprofen, Acetaminophen, Benadryl, Polysporin, Afterbite, Tums, sunscreen, rubbing alcohol, Aloe Vera, Needle and stitching equipment, tweezers, tick removal device
Medical
First Aid Kit – You will not be able to call 911 after the SHTF. The first aid items in your INCH bag should be given a top priority level, just below water.
List of INCH Bag First Aid Supplies
Quick Clot Compression Bandages
Tourniquet
Non Adhering Pads 2×3 inches
Gauze Pads 3×3 inches
Gauze Pads 2×2 inches
Gauze Pads 4×4 inches
Cold Packs and Hot Packs
Electrolyte Mix
Eye Wash or Saline
Penlight
Skin Stapler and Remover
Nasal Decongestion Spray
Utility Lister Scissors
Instant Glucose
Magnifying Glass
Peroxide
Rubbing Alcohol
Witch Hazel
Liquid bandage and/or super glue
Chapstick
Splinter Outs
Burn Gel
Tweezers
Anti-Diarrheal
Stool Softener
Scalpel
Cohesive Self-Sticking Roll Bandage 3 inch by 5 yards
Aid Adhesive Tape
Gauze Roll 2 inches
Gauze Roll 4 inches
Triangular Bandage
Multi Trauma Blood Stop Dressing
Surgical Dressings 5×9 inches
Ammonia Inhalants
Exam Gloves
Bandaids Strips in all sizes, including butterfly Bandaids
Knuckle Elastic Cloth Bandaids
Fingertip Elastic Cloth Bandaids
Oval Eye Pads
Antibiotic Ointment
Antiseptic Wipes
Alcohol Pads
Sting Kill Swabs
Snake Bite Kit
Iodine Swabs
Knee, Ankle, and Elbow Braces
Tylenol and any prescription medications – learn how to make natural substitutes from prescription and over-the-counter medicines and carry an empty container to store the natural medications in.
Resource Material and Comfort Items
Photos and ID – Pack along photos of your loved ones to help bring you comfort and inspiration while surviving in the wilderness, perhaps trying to reach your family or friends. Photo identification might be necessary if stopped by a governmental entity or, in the worst case scenario, for a good Samaritan to use to mark your grave.
Book, playing cards, pen and paper, etc. – Pack a book or deck of cards to give you something to enjoy during the little down time you will get after fleeing your home. The mental diversion will eventually be much welcomed.
Education – Pack a first aid book, tree and plant identification guide, or other survival resource material they may help guide you on your survival journey.
So you have spent your hard earned money, and your valuable time getting prepared. You have read all the articles and made the perfect bug out bag. Now what? You can sit the bag in your vehicle, or home and just wait till SHTF so you can bug out. I asked my self-everyday with my BOB sitting in my backseat of my truck, “What am I missing?”
green molle backpack
I always see new items that I think I have to have and wonder if I should buy that item. I have spent hundreds and hundreds of dollars over the past many years buying stuff so I can be ready.
How do I know if I am ready?
I knew there had to be a valuable way of finding out if my bag could keep me alive for 3 days or longer if needed. I put my bag to the test. Here is what I have done and continue to do.
I do on a regular basis “Survival Campouts” or “Bug Out Bag Campout”. Basically, the premise behind these is to have different scenarios that will test my knowledge and bag.
I like to do this at different seasons throughout the year. It can’t always be sunny in the 70s. I just finished one a couple of weekends ago. Here it was cold and rainy; needless to say it was miserable.
I did this one with several family members that tagged along. Each of us had our own bags. I typically use land that my brother owns. There are 81 acres of land. I am currently talking with other friends who have large amounts of land. It doesn’t do me a lot of good to constantly use the same land since I know the layout of it.
Here is how I structure the testing weekend. I come up with what I consider possible real life events that would require us to bug out and that would cause us to abandon our vehicles and take to foot. I will use this past weekends experience as an example.
The first thing I did was ensured that the land was not being hunted on. This past weekend was opening rifle season in Missouri and the last thing I felt like doing was treating a gunshot wound.
There were a total of four of us that went. My girlfriend (27), one of my nephews (10), my mother (57) and I (34) all participated. I also brought along my dog.
When preparing for this test, I told my family to bring what they thought was needed for them to survive for three days in the wilderness. I didn’t put limitations on them since this was their first time.
For me I had only what was on my person, and my bag. My dog also has a vest that has molle packs on it where he carries his food, some water, fire starter kit, a small first aid kit, and a cable run so I can ensure he doesn’t run off. I didn’t add or change anything in my bag, and I wore normal clothing that I would wear for the current type of weather.
The key here is to not do any extra planning or packing. If SHTF in real life and you are forced to bug out, you mostly likely won’t have the chance or time to pack new items. I also keep my bag in my truck and at night I bring it into my house. If I keep it at home and I am out and about and SHTF I am without my bag till I get home.
The scenario started with SHTF. We were forced to bug out due to unsafe circumstances in the neighborhoods we live in. We all had a rally point were we meet up and then proceed to our bug out location.
On the way to the bug out location our vehicles were rendered useless. Now we had to transfer to foot. We packed up with the supplies we had brought and headed in the general direction of our bug out location.
At this point we were all relying on our knowledge and equipment we had on our backs. The weather was in the 40s with the sun up and was forecasted to be in the low 30s at night, plus it was lightly raining. The last time I updated the items in my bag was early summer. I was concerned that I might not have what I need to survive.
As we set up camp and I opened my bag and started to inventory my items, I realized that this was going to be interesting. The first thing I did was setup a shelter and then started a fire. I had 2 quarts worth of water that I carry with so water wasn’t my first concern; it was the colder weather that was rapidly approaching as the sun went down.
This night was a chilly one. Remember I didn’t do extra planning or packing. I had on a long sleeved shirt with my medium coat. I had a brimmed hat in my bag which is designed to keep the sun off my neck, and that was it.
The next morning we decided to stay at this campsite while we figure out our plans moving forward.
We spent the next two days testing our skills and equipment. I had written several scenarios that I implemented at different times of the days to test skills, and knowledge. These are as examples the following, make up your own that will test your skills:
While away from camp an animal finds food in your camp and eats half of it. I took the entire camp food supply and took half of it and placed it out of service.
While away from camp a looter comes in and takes 5 items from your supplies. I took five random items from each persons bag and placed it out of service.
I had a couple of days before the camp out placed a tote and a backpack at random spots on the land. These were there to represent the possibility of scavenging items. They had random items that could be valuable to the camp if found. No instructions or even knowledge of these was presented to the camp. They found the tote, but didn’t find the bag. Of course I recovered this later.
I then added a scenario about a group of unknown people scouting the camp. The group had to decide how to react to them.
The next scenario was the group of unknown people advancing on the camp.
Then it went to a scenario of one of the unknown attackers was injured and another ran off. What steps do you take now? Do you use your few medical supplies to help them?
During “free” time I taught basic skills fire building, shelter building, water purification, foraging, and many others. I would then test their knowledge on how to make or do the simple tasks. On day 3 we did some more training and the packed up camp and headed back to our vehicles.
These are very important types of tests that make you better prepared. It is one thing to have all kinds of equipment and supplies, but another to know how to use it and what actually works.
An example; I carry ration bars, freeze-dried meals, and other long shelf life items. Well the ration bars and snack style items were great.
The freeze-dried meals were a disaster for me. I carry a small cooking pot that I can cook and boil water in. Well, these freeze dried meals produce 4 servings. My little pot wouldn’t cook a quarter of the bags. I tried portioning a small amount into my pot and cooked it like suggested.
The issue is the seasoning is impossible to portion that is loose in the bag. I had a horrible meal that my dog wouldn’t even eat. Plus each of these uses a whole quart of water to make. I now know that these are great for bugging in or even at you bug out location, but not in my bug out bag.
There are many other items I keep in my bag that are absolute worthless. I never even thought of using them in a bug out situation. These would be used in a long-term situation, but not bug out. Remember, 72 hours is what you are striving for.
One of the biggest things I realized was how I am not all weather prepared. I had one mylar emergency blanket. If it weren’t for my knowledge and my dog snuggling with me, I would be an ice cube. So very quickly in a short three days, I realized I had a few mistakes that could have cost me my life in a real SHTF situation.
In conclusion, if you have not yet tested your bug out bag, or if it has been a while then go out and test it. Unless you plan on repacking your bag every few months, I recommend packing stuff for the different weather you might come across.
Also don’t be afraid to pull items out of your bag you don’t use. Every pound counts when you are lugging your bag around for miles and days. There is no better way to know if you are ready than to put your skills, knowledge and equipment to the test.